This article will cover how to Modify a Custom Report in CenPoint.
*Only use this feature if you consider yourself Tech-Savvy.
This feature may involve technical details, configuration settings,
or procedures that could be challenging for users who lack a technical background.
CenPoint now has a new built-in way to Modify Custom Reports
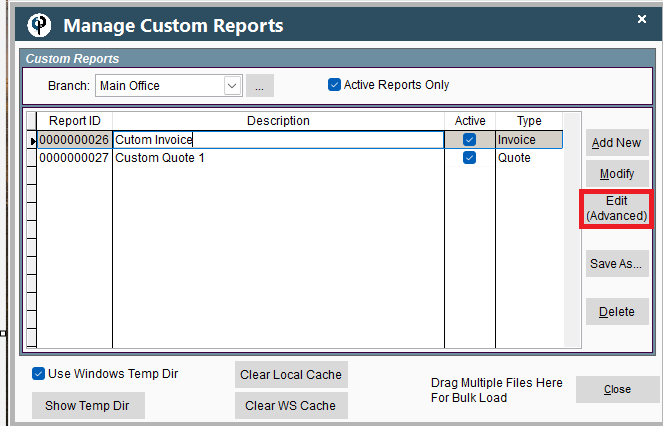
Start by going to File→Utilities→Server Utilities →Manage Custom Reports
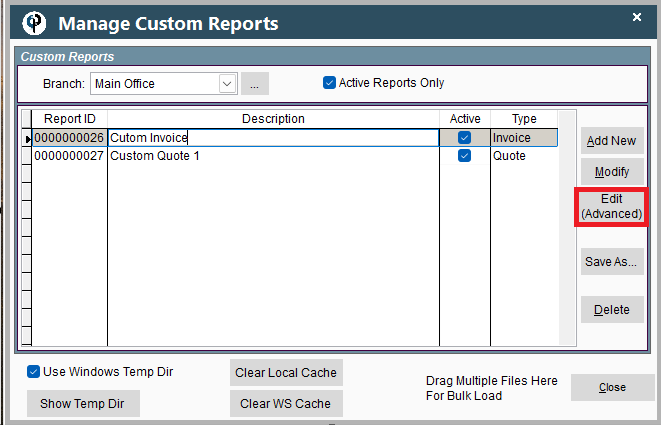
Select the report you want to modify and click Edit (advanced)
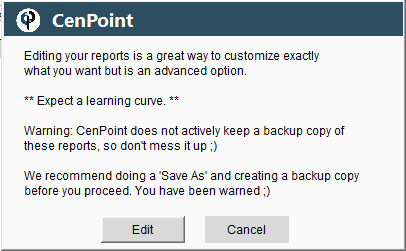
You will be warned to take a backup copy before you start-please do!
To take a backup copy of your report highlight the report and click ‘Save As’ and choose where to save your report-most likely your desktop.
Now that you have a backup you can click edit to edit the report
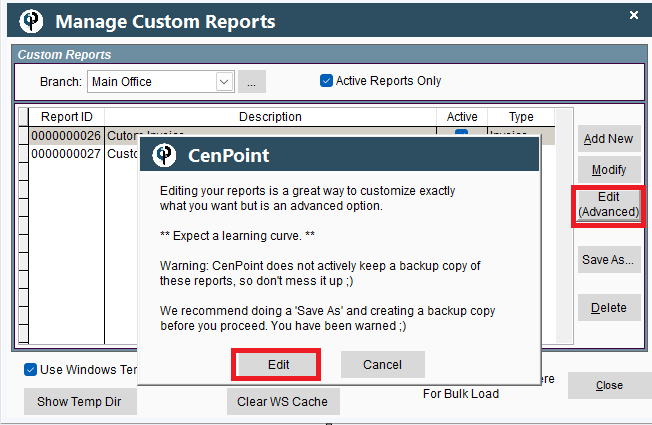
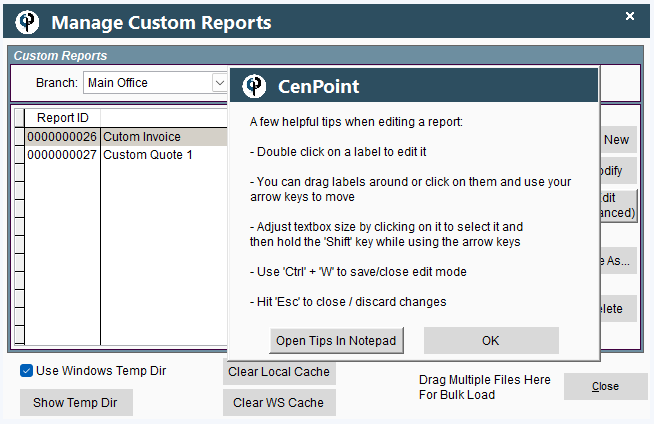
There will be some helpful tips you can click to open in notepad and then click OK to open the report
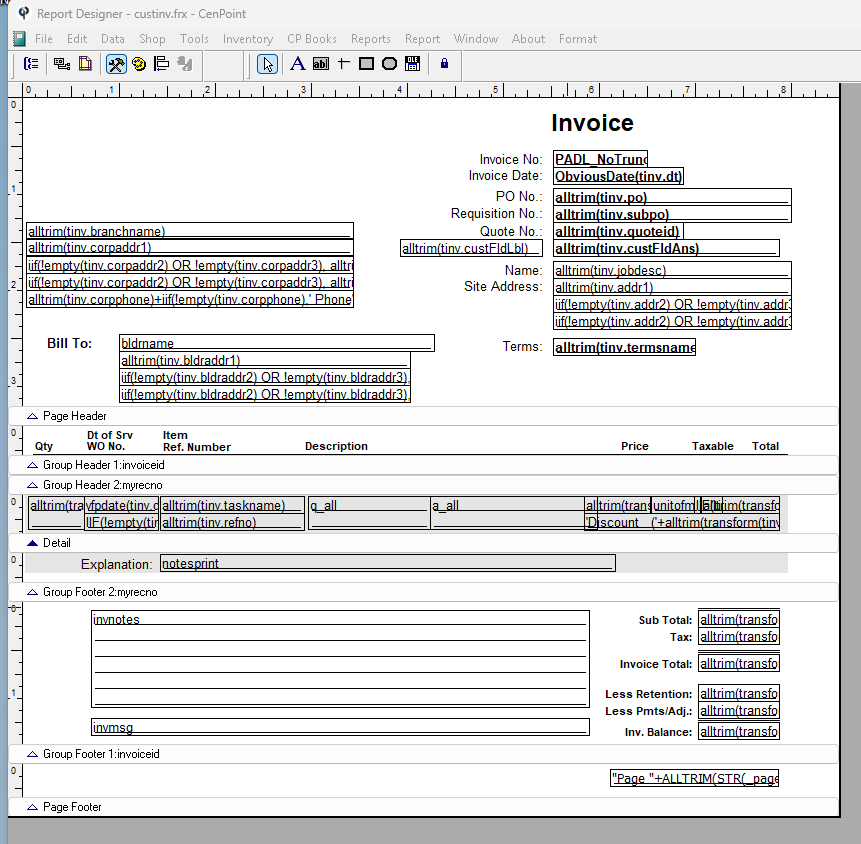
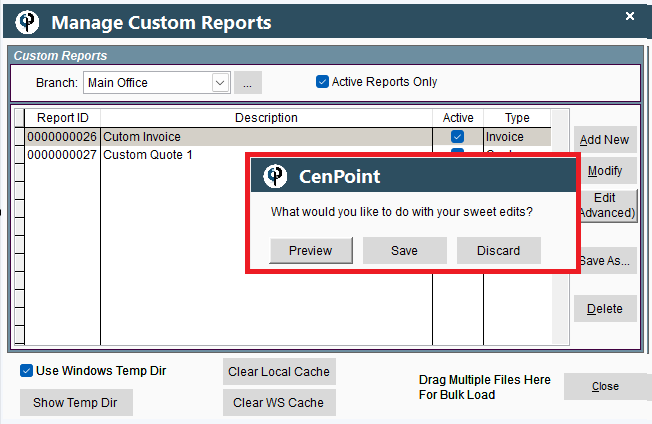
When you close out of the report you will get the option to Preview, Save or Discard
Use the below information for more comprehensive instructions
The basic steps of modifying a custom report are:
Save out the current report as a zip file
Extract the contents from the zip file
Modify the report
Rezip the modified files
Reload into CenPoint
1. Start by going to File->Utilities->Server Utilites-> Manage Custom Reports
.jpg)
2. Find the Report you would like to modify, click 'Save As' and choose where to save the report.
.jpg)
Warning: CenPoint does not have a backup of this report!
We advise you to make an additional copy of the report as a backup, which can be useful in case you mess things up.
3. Find and open your saved Zip file and check the path name to make sure there are no spaces in the file path name.
.jpg)
4.Extract/copy/unzip the files to a new folder.
(At this point you can rename the new folder)
.jpg)
Note: if you are updating the logo use the following steps
a. Add a new logo by selecting the original logo.png or logo.jpeg file
(in the new folder) and rename it.
.jpg)
b. Save your new logo to the same format as the original logo
i.e. '.png' '.jpeg' if not already.
c. Name the new logo 'logo.png' or 'logo.jpeg'
(same as original format) and drop in the new folder.
.jpg)
5. Open the report in CenPoint to make modifications
Go to File-> Utilities-> Workstation Utilities-> Command Window
.jpg)
a. In the command window type 'Modify Report'
.png)
b. In the new folder, right click on the file with the file extension '.frx'
and select 'Copy as path'.
.jpg)
c. In the command window use Ctrl+V to paste
the path after 'Modify Report' and hit Enter.
* click and drag the command window edge to increase the width,
to allow the whole file path to be seen.
.png)
d. Once you hit "Enter" on your keyboard the report should open
in CenPoint and be ready to modify.
.jpg)
Use the following links for Troubleshooting
The file did not open in CenPoint or says file does not exist.
The new logo did not show up when the report opened in CenPoint
6. Modifying the custom report
Please do not change the text of expressions.
You are welcome to resize, move, change font, or not have expressions print.
Examples of an expressions:
alltrim(tinv.branchname)
PADL_NoTruncate(TrimZeros(tinv.invoiceid),5,'0')
tinv.invmsg
Changing expressions will cause the desired information to be "corrupted" on the report and it will not print correctly.
In essence you will break the report, so no touchy! You have been warned ;)
Captions you can change all you want!
Examples of Captions:
Site Address
Name
Description
Price
Resize by single-clicking the field / label (selecting it) and dragging the corners
Reposition using arrows on the keyboard or drag with your mouse (keyboard arrows are much more precise but slower)
Double click to bring up field / label properties.
Properties allows you change the font, position, and print options.
.jpg)
.jpg)
Don't want a label to print?
Double click to bring up the label properties,
Go to 'Print when' tab and type .F. in the
'Print only when expression is true' box, click OK.
Want the label to print?
Make sure the 'Print only when expression is true' box is empty, click OK.
.jpg)
When you have completed all your changes hit Ctrl+W to save changes
Hit Escape to exit without saving changes.
7. Preview your Custom Report
Now that you have modified your report it's time to preview it.
Preview your report by going to Utilities->Workstation Utilites-> Command Window
.png)
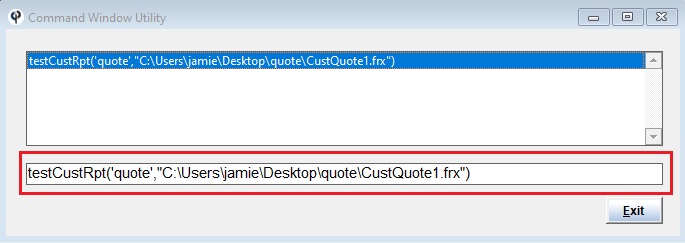
In the command window you will type:
testCustRpt('<<type>>', "<<PathToFile2Test.frx>>")
Let's break that down:
First type: testCustRpt
Second type the report type: ('Quote',
Third copy and paste the path of your frx file:
C:\Users\jamie\Desktop\quote\CustQuote1.frx"
Fourth close the parentheses on the end: ) and hit Enter.
It should look something like this
The path will be in the new folder, right click on the file with the file extension '.frx'
and select 'Copy as path', paste path into the command window after the 'type'.
.jpg)
You will need to change the 'type' to the report you are opening.
Type options are as follows:
Type: Example:
'quote', testCustRpt('quote',"C:\Users\jamie\Desktop\quote\CustQuote1.frx")
'wo', testCustRpt('wo',"C:\Users\jamie\Desktop\quote\CustWO.frx")
'ft', testCustRpt('ft',"C:\Users\jamie\Desktop\quote\CustFT.frx")
'invoice', testCustRpt('invoice',"C:\Users\jamie\Desktop\quote\CustInvoice.frx")
'statement',
testCustRpt('statement',"C:\Users\jamie\Desktop\quote\CustStatement.frx")
If you are happy with your report continue to Step 8,
if not go back to Step 6 and modify the report.
8. Save your updated report in a Zip file.
a. Double click and open your new folder. Select the files in the folder
( .FRT + .frx + logo + settings.ini) right click, and compress to a Zip file.
b. The Zip file will be saved in the new folder.
c. Rename the zip file:
*Do Not name it the same name as your original backup file.
.jpg)
9. Load Custom Report in CenPoint
Go to File-> Utilities-> Server Utilites-> Manage Custom Reports
.jpg)
a. Click 'Add New' and 'Browse' to find your new Zip file,
check the report Information ie..Branch, Description, Type and Save
.jpg)
b. click 'Replace' if prompted.
.jpg)
c. Check you report in CenPoint (Print an invoice, quote, etc.
(whatever the report is for) and enjoy your handy work.
Then proceed to brag about your tech-savvy skills to all who will listen.
Change your report option to the new report loaded and Print to view.
If you are not satisfied with the results start the process again. Starting at step 4.
If you totally screwed up (remember the backup file?) reload the original backup file,
and replace the report you loaded in CenPoint with the original backup file.
Troubleshooting
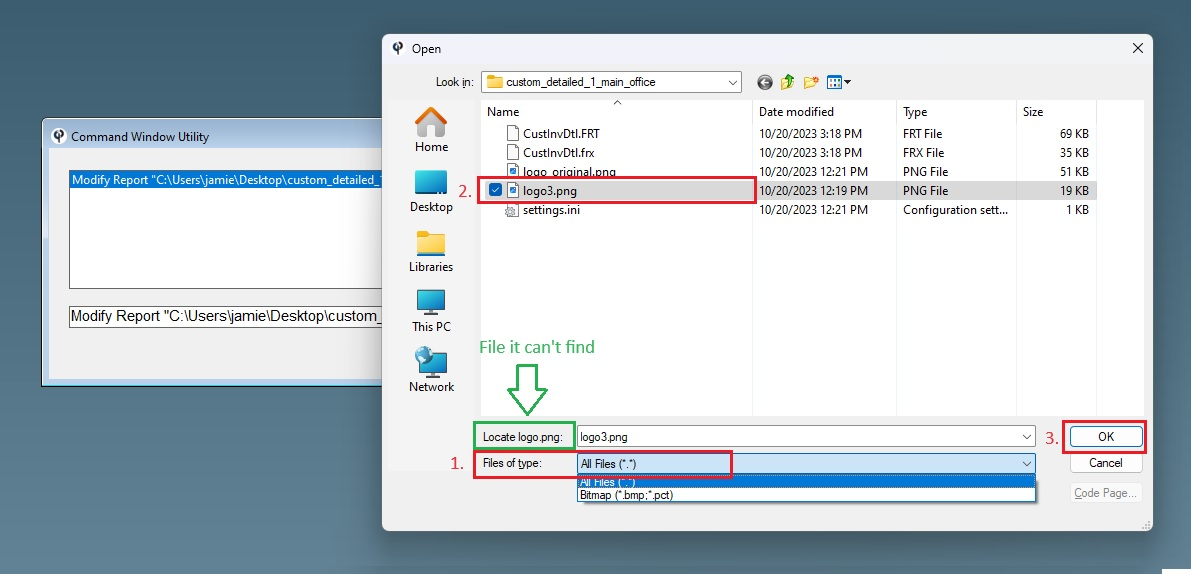
The file did not open in CenPoint or says file does not exist.
This is probably because the logo file name is different than what is expected / was used previously.
Fix this by selecting 'all files' in the window, click on the file it can't find, click OK.
*You may have to do this twice, then the report should open in CenPoint.
The new logo did not show up when the report opened in CenPoint
The previous logo may have been cached and the cache needs to be cleared.
Clear the cache by going to File-> Utilities-> Workstation Utilities-> Command Window
In the command window type 'clear resources 'and your original logo file name and hit Enter
Examples:
clear resources logo.png
clear resources logo.jpeg
Do step 5 again to open the report.
Preview Custom Reports
testCustRpt('<<type>>', "<<PathToFile2Test.frx>>")
Type Options
'quote' or ‘qt’
'wo',
'ft' or 'ftick'
'invoice' or 'inv'
'statement' or 'st'
