This article will cover Vendor Refunds
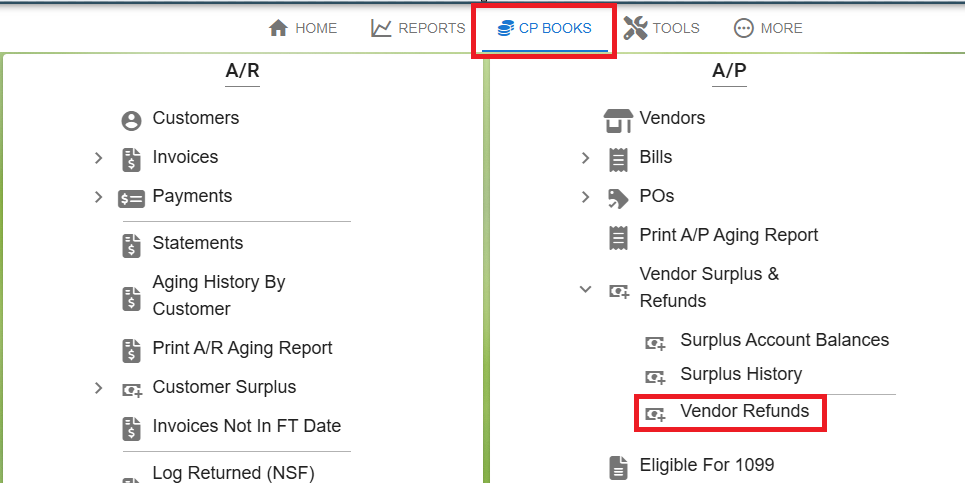
To do a Vendor Refund go to CP Books→Vendor Refunds
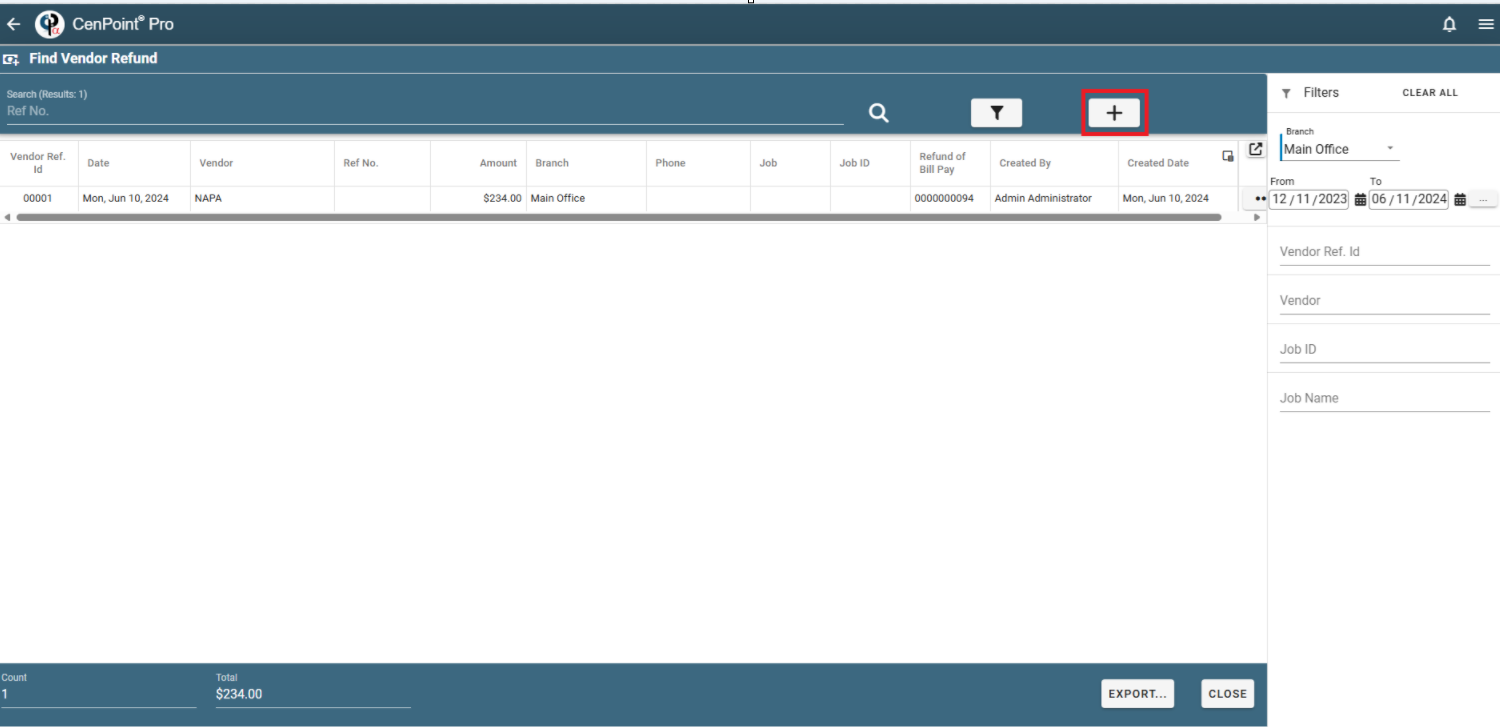
Click the ‘Add’ to create a vendor refund
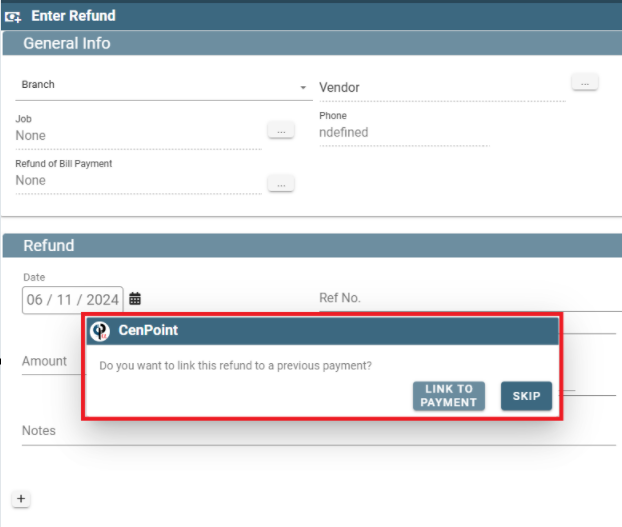
Choose if you want to link to a ‘Previous Payment’ or ‘Skip’
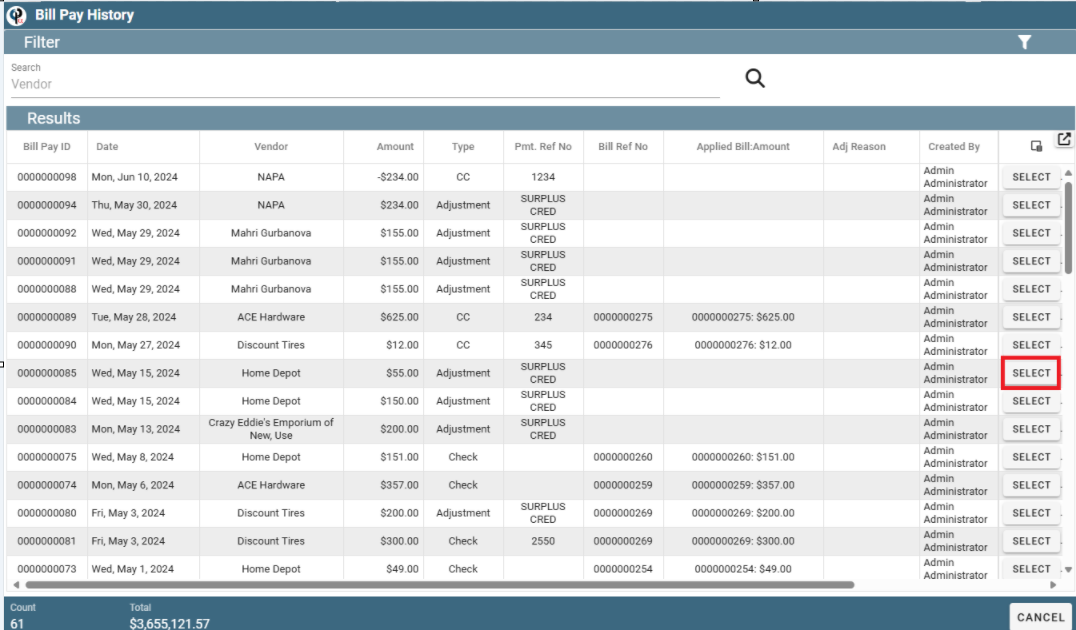
If you choose Link to Payment, the Bill Pay History screen will open, and you will ‘Select’ the payment to link the refund to.
Enter the refund by selecting a branch
Click the ellipsis next to the vendor to select or modify vendor
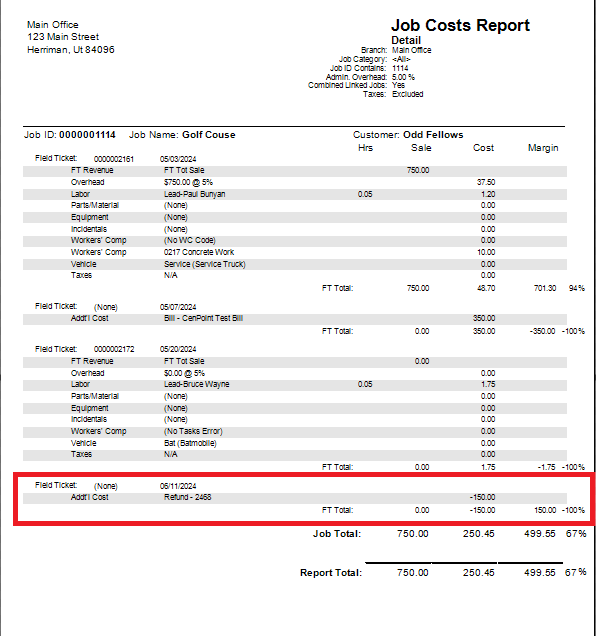
Click the ellipsis next to Job to tie the refund to a Job (if the refund it tied to a job this will flow through to the job costing report)
Click the ellipsis next to refund payment to go View Bill Pay.
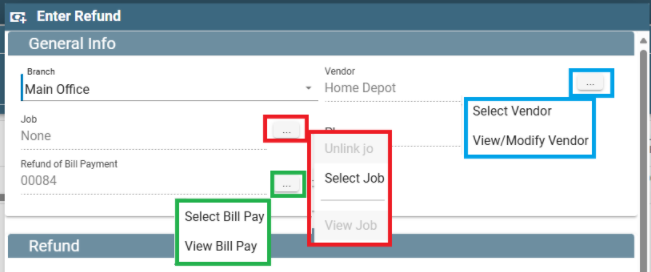
Fill in the refund information
Click the ellipsis to Itemize between more accounts
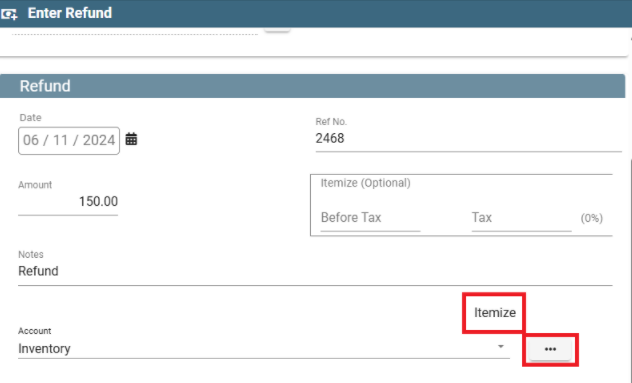
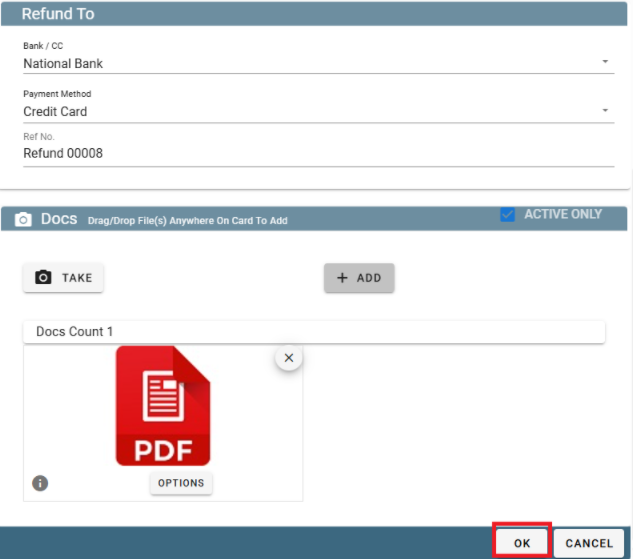
Choose where the refund will be applied
If this refund is related to a previous payment, ensure the correct account is selected
so that the refund is applied to the appropriate credit card or bank account.
Add any documents i.e. receipts
Click OK to save
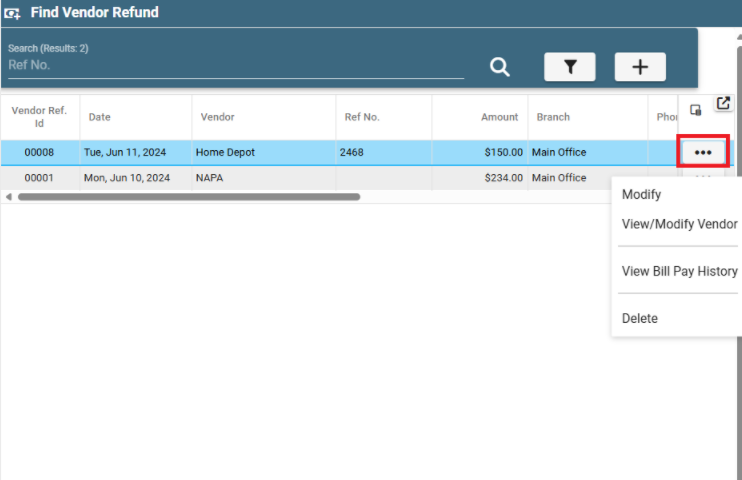
The record of the refund can be found under ‘Find Vendor Refund’
If you need to delete a refund it must be done from the ‘Find Vendor Refund’ screen
The refund can also be found on the ‘Bill Pay History’ screen
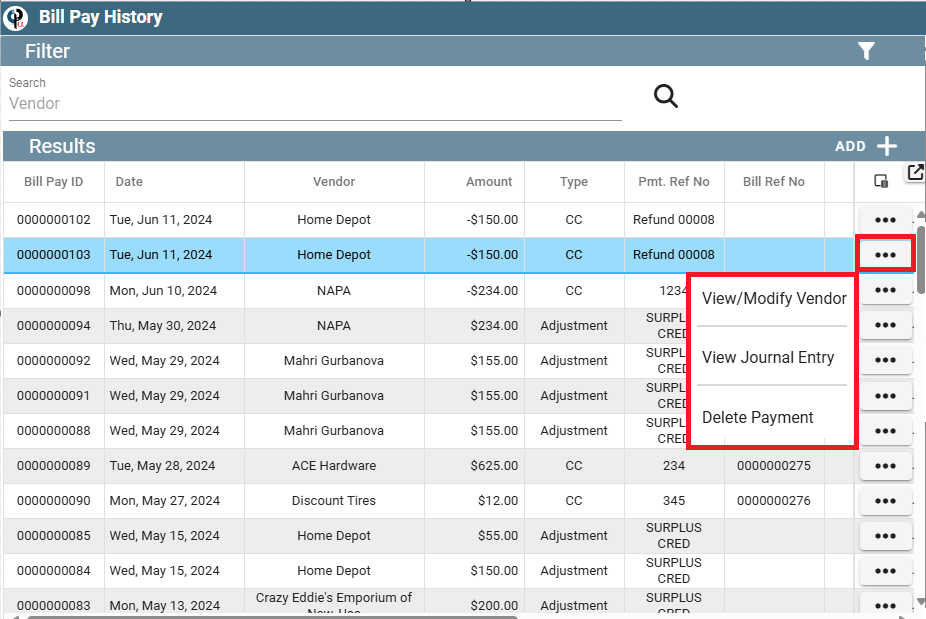
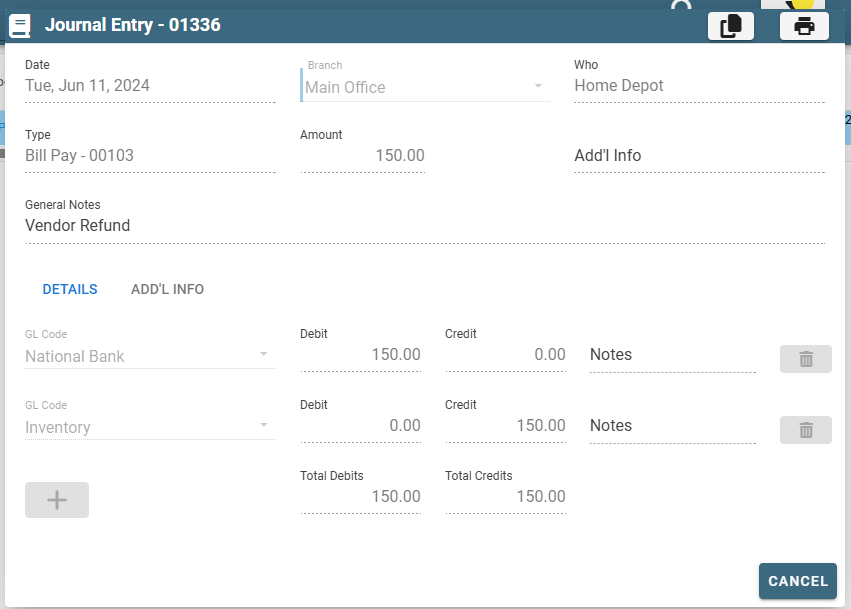
Click on ‘View Journal Entry’ click ‘View’ to view the journal entry

Refunds will flow through to the Job Costing Report if they are tied to a job.
FAQ:
Do I do a Vendor Refund or a Vendor Credit Memo?