 Heads Up!
 Before your first data push in CenPoint you will need to set the Data Push Switch Over Date, see the following article for details:
Connect to Quick Books Online by going A/R and Selecting Quick Books online.
.jpg)
Select the Branch you are connecting to QuickBooks and click next.
.jpg)
QuickBooks should launch in a browser allowing you to login.
(1).jpg)
Once logged into Quickbooks click 'Connect'.

You are now connected and ready to do a Data Push
Select your branch and click next.
.jpg)
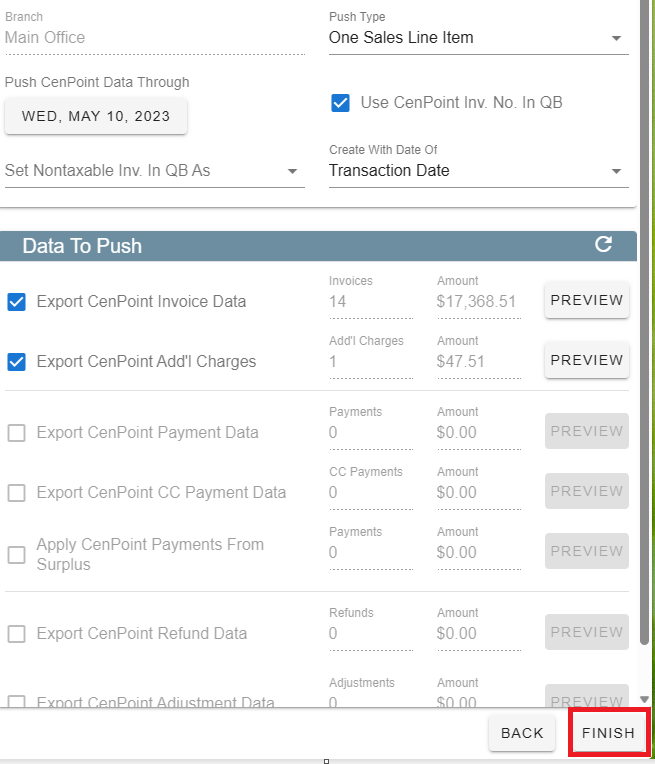
Set your Export Options
Push Type either by One Sales Line Item or GL Code Line Items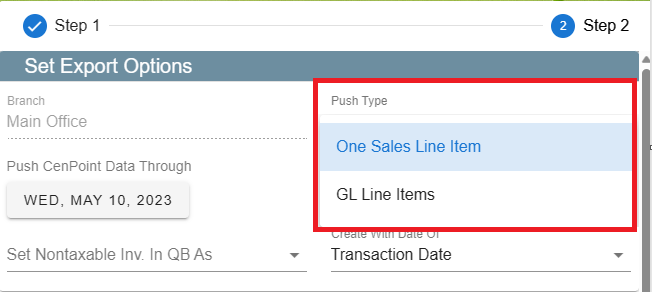
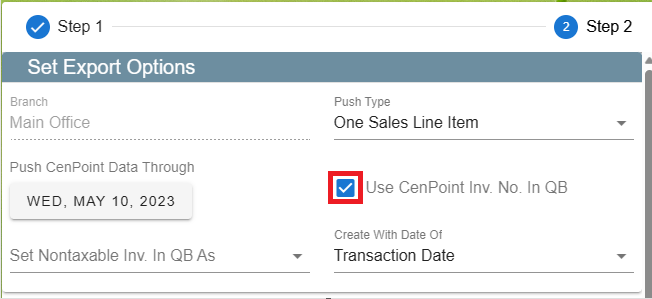
Check the box 'Use CenPoint Invoice Numbers in QuickBooks'
*If you do not want to use this QuickBooks will create it's own invoice number, then you will need to
match up the CenPoint invoice number to the QuickBooks invoice number, which will be two different numbers.
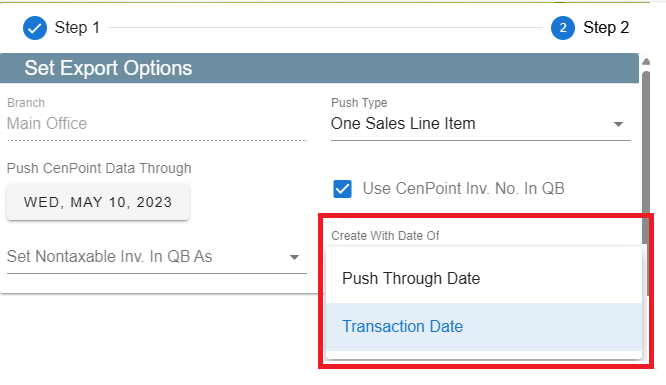
Create with date of:
Transaction Date: most people prefer this option as it uses the date it was originally created.
Push Through Date: will change the date to be the same date as the Data Push.
Now you're ready to click Finish and do your first Data Push