Import Journal Entries into CenPoint using a .csv or Excel file.
CenPoint highly recommends using a desktop/laptop computer to import journal entries.
You must use a .CSV or Excel (.xlsx) file to import your Journal Entries into CenPoint.
.csv files are good option as they work across all platforms i.e. Windows and Mac and can be opened by Excel.
The basic steps will be:
Make or get (i.e. from your payroll company) a .csv or excel file with the corresponding accounts in CenPoint
In CenPoint go to Journal Entries and select import
Map the file in CenPoint
Import
Open the file you are going to import to Journal Entries.
There are two kinds of files you may see, 1) the debit and credits are in separate columns 2) the debit and credits are in the same column
This example will show both file types. In CenPoint under the Chart of Accounts (GL Codes) our example we will use the Current Asset: National Bank and Job Expenses
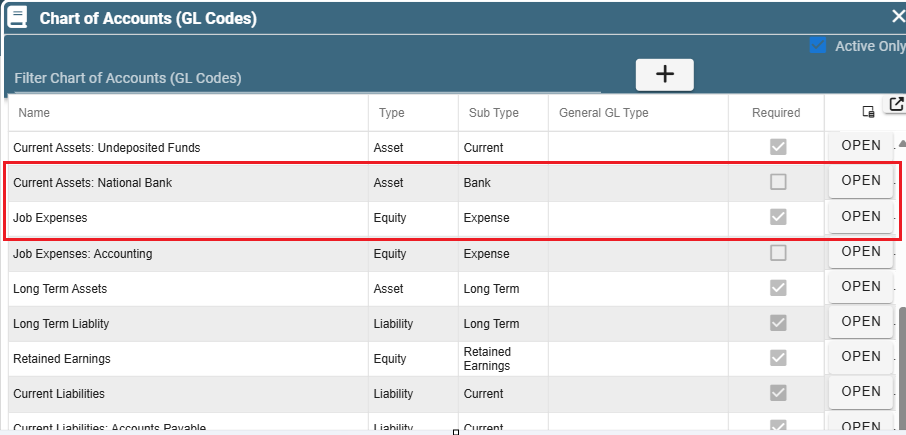
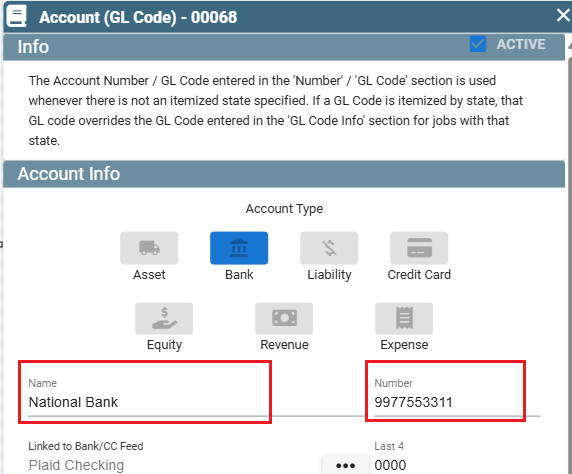
Open your GL account in CenPoint and match the GL account and GL description to the .csv/excel file
In our example we will open the Current Asset: National Bank GL (the account it is coming from) and add the GL Account (9977553311) and the GL Description (National Bank) to the import file. Repeat this step for each GL account you need.


Add/Edit the amounts and notes if applicable.
In CenPoint go to Journal Entries and select import
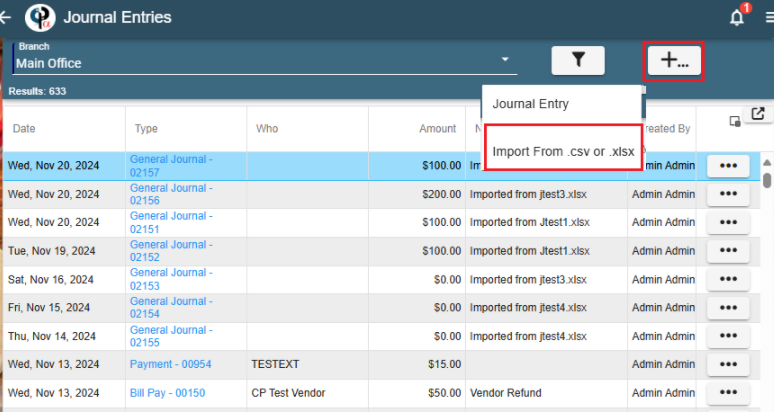
Go to CP Books→Journal Entries
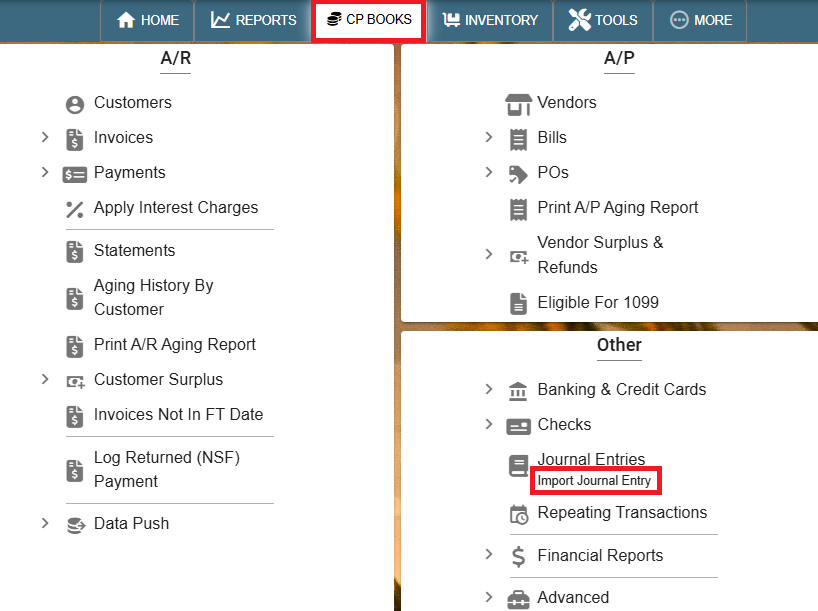
Click the ‘Add’ button and select Import from .csv or xlsx
3.Map the file in CenPoint
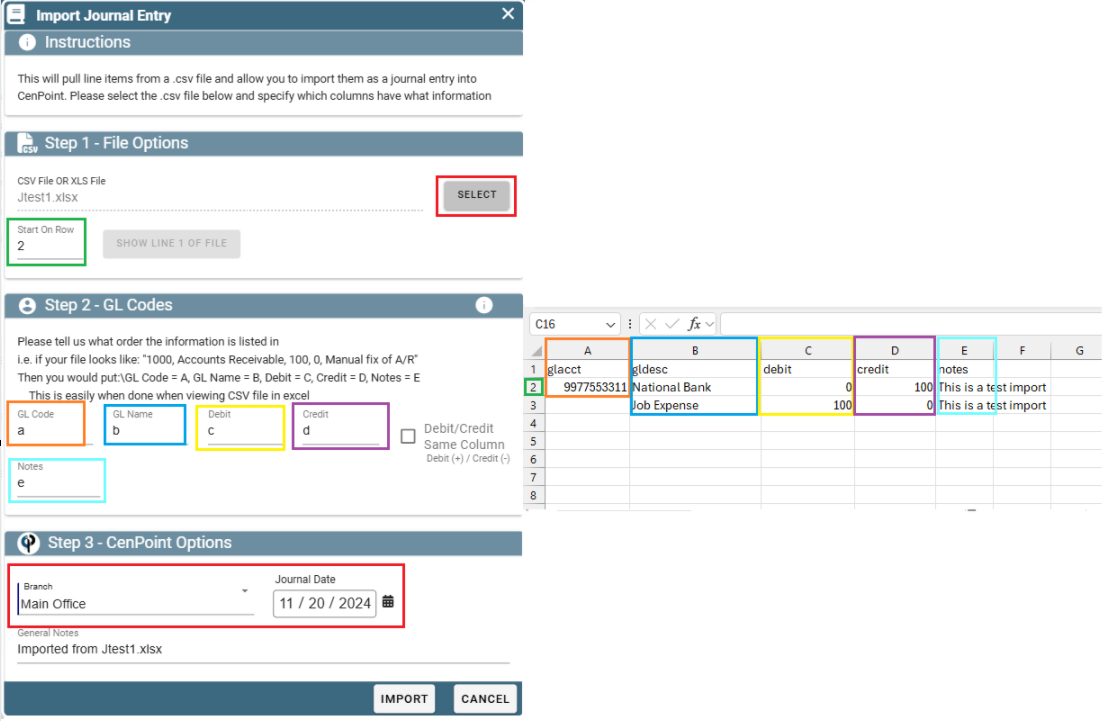
Select the file you are going to import
Set your starting Row
If you are using a file that has the debits and credits in separate columns you would map it in CenPoint as follows:
i.e. if your file looks like: "1000, Accounts Receivable, 100, 0, Manual fix of A/R"
Then you would put:\GL Code = A, GL Name = B, Debit = C, Credit = D, Notes = E
Select a branch and a date
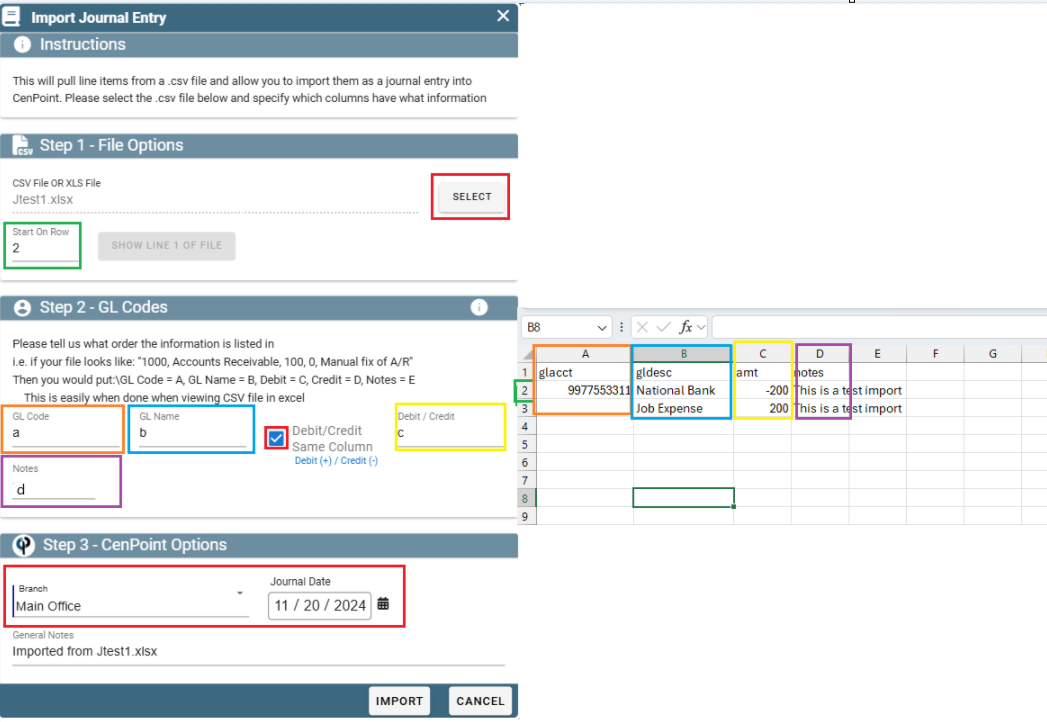
If you are using a file that has the debits and credits in the same columns you would map click the box Debit and Credit Same Column and then map it in CenPoint as follows:
i.e. if your file looks like: "1000, Accounts Receivable, 100, 0, Manual fix of A/R"
Then you would put: GL Code = A, GL Name = B, Debit = C, Notes = D
Select a branch and a date
Import
One you have the file mapped in CenPoint, click Import
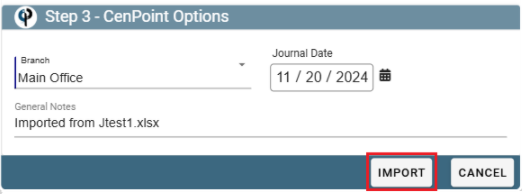
You should receive a notification of the entry imported and the amount.
If the amounts (debits/credits) do not match the file will not import!

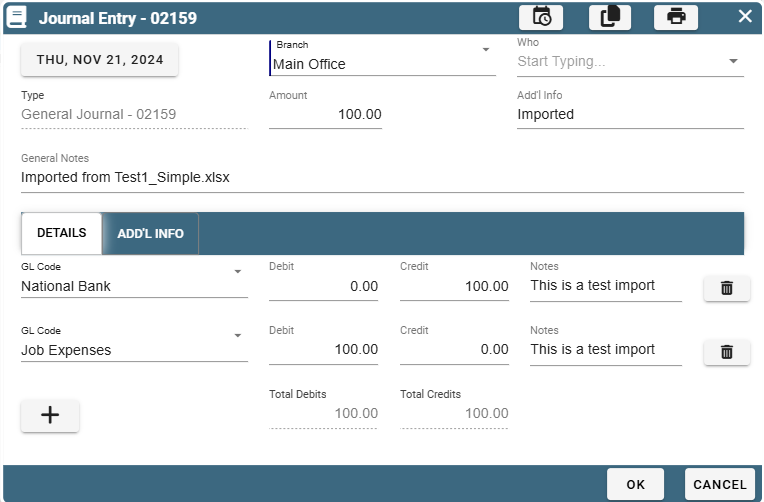
Once imported go to Journal Entries and you will see the imported entry
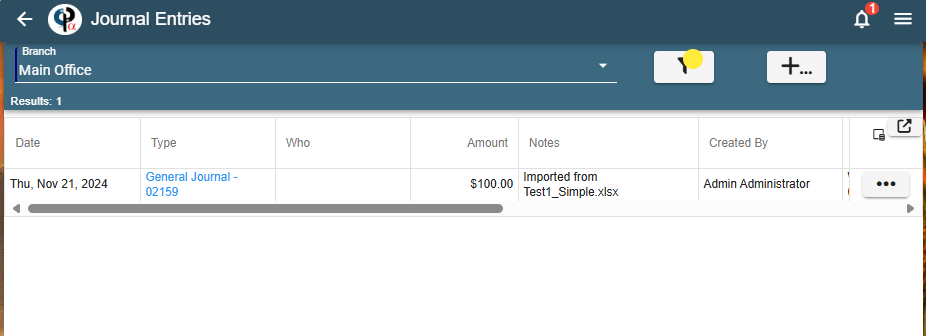
From there you can view the Journal Entry
