Importing Customers Into CenPoint
CenPoint highly recommends using a desktop/laptop computer to import customers.
Go to portal.cenpoint.com and sign in.
You must use a .CSV or .XLS file to import your customer list into CenPoint, .csv and .xls files are good
across all platforms i.e. Windows and Mac and can be opened by Excel.
Get a .CSV file of your customers.
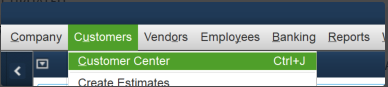
If you are exporting customers from Quick Books use the following steps:
a. Go to Customers->Customer Center
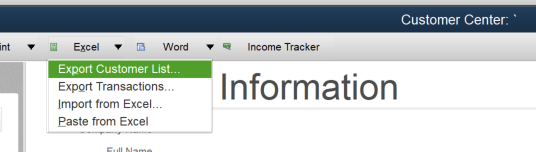
b. Go to Excel and from the drop down list choose Export Customer List
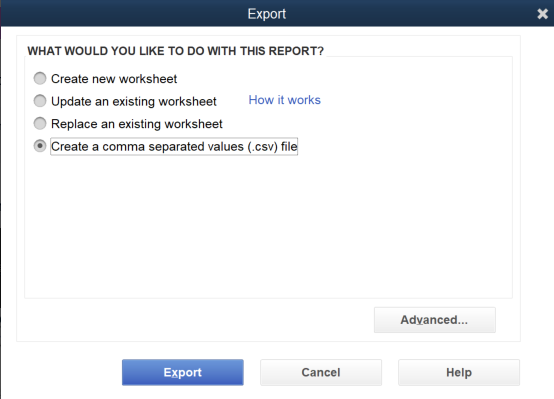
c. Choose Create a comma separated values (.csv) and choose where to save that file.
Once you have your file saved:
Open your .csv file, and check what customers you want active
(only active customers are imported)
by typing one of the following options in the Active column (if not already marked)
Active, Yes, Y, True, T, 1
.png)
If you happen to have a customer with a colon in their name,
they will need to be entered manually.
*Any fields that contain a colon in the customer name like in lines 14 & 15,
(pictured below), will not be added as a customer.

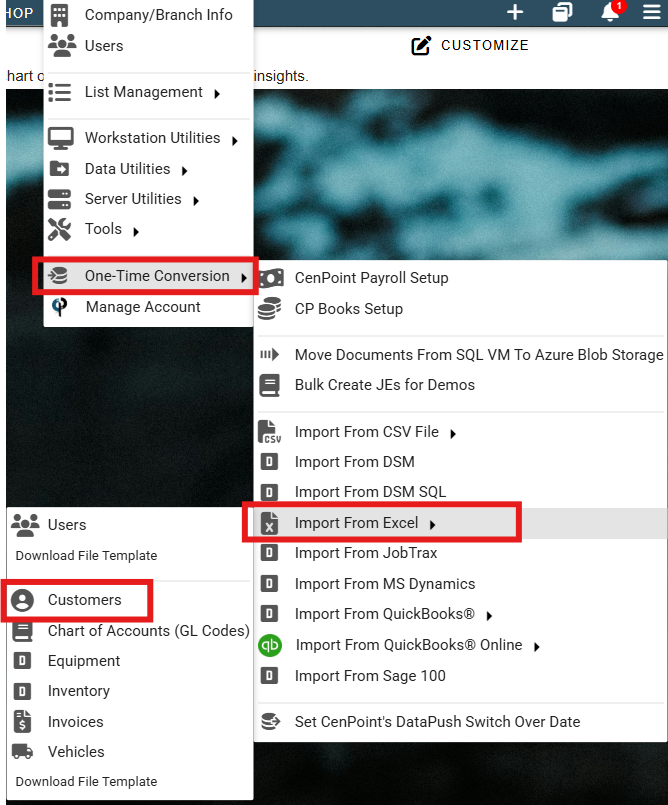
Importing the data into CenPoint.
There's two places to get to the import, both lead to the same page.
First: Go to More > One-Time Conversion > Import From CSV File > Customers
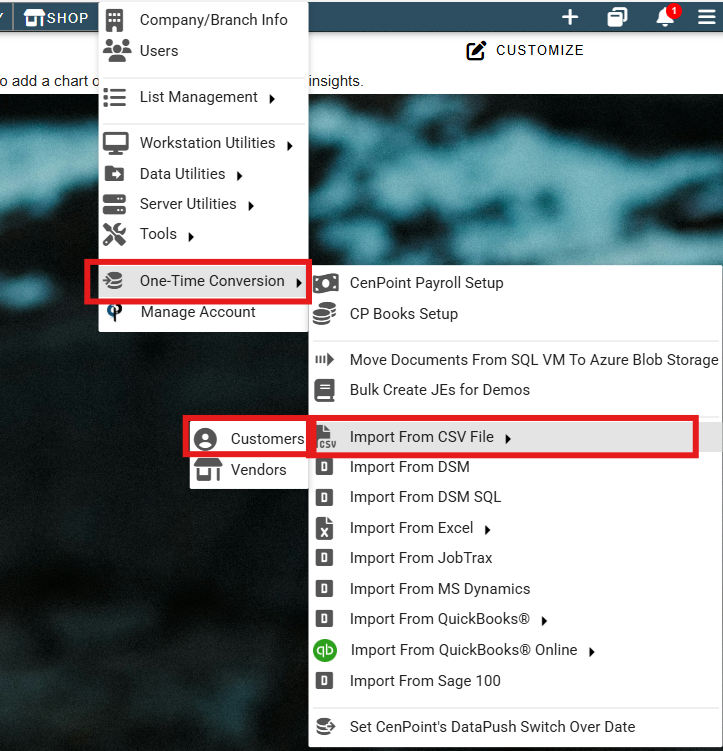
The second place is to: Go to More > One-Time Conversion > Import From Excel > Customers
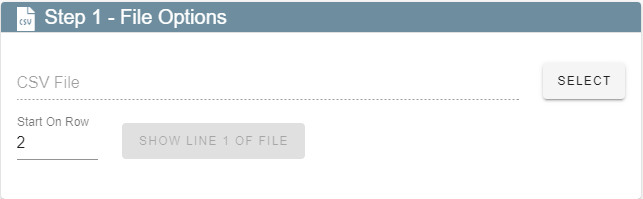
Step 1- File Options
Choose the row to start on.
Example: in the picture below 'row 1' contains headers, and the data starts on 'row 2'.
In this case '2' would be typed in 'Start on row' in CenPoint.
.png)
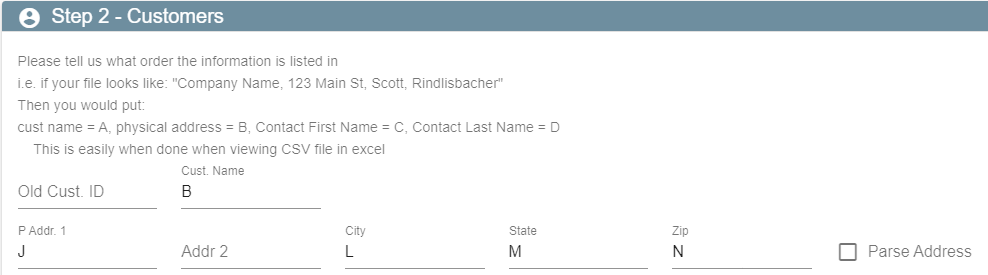
Step 2: Customers
b. Now match the rows of the .csv file to the corresponding fields in CenPoint.
Example: In the .csv file pictured below the customer name is listed in column B.
In CenPoint 'B' would be typed in the customer name field. (Pictured below)
.png)
.png)
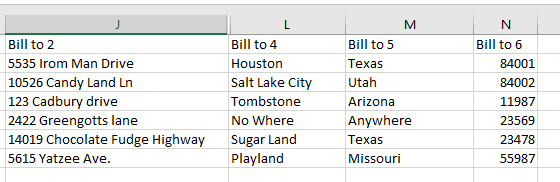
Example 2: The address fields (pictured below) are in columns J,L,M,N
In CenPoint:
'J' is in address
'L' for City
'M' for State
'N' for Zip code.
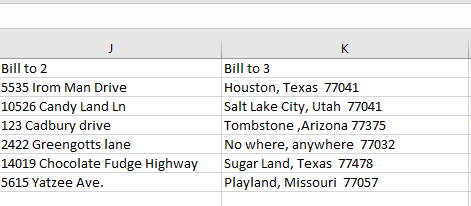
Example 3:
If you have a column on the .csv file that contains multiple items of information,
(Example column 'K' pictured below) such as City, State, and Zip,
Click the 'Parse Address' box in CenPoint and Type in the column names
separated by a comma.
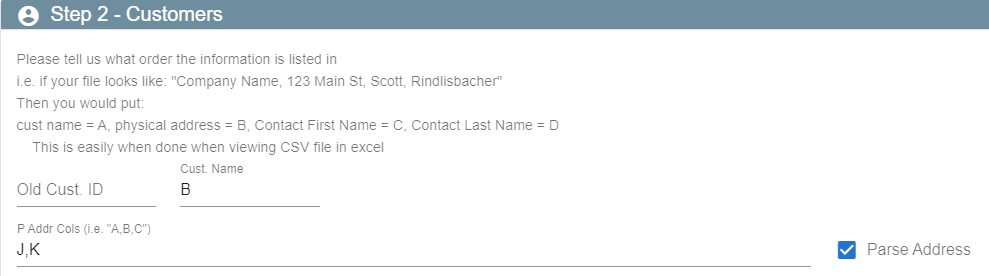
Then continue matching the columns of the .csv file to the corresponding fields for
Step 2: Customers and Step 3:Contacts.

.png)
Step 4: CenPoint Options
Choose the branch where this import belongs.
* To set up a branch go to ->List Management->Company Branch Information.
Choose the option to Replace all customers or Keep and add to existing customers
by clicking the corresponding radio button.
Choose the default terms for customers.
* To set up terms go to -> List Management->Terms
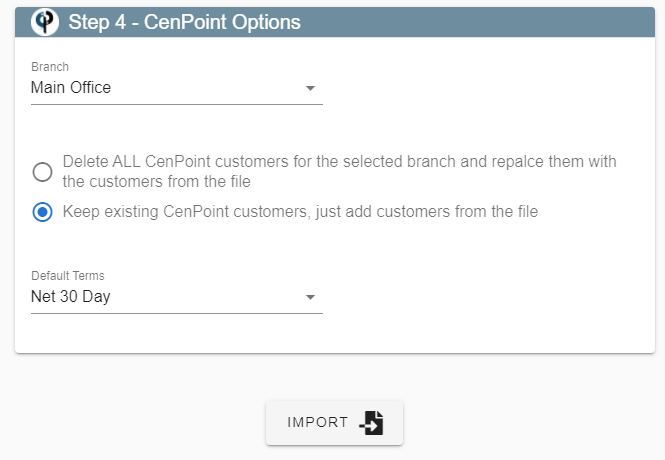
Step 5: Import
Click the Import button, and hum a happy little tune
while your customers are being imported into CenPoint.