
1. Install CenPoint on new server
- Go to ftp://www.dssapps.com/cenpoint/setup
- Select CPsetup_x64_full.exe for 64-bit or x86 for 32 bit
- Download and install
2. On old server, back up data by going to
More -> Server Utilities -> Backup Data
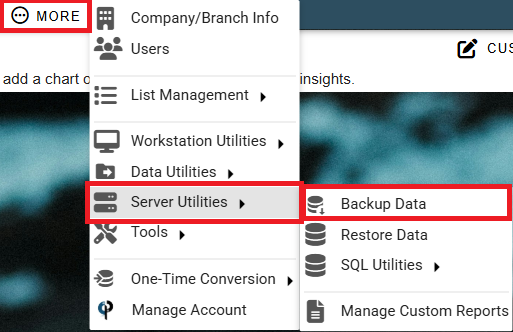
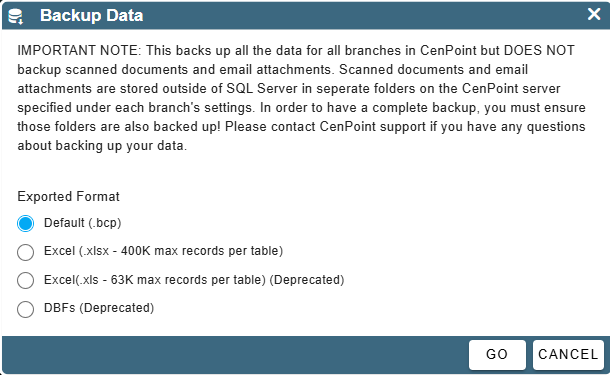
From here, this Backup Data screen will appear. Select how you wish to save your data.
Once finished, transfer file over to new server using either an external drive or over network to new server
3. Backup scanned documents and email by going to
More-> Company/Branch Information -> Select Brach and click the ellipsis -> Modify -> Misc. Tab
Find ‘root path on server’ for scanned documents. Navigate to Scanned Documents folder using windows explorer and copy it to an external drive or directly transfer over network to new server
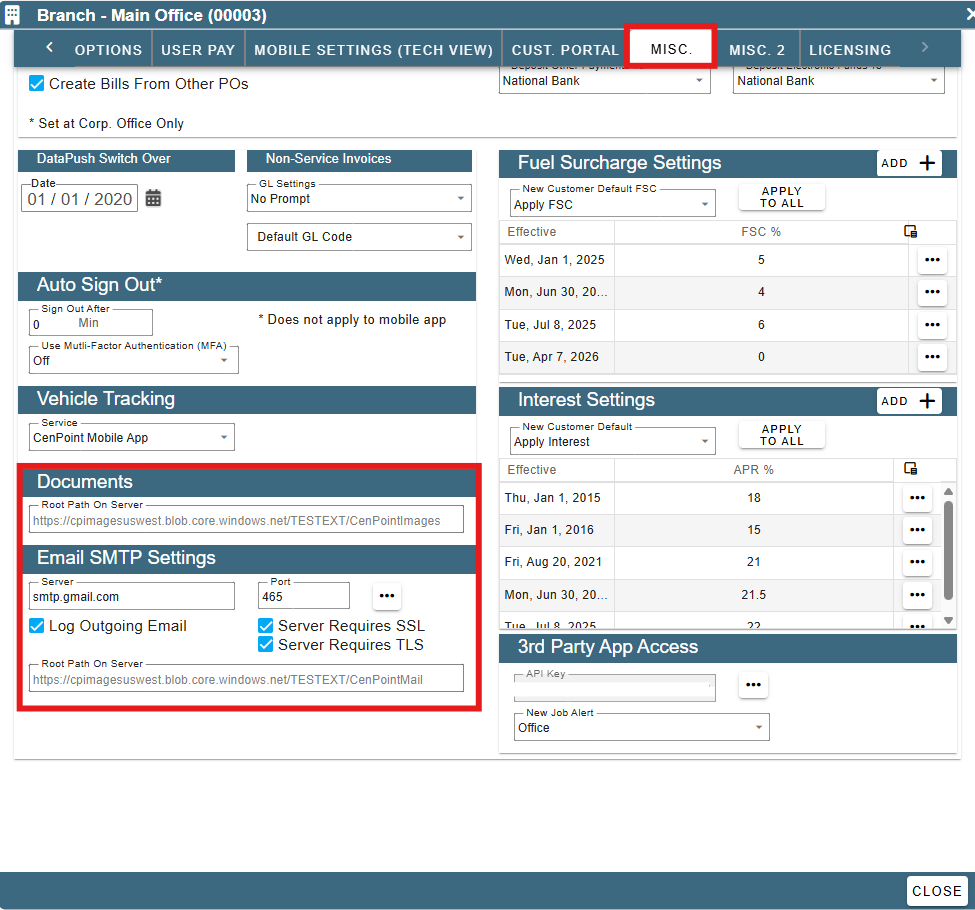
4. Backup Email by going to
More-> Company/Branch Information -> Select Brach and click the ellipsis -> Modify -> Misc. Tab
Find ‘root path on server’ for email. Navigate to email folder using windows explorer and copy it to an external drive or directly transfer over network to new server
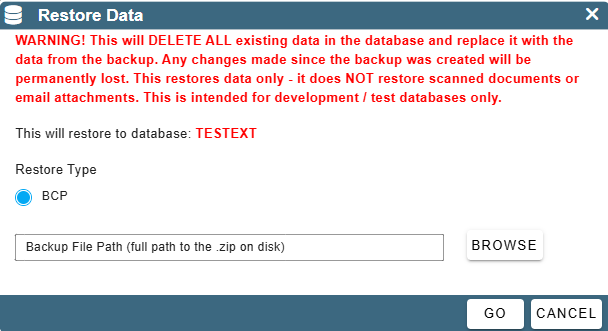
5. Restore Data in CenPoint on new server, go to
More-> Server Utilities -> Restore Data
.png)
Click 'Browse" next to the file path and navigate to where you put the backed-up data
Click Go
6. Restore scanned documents and email by going to
More-> Company/Branch Information -> Select Brach and click the ellipsis -> Modify -> Misc. Tab
Find the location where you put the scanned documents folder and email folder and move them to the respective ‘Root Path on Server’ for scanned documents and email
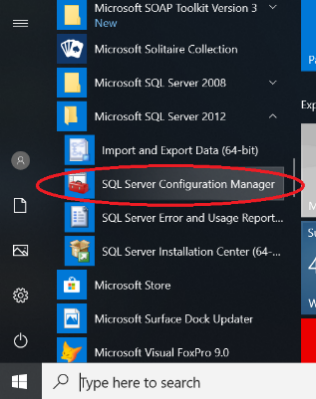
7. Configure the SQL Listening Port
Go to your program list and find SQL Server Configuration Manager -> Open
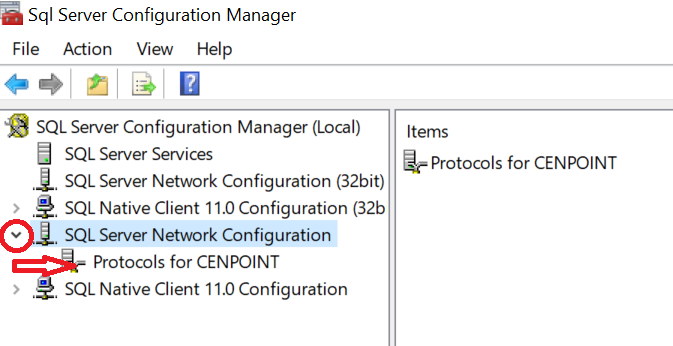
Expand SQL Server Network Configuration -> Right Click Protocols for CENPOINT->Open
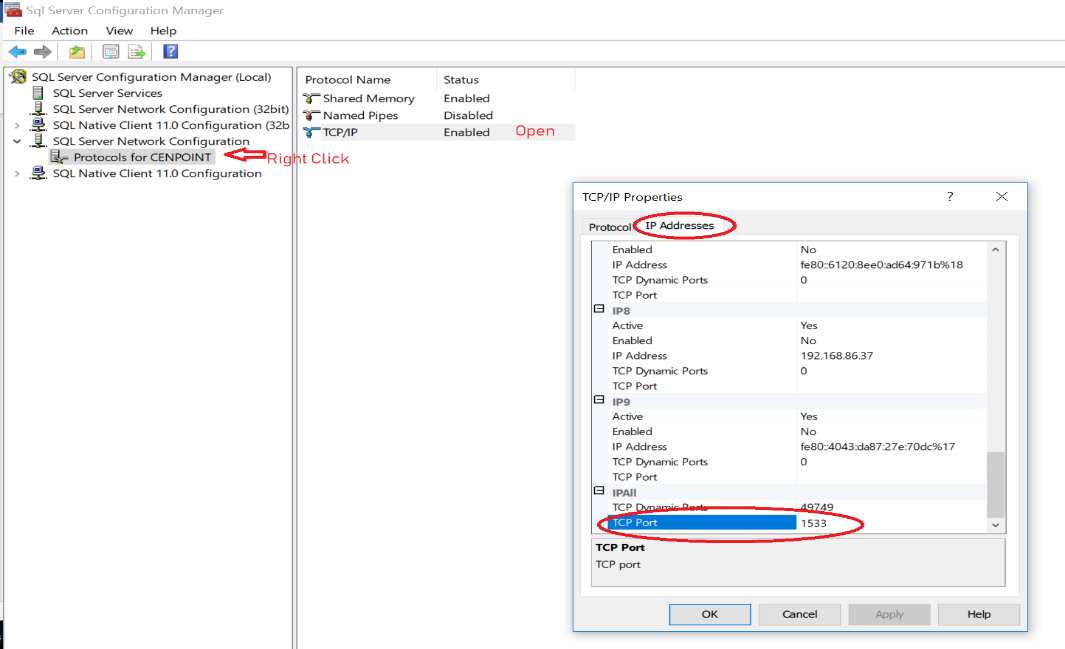
Double Click on TCP/IP-> Click on IP Addresses Tab -> Scroll to the bottom until you find IPAII Section and change the Port to 1533 ->Click Ok
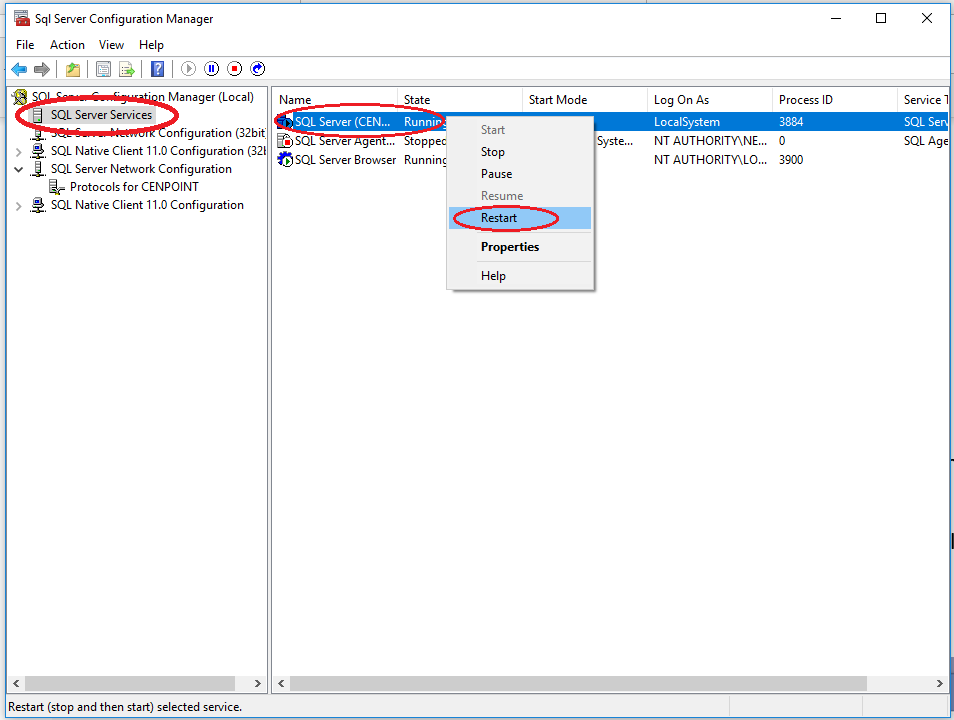
Go to SQL Server Services-> Click-> then Right Click SQL Server (Cenpoint) and Restart. This will not restart your computer, this will just restart the SQL service.
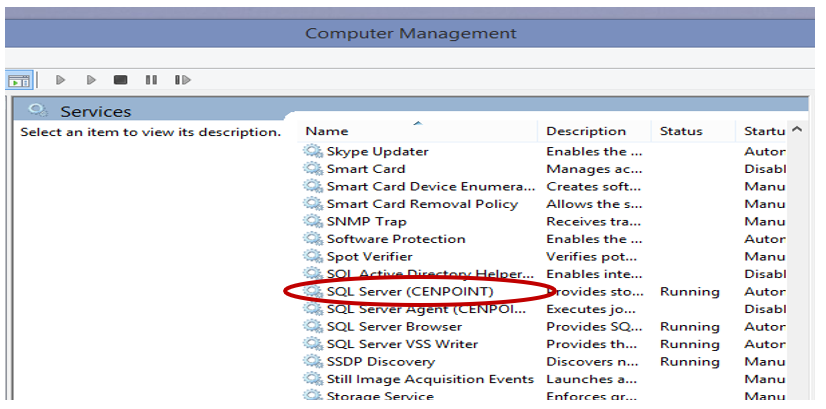
8. On the old server, Stop CenPoint service:
a. SQL Server (CENPOINT)
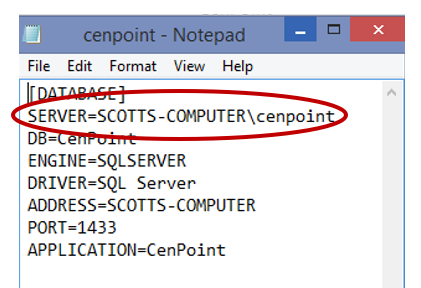
9. On each work station, edit cenpoint.ini to point to the new server. Cenpoint.ini is located in the CenPoint folder where you installed CenPoint
a. You may use either the computer name or the IP address
b. You may need to adjust your firewall settings to allow other computers to access your new server
Congrats! CenPoint is Now Running on Your New Server!