
Shop Video Setup
Define Our Shop
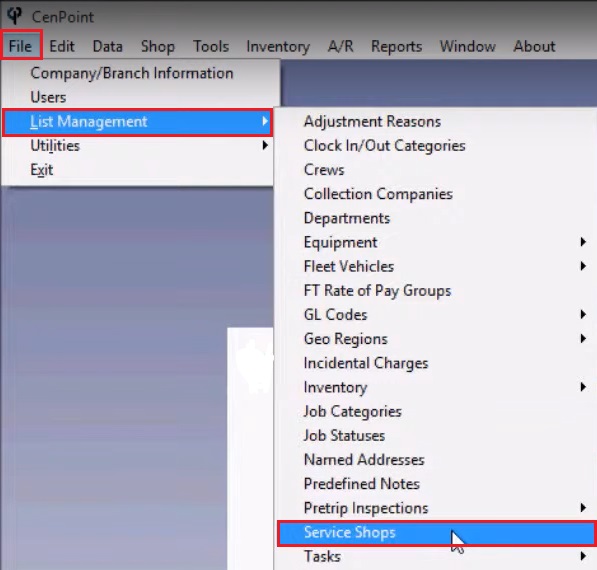
Start by going to File-> List Management-> Shop-> Service Shops
Sho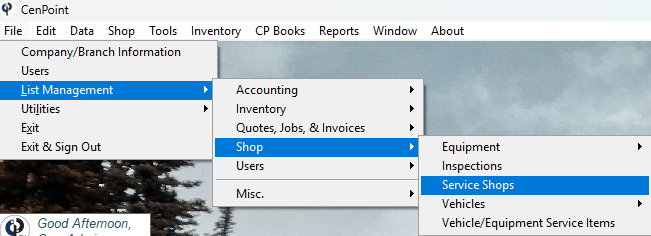
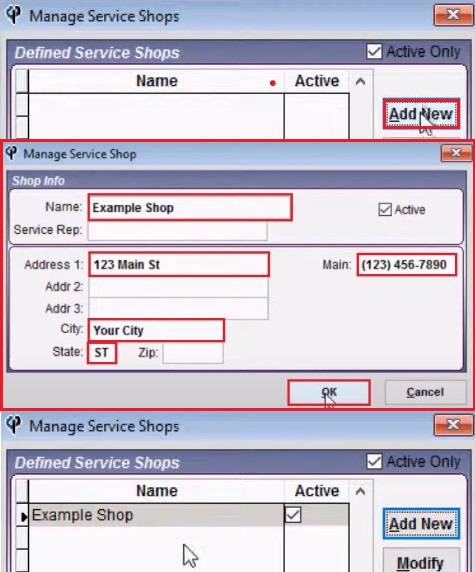
Add New -> Write Name, Address, City, State and Main -> OK -> If you need to add more then Add New
Mechanics Inside of our Shop
If you have somebody down the road that takes care of all the transmissions on your vehicles, you could add in a shop to take care of that when you're scheduling, you can have an accurate idea of where your vehicles are at all times.
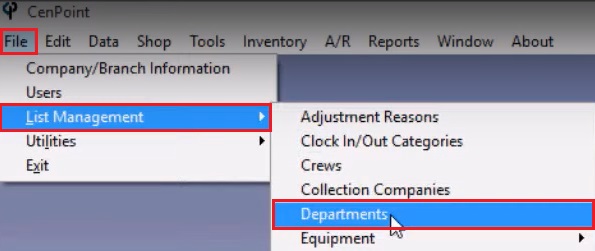
File -> List Management -> Department
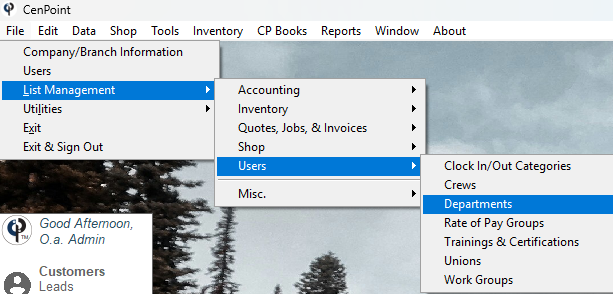
Define Departments to Assign Users or Mechanics
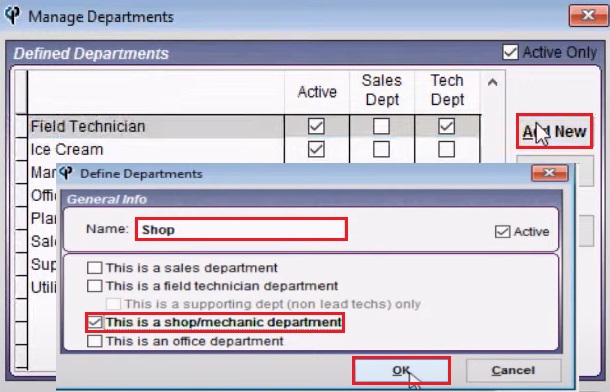
Option 1: Create a New Department- Add New -> Write the name of a Shop -> Click "This is a shop/mechanic department" -> OK
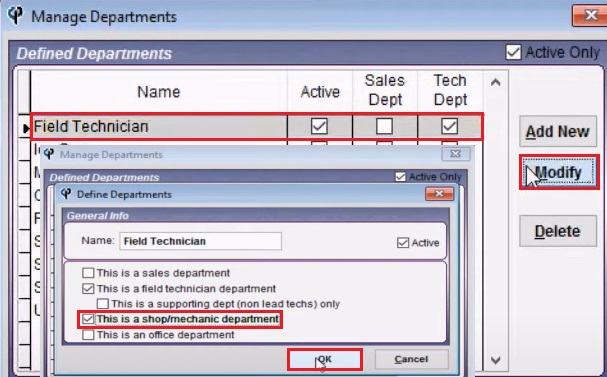
Option 2: Modify Existing Department - If your field technicians double as mechanics, we can come under our Field Technicians. Click Field Technicians -> Click Modify -> Check "This is a shop/mechanics department" -> OK
Make sure you have a user assigned to one of the departments that you remarked as being a shop department. To check that, Go to File -> Users
Shop Video Part 1
Terms and Definitions
Service Order - It is what the mechanic is scheduled to do. Ex: oil change or tire rotation
Service Ticket - it is what the mechanic actually did.
Schedule
Start by going to Shop -> View Schedule
.jpg)
Let's add in some service orders to turn them into service tickets. To do that, you have 2 options.
First option: Shop -> View Schedule -> Misc... -> Create New Service Order -> For Vehicle / For Equipment
.jpg)
Second option: Shop -> Service Orders -> Add New... -> For Vehicle / For Equipment
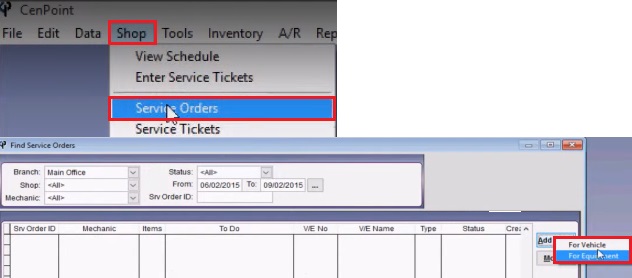
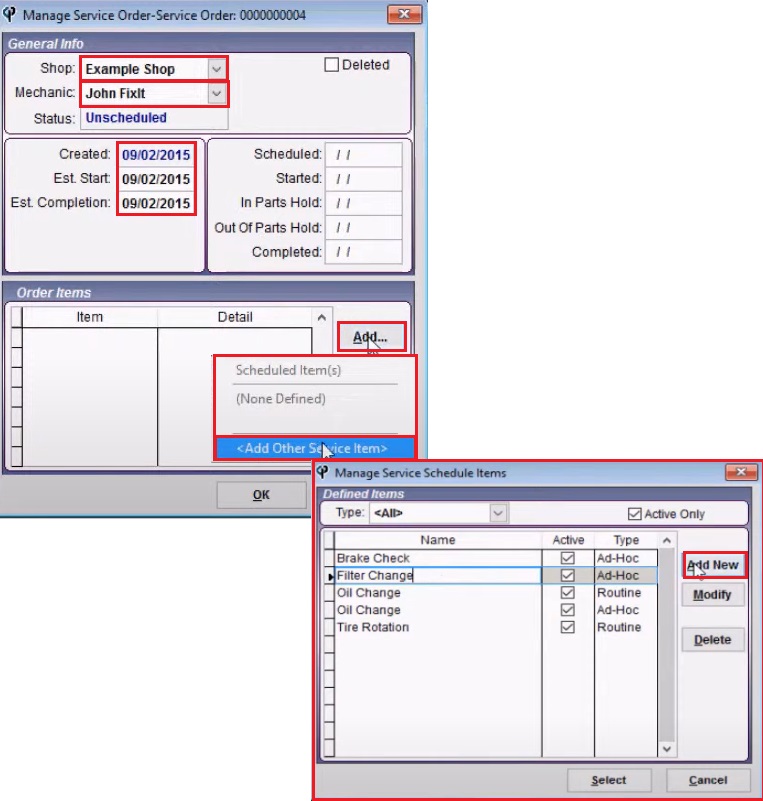
Let's choose for a vehicle and highlight your vehicle on the list then click on select. This is where you create your Service Order. Now choose the shop that's going to be internal/external. If you do not see the shop that you're looking for here, in a previous video, I walked you through how to create and set up your shops and vehicles. Choose your mechanic and estimated date. Under the Order Items, this is that you want to schedule your mechanic to do.
Click Add -> Add Other Service Item -> If what you are looking for is not there, you can Add New -> Choose your Order -> Select -> Add Notes -> Click Ok
Put the Order in the Schedule
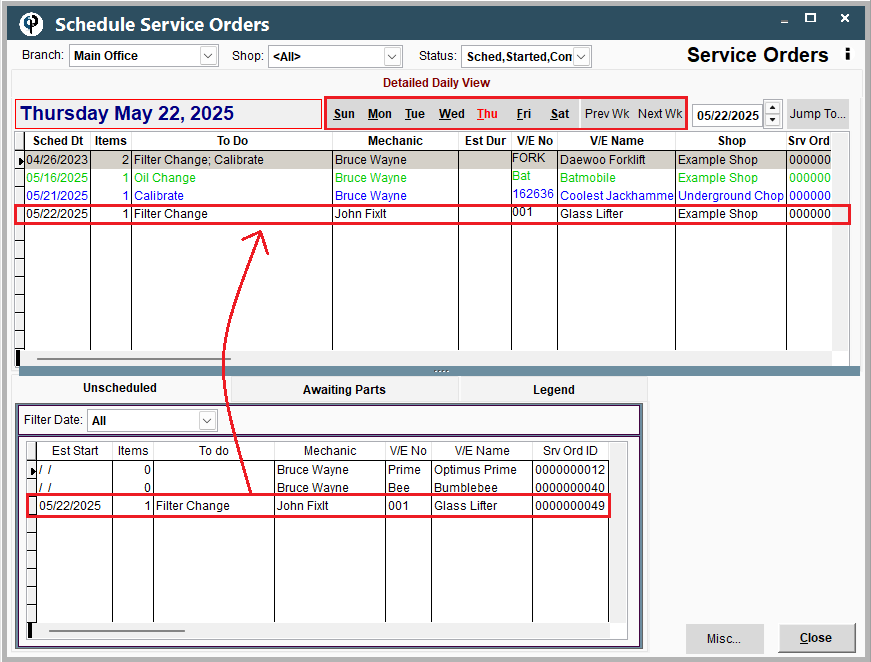
Click Shop -> View Schedule.
You can see the service order you just added in the unscheduled box.
To schedule it, drag the order up to schedule it for today or any date
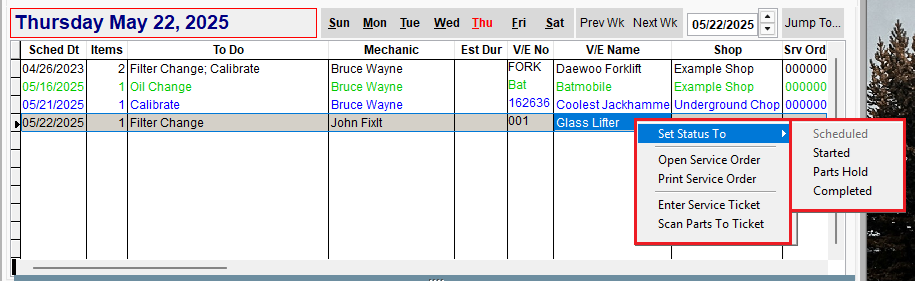
Change Service Order Status
Right Click on your order in the Shop Schedule -> Set Status To -> Started/Parts Hold/Completed. It will change the color so you can see what's going on

Shop Video Part 2
More on Entering Service Ticket
Service Ticket is what we actually did.
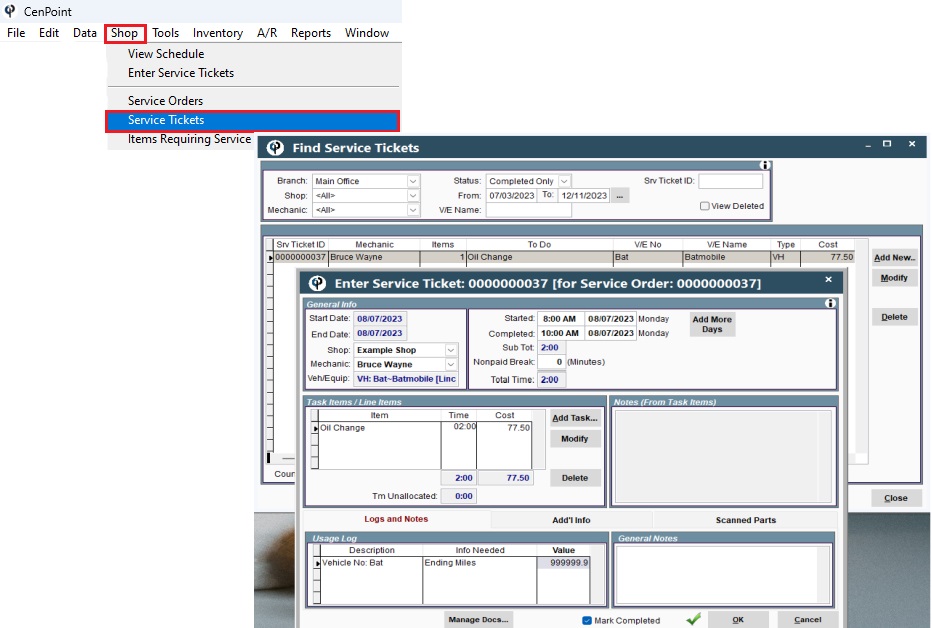
There are 2 ways to find a service ticket:
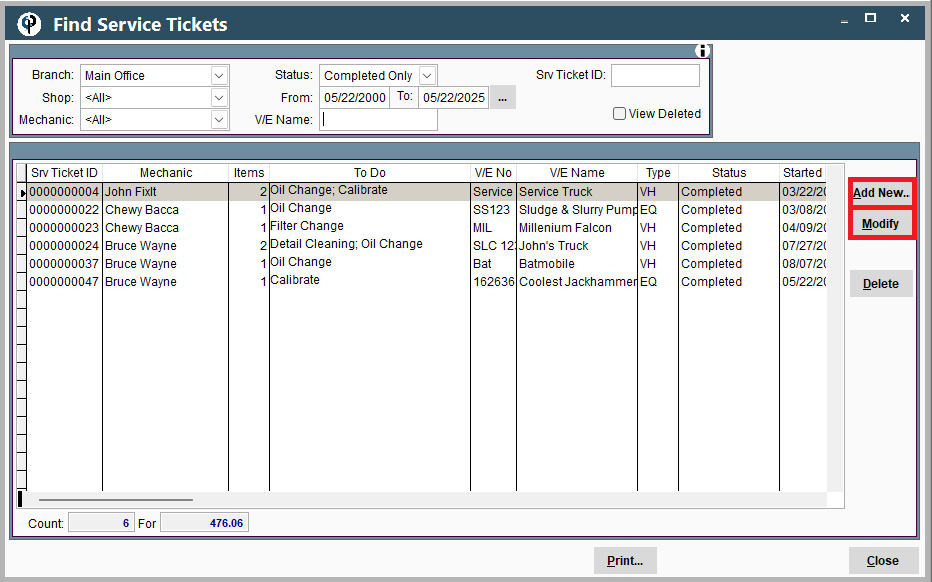
1. Go to Shop -> Service Tickets
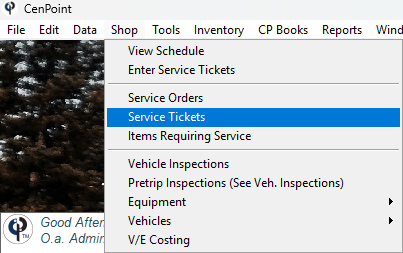
Now you can select a Service Ticket and click Modify or create a new one by clicking Add New
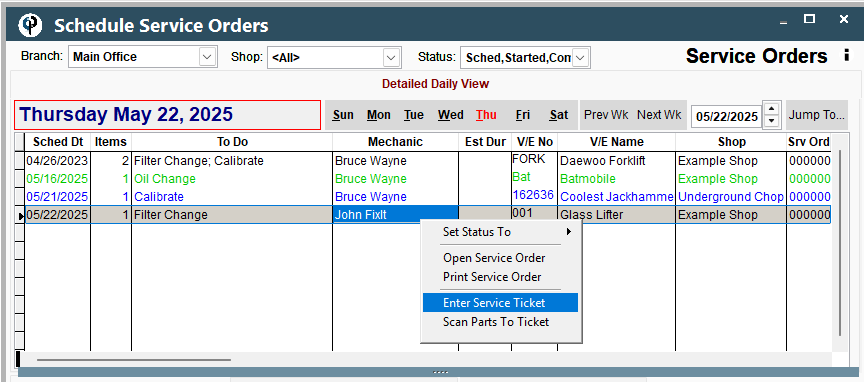
2. Go to Shop->View Schedule
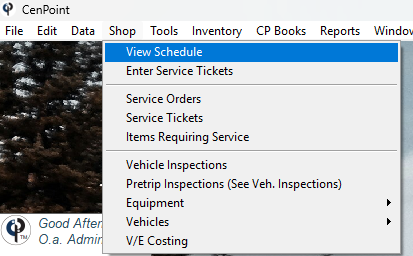
Then find your desired Service order and right click on it -> Enter Service Ticket
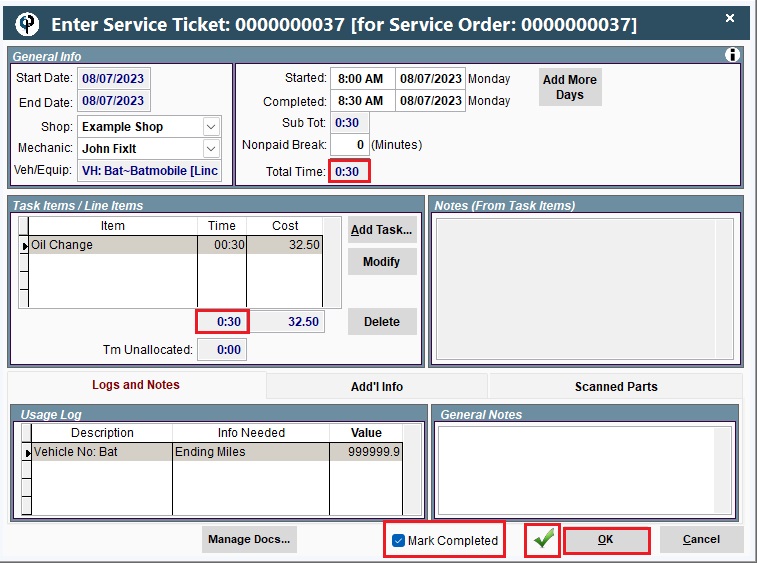
If a different mechanic ended up working on it than the one listed on the Schedule Order, you can update that information in the Service Ticket. You can put the time when it was started and completed. If this service order expands multiple days, you can click on Add More Days and put on the time and date then click OK. Here, you can see the total hours.
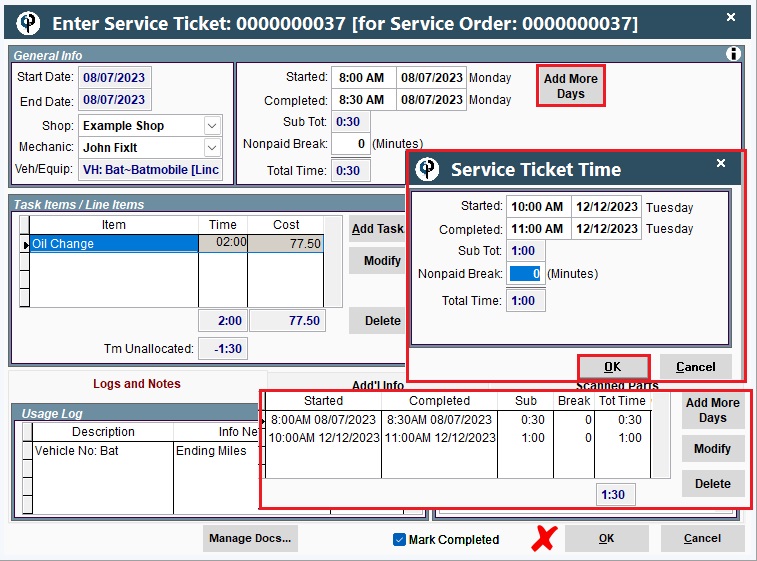
Inside your service Ticket click Add Task -> Oil Change / whatever your task is -> Put in an actual time -> Add New in Parts/Material Used (if you need to add any parts or materials) -> Add New in Incidental Charges

Now, in this example we will delete the second day we added because our actual time was 30 mins.
If you click OK the service ticket will be created.
Note: The green checkbox tells you that the estimated time on the Service Order matches the amount of time the Service Ticket took.
A Red X would warn you that the two times do not align, helping you notice discrepancies.
View Past Service Tickets
Shop -> Service Tickets -> you will see the one you created
Items Requiring Services
When we define our vehicles and equipment, we can set up a service schedule saying that every so many miles/hours, we would like to change the oil.
Shop -> Items Requiring Service -> highlight one on the list -> Create S.O. (Service Order) -> Fill in the boxes -> Add Order Items (if needed)
.jpg)