
Transferring Parts among Different Locations
There are 2 ways to transfer parts inside CenPoint: One-Part Transfer and Two-Part Transfer
1 Part Transfer - You transfer a part to a warehouse or truck, and it is automatically there.
Example: You transfer Diamond Blade 123 to John’s truck, now in CenPoint Diamond Blade 123 now shows as inventory on John’s truck.
2 Part Transfer - You transfer a part to a warehouse or truck, then the part must be received by that warehouse or truck.
Example: You transfer Diamond Blade 234 to John’s truck, now John must sign into CenPoint and receive the Diamond Blade 234 for inventory on his truck.
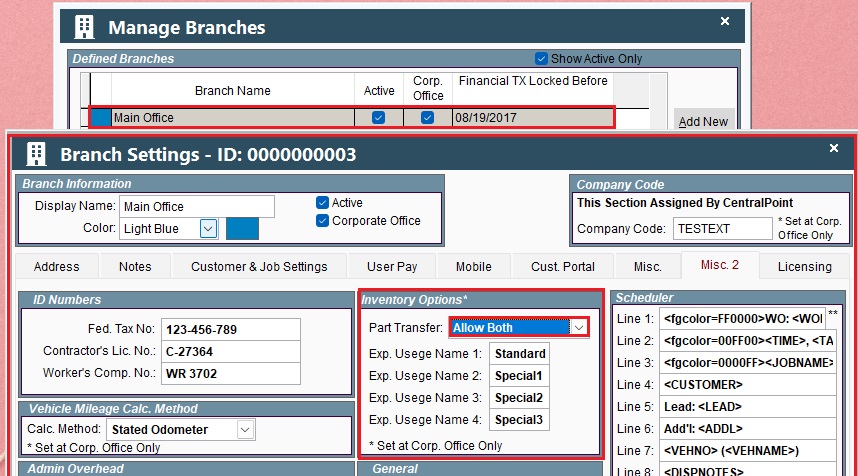
Allow Both - There will be an option where you can check and say I want it to be
To Set Part Transfer Options go to: File -> Company/Branch Information -> Click Main Office twice -> Click Misc. 2 ->
Inventory Options box, Part Transfer-> Click OK
Transfer Parts
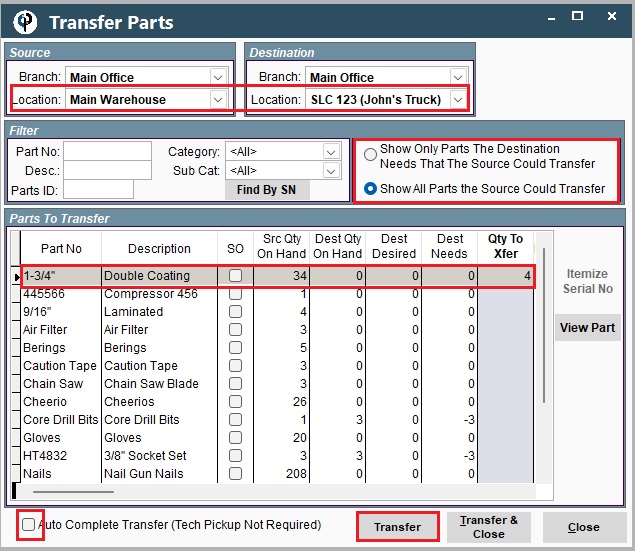
Transfer Parts by going to Inventory -> Transfer Parts ->
Choose Source Location and Destination Location
Click the radio button for either ‘Show Only Parts the Designation Needs’ or ‘Show All Parts’
Choose the Part you want and the quantity to transfer.
Check the Auto Complete Transfer box if you want the part to automatically transferred, otherwise check the box for 2-part transfer.
Click ‘Transfer’ or ‘Transfer and Close’ if you are done transferring parts.
2 Part Transfer→ Parts Pickup
The tech receiving the parts would sign into CenPoint and go to Inventory→Parts Pickup
.png "image(12).png")
They would then type in the quantity received, click OK, and the parts would be transferred.
.png "image(14).png")