
Take a Overview Tour of CenPoint.
CenPoint is designed to help subcontractors ease their workflow, improve the customer experience and provide endless reports to analyze your business.
We will go over several of these features and see how they all work together. A quick overview is this:

We often but not always start with a Quote.
We will capture a digital signature from our customer and then convert our Quote to a Job.
Work Orders are the days scheduled for technicians to be on-site.
Work Orders create your schedule and are displayed on one of our many Schedulers.
Once the work is scheduled technicians use the Mobile App to fill out a digital Field Ticket.
The Technician records their time, and what work was actually done on the job on the Field Ticket.
On their way to the job site, it can be set up so Tech's can automatically send the customer their ETA. The mobile app is also where they can put their captured photos of the job site, record the hours and tasks performed, and much more.
With our digital FIELD TICKETS completed, they can easily be priced and automatically converted into an INVOICE. We will send the customer a link to view and pay their INVOICE through our secure payment portal.
Now, let's show you how to do it on your own in CenPoint:
Creating a Quote:
Mobile App
This will be useful for when you are on-the-go.
Desktop Version
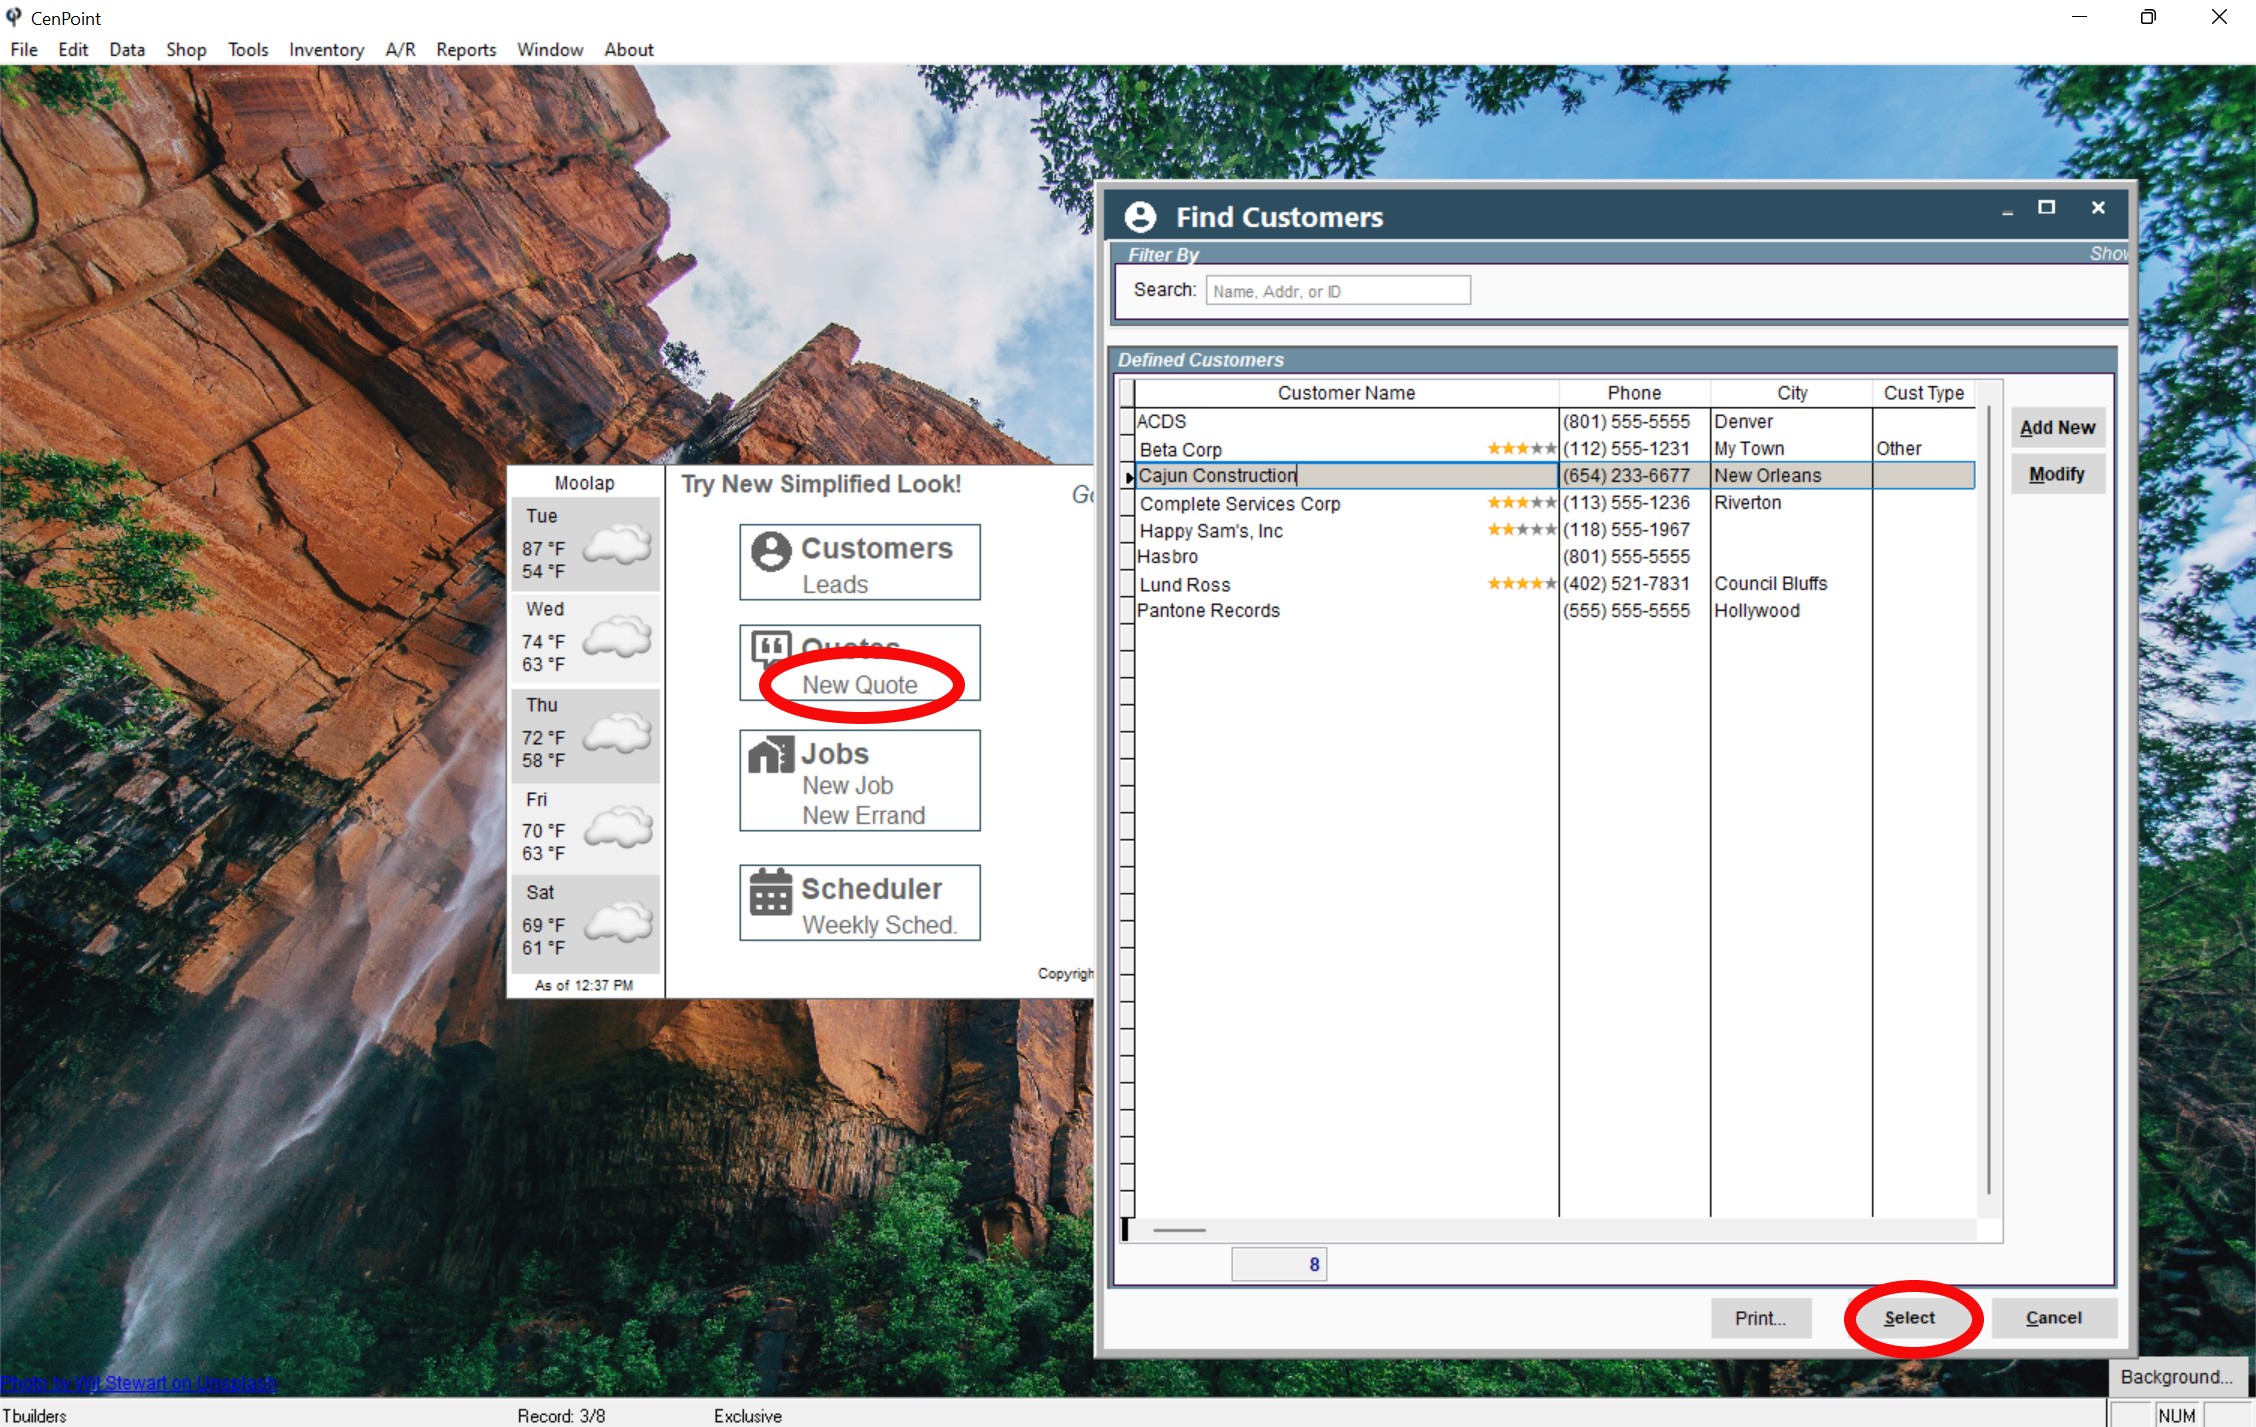
From the CenPoint Main Screen, Click on New Quote> Find the correct customer> and start filling out the information on the Job Quote Screen.
Job Quote Information includes, but is not limited to:
Job name
Quote Date
Sales Rep
Address of job
Additional tabs near the middle of the screen

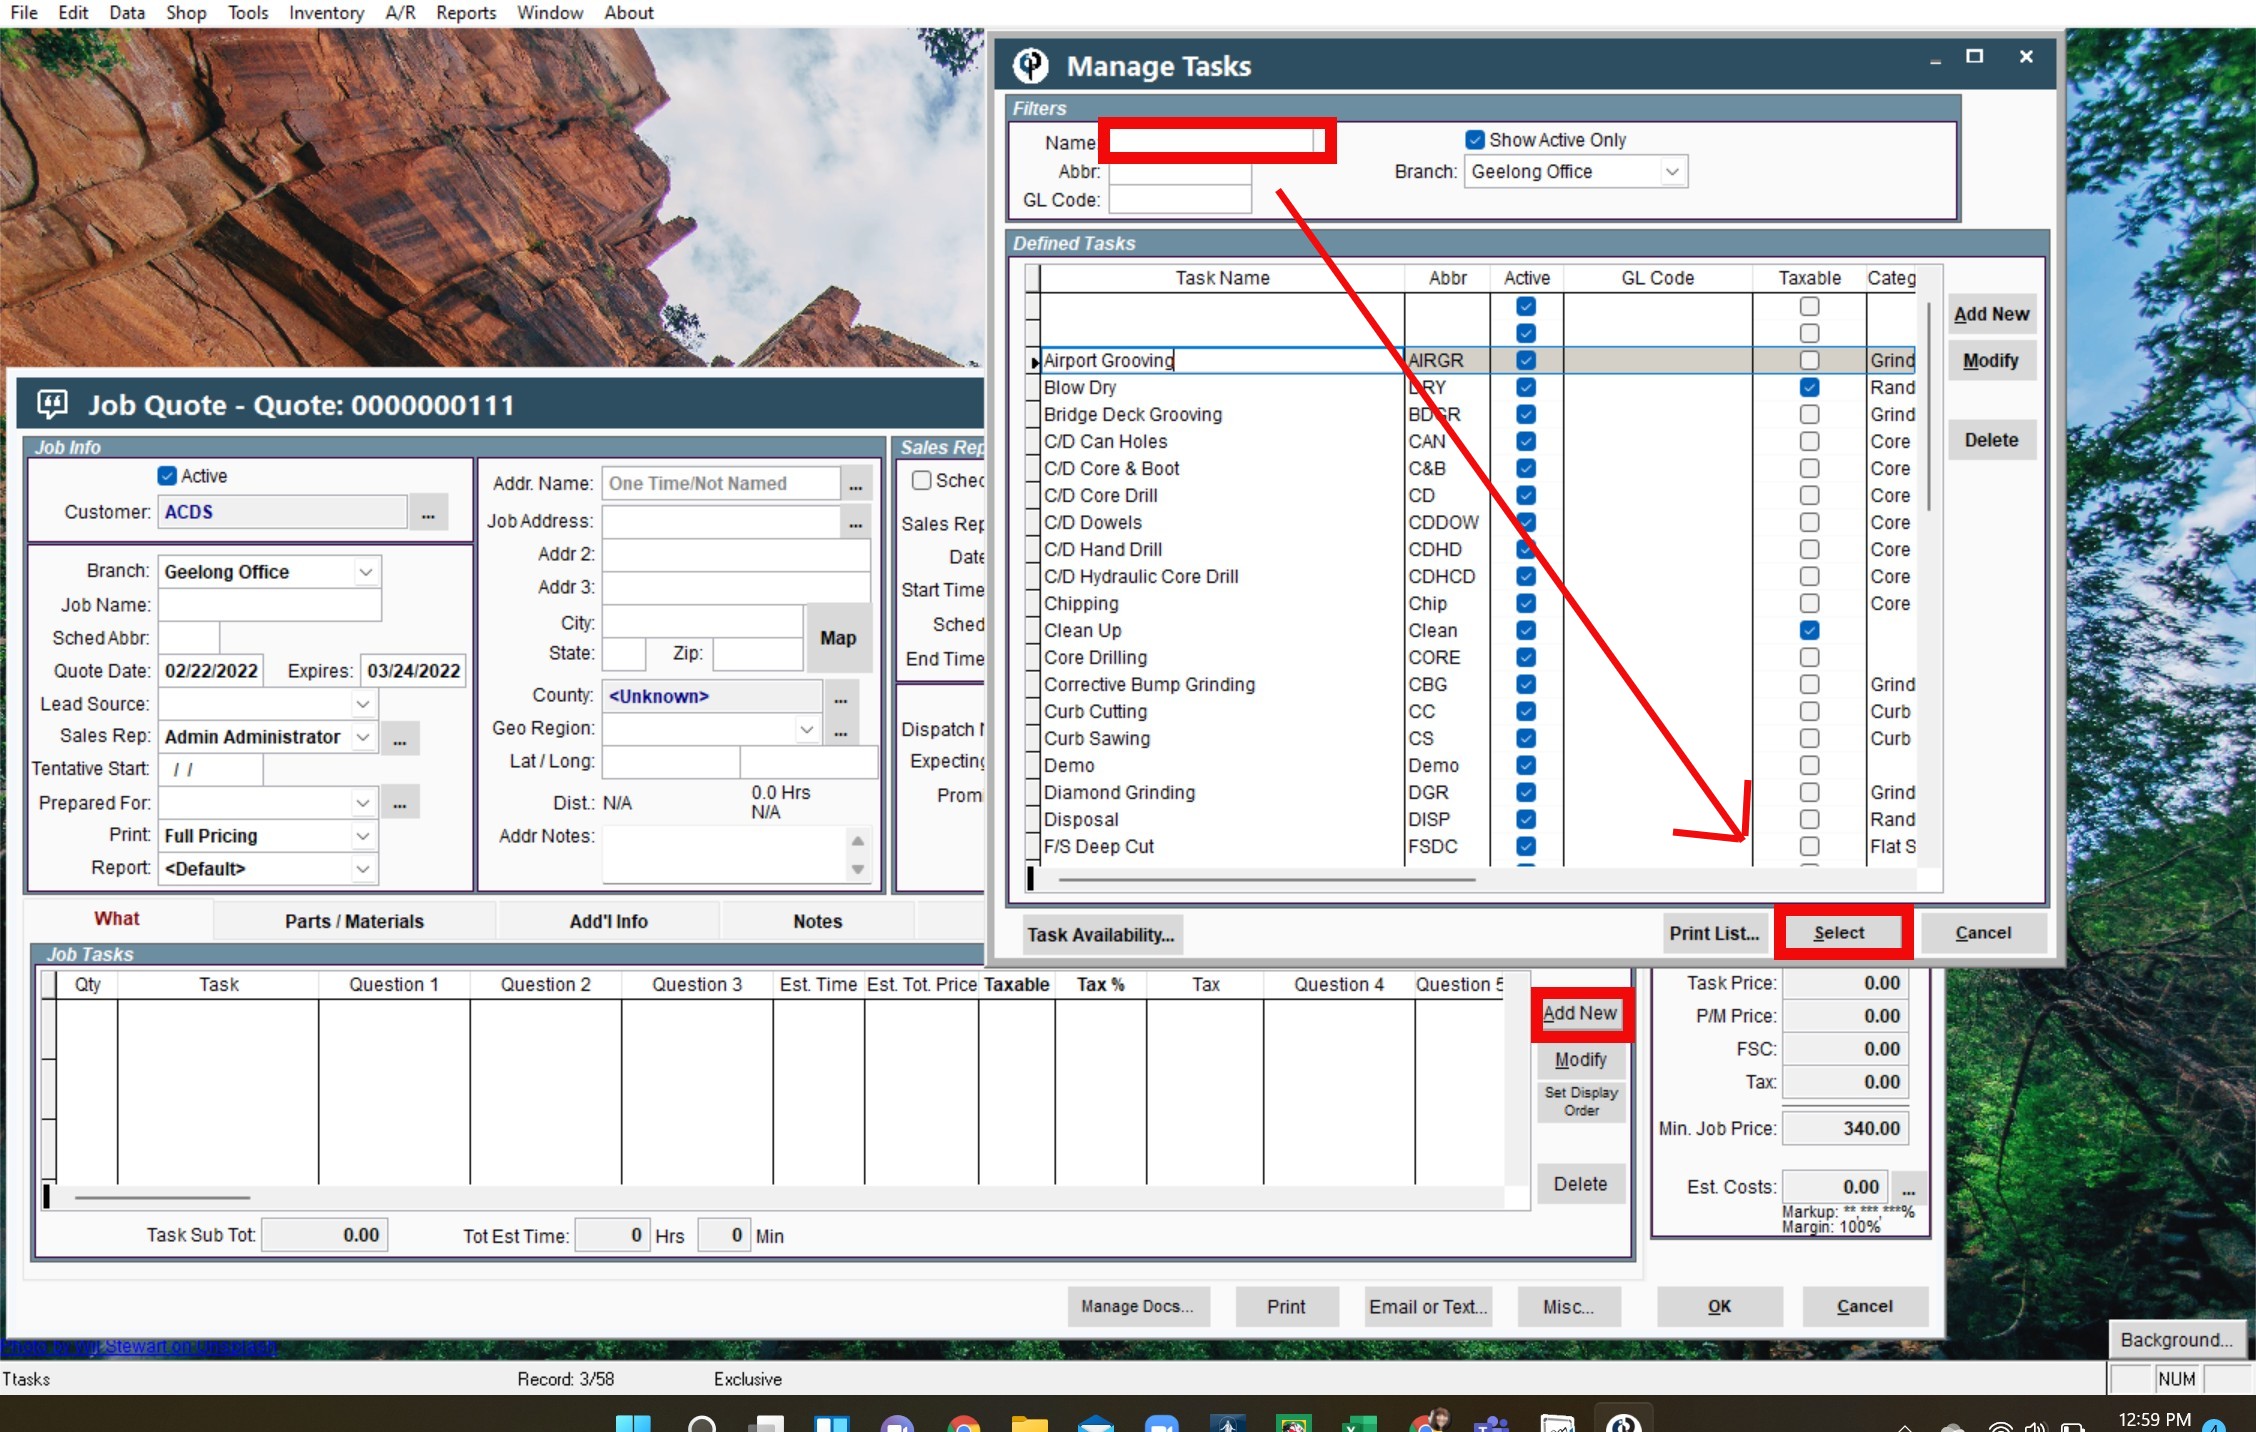
What
Allows you to add Tasks that are included for the job
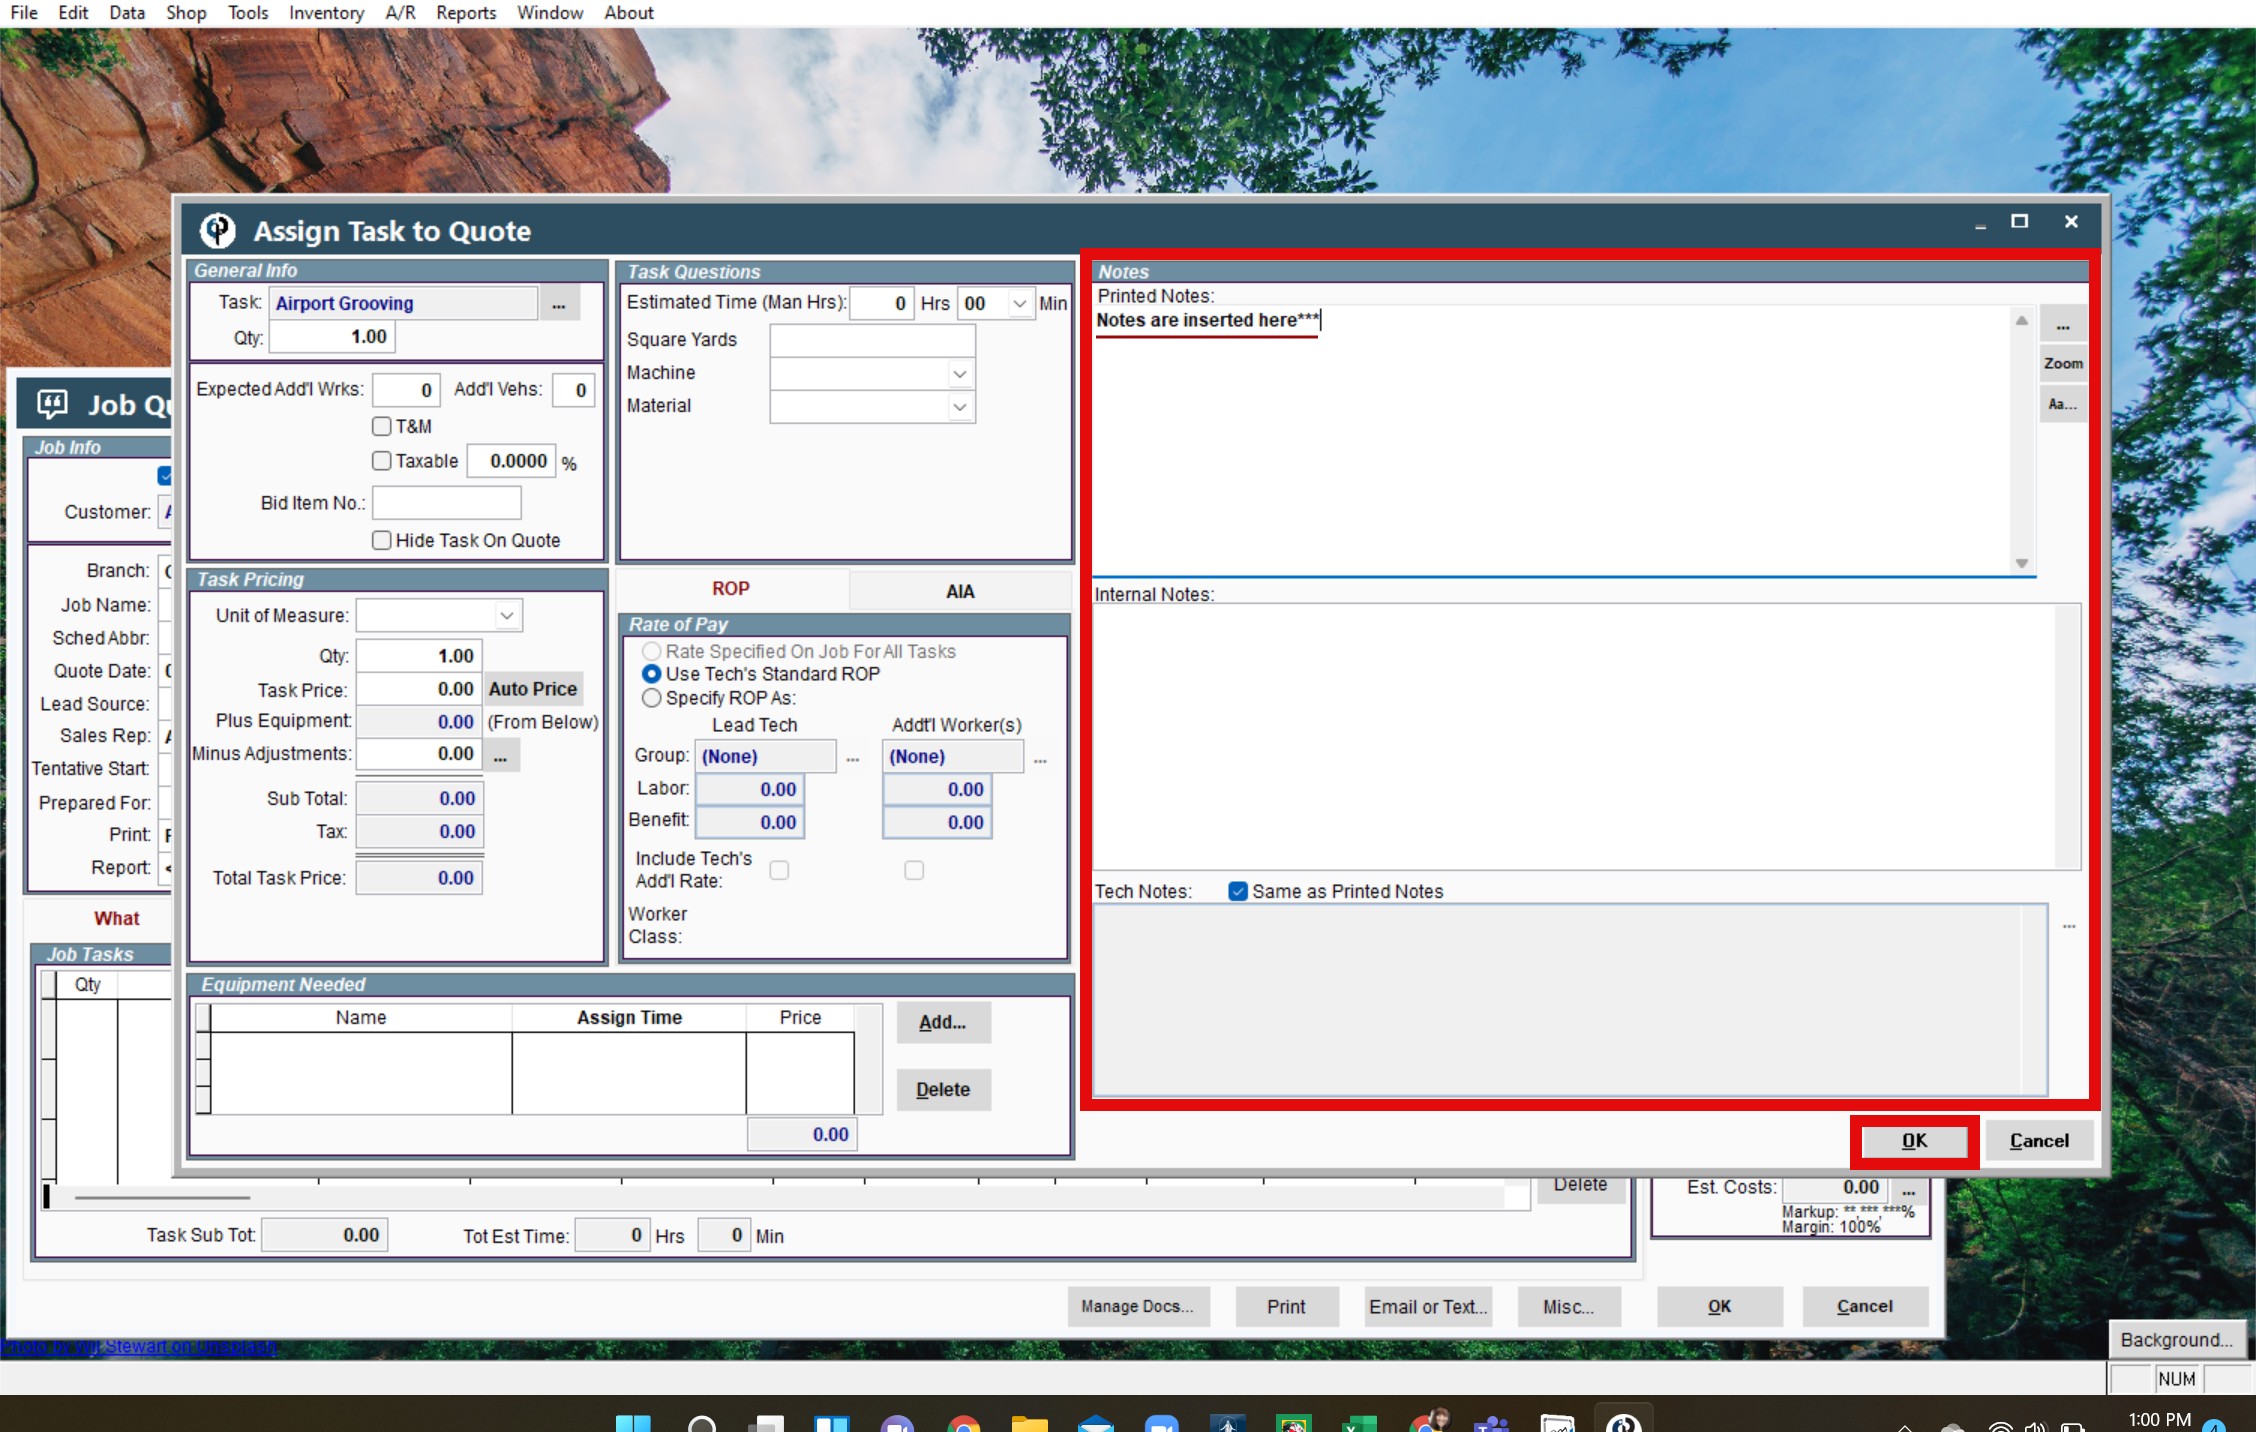
To add a new task, click Add New> Type in the task you are looking for and/or add tasks that are not listed> Click Select> fill in details about that task> Click OK when you are finished to save that task.
To modify a task that is already in the list, Click Modify and adjust as needed.
Parts/Materials
Add'l Info
Notes
eSigned
Linked Quotes
Activity Log
Buttons along the bottom of the page include:
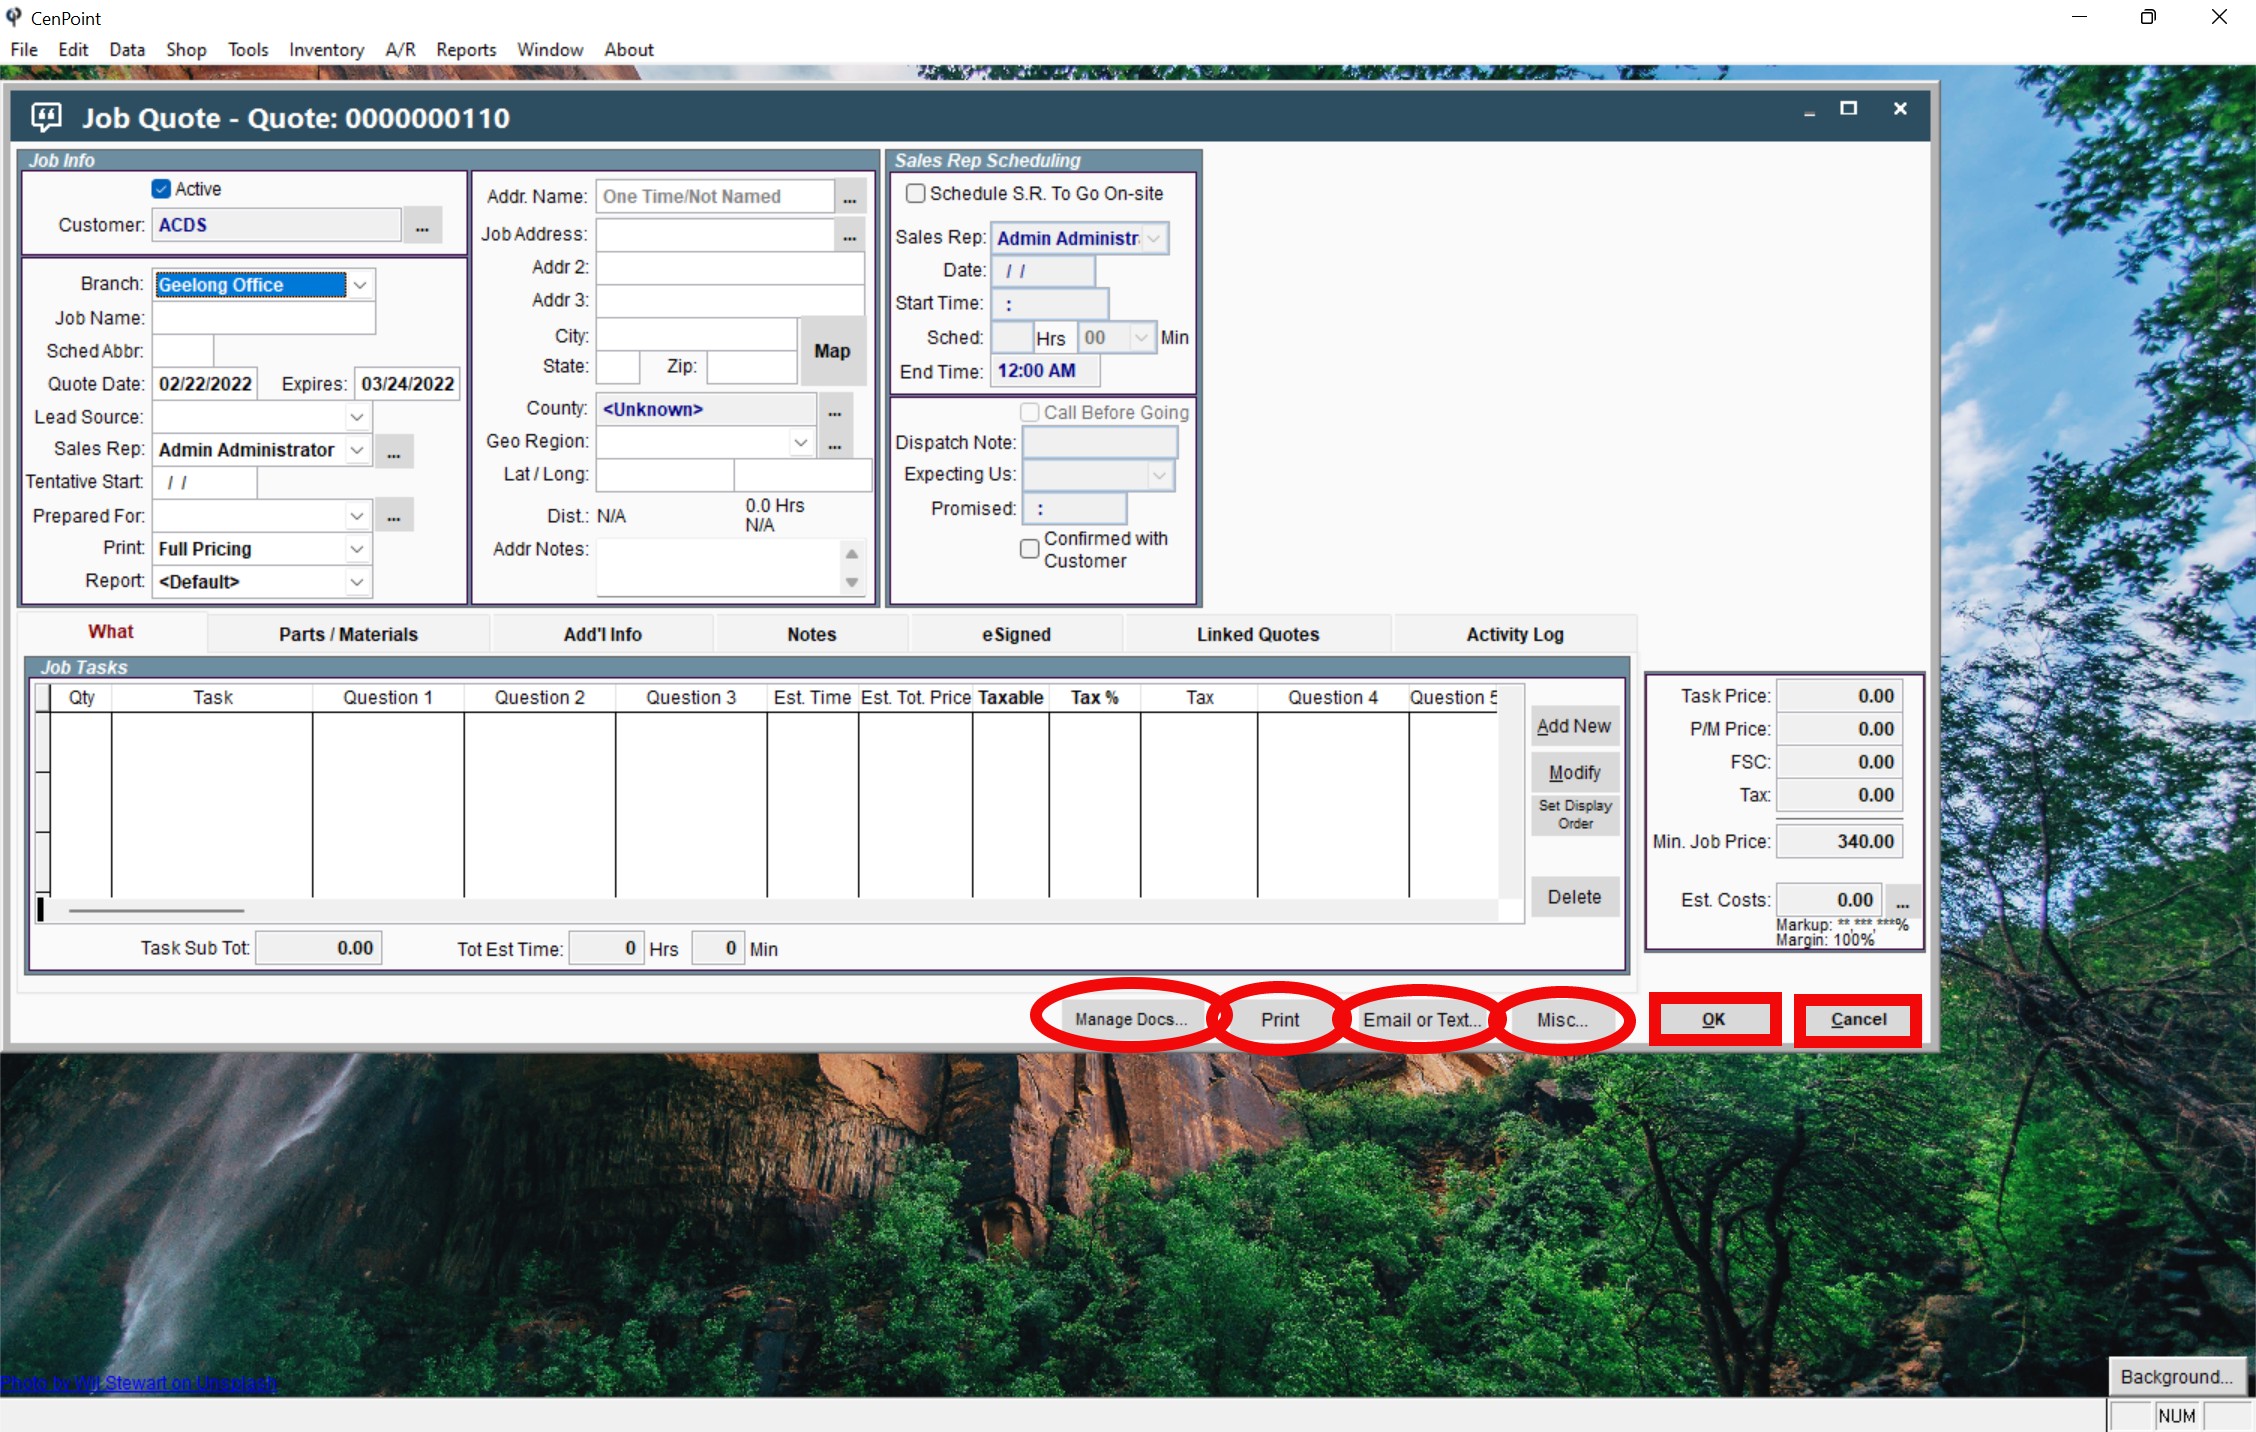
Manage Docs
You can add documents, photos, or files by clicking this button> View Documents> Add> and attach whatever you need to this Job.
Email or Text
Once you are finished adjusting the Job Quote as needed, you can send this to your customer via Email or Text for them to view.
Just click the Email or Text button at the bottom of the screen and choose whether you would like to send them the Quote as an Email-PDF, Email-Link, or Text-Link.
The link option allows the customer to view and sign the quote through our Customer Portal.
Print
Misc..
OK
When everything is finished, Click OK
Cancel
Converting a Quote to a Job:
After the quote has been accepted, Click on Quotes from the CenPoint Main Screen> Find the designated Quote> Click Convert to Job on the right hand side of the screen> a pop up screen will say Continue> another pop up screen will say Open Job.

Creating a job:
After you Open the Job, most of the information will already have transferred over from the Quote. However, you will need to add some more specific information, such as:
Who & Where
What & When
Add'l Costs and Job PO's
Payroll
Add'l Info
Activity Log
Project Info
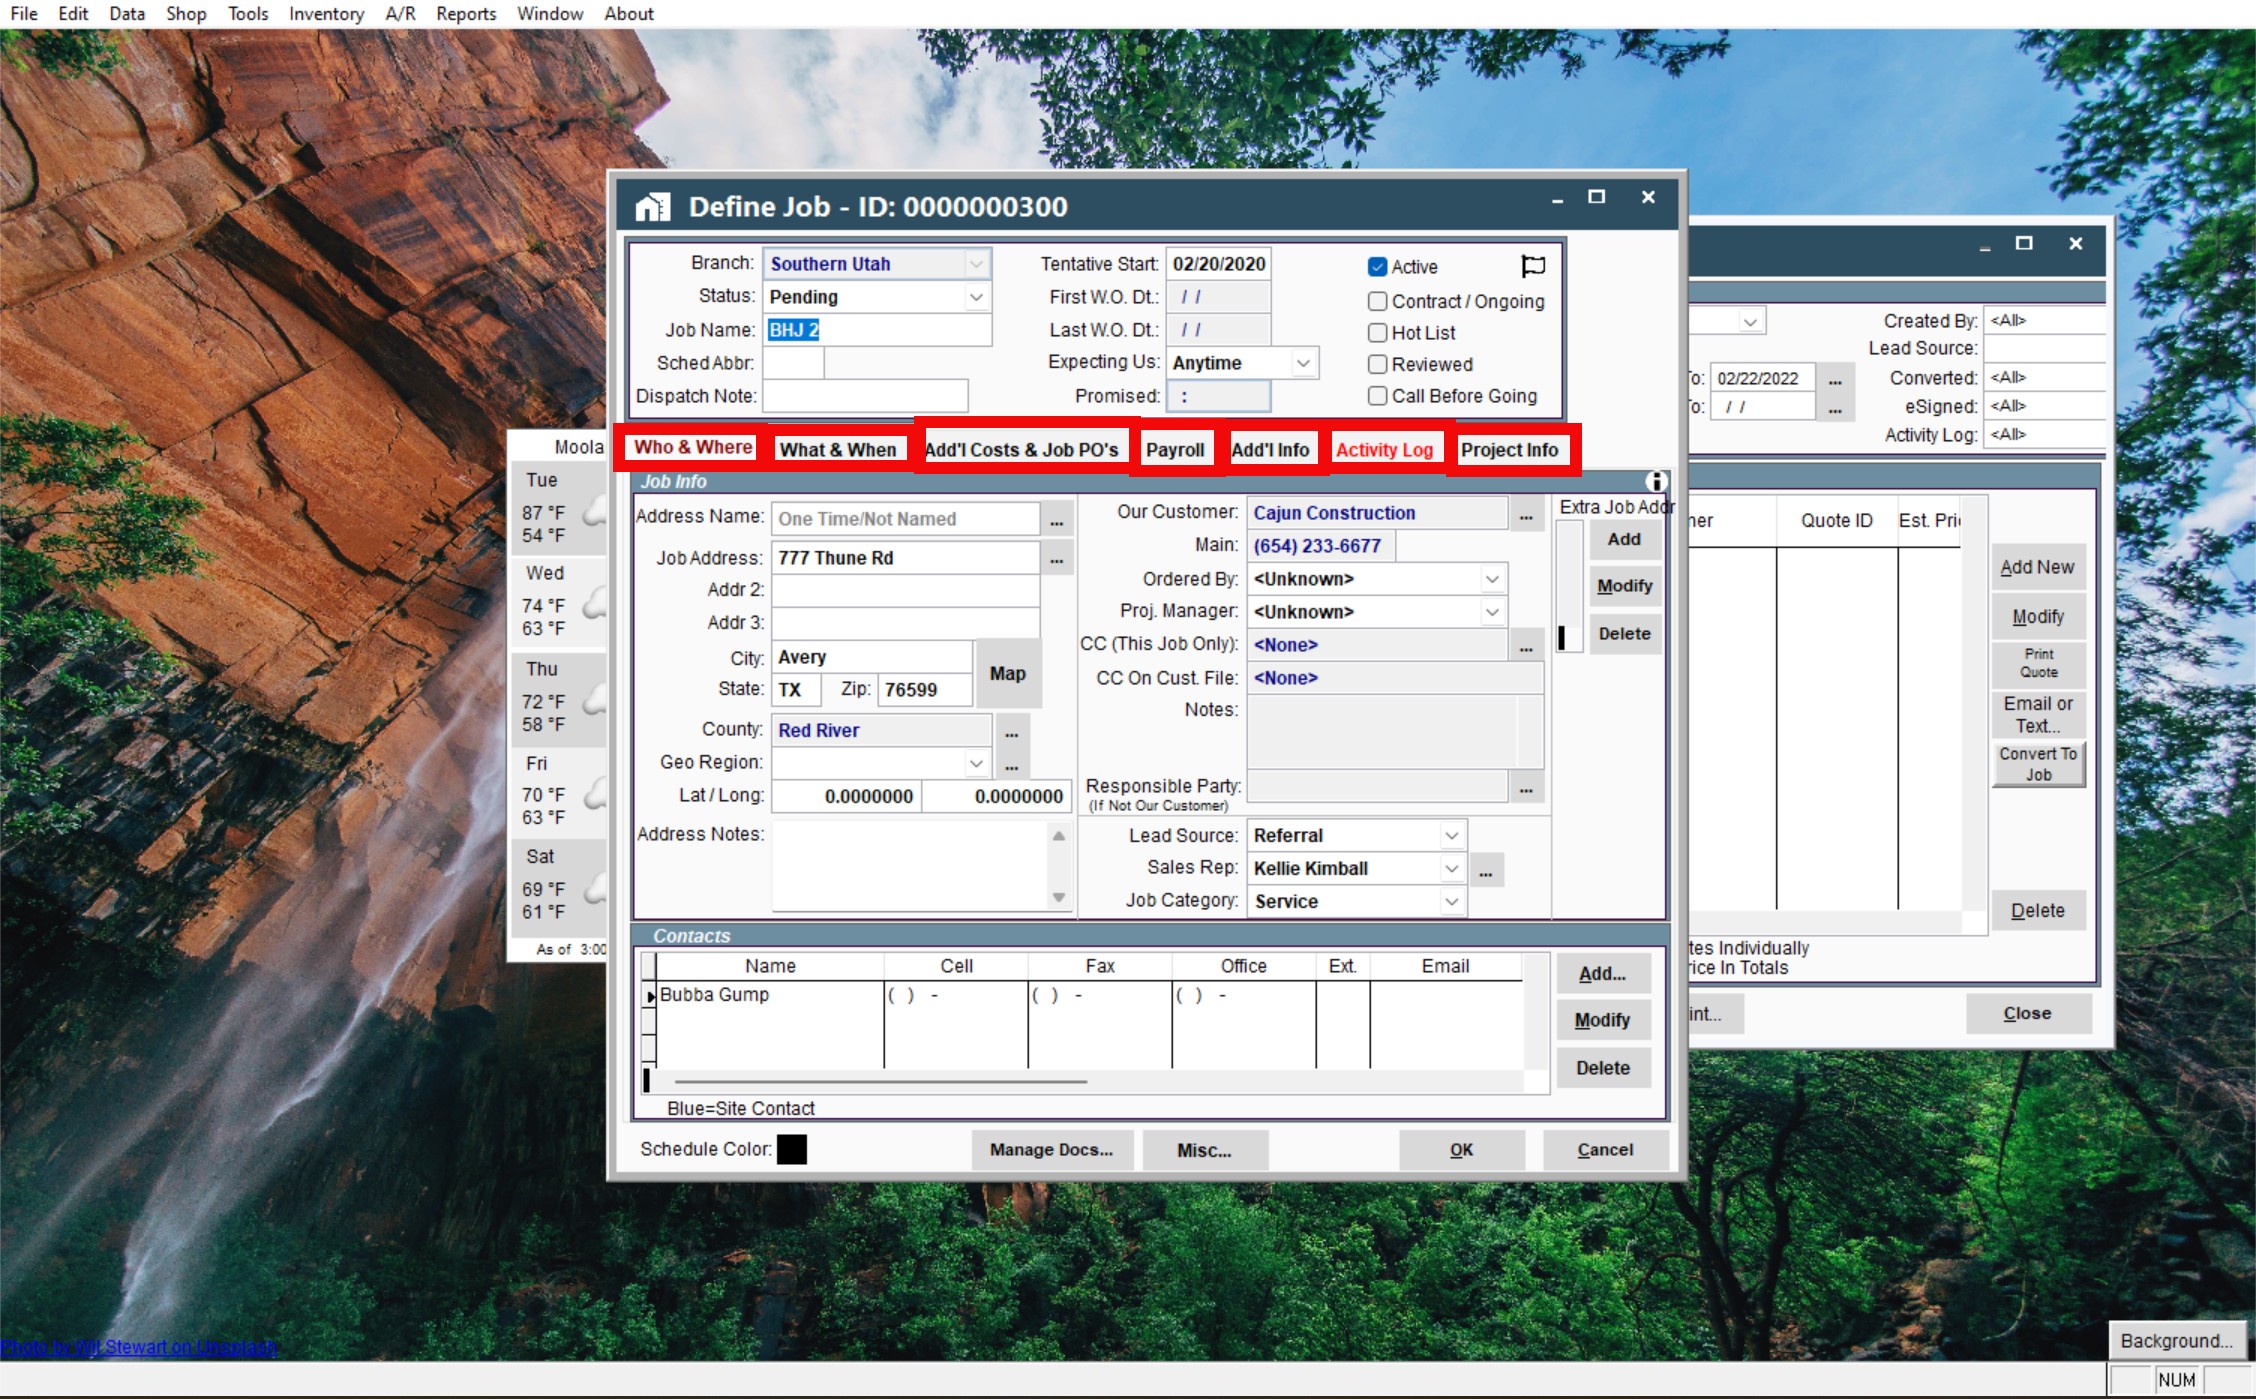
For more information on how to fill out the Job Screen, please click on the following link: https://help.cenpoint.com/docs/full-job-screen
Creating a Work Order:
Work Order: a day of work on a specified job
From the Define Job Screen where you created the job, under the What & When tab click the button on the right hand side that says Add W.O.> fill out the information.

Enter the following information into their corresponding slots
Date
Technician(s)
Vehicle(s)
Start time/End time
Tasks
Etc.
For more information on how to navigate the Work Order Screen, click the following link: https://help.cenpoint.com/docs/work-order-overview
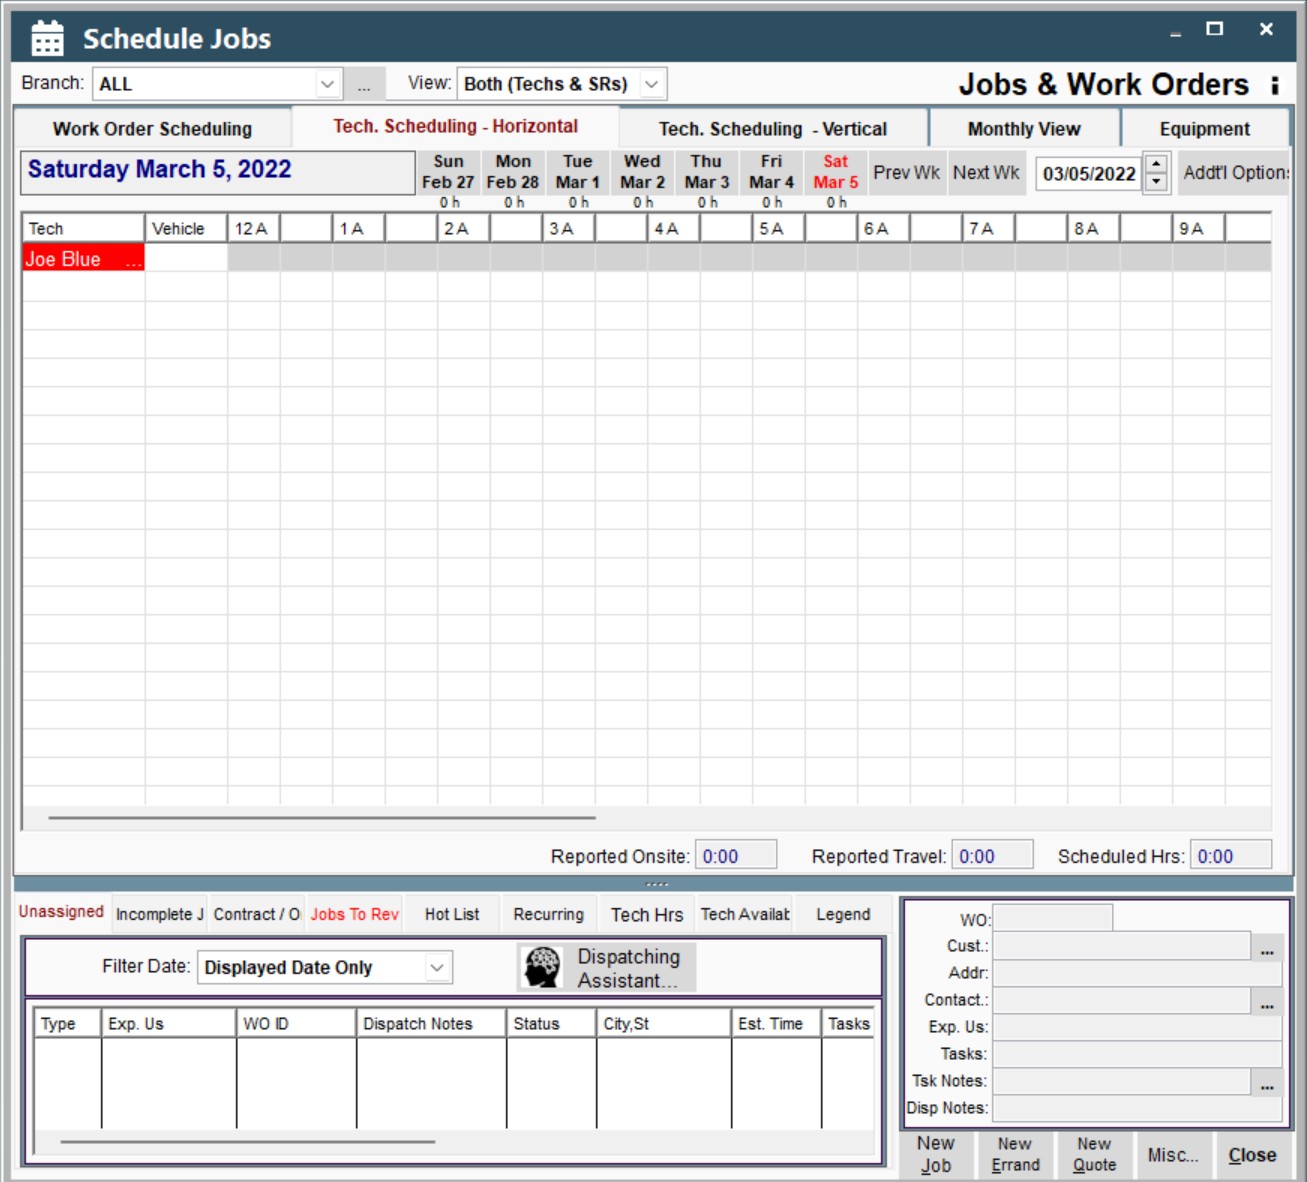
Scheduler:
Take a look at your Jobs, Work Orders, and more on the Scheduler.
From the CenPoint main screen, click Scheduler> select the date that your job is scheduled to begin (the scheduler automatically opens on Today, so you may have to adjust to your desired date).
You can see all types of Work Orders for different customers and their times
Adjust the Schedule View:
You can adjust the view of the scheduler with the tabs across the top of the Screen
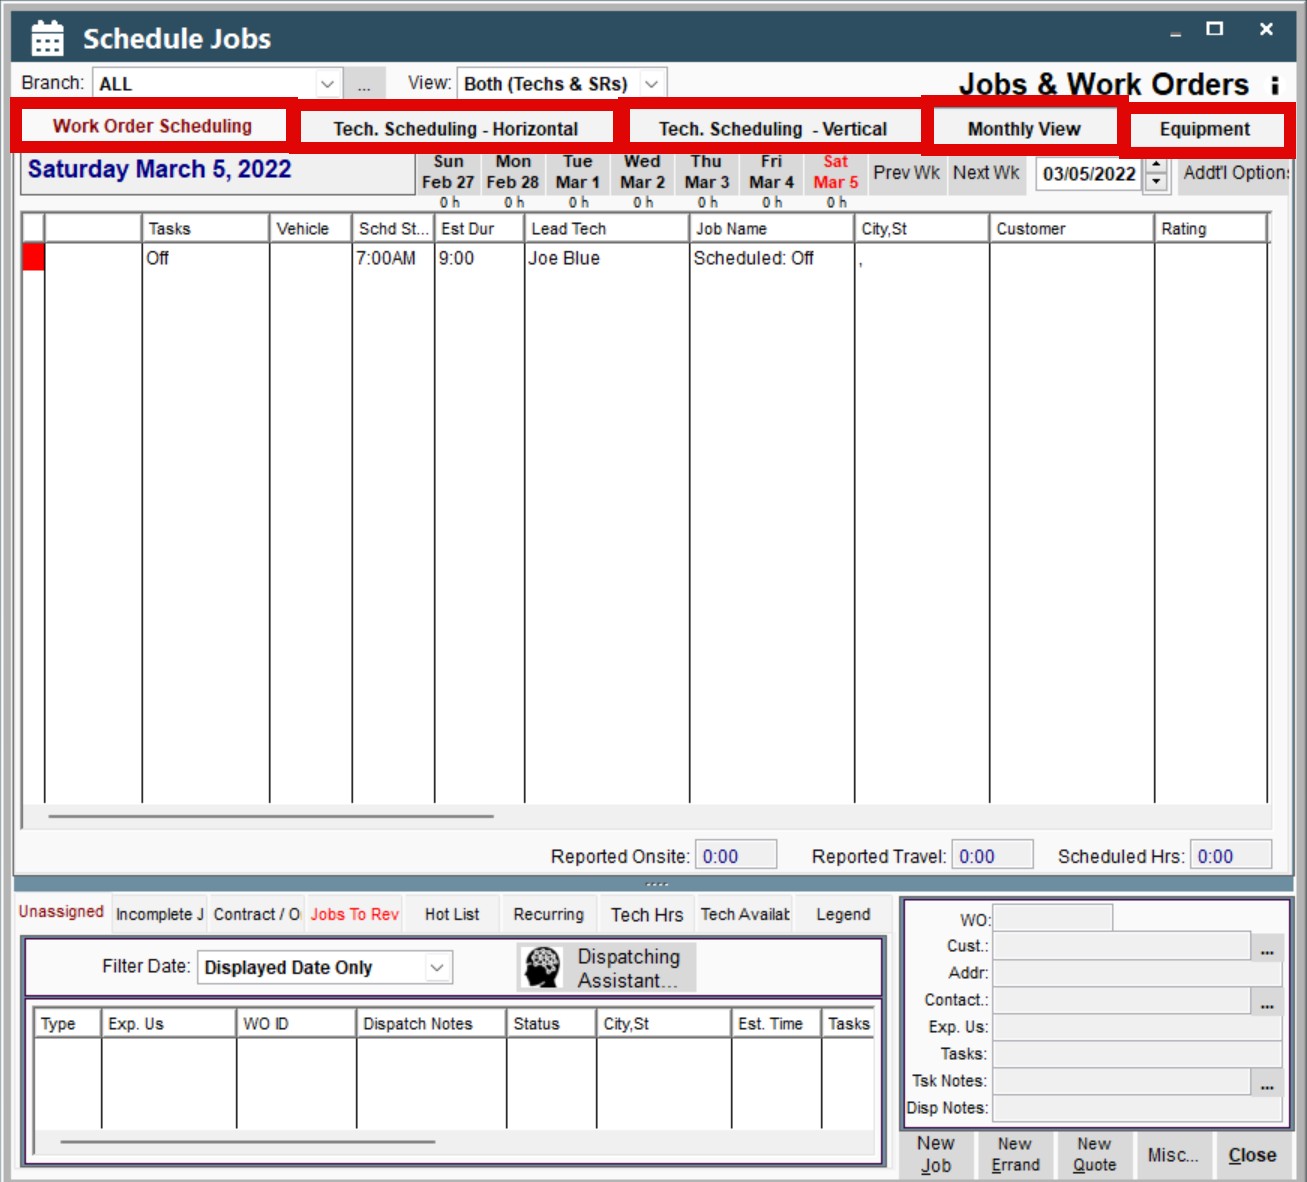
Weekly Scheduler:
This Screen allows you to see multiple days at a time
Click Weekly Schedule (from Main Screen)> Click the View drop-down menu in the top-middle part of the screen> choose the time period that you would like to view.
You can customize this screen (ex: changing the colors of different work orders) to differentiate between tasks, customers, etc.
This schedule is also very useful to dispatch vehicles appropriately
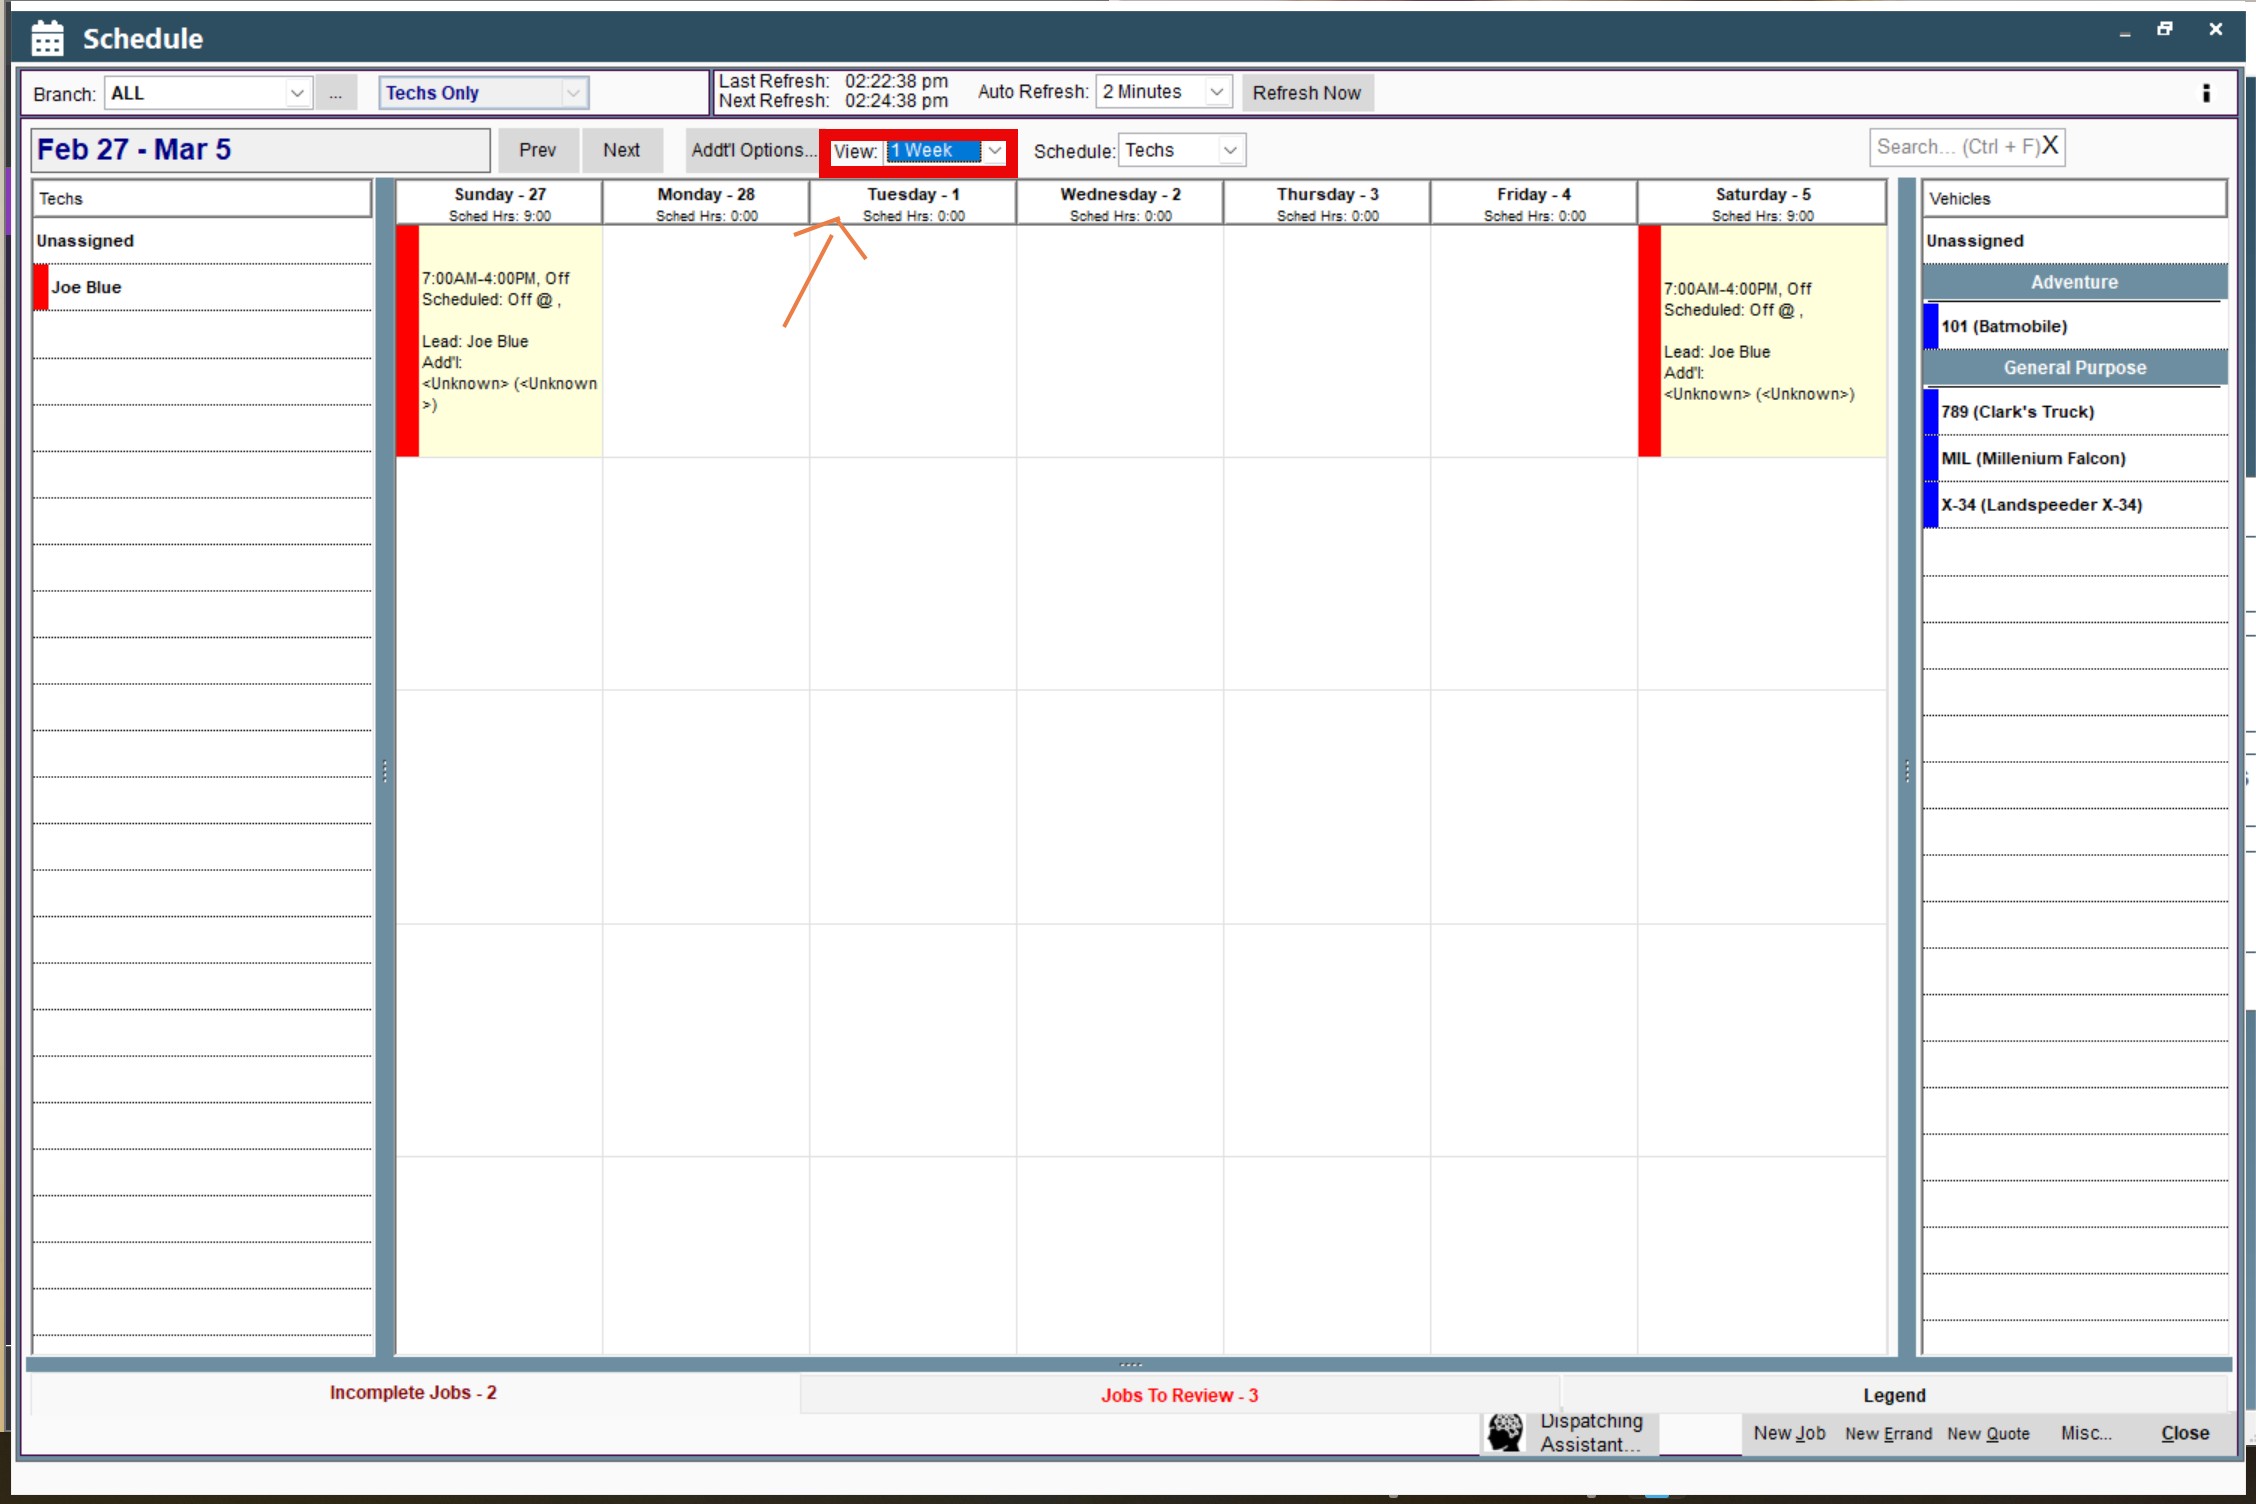
You can also schedule on-the-go via the CenPoint mobile app, if needed.
The Scheduler allows you to drag-and-drop Work Orders to different technicians and/or reschedule job times easily.
If a tech that you assigned to a Work Order is unavailable on the day of the job, you can drag the Work Order to the bottom table of the screen to make it an "unassigned" Work Order. Then, when you are ready to replace that tech's Work Order, you can drag the Work Order over to another tech to give them the assignment.
You can also click on that specific tech's name> click User Availability> click the drop down menu next to the date that the tech is gone> and specify why the tech is not there so that no one else tries to assign him/her work for that day.
Those options include the following:
Available
Meeting
Off
Vacation
Sick
On Call
You can also customize this list under Pick List data

Scheduler- Technician View from Mobile App
Go to the CenPoint Mobile App> click Scheduler> and click on the date of the Job. The tech will see the following:
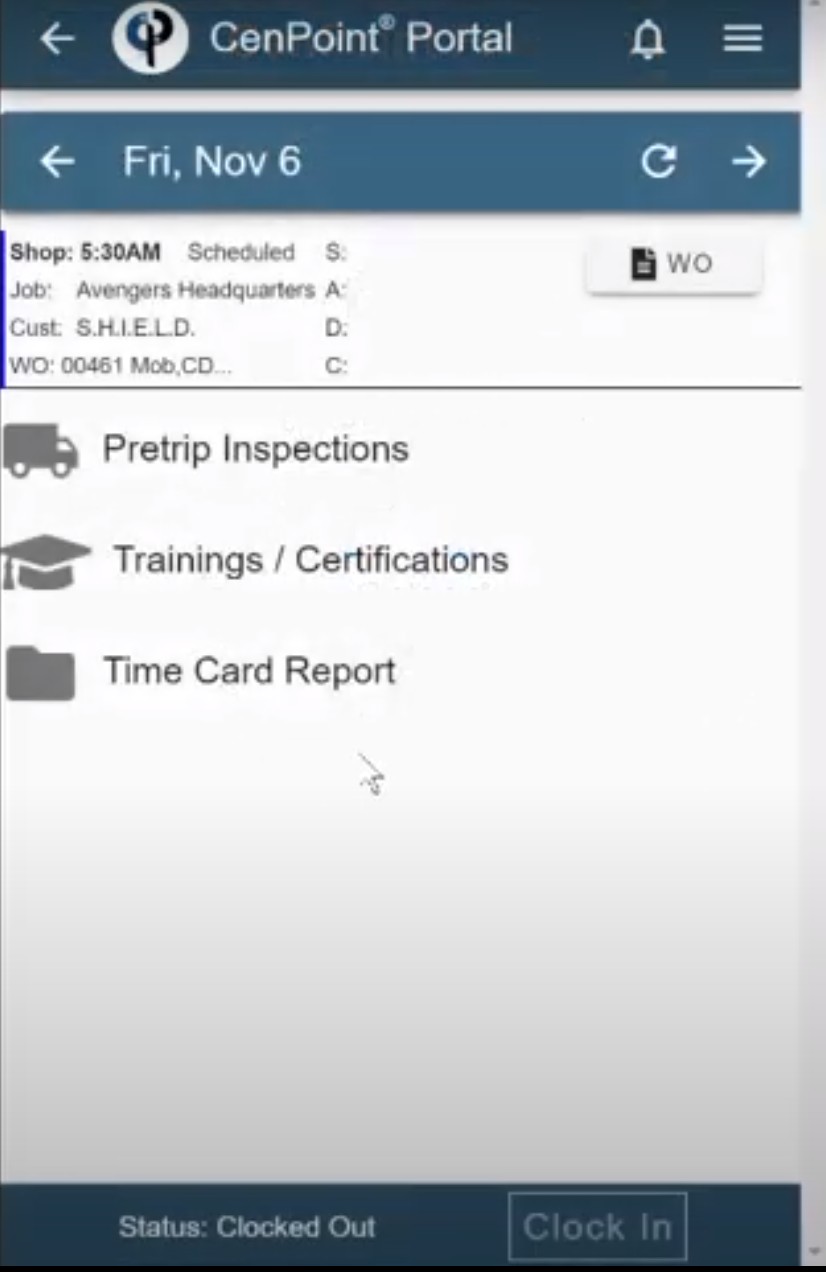
They will be able to see ONLY their own schedule.
If they click on the Work Order button they will be able to access the necessary information for the Job such as: Arrival time, vehicles, phone numbers for necessary contacts, etc.
When the tech(s) is ready to drive to the job site, they can hit the button within that WO tab that says "Started/In Route."
When this button is hit, a few things will happen:
The customer will get a text saying that the tech or techs are on their way and will give their approximate arrival time.
The Scheduler will update from a red-colored Work Order label to a green-colored Work Order to represent that the technicians are on their way to the Job.
When they arrive to the Job they click the corresponding button that says "Arrived."
When this button is hit, a few things will happen:
The customer will get a text saying the tech is now on site with their name and phone number if there are any questions.
The Scheduler will update to an orange-colored icon to represent that the tech(s)
Once the tech arrives, they will be able to fill out paperwork such as a Job Safety Analysis (JSA), Safety Plan, Field Ticket, Etc.
Click on Field Ticket and read below for more information regarding that.
Field Ticket - Technician View from Mobile App
Tasks:
This screen allows you to fill in the tasks and task information that you completed during that day. Just click the checkbox next to the task and a pop-up screen should appear for you to fill out the appropriate information.


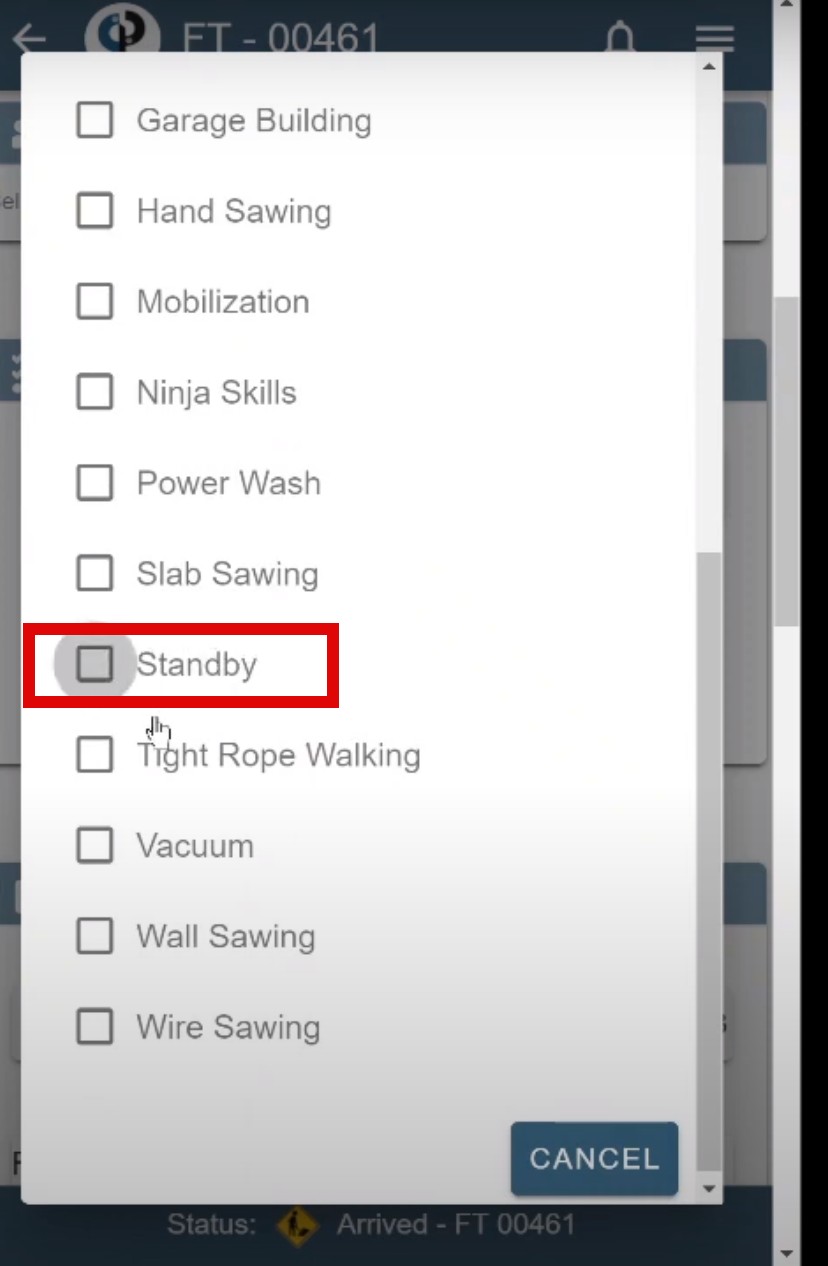
If a tech arrives and is waiting to be allowed onto the Job site, they can add it "Standby" time as well to be documented on the Field Ticket.
Go to Field Ticket> Click the Add+ button on the Tasks tab> Scroll down to Standby> fill in the appropriate info
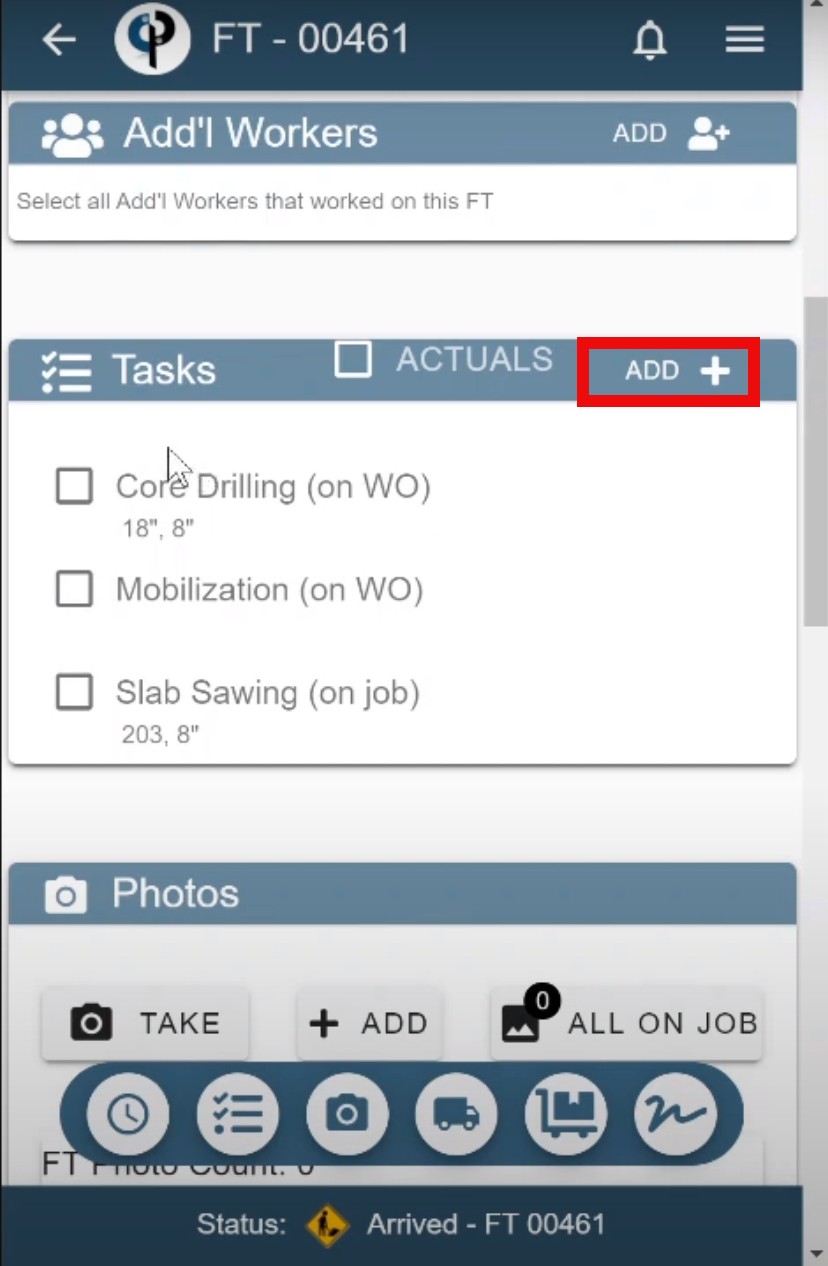
Photos:
During or when you are done with your work, you can take or add photos to the Field Ticket Screen.
Parts and Materials:
Customer Sign: Once you have filled everything out, you can finish off the Work Order with a customer's signature. You can retrieve that a few different ways:
1. Have the customer sign on the tech's device
2. Text a link to the customer's phone so they can sign there
3. Send a QR code to the customer's device
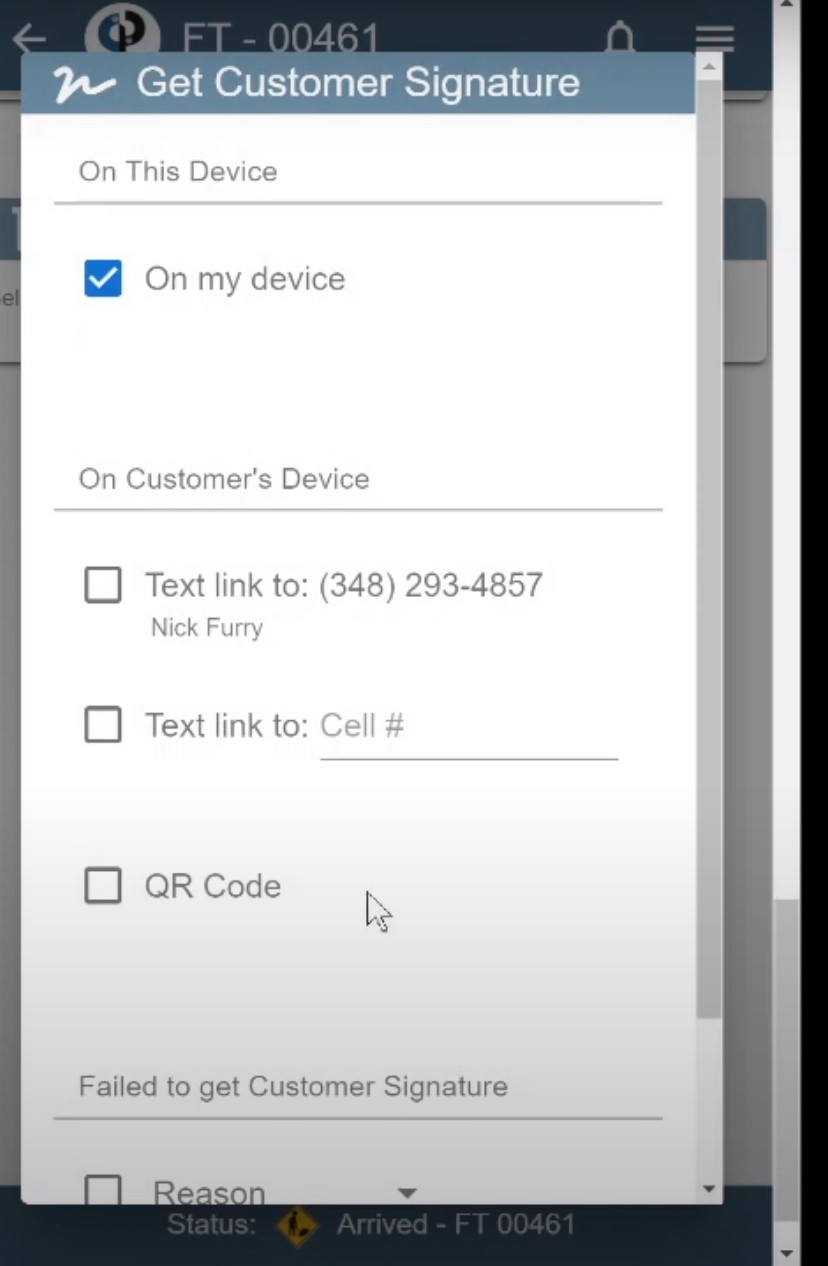
If the customer refuses to sign, there a section that is located in the Customer Signature tab as well.
After the customer has signed, you can click the button on the Time Card that says "Departed."
This will so a couple things:
It will send a final text message to the customer saying that the crew has left and giving the office number if they have any additional questions.
The Scheduler will update to a purple-colored icon to represent that the techs have left the Job site.
When the tech's have completed their drive time back to the shop, they will click the "Completed" button within the Time Card.
Once the technician's have filled everything out within their tickets, it is time to turn those Field Tickets into an Invoice.
Invoice
Go to the CenPoint desktop Main Screen> Click WO & FT Flow
Field Ticket Filters:
These filters are located at the top left side of the screen with YES or NO checkboxes.
This allows you to keep track of everything you received and/or submitted regarding the Field Tickets, such as:
Yes/No : Tech Returned FT
Yes/No: Time Card Approved
Yes/ No: Emailed FT
and More...
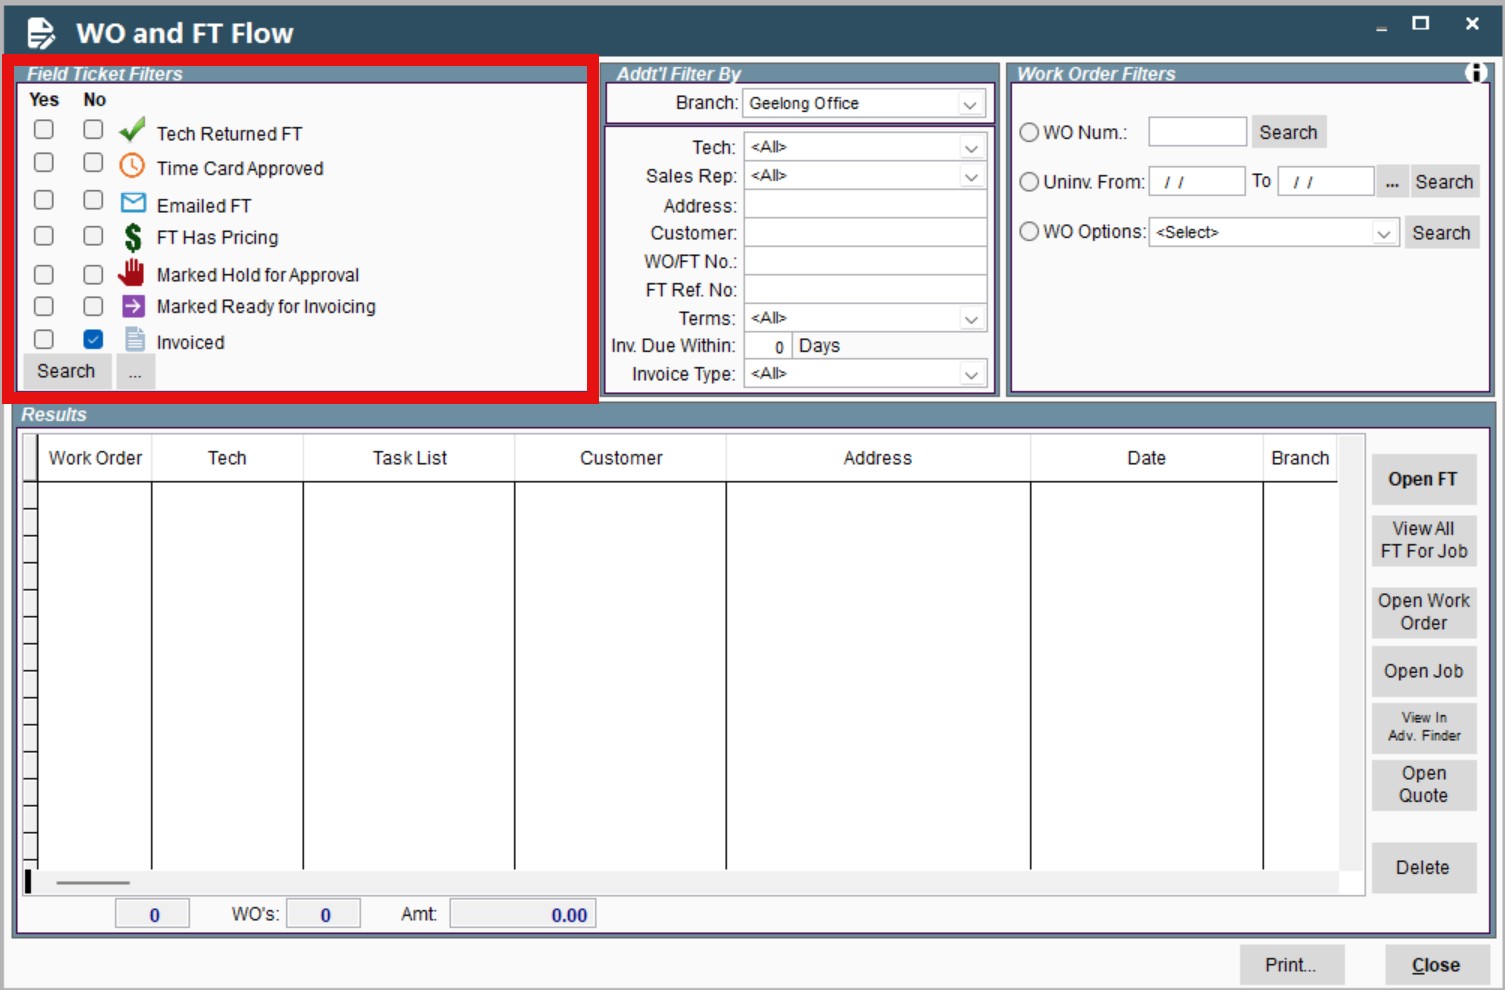
Results:
The bottom table on this WO and FT flow screen shows you all of the tickets that need to be taken care of:
Select the Work Order you want to access> Click the Open FT button on the right-hand side> review the Field Ticket(s) to make sure the information is correct and put pricing on them as well.
When that is completed, mark the tickets as Ready for Invoicing by selecting the checkbox in the upper right-hand section of the screen that says Ready for Invoicing> Click OK.
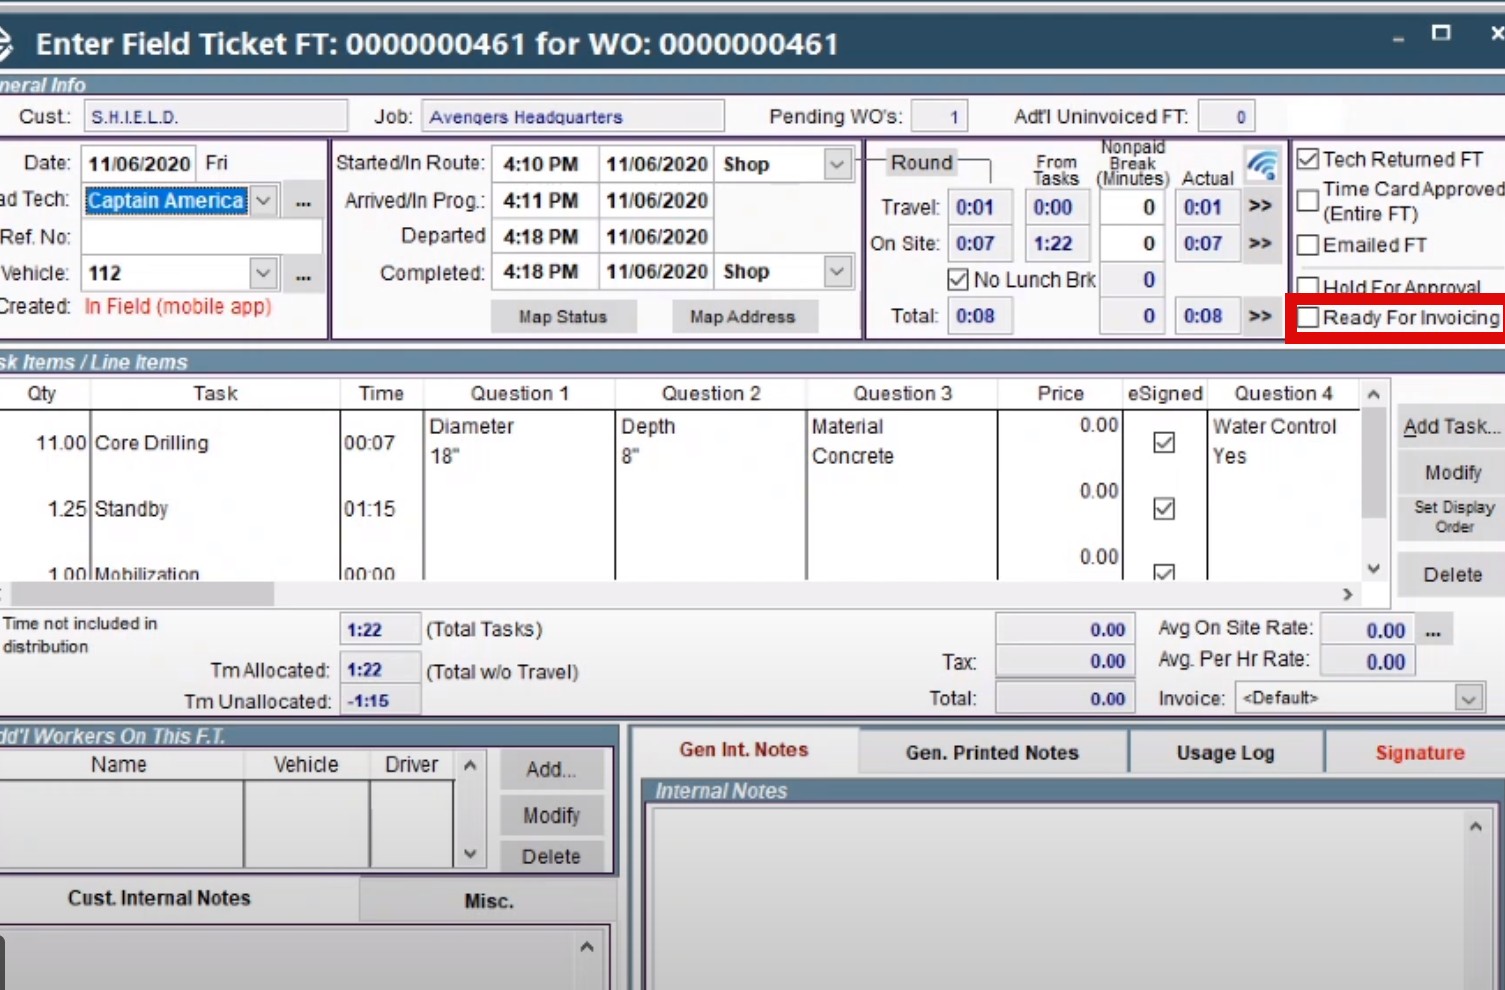
After that is completed, the tickets should disappear from that screen to let you know that you don't need to do anything else there.
Invoices:
To create an Invoice, click the Create Invoices button from the CenPoint Main Screen.

Now you can look at the tickets that you marked as Ready for Invoicing. To view a specific Invoice, click on the designated FT> Click the Preview button at the bottom of the screen> review the Invoice.
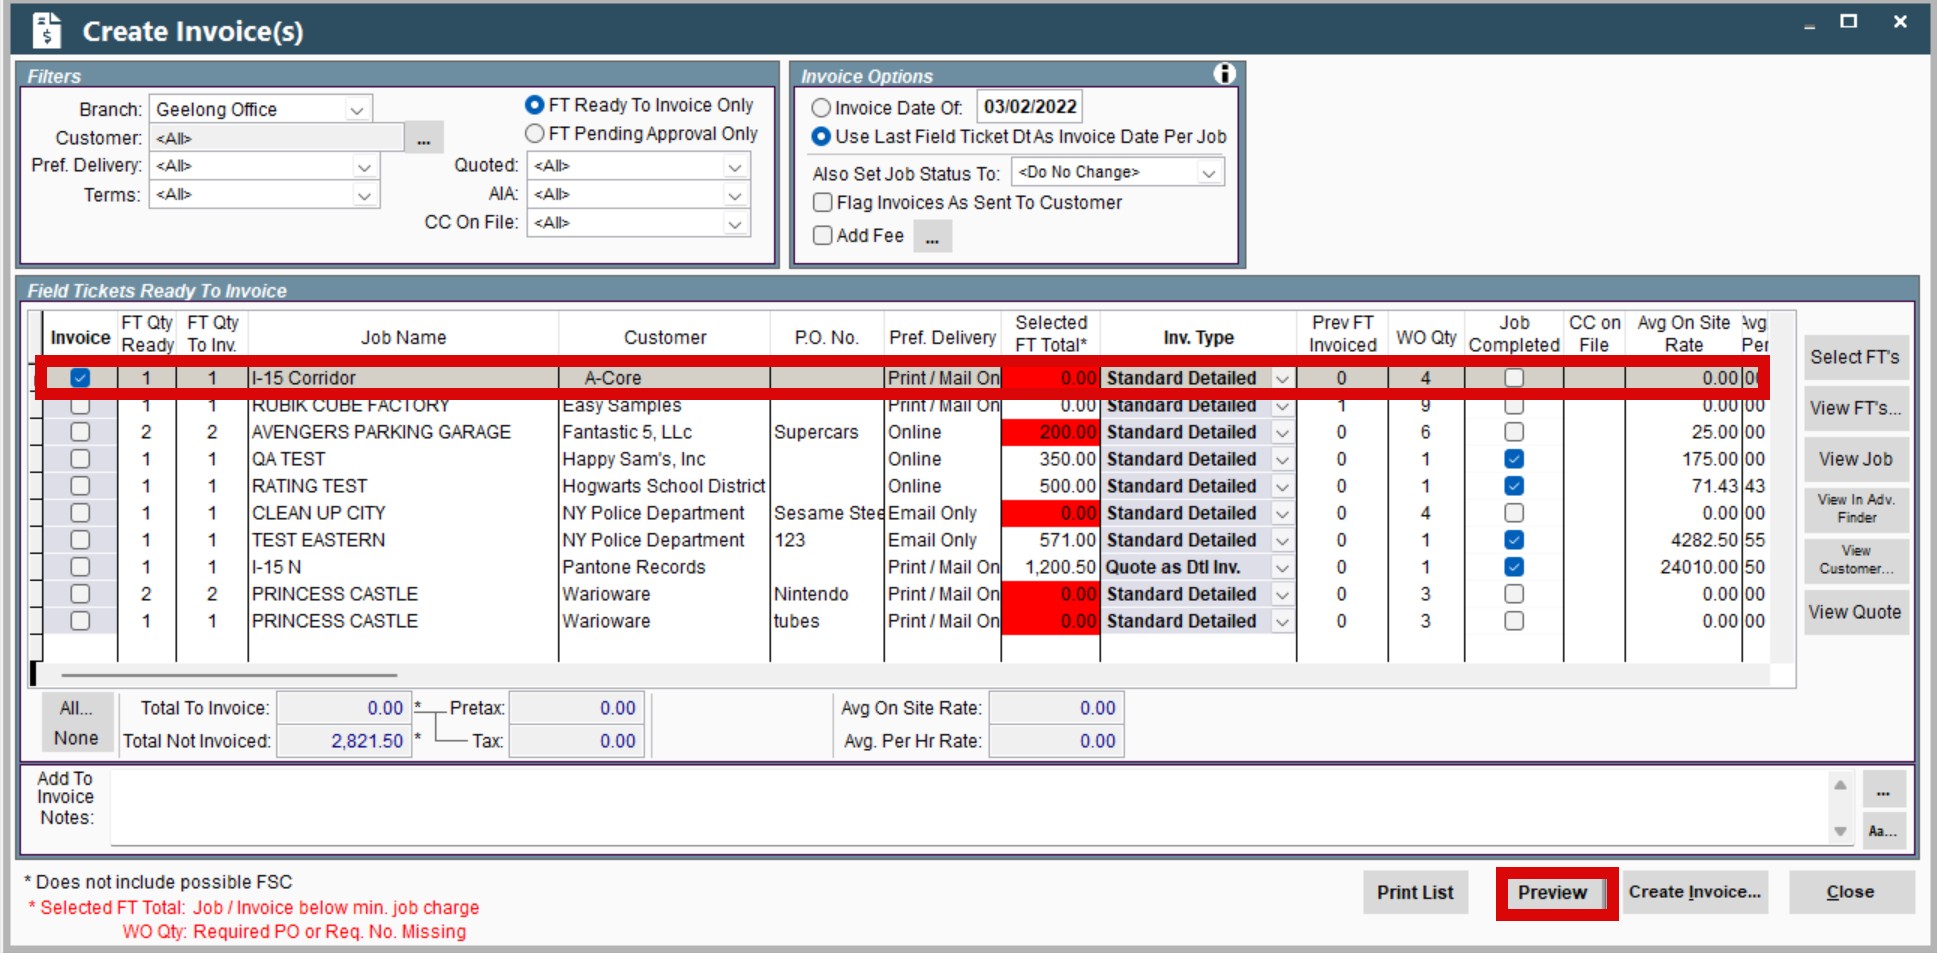
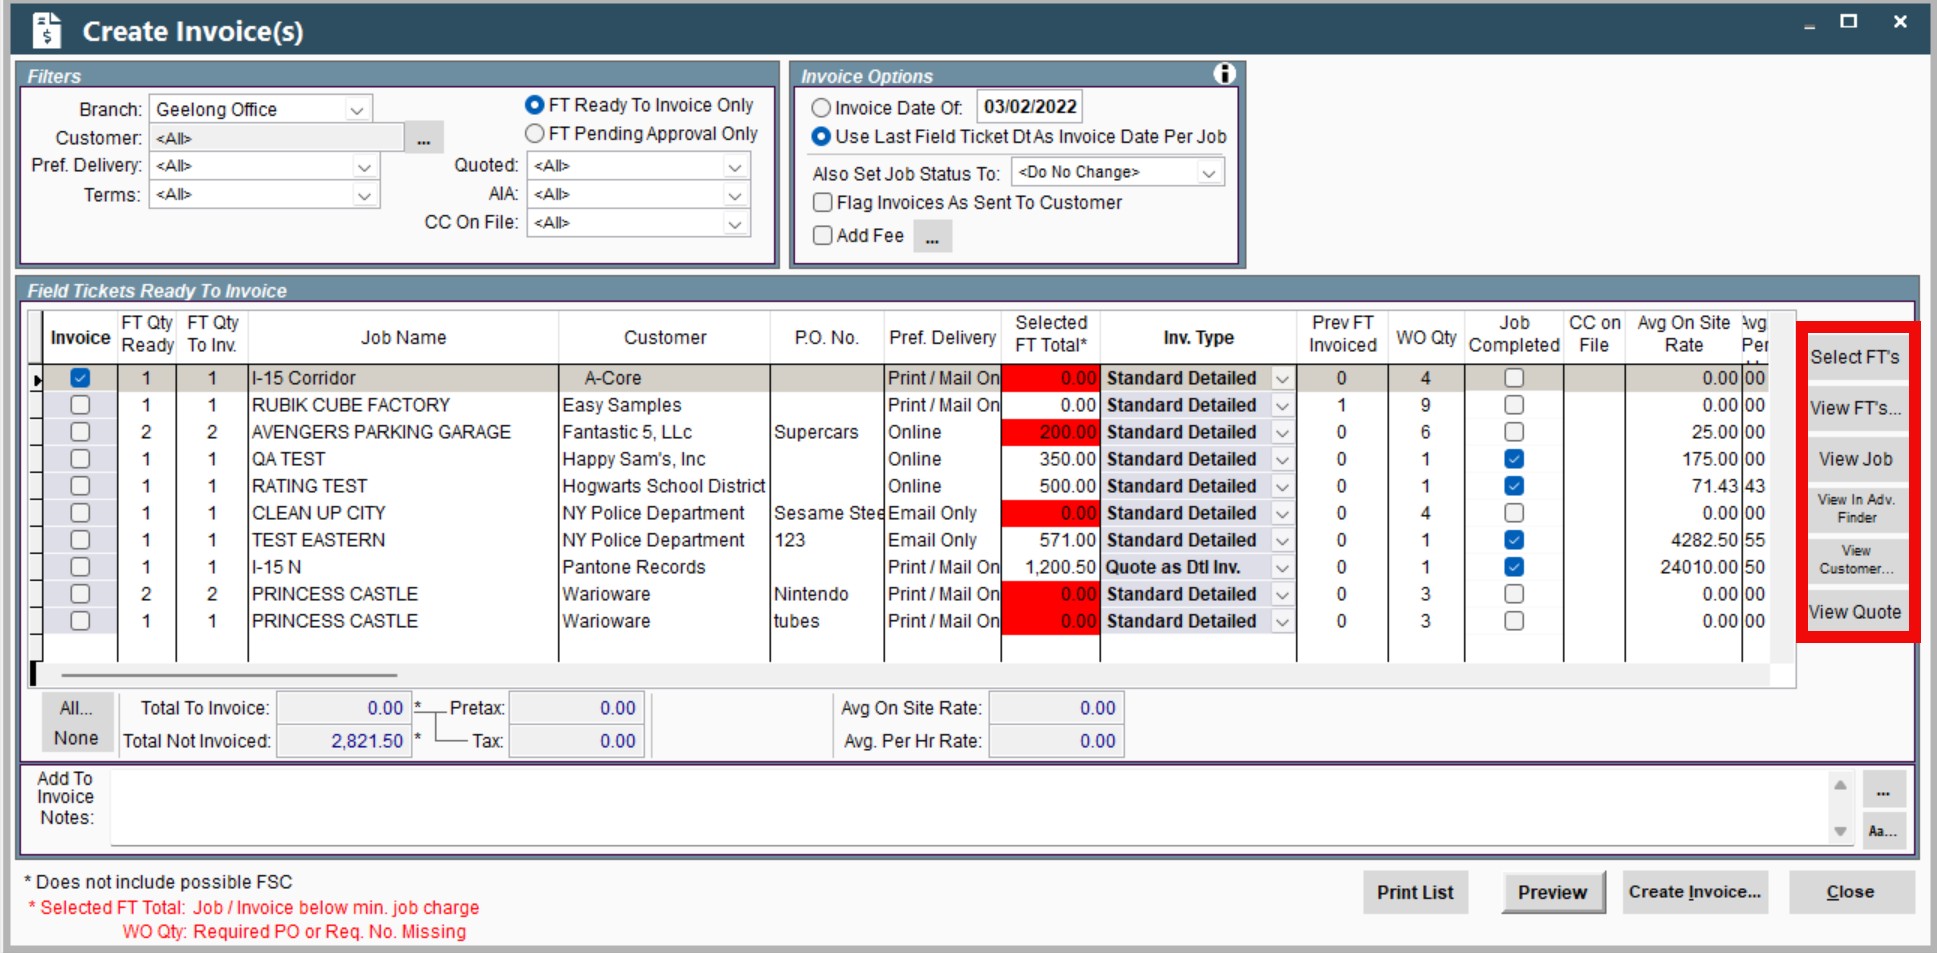
If anything on the Invoice is wrong, exit out of the Invoice Preview and make adjustments with the buttons aligned vertically on the right side of the Create Invoice(s) Screen
Select FT's
View FT's
View Job
View in Adv. Finder
View Customer
View Quote
Once everything looks correct, click the button at the bottom of the Create Invoice(s) screen that says Create Invoice> Select Invoice only or Invoice and FT's.
Once you are in the Invoice, you can send a PDF of the Invoice to your customer by clicking the Email icon along the top of the page, fill in the required information> click Send.
You can also text or email a link of your Invoice to your customer for them to view and pay the Invoice.
From the Create Invoice(s) Screen, click Create Invoice> and select whether you want to text or email a link to your customer.
Completed:
With the information entered in this process we can now run many reports in CenPoint. Examples include but are not limited to:
Tax Reports
Dispatcher Report Card
Field Tickets
Time Overview
Certified Payroll
Etc.
For more information on those, visit help.cenpoint.com for more information on specific reports.
If you have anymore questions, please contact us via the information below:
Phone: (801) 478-6822
Support Email: support@cenpoint.com
Sales Email: sales@cenpoint.com
**We offer FREE demos and unlimited support to our customers.**