Scanning basically 'types' in the barcode to save you time.
So, in theory it could be used in other places in CenPoint to 'type' for you.
Give it a try! 😁
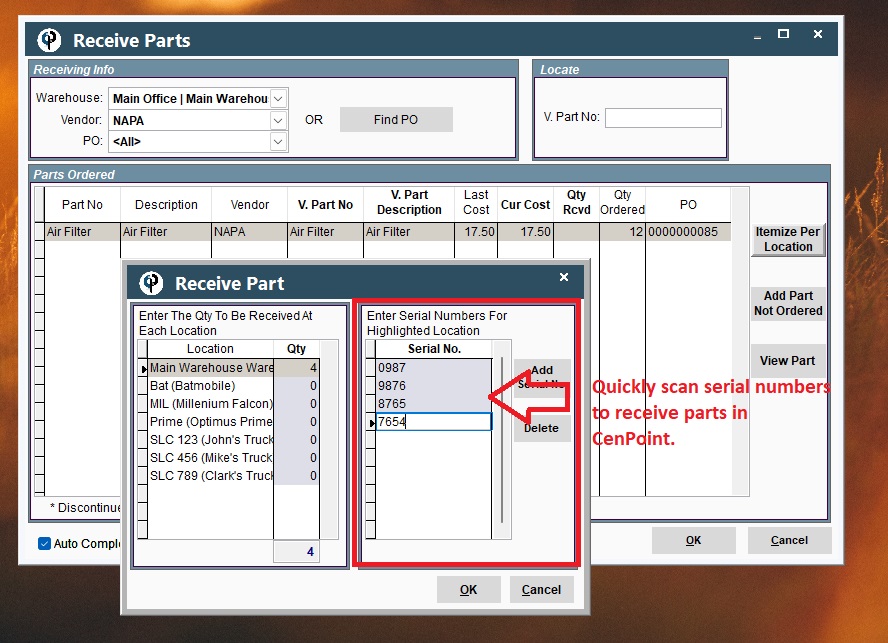
Use Bar Code Scanning for Receiving Inventory in CenPoint.
Once you have ordered parts, and are ready to receive them,
scan the items you are receiving into CenPoint.
To Receive parts go to Inventory-> Receive Parts From Vendor-> Itemize Per Location
.jpg)
Start scanning away to receive parts.
Use Bar Code Scanning on Service Orders in CenPoint
To 'pre-load' the needed parts on service tickets in CenPoint,
you can scan all needed parts at once.
This is especially helpful when checking them out from the shop counter before
and while doing work on the service ticket.
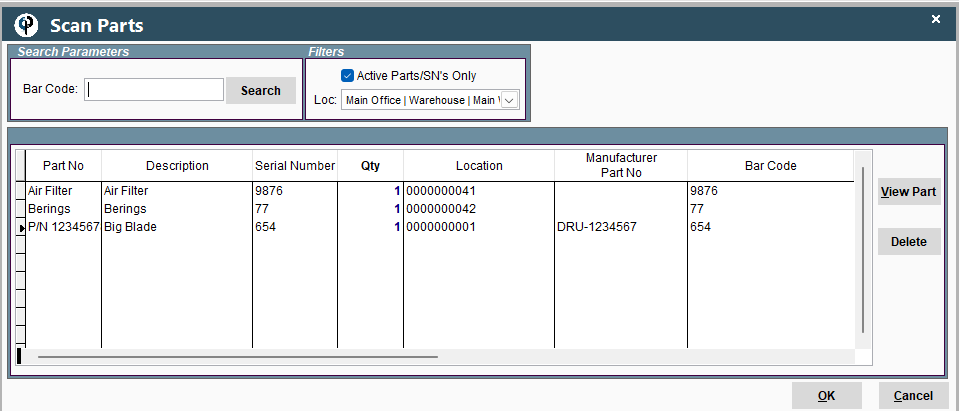
You can scan either the Serial Number or the Manufacturer Number
to add a part to a Service Order.
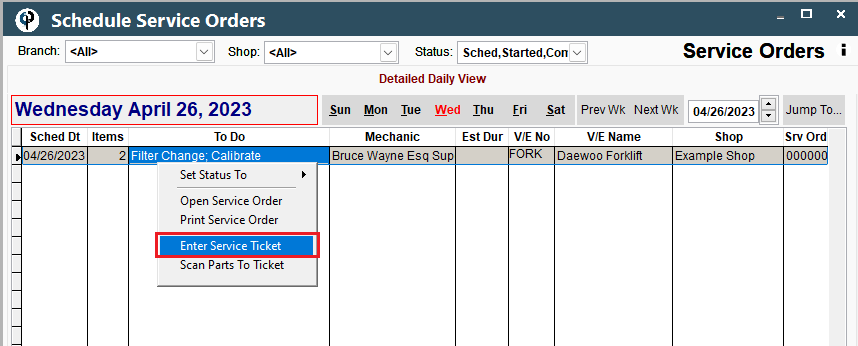
Right click on a scheduled service order and select Scan Part to Ticket.
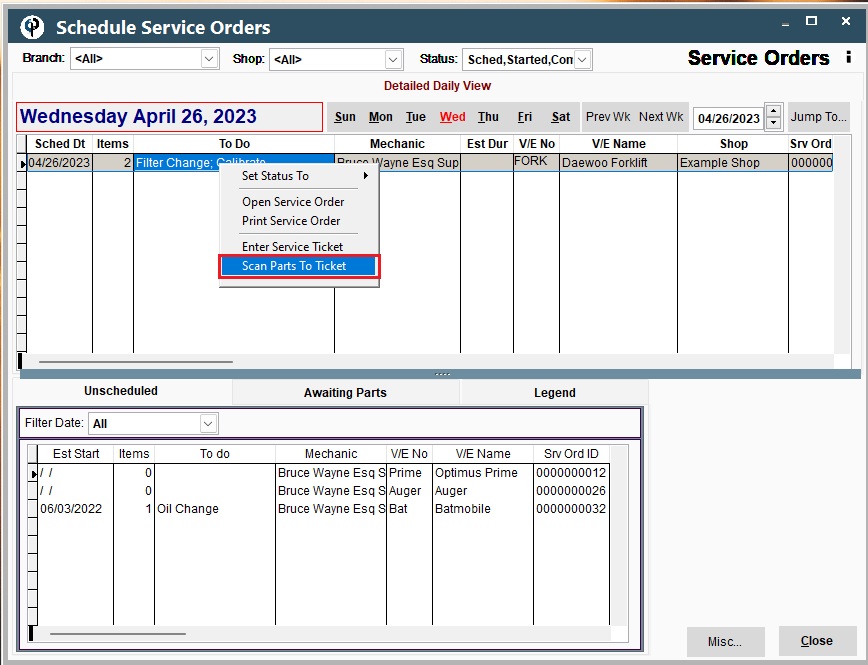
Scan all the needed items for that service order and click OK when finished.
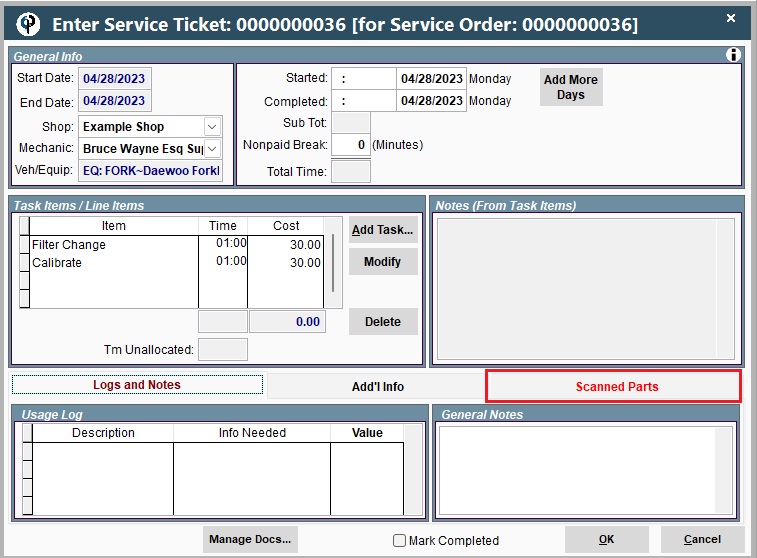
After the service ticket is completed, assign the parts you added to the ticket to the corresponding line item(s)
Right click on the Service Order on the Schedule and Select Enter Service Ticket.
On the Service Ticket, if there are scanned parts, the 'Scanned Parts' tab will be highlighted in red.
Once parts have been scanned the parts are deducted from your inventory.
Assign the scanned part to a Task
Highlight the part number in blue, then drag the Scanned Part to the task, the part is associated with.
You can also scan additional parts if needed by clicking 'Scan Part(s)'
.jpg)
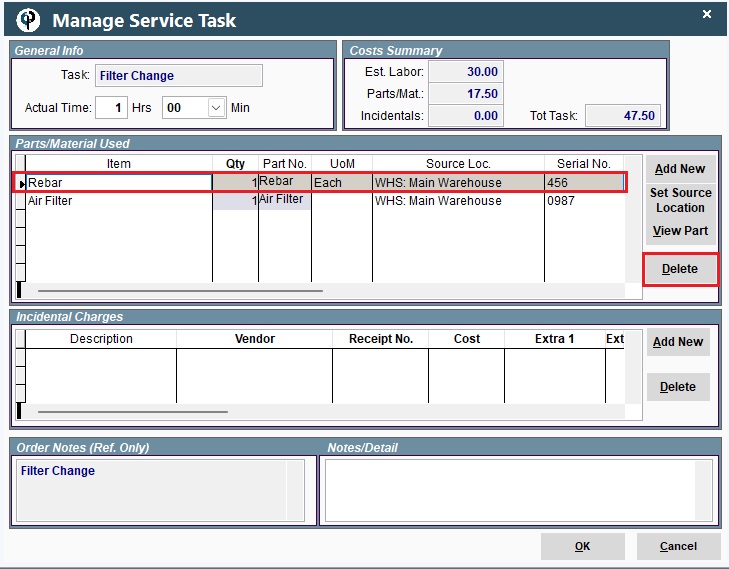
Delete a part that was scanned but not used.
The part that needs to be deleted, will need to be assigned to a task by highlighting and dragging it to a task.
Modify the task it was assigned to, select the part, and click the Delete button.
The deleted part will be moved back to Inventory.