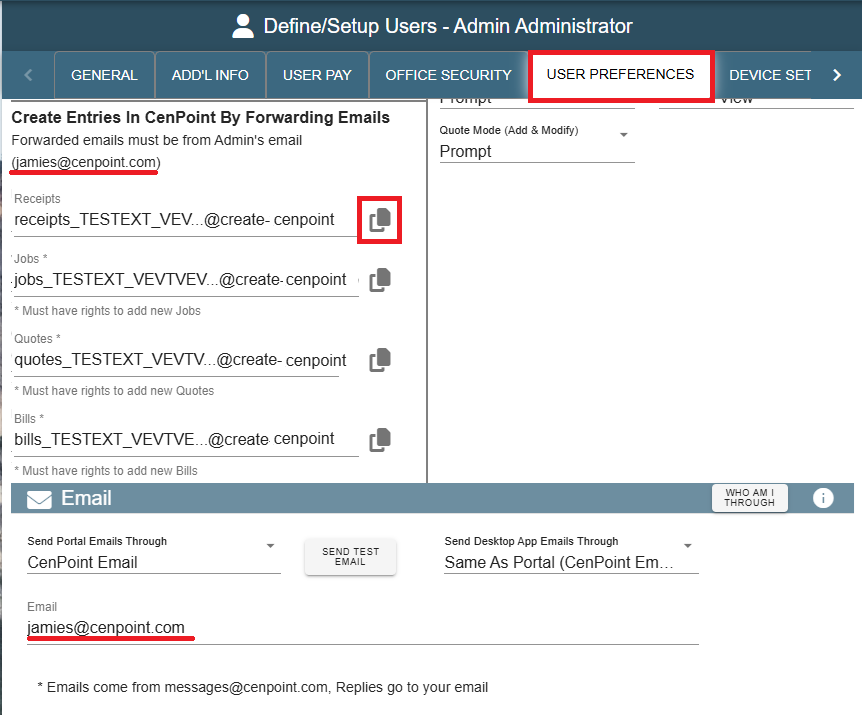
Automatically create a receipt, job, quote or bill in CenPoint by forwarding an email from a customer.
Create an entry by forwarding an email, using the recipient address linked to receipts, jobs, quotes, or bills as specified by the icons found under user preference in the menu.
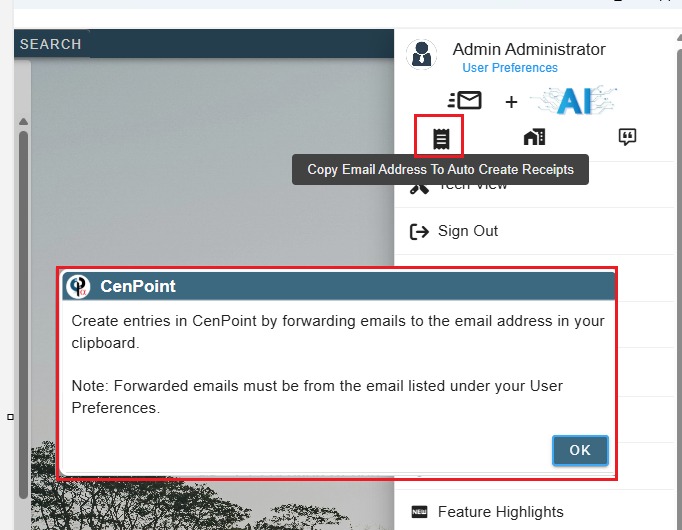
Click on the icon for either Receipts, Jobs or Quotes to copy the email address to paste into the “To” field when you forward the email.
Note: The forwarded email must be coming from the email you set up in CenPoint.
Create an entry by forwarding an email, using the recipient address linked to receipts, jobs, quotes, or bills as specified in the User Preferences section of CenPoint.
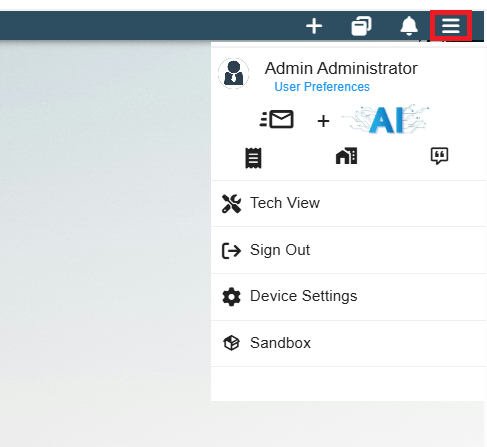
On the Portal click on the hamburger menu in the top right corner and click on User Preferences the User Preferences will automatically open
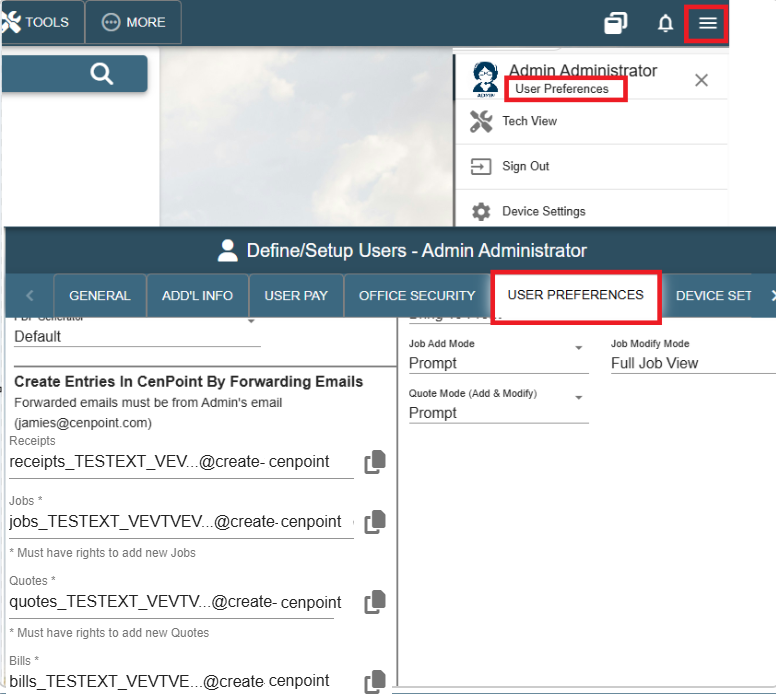
*You can also get to user preferences by going to Users-> then the user Preferences Tab
To create an entry in CenPoint, copy the appropriate recipient address from CenPoint and paste it into the 'To' field of the email you're forwarding. For example, to create a receipt, copy the receipt address and use it as the recipient when forwarding the email.