
Departments
Set A User's Department
Each user in CenPoint belongs to a department such as field technician, office, management, sales, shop, etc.
To set a user's department go to More -> Users
.png)
Find your user and then double click on them or click the Ellipsis -> Modify
.png)
Go to the General Tab and select the department from the dropdown.
.png)
Note: The user's department does not influence what the user can access in CenPoint. Instead, a user's department influences which drop downs they appear in throughout CenPoint. For example, a User in the Field Technician department will show up on the first list to choose from when assigning people to a Job, while someone in the Office department would not.
Add/Modify Departments
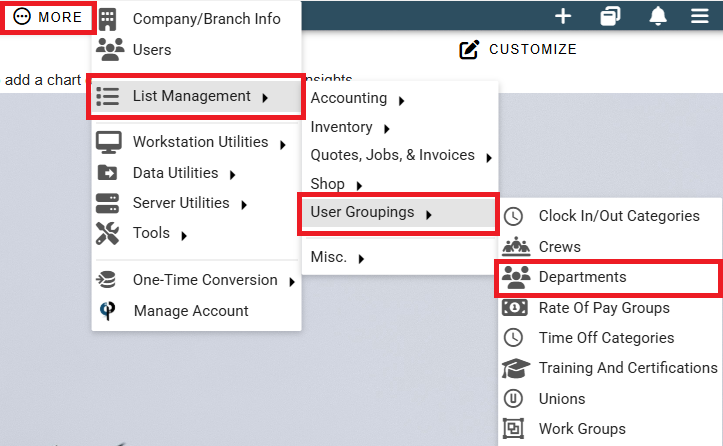
To add or modify your departments go to More -> List Management -> Users -> Departments.
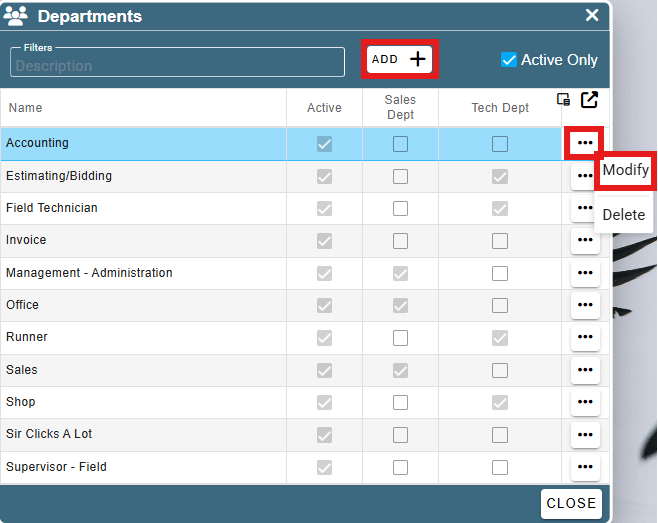
Click the Add button to create a new department.
Click the Ellipsis -> Modify to edit an existing department.
When you modify a department, you can use the checkboxes to determine which lists users of this department will show up in.
For the department to show up as an option to assign to a user, make sure the "Active" box is checked.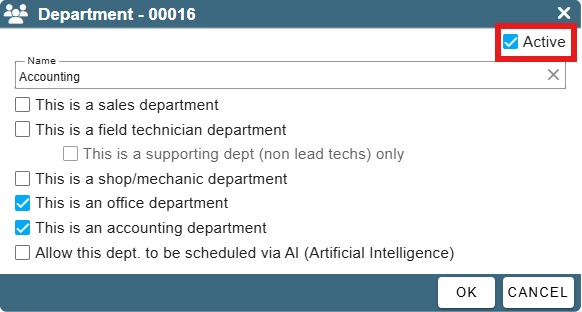
- Active checkbox: Selects whether this department will show up as an option to assign users to.
- Sales department: users belonging to a sales department can be added as a sales rep on the Quote.
- Field Technician Department: users belonging to a field technician department can be added as a lead helper on a Field Ticket.
- Supporting Department: users belonging to a supporting department can be added as a helper, but not as a lead on a Field Ticket.
- Shop/Mechanic Department: users belonging to a Job/mechanic department can be added as a mechanic on a shop ticket.
- Office Department: users belong to the Office or Administration Staff.
- Accounting Department: users belonging to the accounting staff.
- The last checkbox: is used to limit AI scheduling to certain groups of field technicians. To learn more about AI scheduling, see AI Scheduling