How to Setup your Departure Checklist on Desktop and Portal
What is a Departure Checklist?
A departure checklist is a reminder you can set up for your techs to collect things like tools before they leave the jobsite. Here is an example of how it would work on the Technician's mobile app:
1. When the lead or driver clicks Departed . . .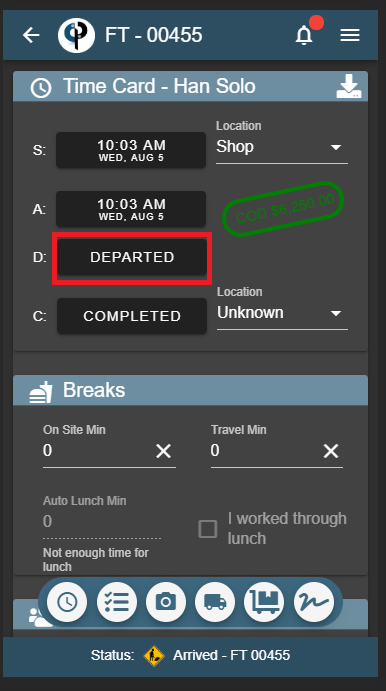
2. A Checklist of items will appear, reminding the tech to take the items with them. No tools or equipment left on the jobsite!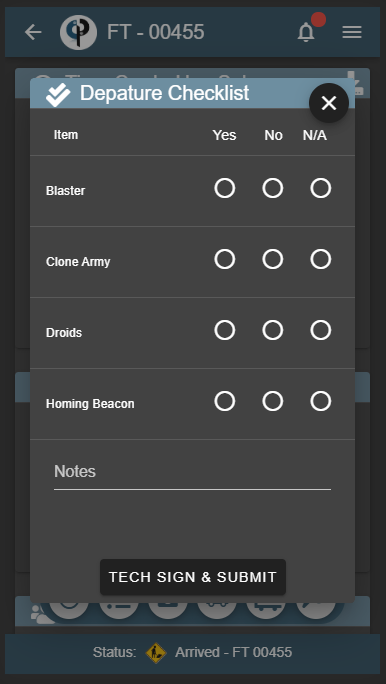
3. The technician will then check Yes, No, or N/A for each item.
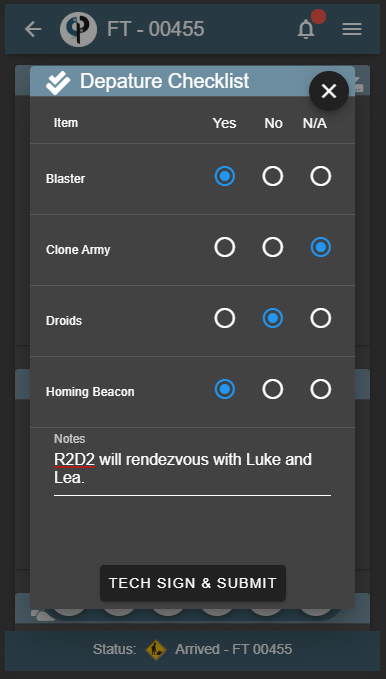
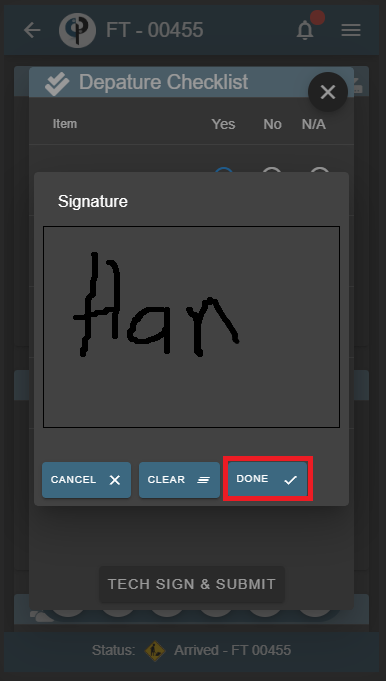
4. Finally, the tech will sign off on the Departure Checklist.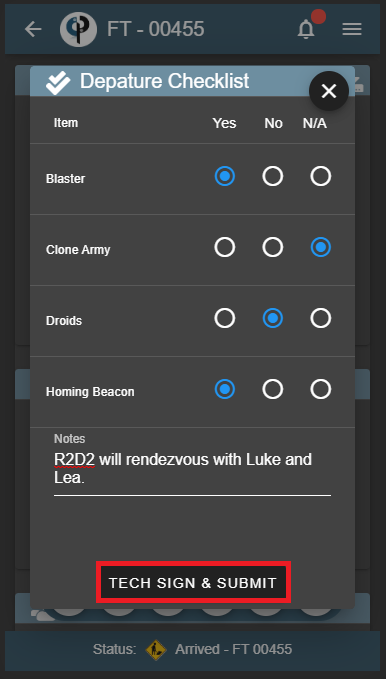
Departure Checklist on Portal
Set Up your Departure Checklist on Portal
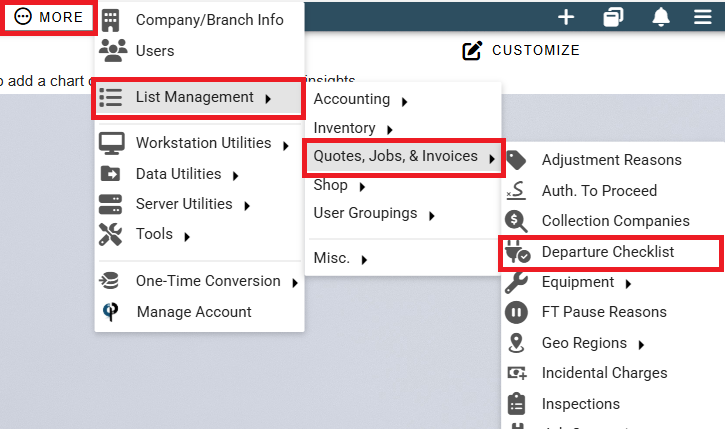
Go to More -> List Management -> Quotes, Jobs, & Invoices -> Departure Checklist
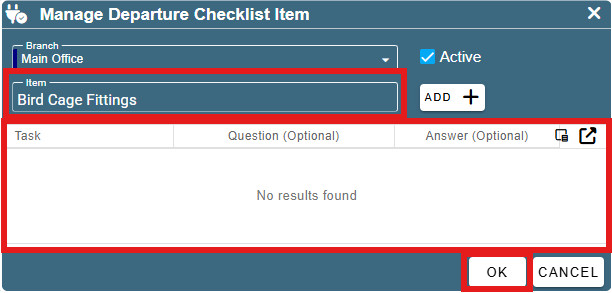
Click the 'Add' button to create a new checklist item or click the Ellipsis -> Modify to edit an existing one.
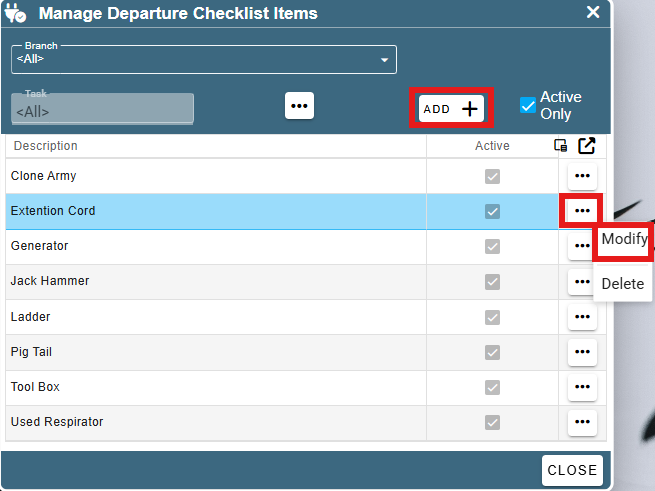
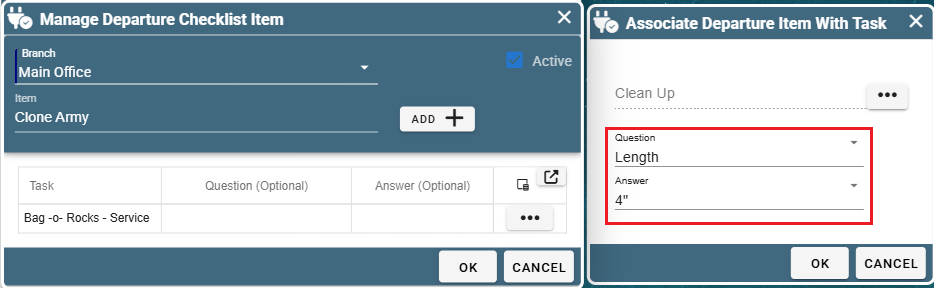
Give the item a name. If no tasks are associated with this checklist item, it will always show up on the Departure Checklist when a tech tries to leave the jobsite.
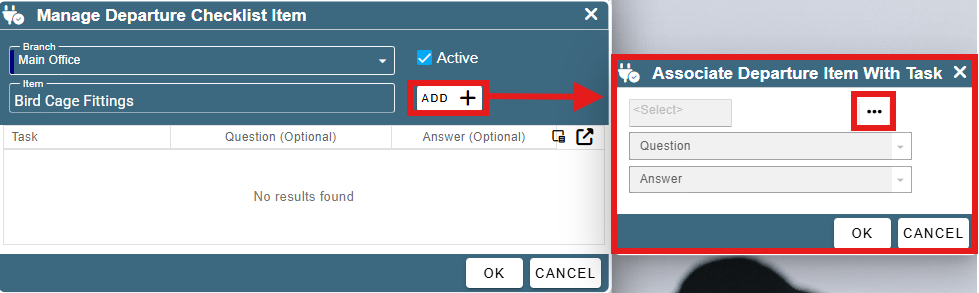
To associate a task with this Checklist item click Add and then click the ellipsis on the new window that will appear.
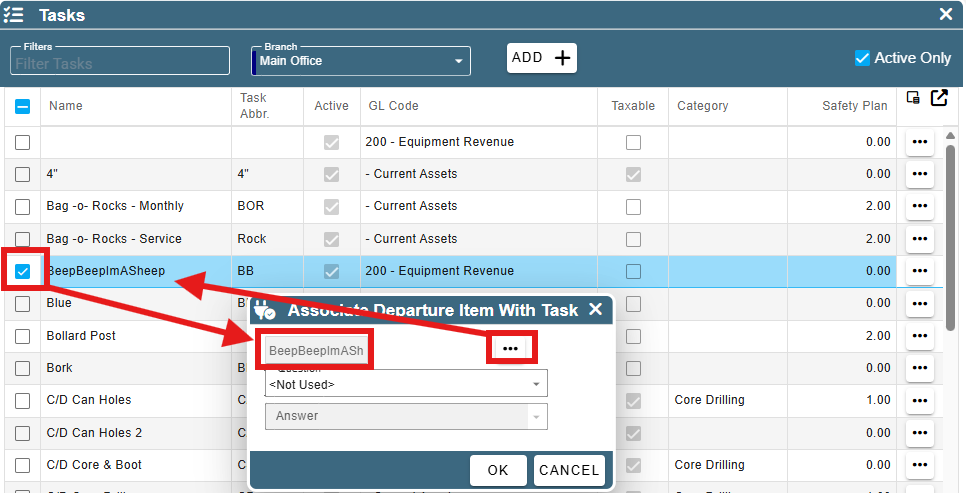
Find the desired task, click Select, then click OK on the Associate Departure Item with Task window.
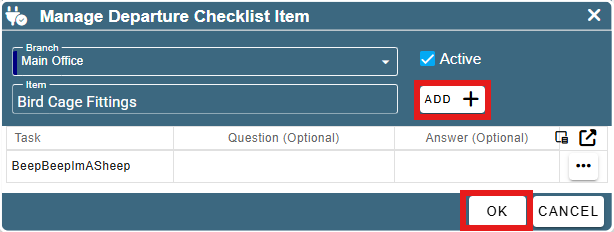
Add additional tasks as needed. Click OK when you have attached all desired tasks.
Additionally, you can pick a question and answer, so the item will only show up if the task was added AND if the question was answered in a certain way.