
2. Bold, italicize, or change the color of text.
3. Insert a Numbered or Bulleted List
4. Insert a Line Separator
5. Create a Link
6. Add a Logo
On Desktop
1) Open the Email Settings
1a. On the homepage of CenPoint, click on "User Preferences"..png)
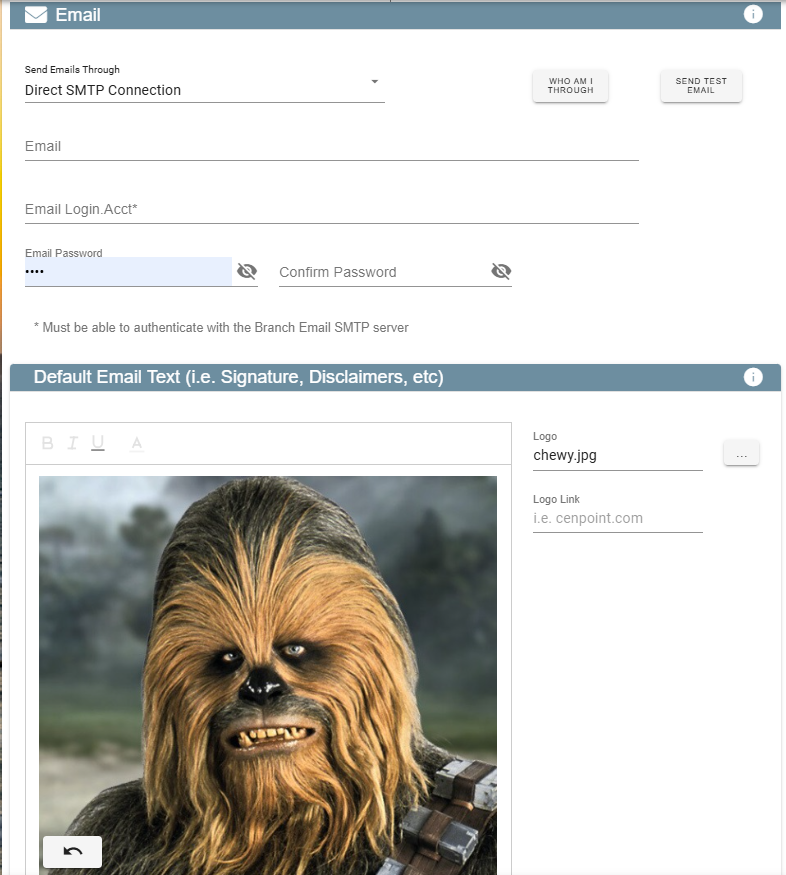
1b. On the windows that opens, select the 'Email' tab..png)
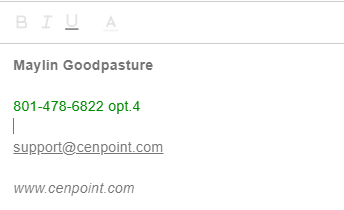
1c. Enter your email signature under 'Default Email Text'. This text will appears in the body of every email you send through CenPoint!.png)
2. Bold, italicize, or change the color of text.
2a. Highlight the text you would like to change..png)
2b. Click the Drop Down Box, and make you selection (multiple options can be selected).png)
3. Insert a Numbered or Bulleted List
.png)
4. Insert a Line Separator
.png)
5. Create a Link
5a. Highlight the text that will be clicked on to redirect to your link..png)
5b. Click on the "Link" button, and enter your URL.png)
6. Add a Logo
6a. Click on the Ellipsis next to "Logo" > "Set / Change".png)
6b. Browse to the File Location, select the image, and click open..png)
6c. Change the size of your Logo by dragging the top right corner..png)
6d. Add a Logo Link, that a click to your logo will redirect to..png)
On Portal
1) Open the Email Settings
1a. Go to More -> Users -> Select a User -> User Preferences and scroll down
1b. Enter your email signature under 'Default Email Text'. This text will appear in the body of every email you send through CenPoint!
2. Bold, italicize, or change the color of text.
2a. Highlight the text you would like to change.
3. Add a Logo
3a. Click on the Ellipsis next to "Logo" > "Set / Change"
.jpg)
3b. Browse to the File Location, select the image, and click open.
3c. Change the size of your Logo by dragging the top right corner.
3d. Add a Logo Link, that a click to your logo will redirect to.
.jpg)
Congratulations you have Set up your Email Signature!