For more specifics in each area and setting up inventory use the following link:https://help.cenpoint.com/v1/docs/en/set-up-inventory
Inventory on Desktop
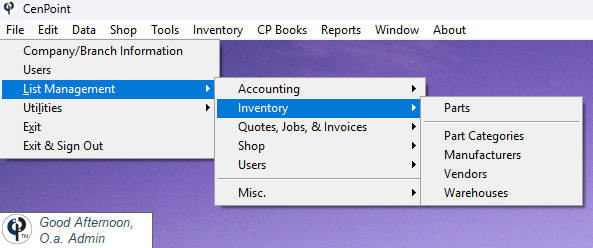
Manage your inventory in CenPoint by going to File -> List Management -> Inventory
Note: You may want to set up Parts Categories, Manufacturers, Vendors, and Warehouses before setting up Parts.
Parts Categories on Desktop
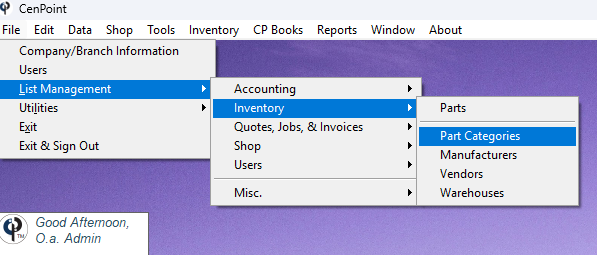
Set up your Parts Categories by going to File -> List Management -> Inventory -> Part Categories
Click 'Add New' to create a category. Highlight an existing category and click 'Modify' to edit them.
Inside each category you can add subcategories.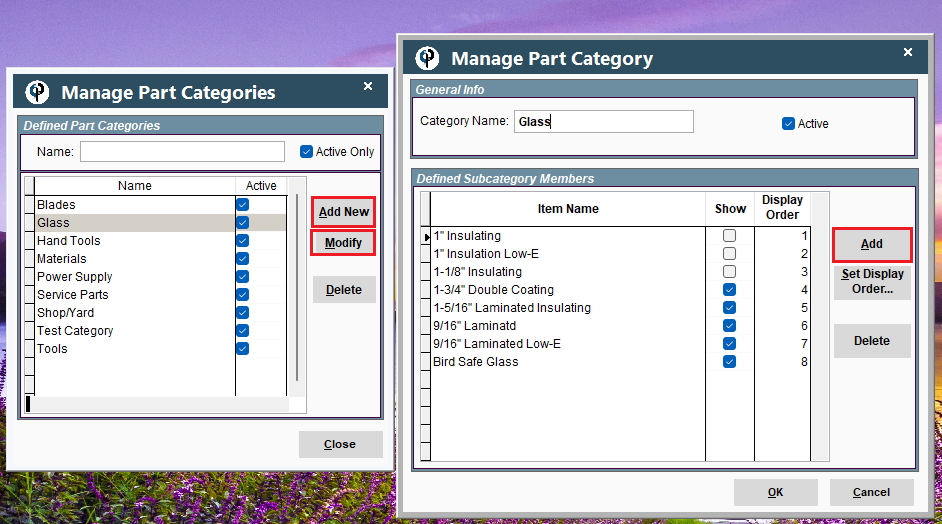
Manufacturers on Desktop
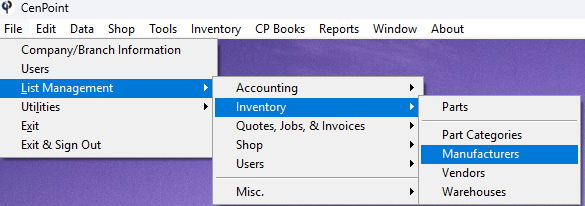
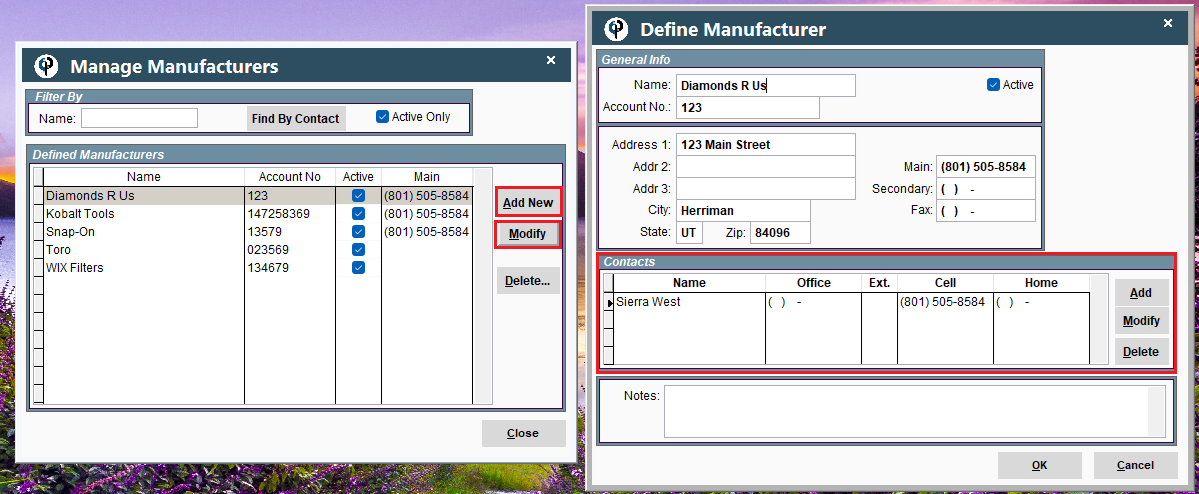
Set up your Manufacturers by going to File -> List Management -> Inventory -> Manufacturers
Click 'Add New' to define a Manufacturer. Highlight an existing Manufacturer and click 'Modify' to edit them.
Inside each Manufacturer you can add/edit the contacts you have associated with the manufacturer.
Vendors on Desktop
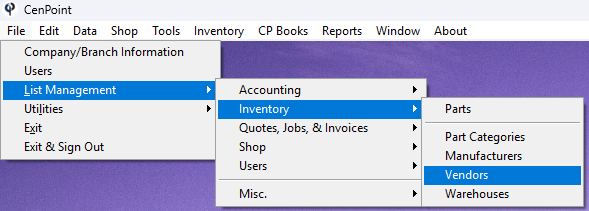
Set up your Vendors by going to File -> List Management -> Inventory -> Vendors
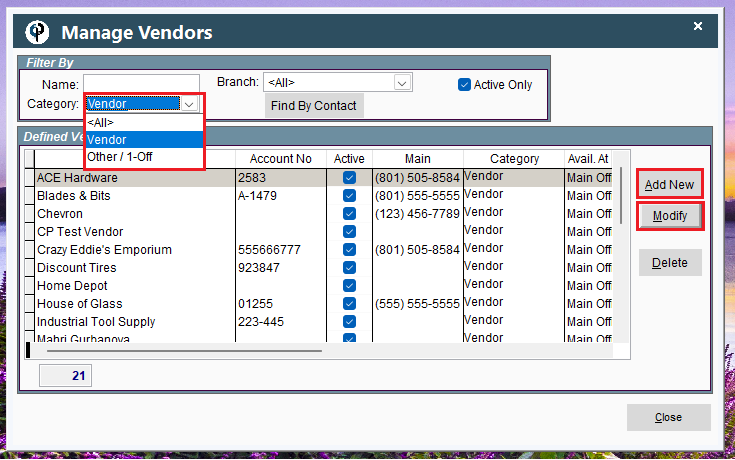
Click 'Add New' to create a Vendor. Highlight an existing vendor and click 'Modify' to edit them.
Use the Category drop down to filter your search for vendors.
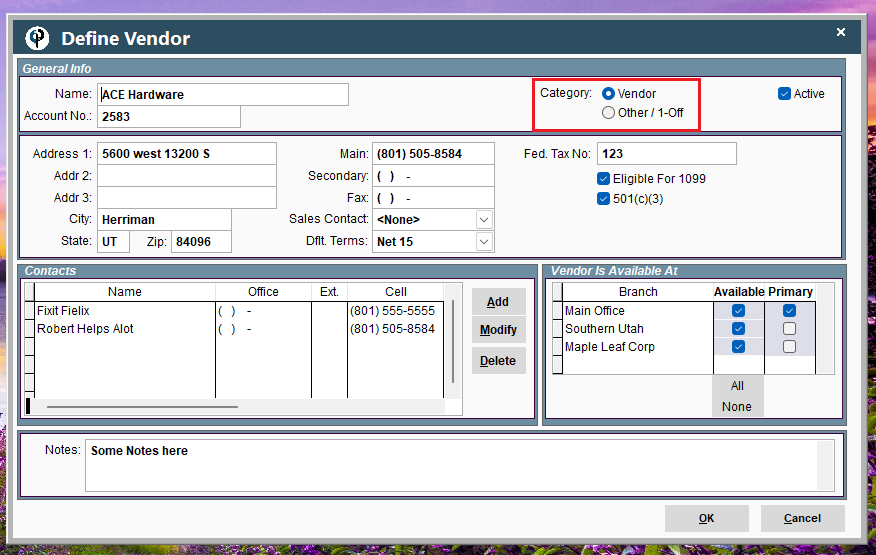
Fill in the Vendor's Information.
Create contacts for that vendor if applicable.
Mark a vendor as 1-Off/Other if so desired.
Warehouses on Desktop
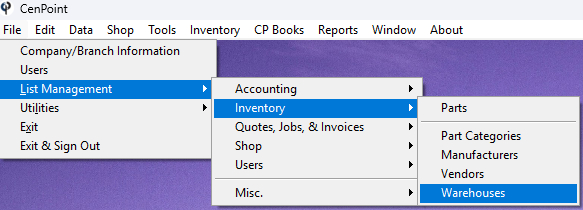
Set up your Warehouses by going to File -> List Management -> Inventory -> Warehouses
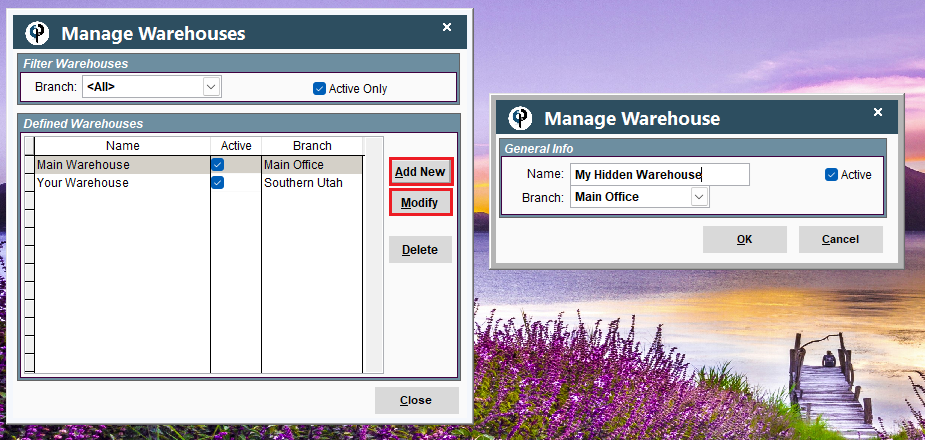
Click 'Add New' to create a Warehouse. Highlight an existing Warehouse and click 'Modify' to edit them.
Parts on Desktop
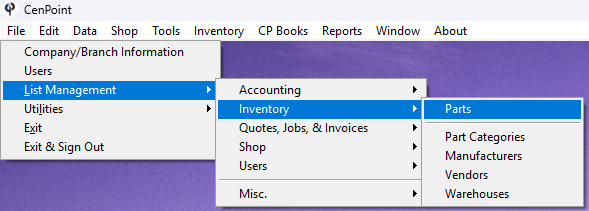
Now that you have the basics covered, it's time to set up Parts by going to File -> List Management -> Inventory -> Parts
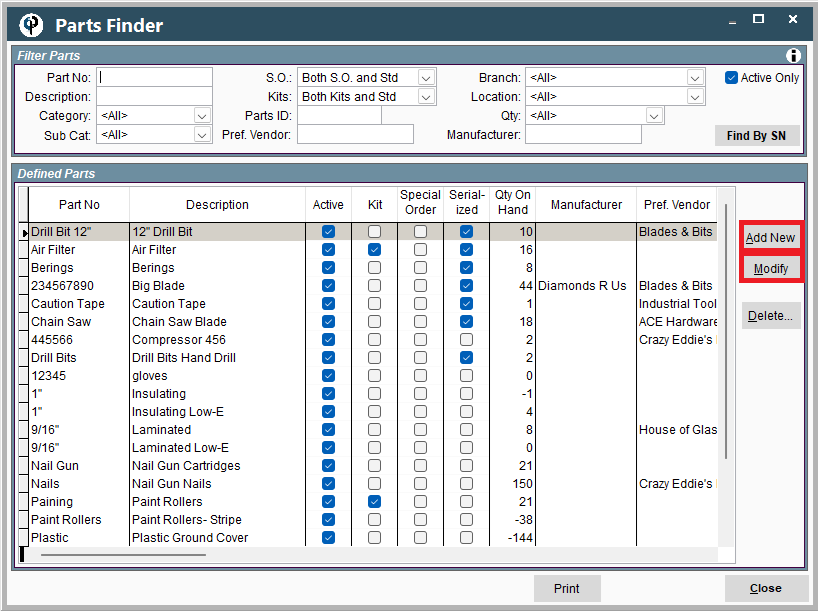
Click 'Add New' to create a new part. Highlight an existing part and click 'Modify' to edit them.
Use the filters like Category, Description, and Branch to find the part you are looking for.
Use the following link for more information on setting up parts, creating P.O.'s and Inventory:
Inventory on Portal
Parts Categories on Portal
Set up your Parts Categories by going to More -> List Management -> Inventory -> Part Categories
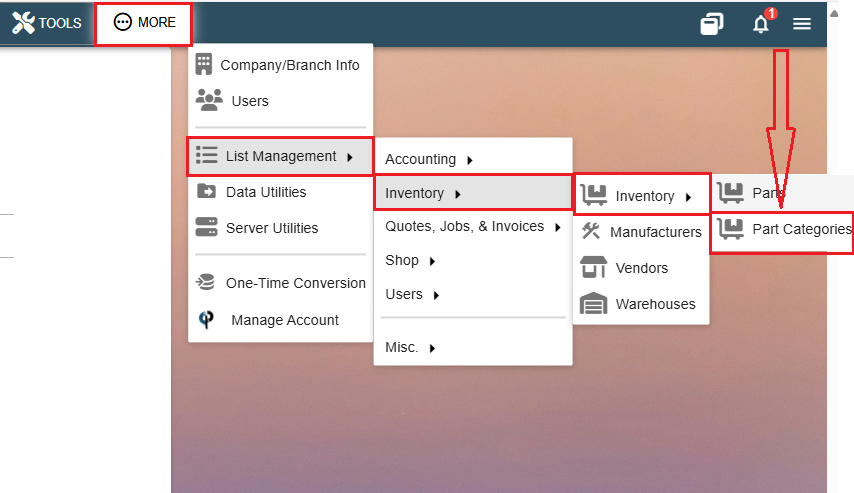
Click the Ellipsis -> Modify to edit an existing Category.
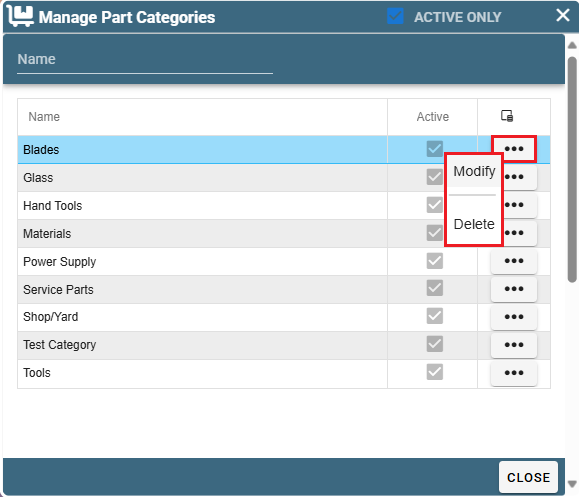
Inside each category you can make sub-categories. Click the 'Add' to create a new sub-category. Click the Ellipsis -> Modify to edit an existing sub-category.
Manufacturers on Portal
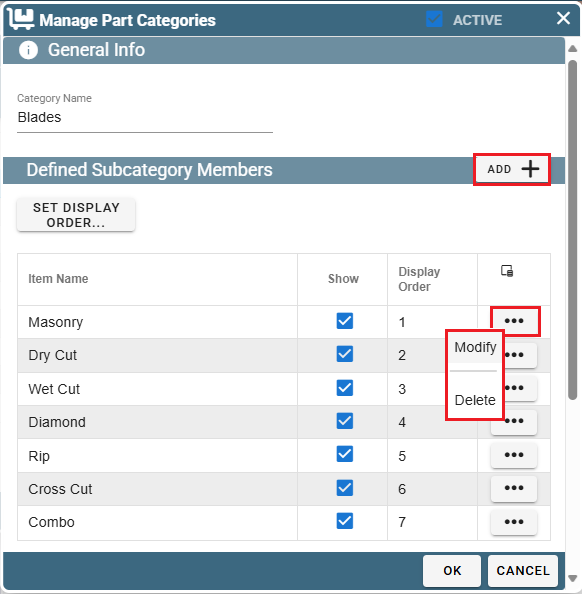
Set up your Manufacturers by going to More -> List Management -> Inventory -> Manufacturers
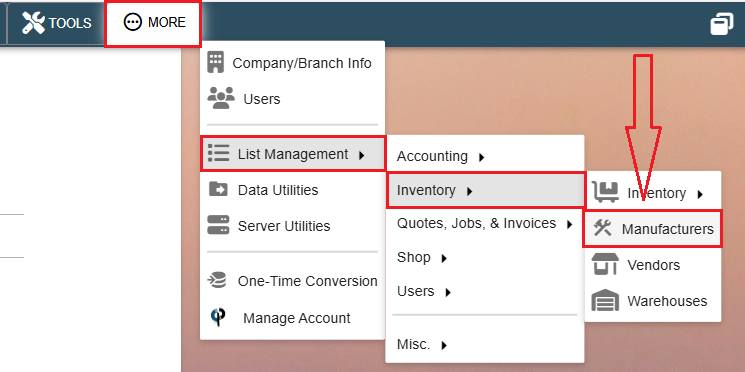
Click 'Add New' to define a Manufacturer. Highlight an existing Manufacturer and click 'Modify' to edit them.
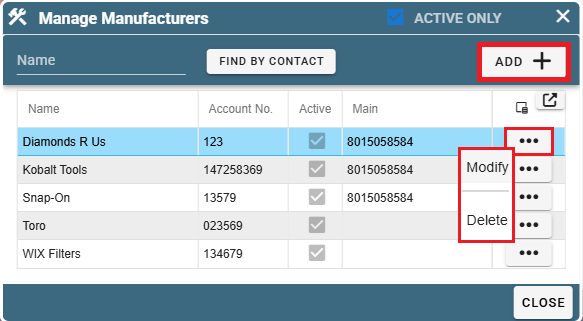
Inside each Manufacturer you can add/edit the contacts you have associated with the manufacturer.
Aside from the expected information like addresses and names, you can also record any notes you feel important and associate them with the manufacturer.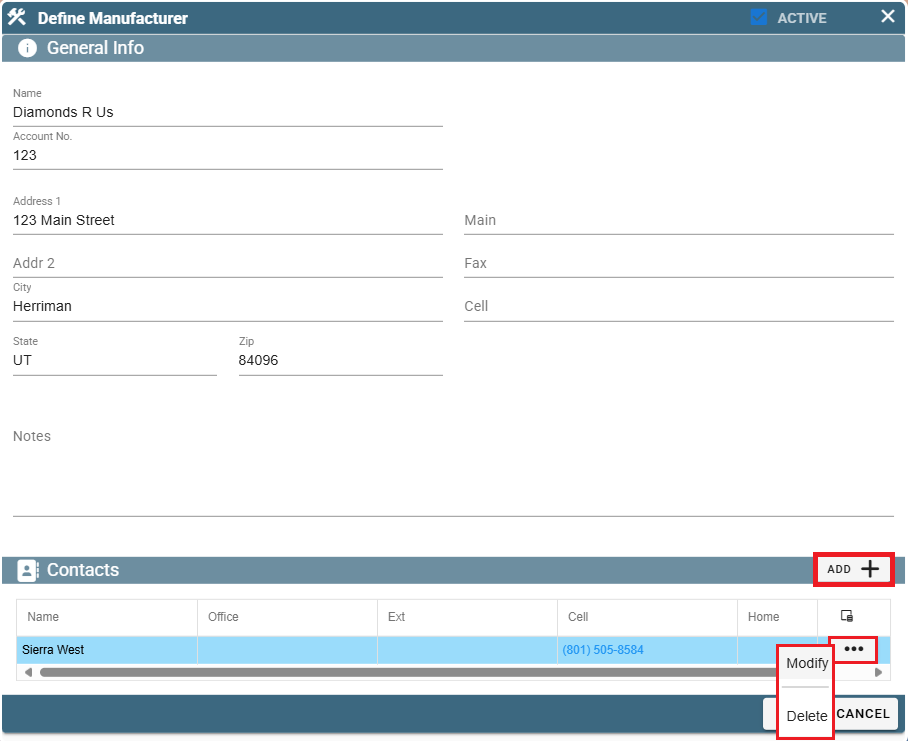
Vendors on Portal
Go to More -> List Management -> Inventory -> Vendors
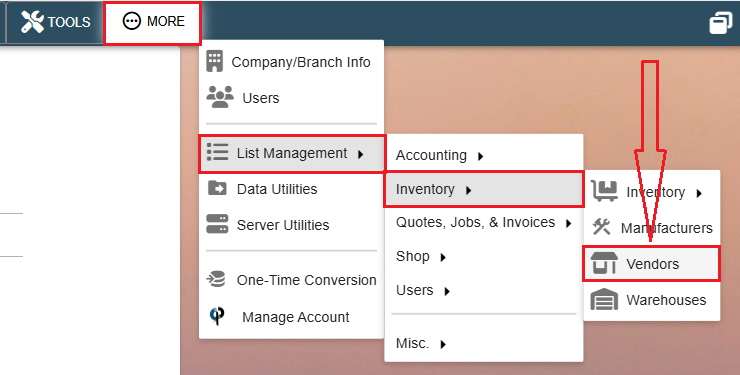
Click 'Add New' to create a Vendor. Click the Ellipsis -> Modify to edit an existing vendor.
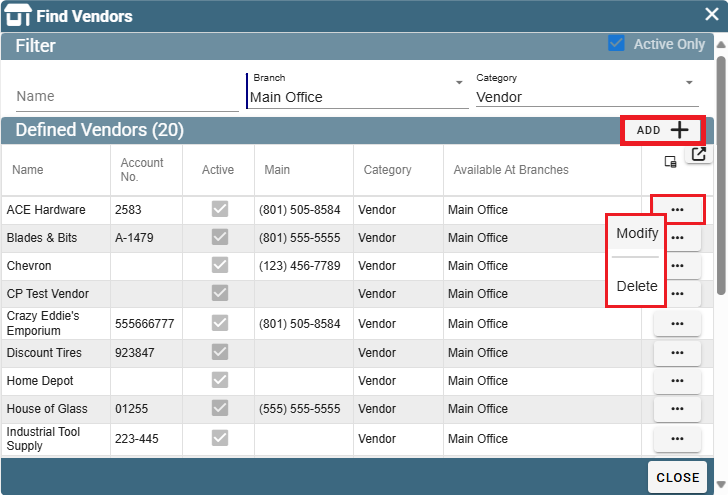
Enter the name of the vendor or use the Category drop down to filter your search for vendors.
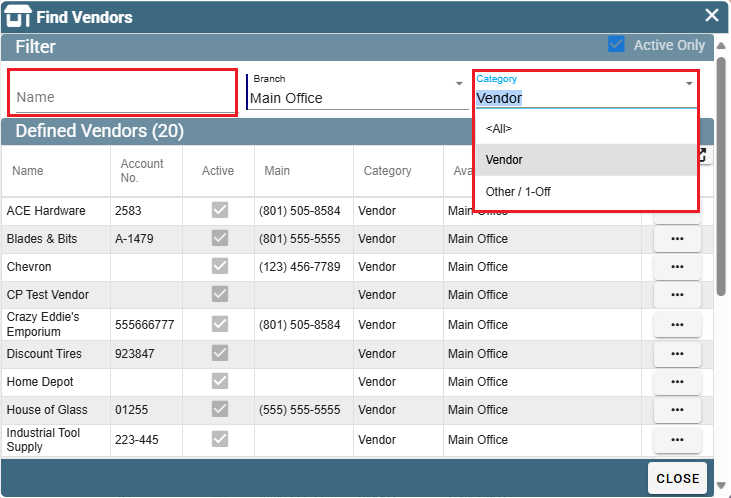
When creating a vendor select which category it should be a part of.
Other/1-Off means that you likely won't use this vendor again.
Vendor hints that it's a vendor you'll be visiting repeatedly.
Add notes about the vendor if desired.
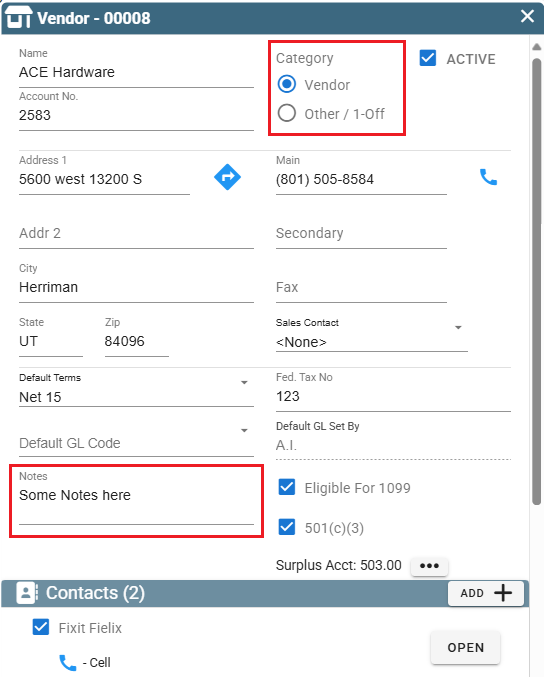
Add contacts for this Vendor by clicking the 'Add' button. Edit an existing contact by clicking the 'Open' button.
Select which branches will be able to see this vendor in CenPoint.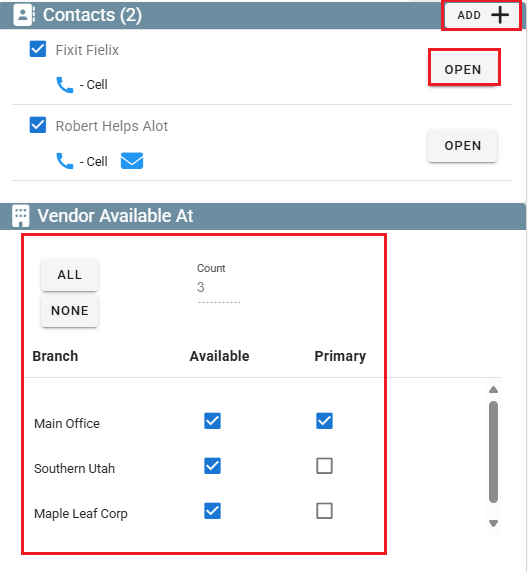
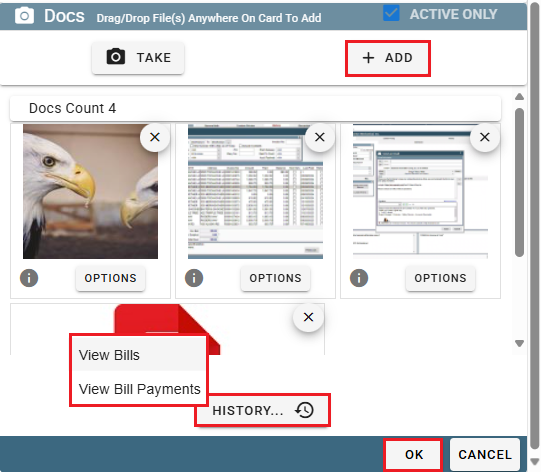
Add documents by clicking the 'Add' button.
Click the 'History' button to see bills and payments associated with this vendor.
Click 'OK' to close the window.
Warehouses on Portal
Go to More -> List Management -> Inventory -> Warehouses
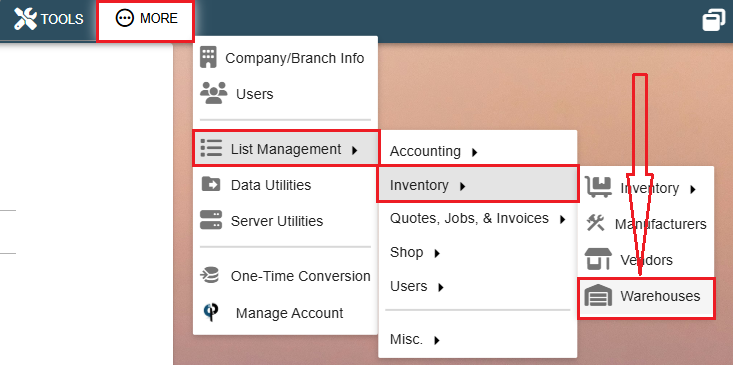
Click 'Add' to create a new warehouse.
Click the Ellipsis -> Modify to edit an existing warehouse.
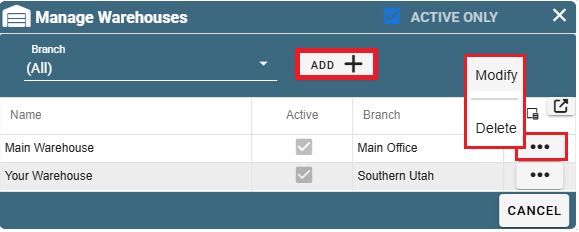
Write the name of the warehouse and select which brand it should be in.

Parts on Portal
Now that the basics are covered, we can set up Parts by going to More -> List Management -> Inventory -> Inventory -> Parts
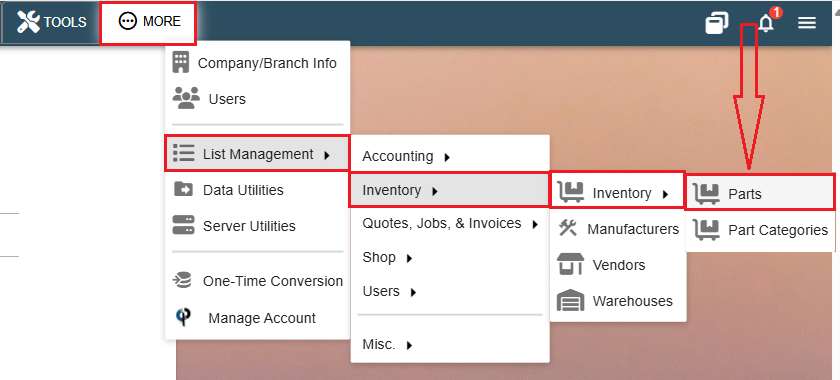
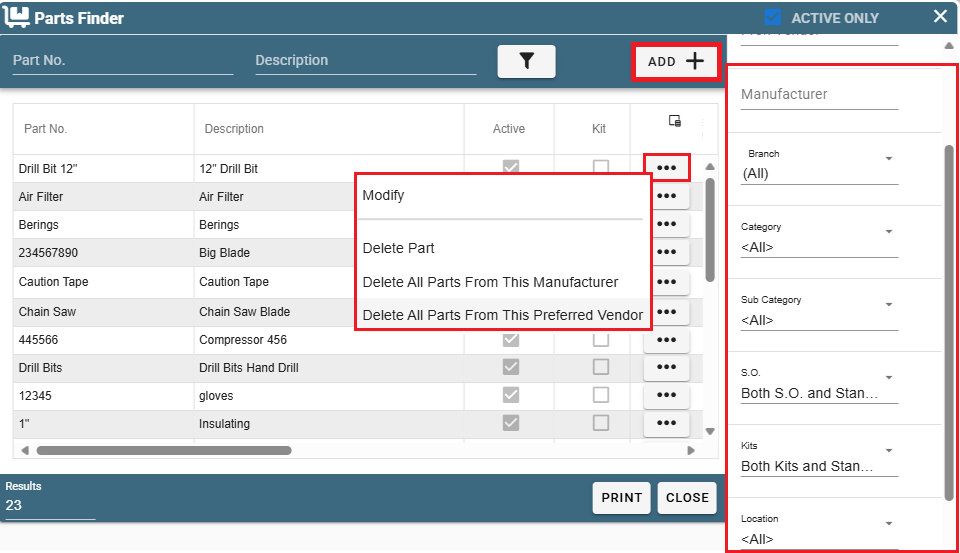
Use the filters on the right to narrow your search by things like manufacturer, vendor, or part id to help you find the part you're looking for.
Click 'Add' to create a new part.
Click the Ellipsis -> Modify to edit an existing part.
Use the following link for more information on setting up parts, creating P.O.'s and Inventory:
FAQ:
The price for a new part is not right
CenPoint uses FIFO (First In First Out).
First in First out is how CenPoint uses the inventory costs because the cost may have changed over time when buying the part.
Example: You bought a part for $10.00 and you bought 10 of them , then you re-bought another 10 of that same part but the cost is now $15.00,
CenPoint will not use the $15.00 price until the first 10 at $10.00 are consumed from the inventory.
If you need to use the new price, you can Adjust the quantity on hand to Zero then add the new parts or consume the parts internally.