Warning
This article is intended to help you set up the prevailing wage for a Job, or other discrepancies in hourly rate. To set up the default rate for user see Define Rate(s) of Pay
To change the rate paid for hours worked on a Job, there are 3 options. We can…
1. Specify a minimum rate for lead technicians/additional workers, for all hours on the Job.
2. Specify the minimum rate for hours worked on certain tasks.
3. Set up multiple rates for each user, and tell the system to bump everyone up to their 2nd, 3rd etc. rate for all Job hours.
Job Rate of Pay on Desktop
Option 1: Specify Minimum Rate for All Hours on the Job.
Payroll Tab
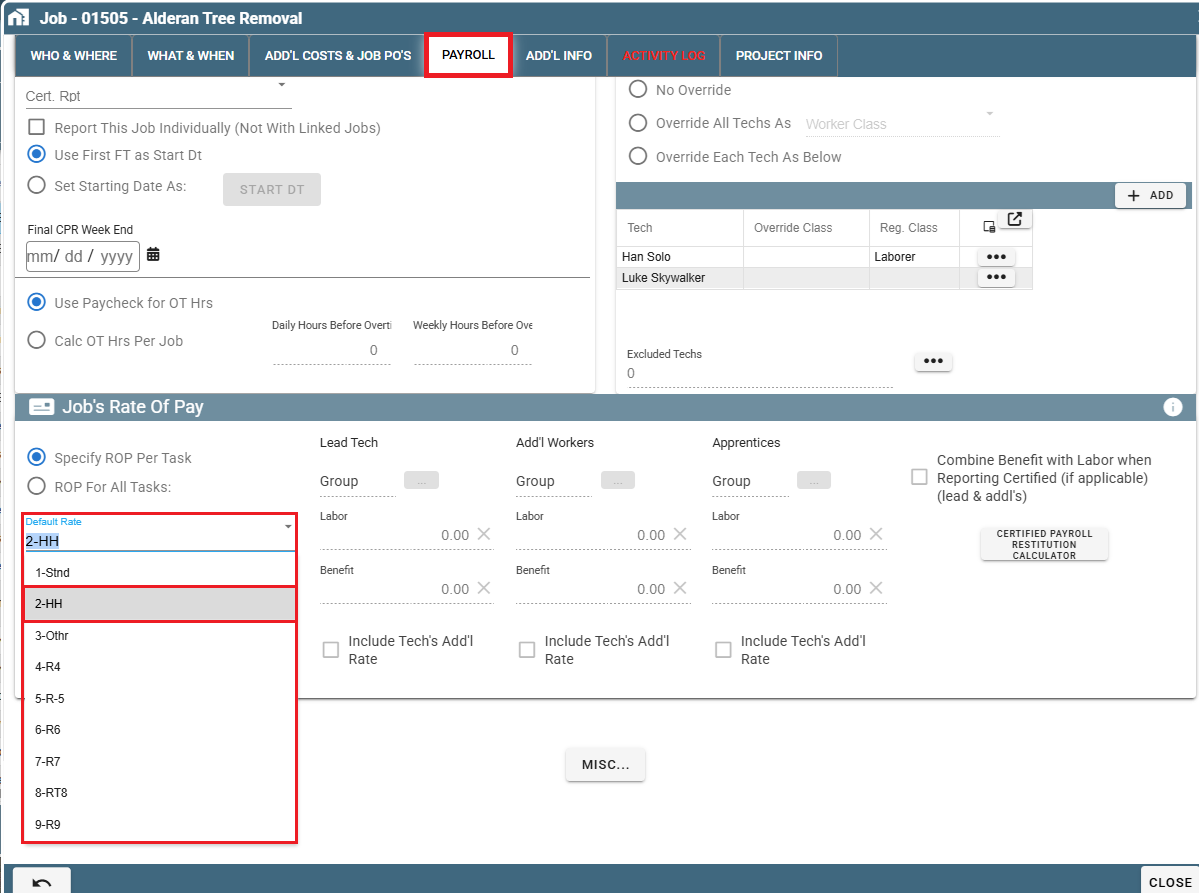
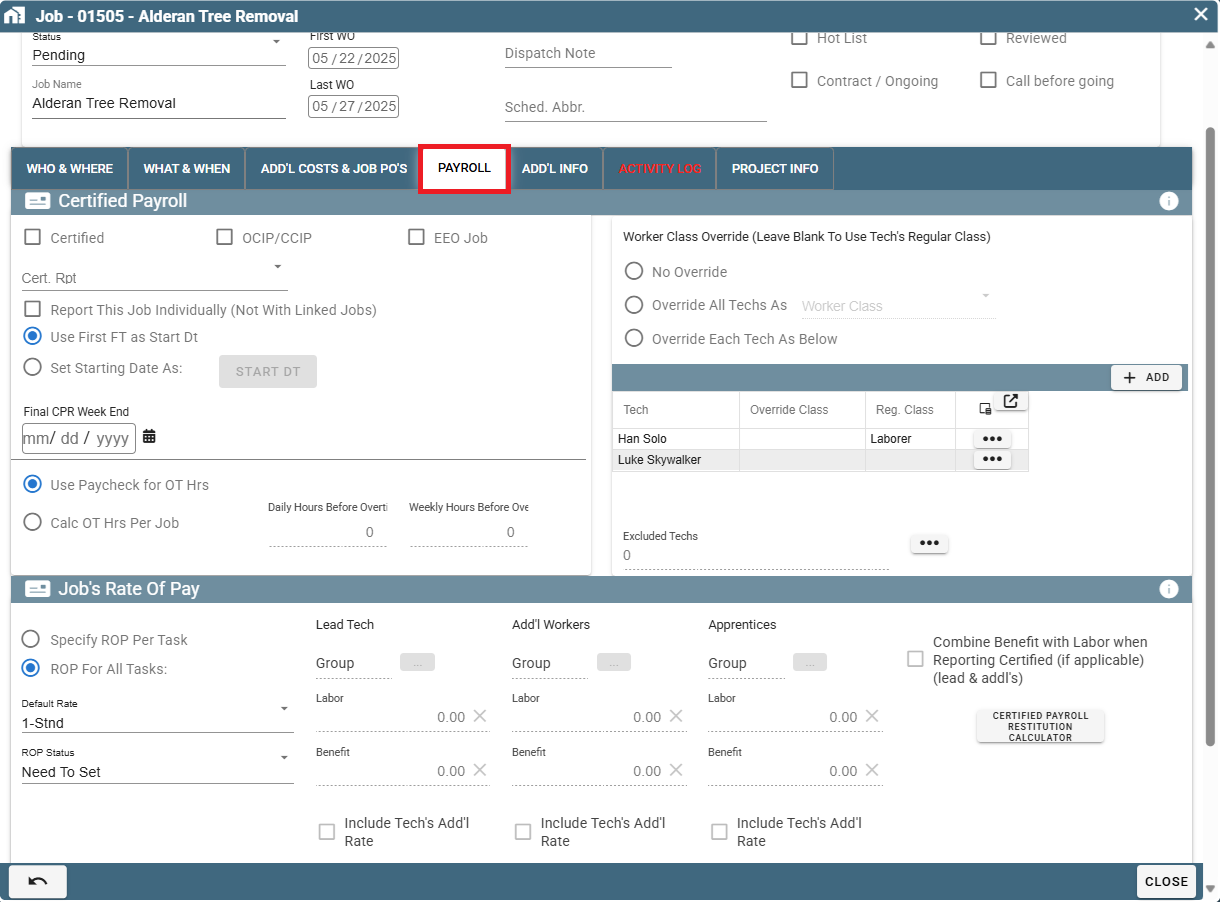
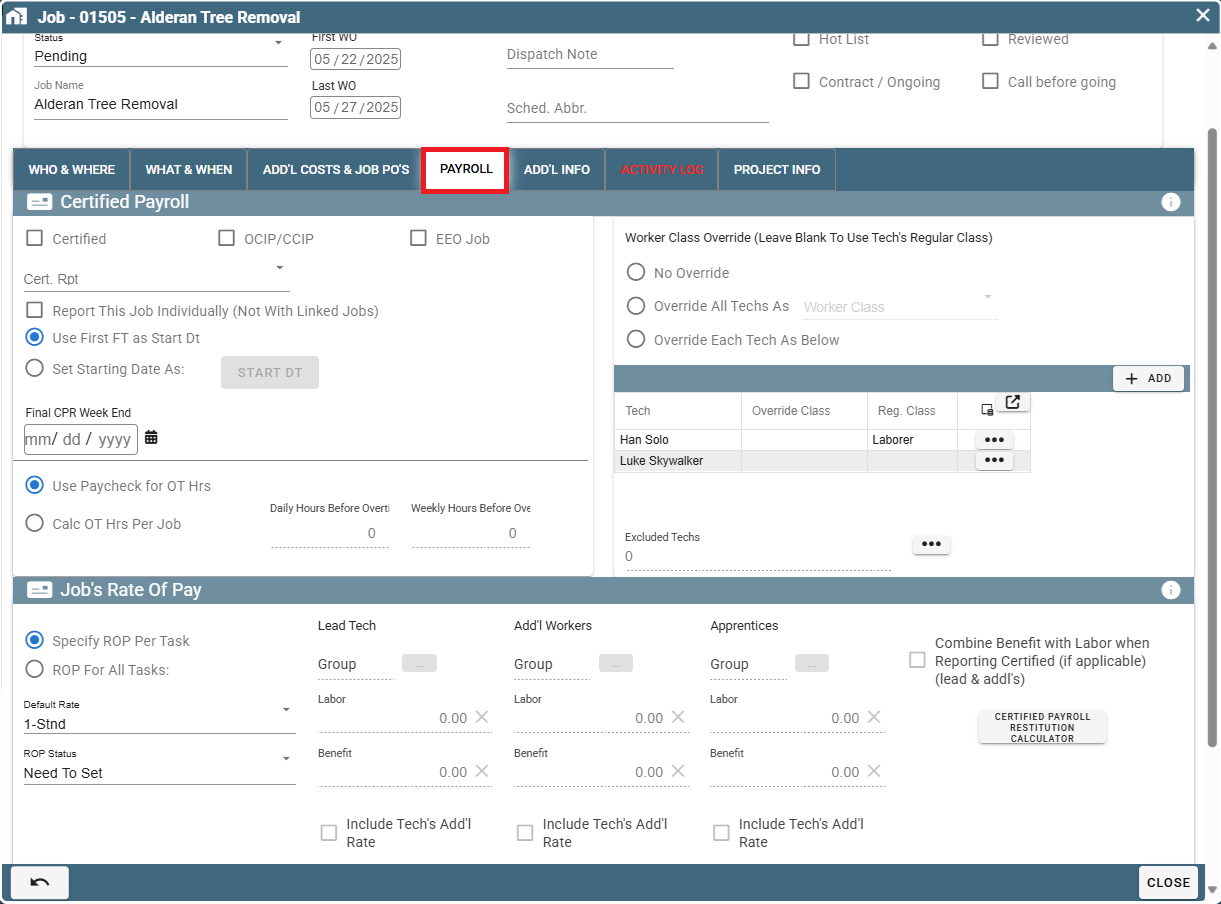
Open your Job and go to the “Payroll” tab.
.png)
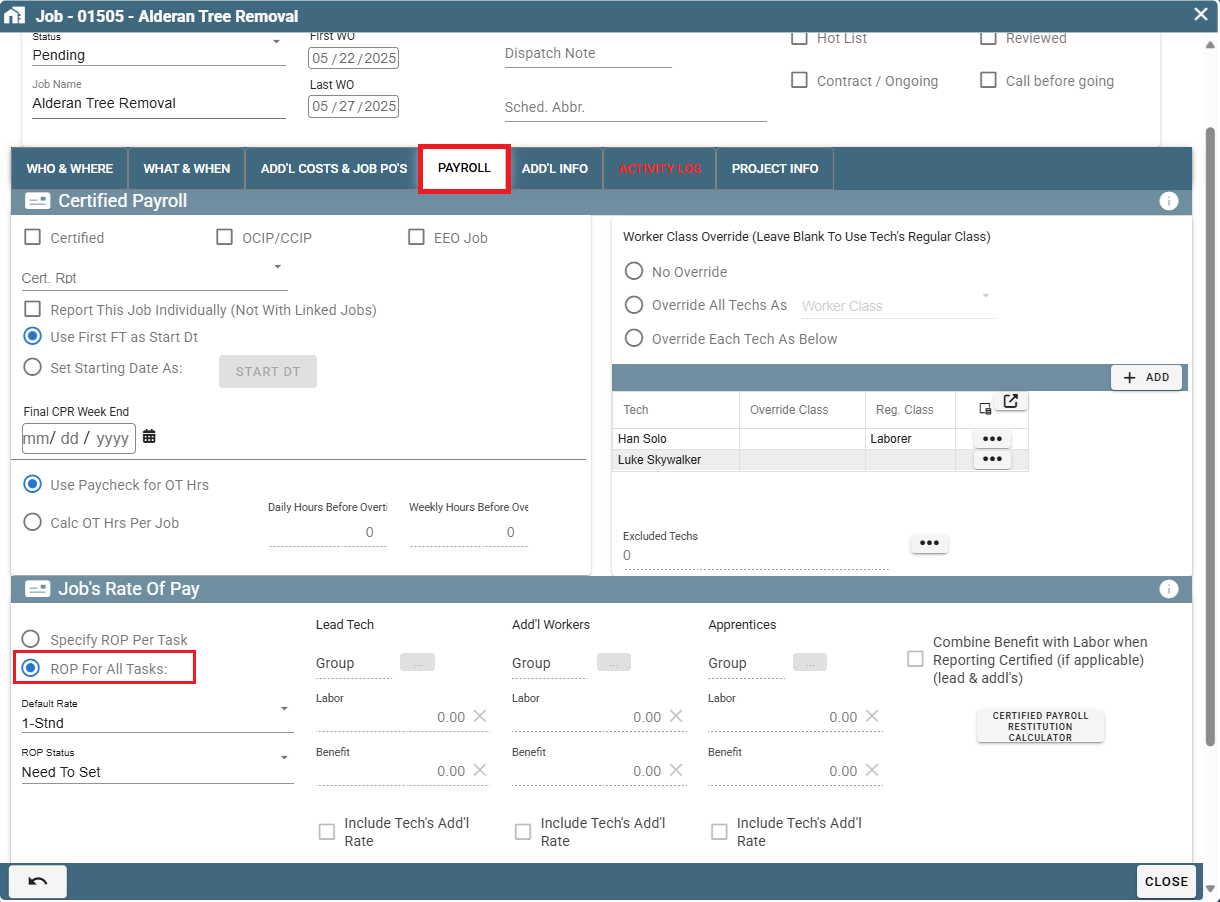
ROP for All Tasks
Select “ROP for All Tasks Is:”
.png)
Select Minimum Rate
Select the minimum rate for the lead tech and the additional workers (in case the rate is different).
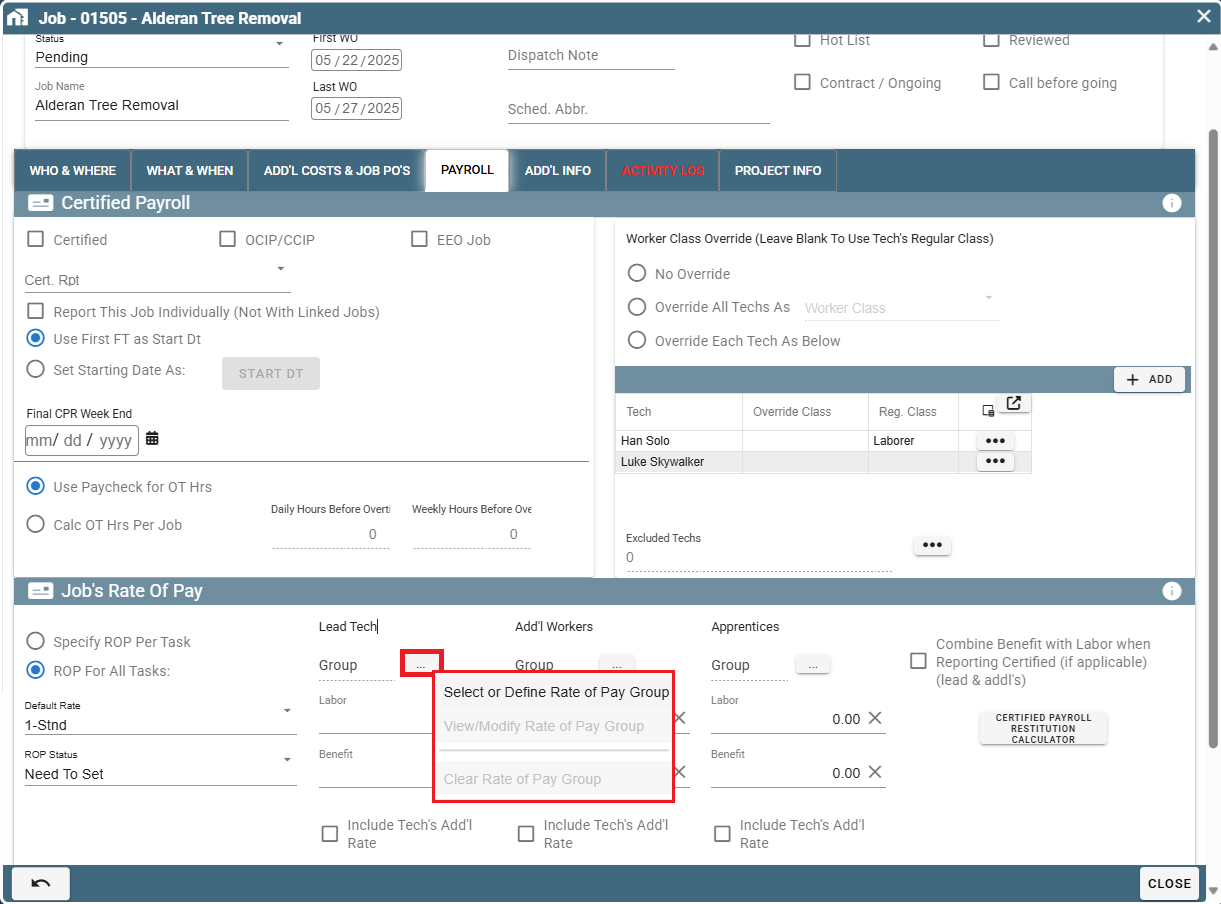
To set the Lead Tech rate, click the ellipsis next to Lead Tech, and click "Select or Define ROP Group"..png)
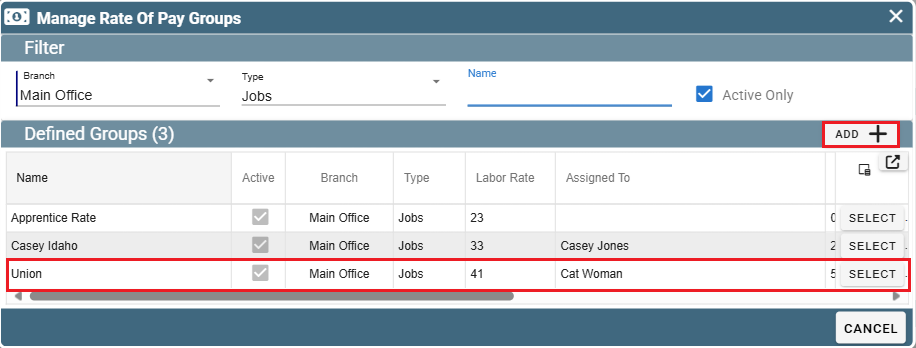
This will pull up a list of all your existing rates, including the rates your technicians already have. You can highlight an existing rate or add a new one..png)
Repeat the step "Select Minimum Rate" to set the Rate of Pay for the additional worker section.
Note: if any user's regular rate is higher than the selected rate, the system will continue to use their original rate.
.png)
Option 2: Specify Minimum Rate of Pay for Each Task.
Payroll Tab
Open your Job and go to the “Payroll” tab.
.png)
ROP Per Task
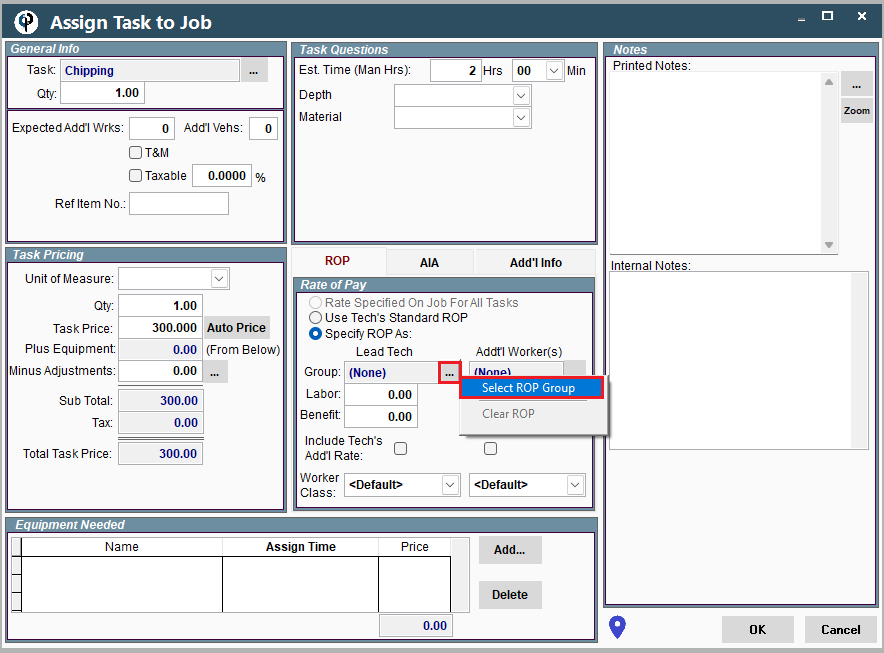
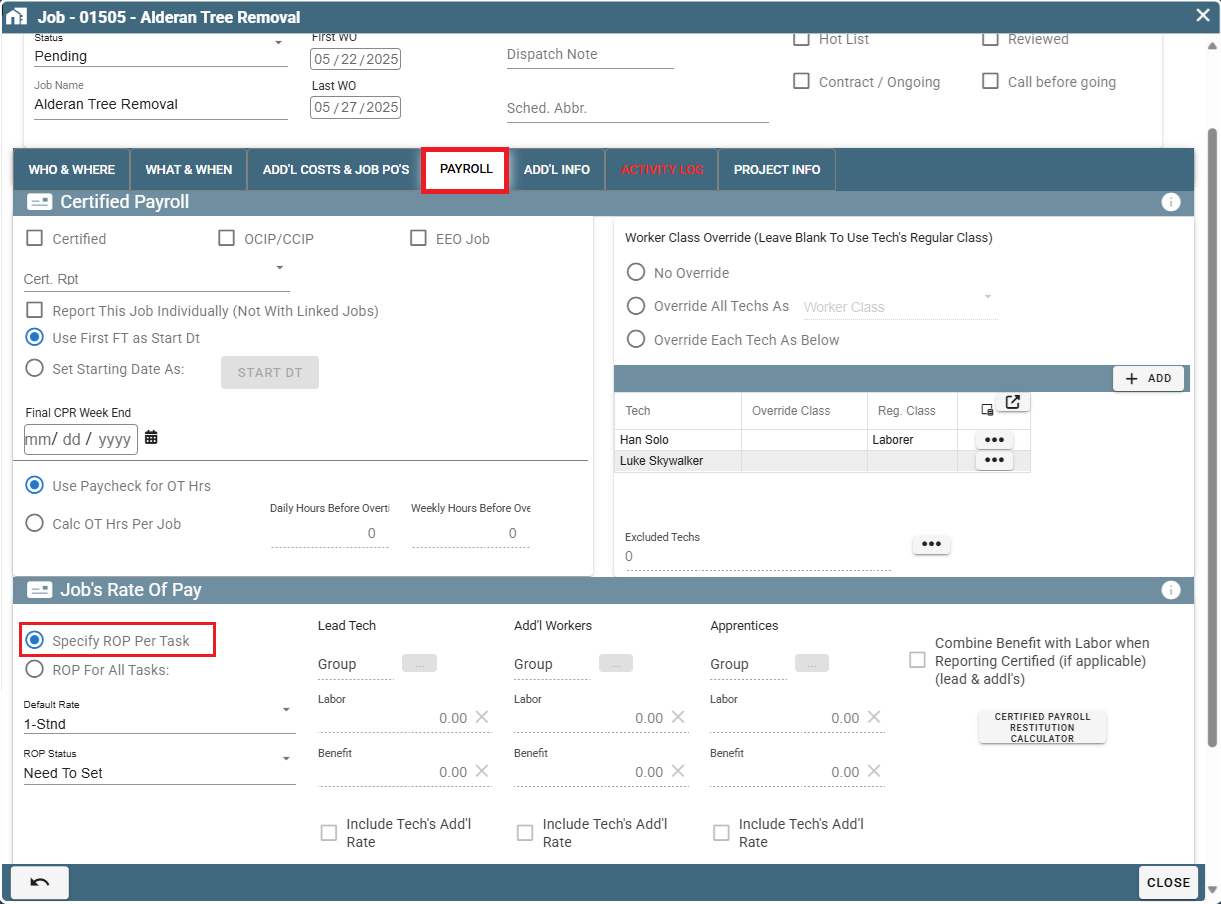
Click "Specify ROP Per Task". (Note that the rates to the right of this button are grayed out and will not be used).
.png)
Specify FOP Per Task
The rate of pay must now be specified for each task on the Job.
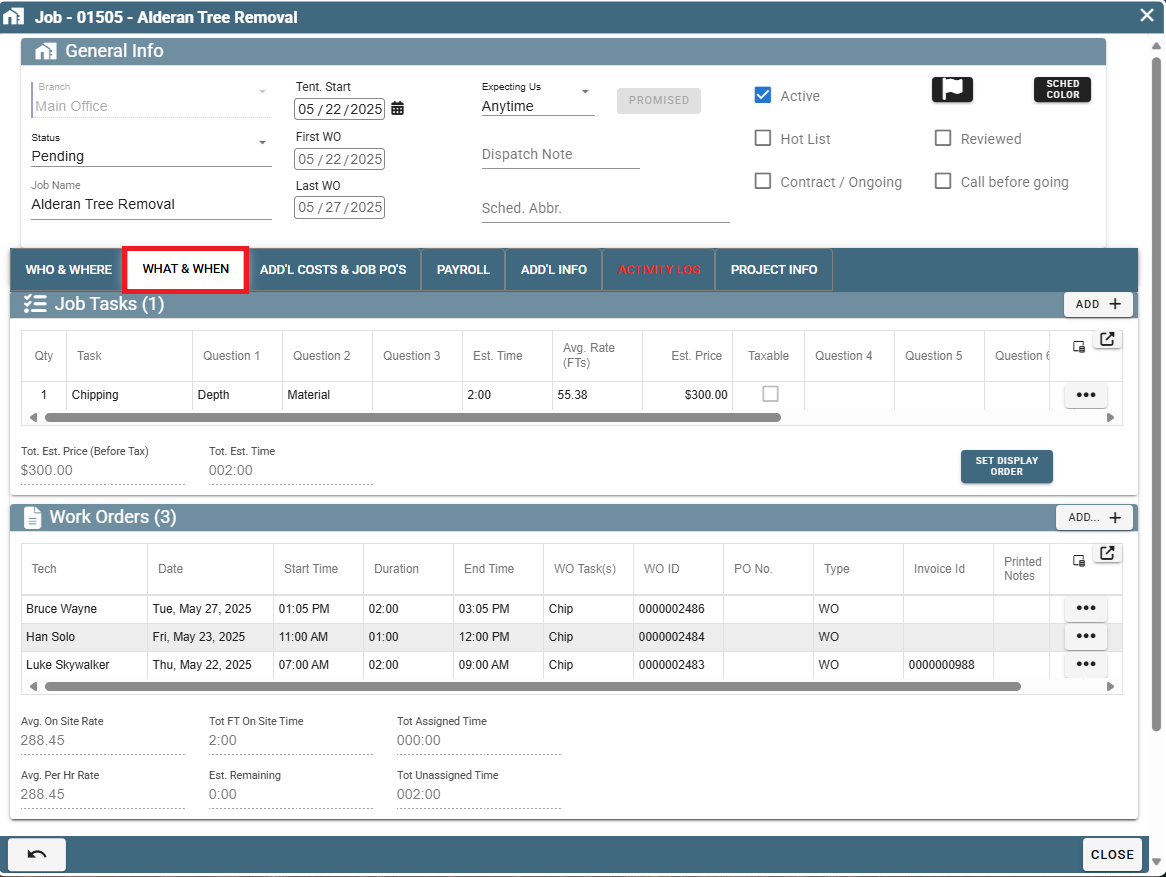
Go to the "What & When" tab.
.png)
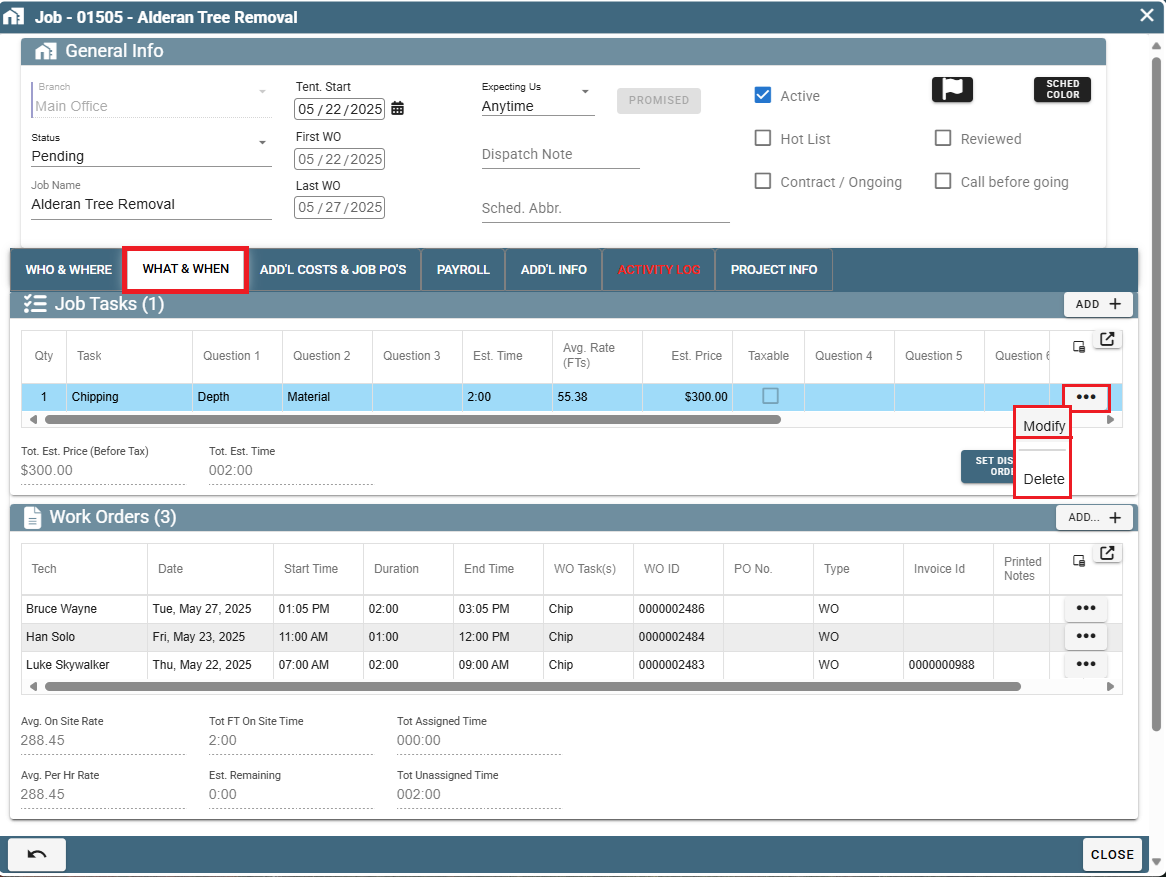
Highlight a task and click "Modify".
.png)
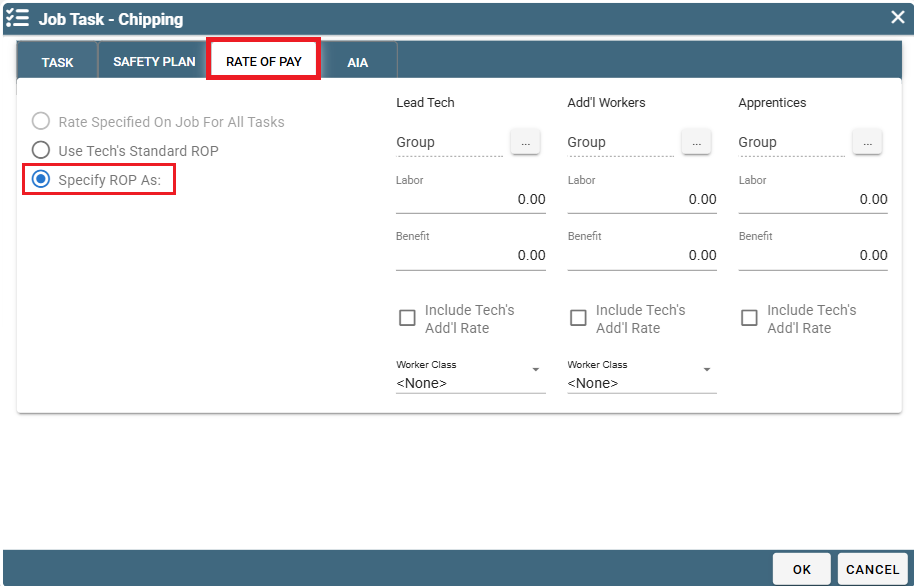
Click "Specify ROP As:"
.png)
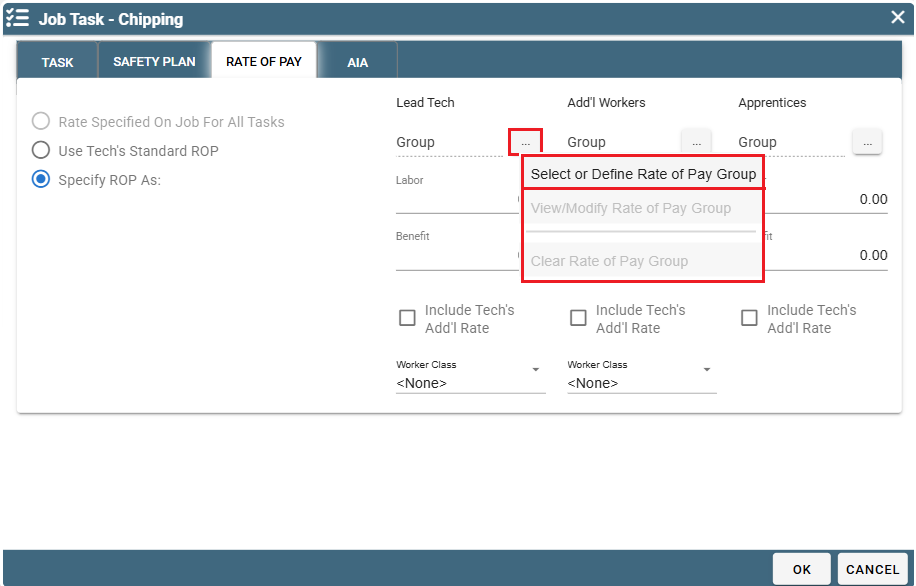
Click on the Ellipsis and select the "Select ROP Group" option to set the rate for the Lead Tech, and the Additional Workers.
Important Note: Please don't forget that this method requires you to set the rate for all tasks requiring an alternative rate.
Option 3: Set Up Multiple Rates for Each User
For more information on Rates of Pay visit the following link: Define Rate(s) of Pay
Modify User
Set up multiple rates for the user.
Go to File → Users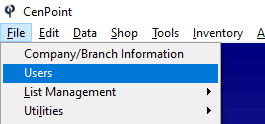
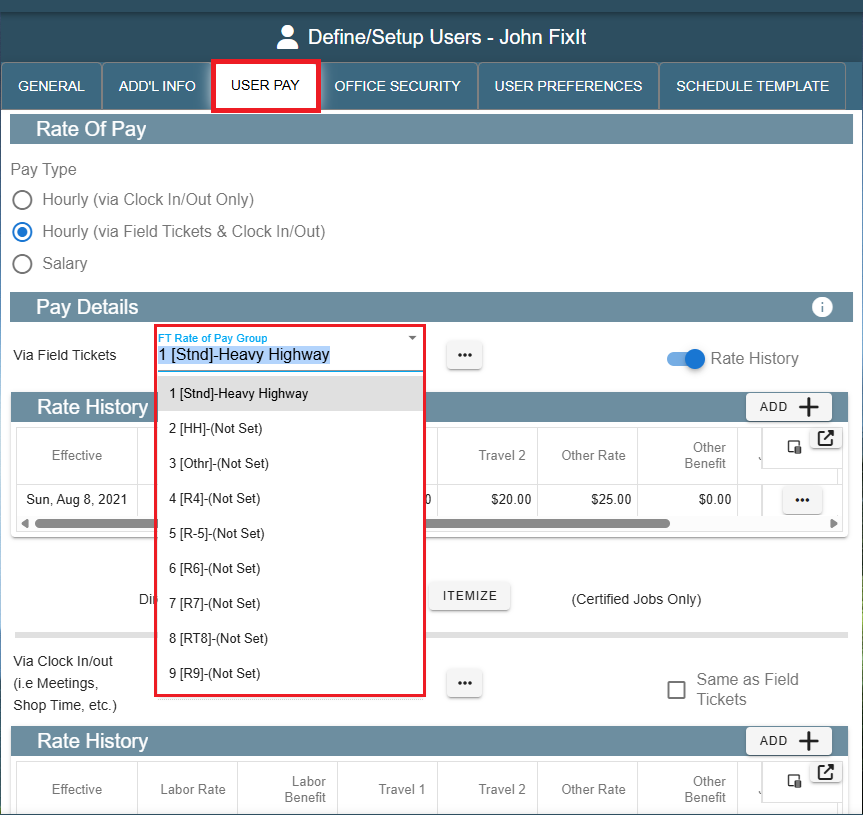
Highlight a user and click "Modify". This will open a window in the Portal so don't be surprised if it looks different than the rest of Desktop.
.png)
Go to the "User Pay" tab.
FT Rate of Pay Group
In the drop down you can see that there are several rates for our user. In this example only the first rate has been defined.
Define ROP Group
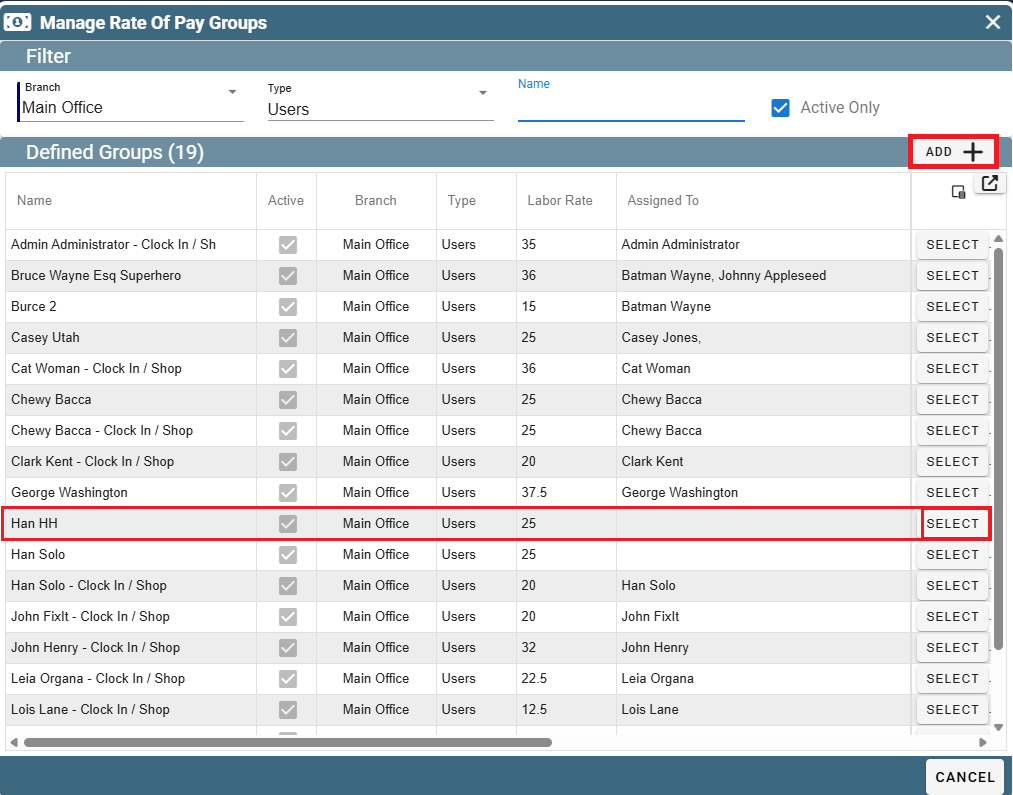
To define another rate, click the ellipsis button and click "Select or Define Rate of Pay Group".

This will take you to a list of all rates you have previously set up. Select an existing rate and click "Select" or click "Add" to create a new rate, then click Select to apply it to this user.
For more information on Rates of Pay visit the following link: Define Rate(s) of Pay
Specify ROP for Job
Specify which rate level to use for the Job.
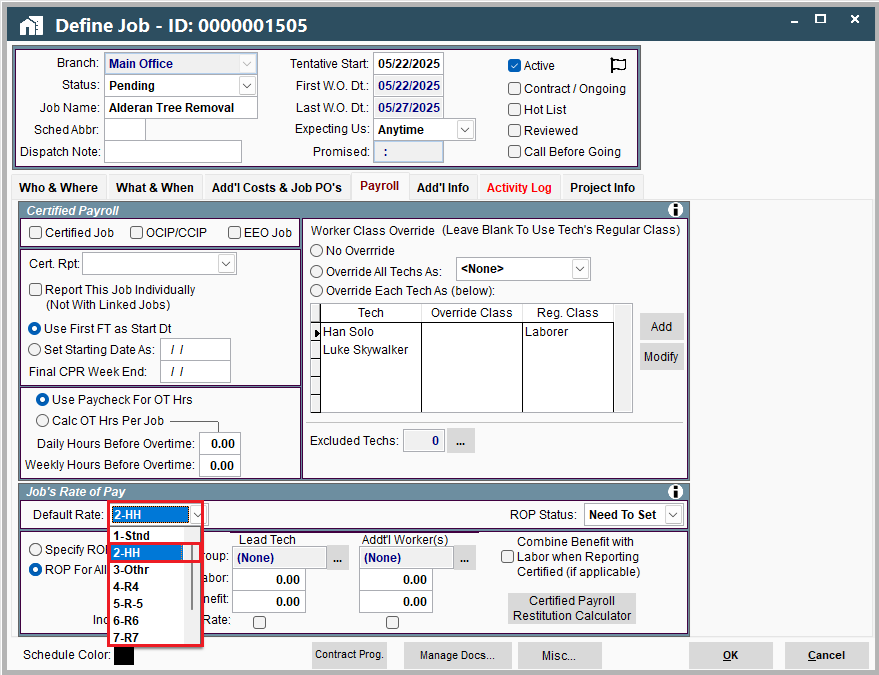
Back on the Job, under the "Payroll" tab, you will select a rate level in the drop down next to "Default Rate:".
This example will give each user their 2nd level rate for hours worked on this Job.
Job Rate of Pay on Portal
Option 1: Specify Minimum Rate for All Hours on the Job.
Payroll Tab
Open your Job and go to the "Payroll" tab
ROP for All Tasks
Select the "ROP for All Tasks:" option
Select Minimum Rate
Select the minimum rate for the lead tech and the additional workers (in case the rate is different).
To set the Lead Tech rate, click the ellipsis next to Lead Tech and click "Select or Define ROP Group".
This will pull up a list of all your existing rates, including the rates your technicians already have.
You can highlight an existing rate or add a new one.
Repeat this step of "Select Minimum Rate" to set the Rate of Pay for the 'Additional Worker' section.
Note: If any user's regular rate is higher than the selected rate, the system will continue to use their original (higher) rate.
Option 2: Specify Minimum Rate of Pay for Each Task
Payroll Tab
Open your Job and go to the "Payroll" Tab
ROP Per Task
Click "Specify ROP Per Task". (Note that the rates to the right of this button are grayed out and will not be used).
Specify ROP on Each Task
The rate of pay must now be specified for each task on the Job.
Go to the "What & When" tab
Highlight a Task, click the Ellipsis, and then click "Modify"
In the Task window that appears, click on the "Rate of Pay" tab and click on "Specify ROP As:"
(Do the following step for Add'l Workers and Apprentices once you've finished with Lead Tech)
Click on the Ellipsis for the Lead Tech and click the "Select or Define Rate of Pay Group" to set the Rate of Pay.
Important Note: Please don't forget that this method requires you to set the rate for all tasks requiring an alternative rate.
Option 3: Set Up Multiple Rates for Each User
For more information on Rates of Pay visit the following link: Define Rate(s) of Pay
Modify User
Set up multiple rates for the user.
Go to More -> Users
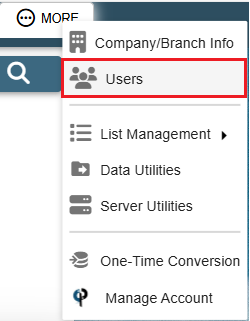
Find your user and then double click on them or click the Ellipsis -> Modify

Go to the "User Pay" tab.
FT Rate of Pay Group
In the drop down you can see that there are several rates for our user. In this example only the first rate has been defined.
Define ROP Group
To define another rate, click the ellipsis button and click "Select or Define Rate of Pay Group".
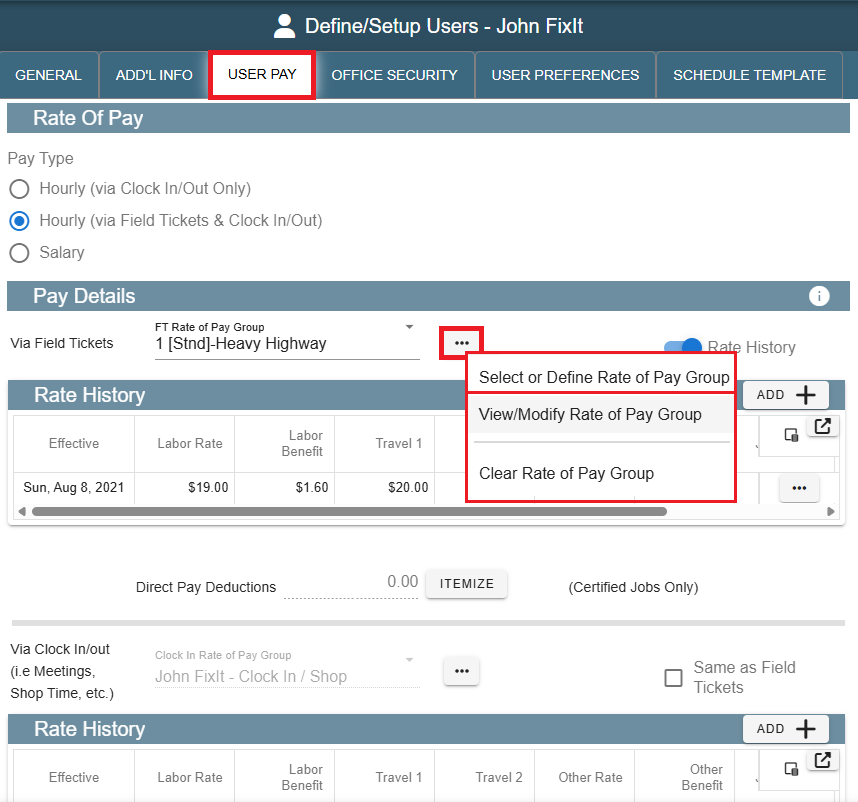
This will take you to a list of all rates you have previously set up. Select an existing rate and click "Select" or click "Add" to create a new rate, then click "Select" to apply it to this user.

For more information on Rates of Pay visit the following link: Define Rate(s) of Pay
Specify ROP for Job
Specify which rate level to use for the Job.
Back on the Job, under the "Payroll" tab, you will select a rate level in the drop down next to "Default Rate".
This example will give each user their 2nd level rate for hours worked on this job.