See this link for additional information on Rates of Pay: User Pay
Define Rate of Pay
Naming Different Rates of Pay
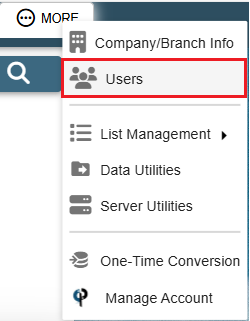
To set up Rates of Pay go to More -> Users
Find your user and then double click on them or click the Ellipsis -> Modify

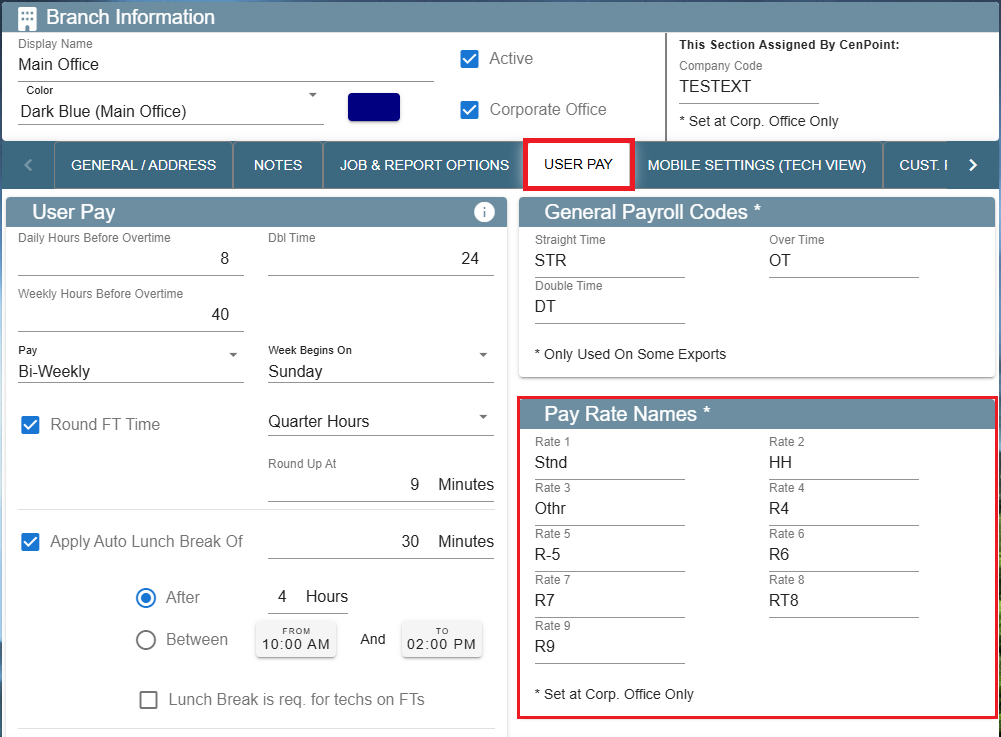
Now navigate to the User Pay tab and enter the different names you'd like associated with different rates of pay.
Examples: Standard Time, Driving Time, Waiting Time, Other, etc...
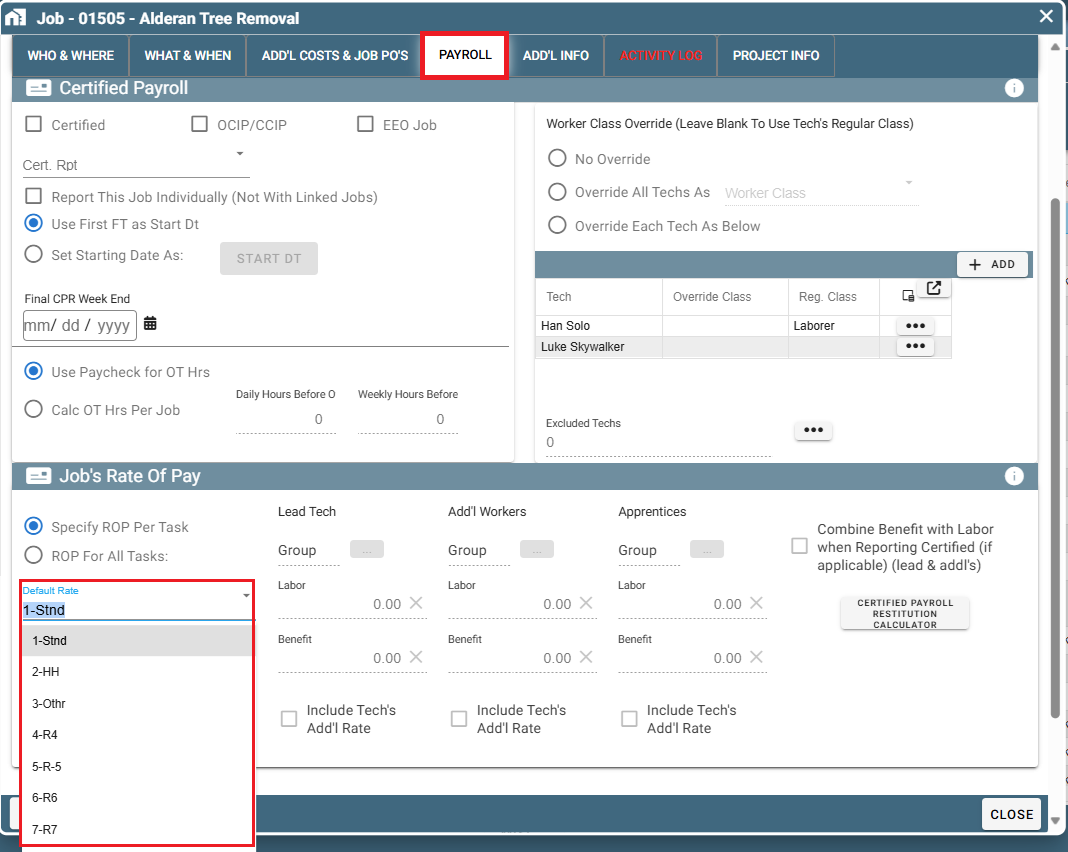
Set Rate of Pay on a Job
When setting up a Job you can define the Rate of Pay that job uses.
To set the Rate of Pay on a job, open the Job go to the Payroll Tab->Select Rate of Pay
The selected Rate of Pay will apply to Job Costing and Payroll for the Technicians.
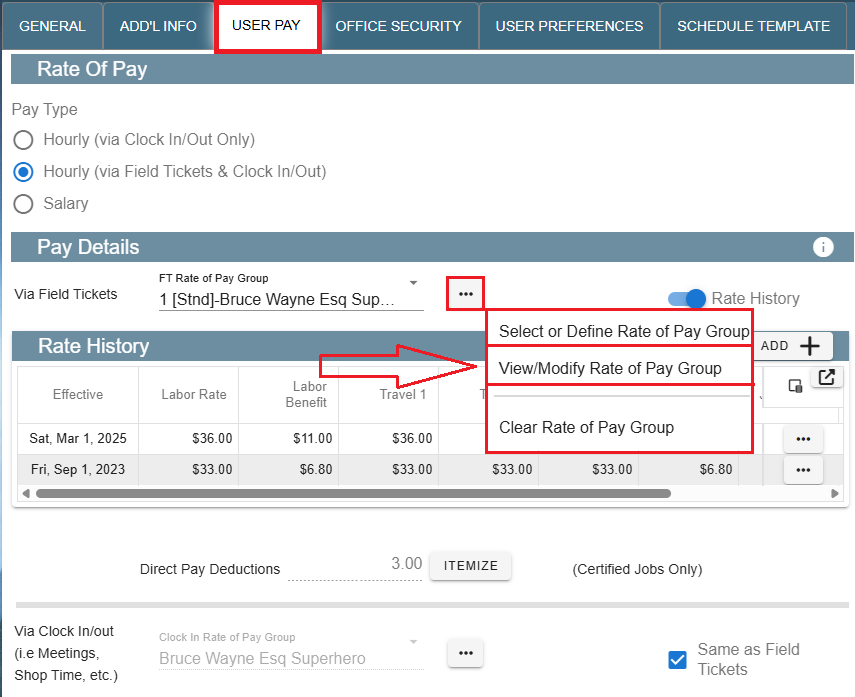
Rate of Pay for Technicians
To set up Rate of Pay for Technicians go to More->Users
Find your user and then double click on them or click the Ellipsis -> Modify
Go to the User Pay tab.
In the Pay Details section click the Ellipsis->Select or Define Rate of Pay Group
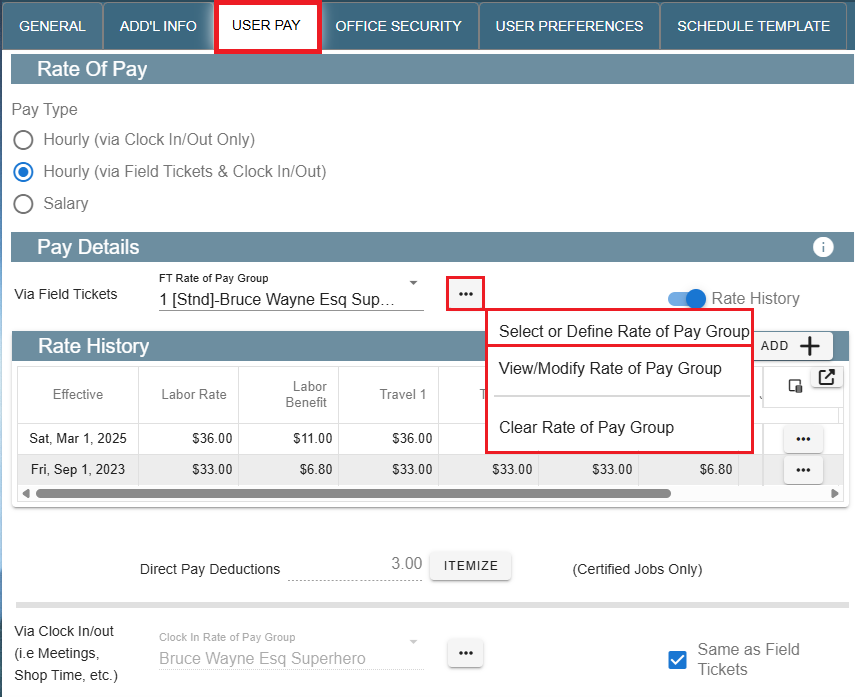
Then select an existing Rate of Pay group to apply to that User.
To create a new rate to apply to that user, click 'Add New' and select the appropriate Branch Name, Group Name, and Type of Group.
Note: The 'Straight Time', 'Over Time', and 'Double Time' are LABELS that you can adjust so the naming of the rates is crystal clear.
Note: To add pay rates inside your Rate of Pay Group click add in the 'Rate History' section.
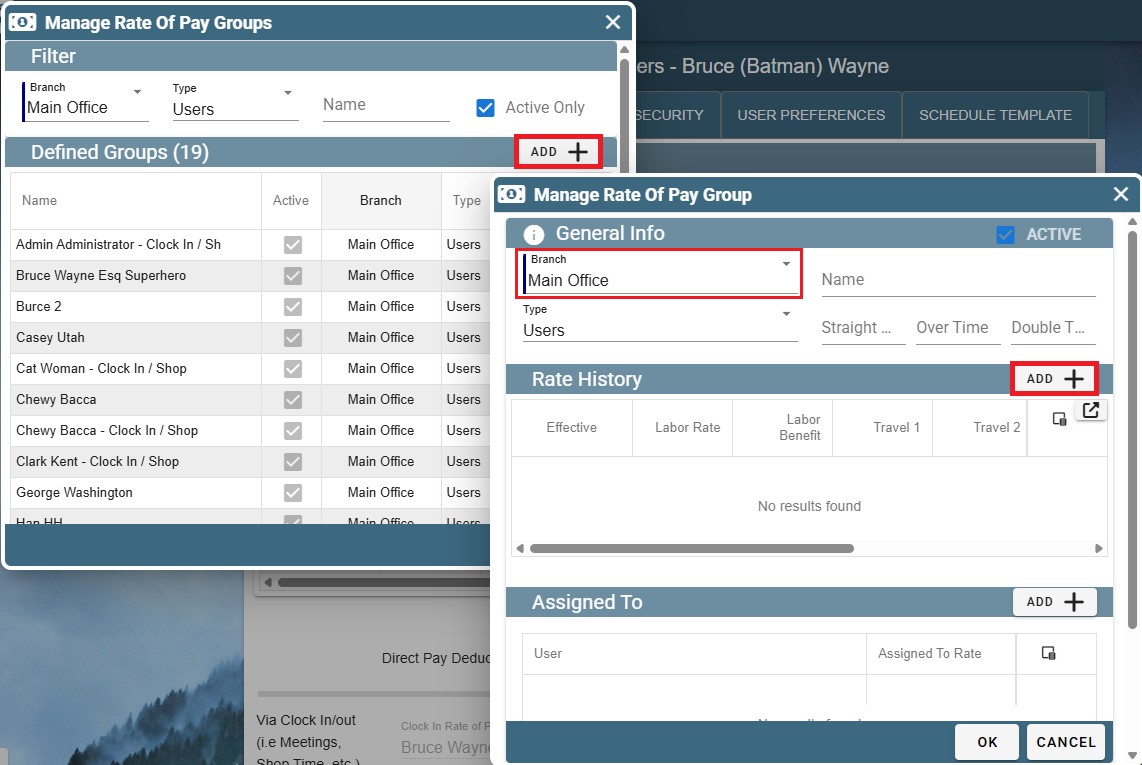
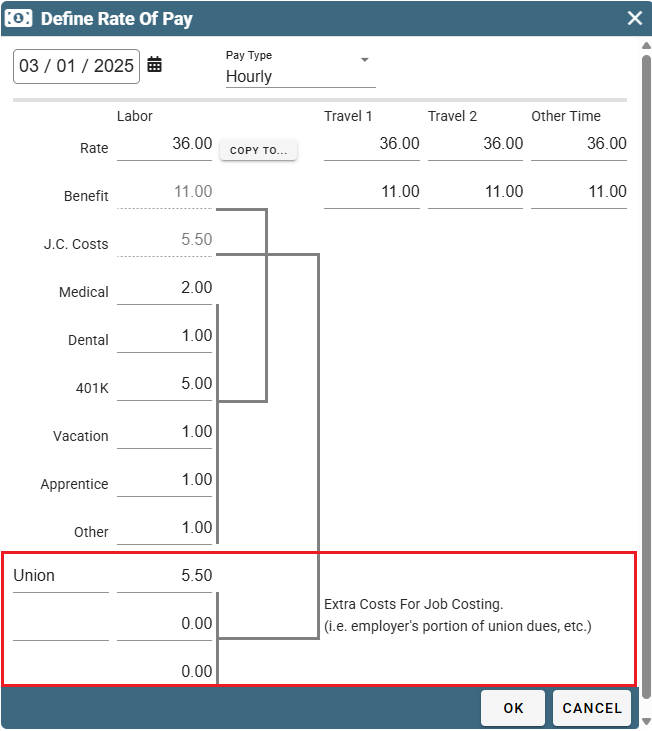
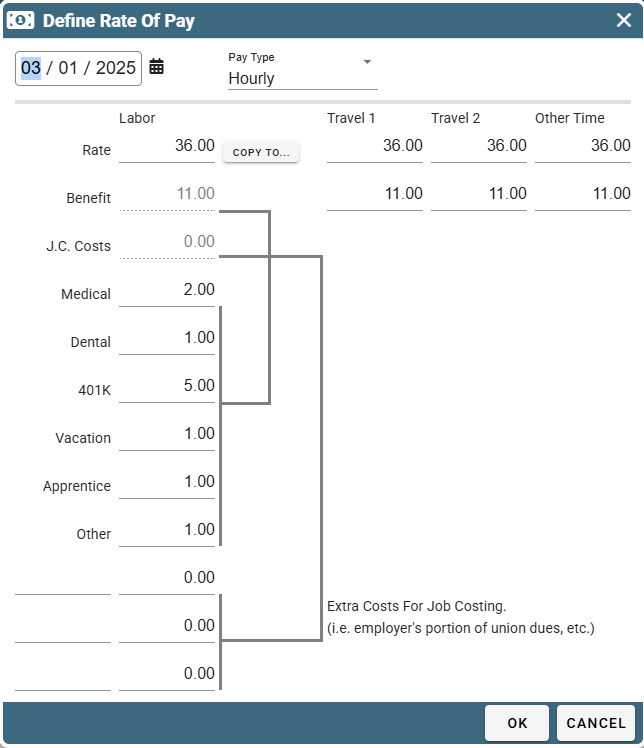
Upon clicking Add in the 'Rate History' screen the 'Define Rate of Pay' window will appear. Fill in the information and click OK to save and close the window.
Travel is used if you pay different rates for Travel, other could be used for a standby time rate.
Now that data is reflected in the Rate History when that Rate of Pay is selected.
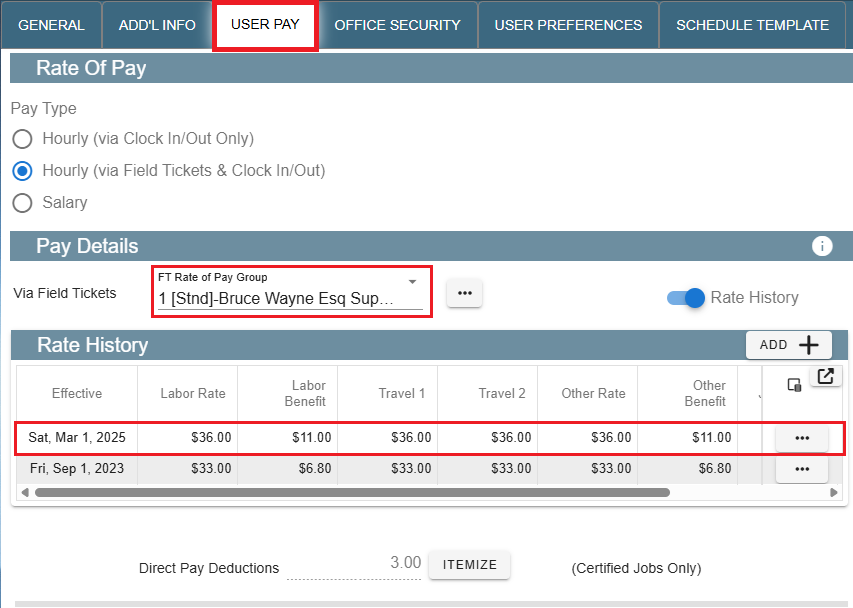
Use this same process to easily schedule future raises for your users.
Separate Benefits from Payroll
You may need to separate benefits from payroll in the case of a Union or the like.
Inside your User's settings under the User Pay tab-> Click ellipsis next to FT Rate of pay group->View/Modify Rate of Pay Group
Select applicable Rate from Rate History-> Click the Ellipsis -> Modify
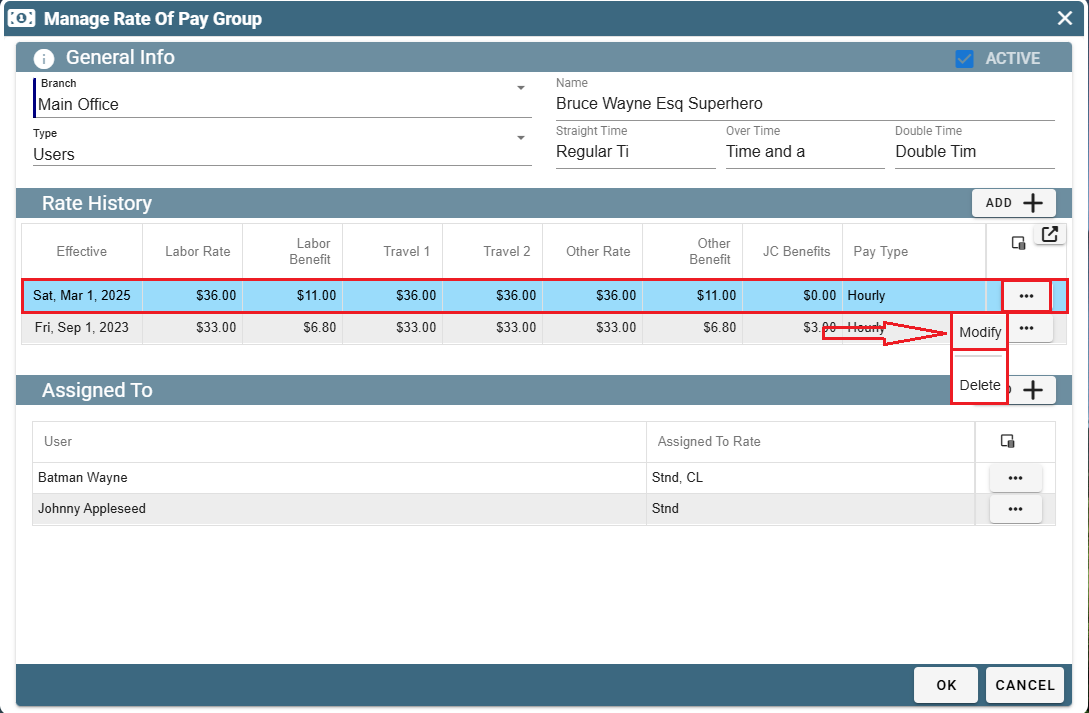
On the Define Rate of Pay screen add the benefits that are to be separate from payroll in the bottom three fields.
This section will still report for Job Costing but will not be included in payroll.