How to set your custom report as the default in CenPoint.
How to load a custom report into CenPoint.
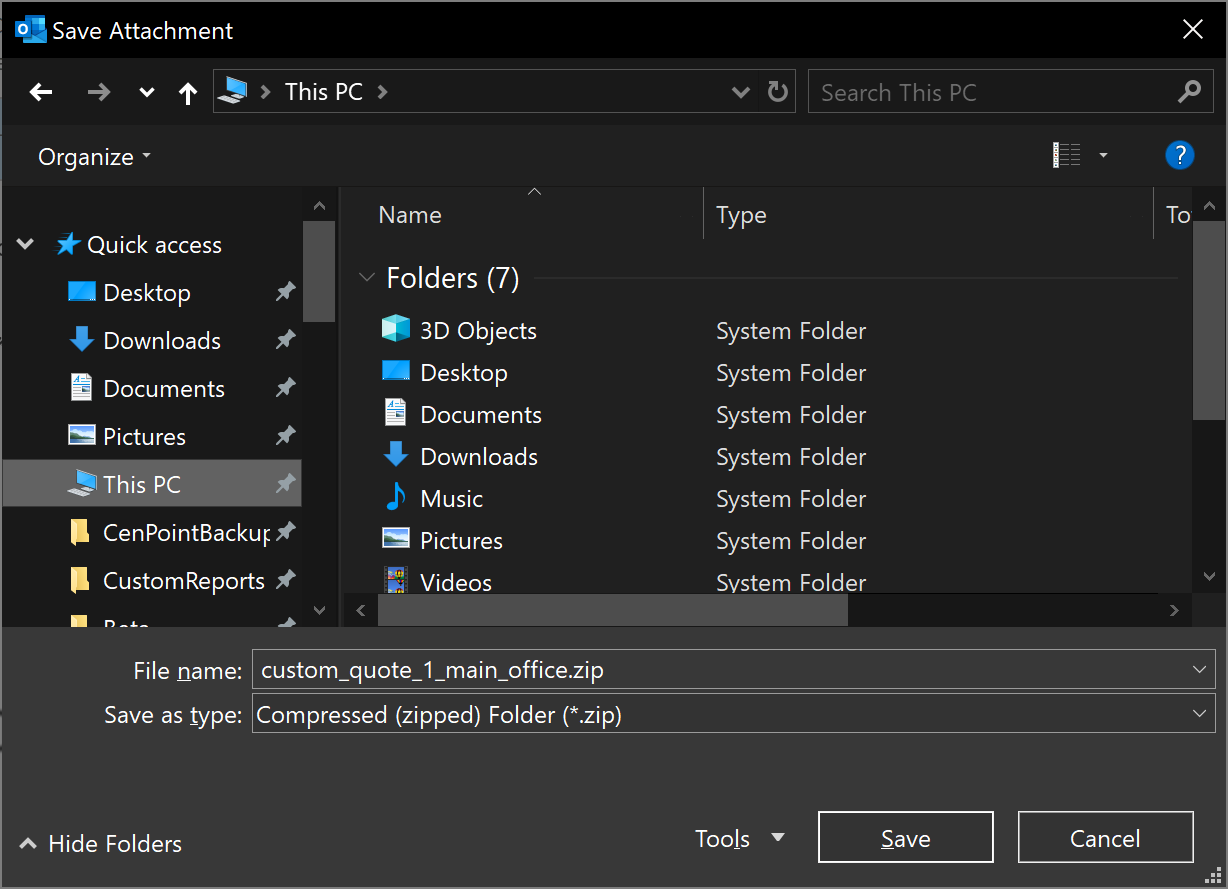
1. You will receive your custom report as an email attachment. Open the email, and save the attachment to a location on your computer.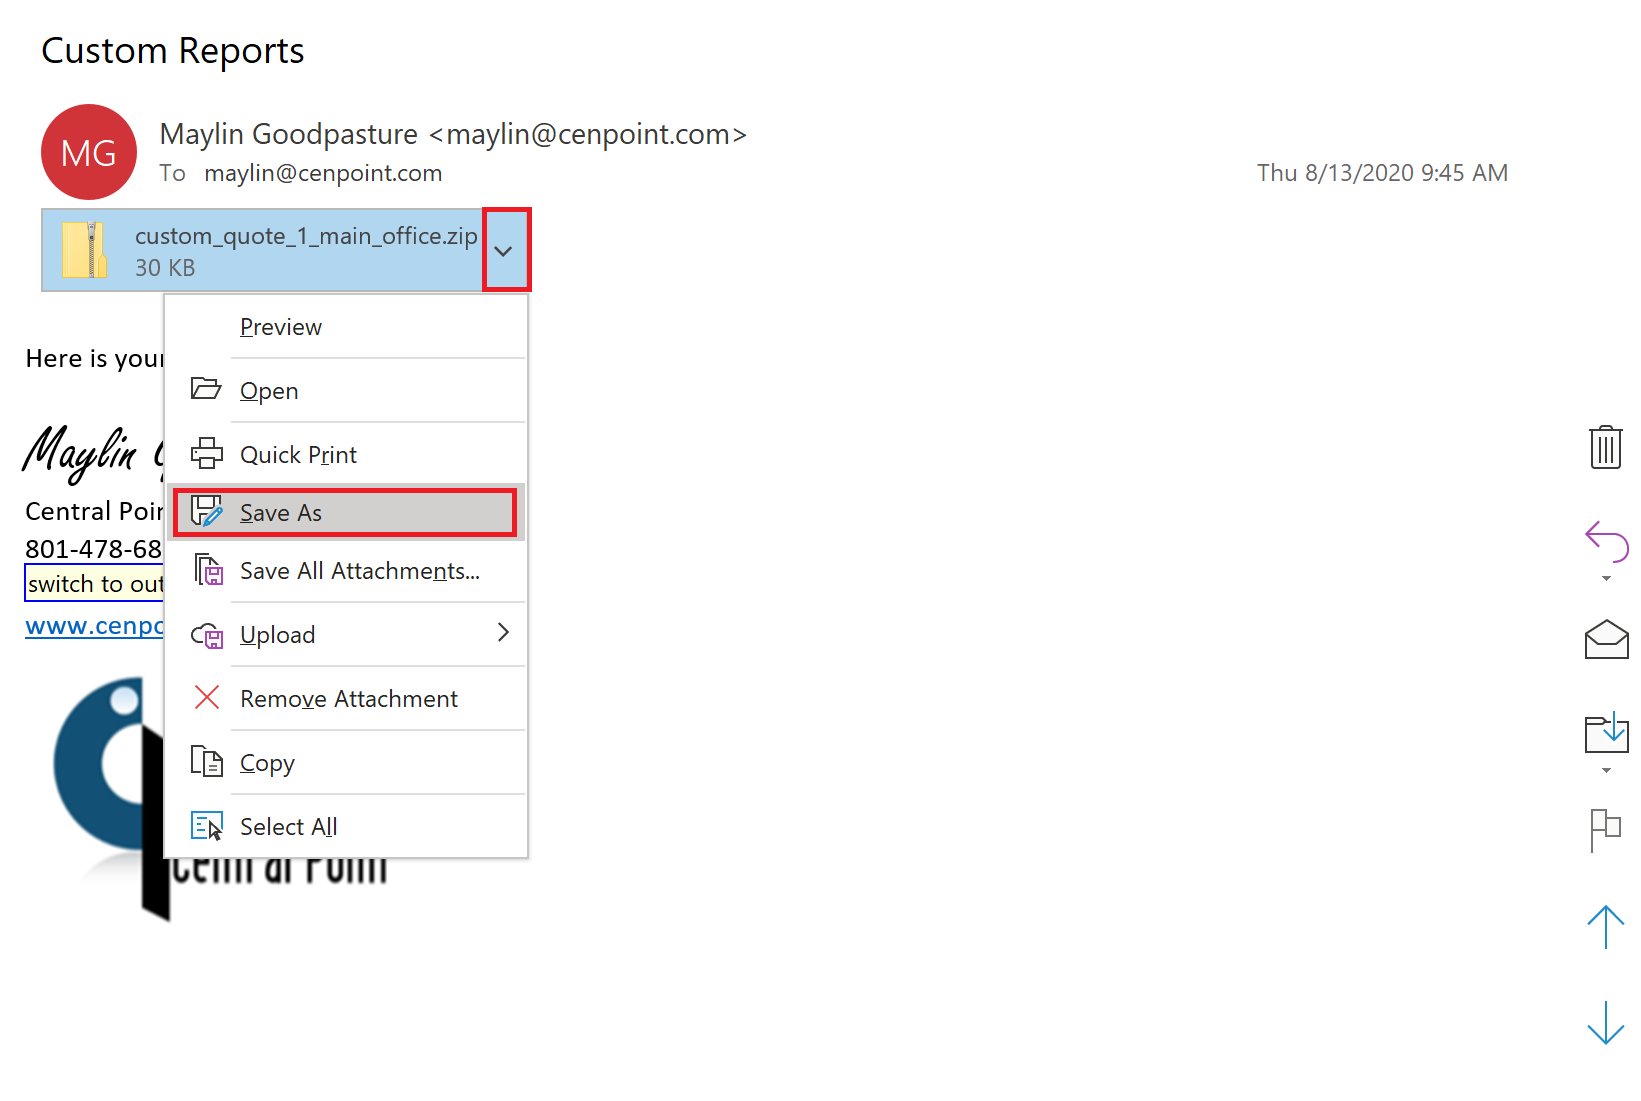
2. In CenPoint, go to File > Utilities > Server utilities > Manage Custom Reports.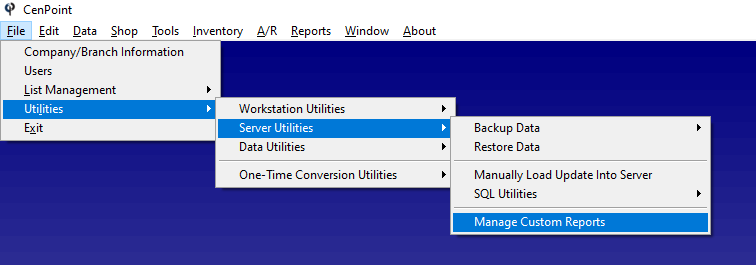
3. Select the correct branch (if needed you can load this report to multiple branches one at a time)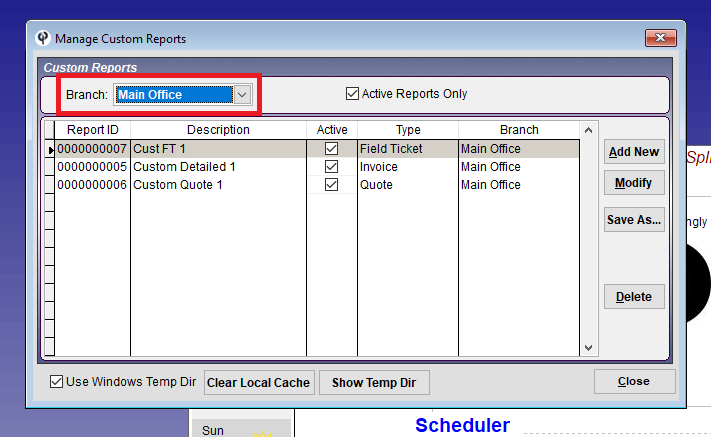
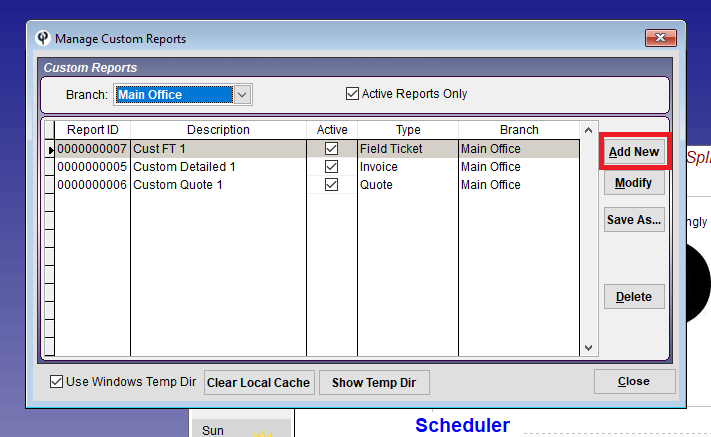
4. Click the add new button.
5. Click the browse button.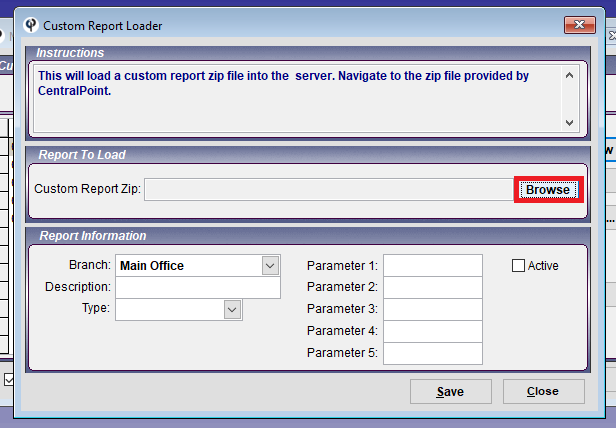
6. Locate the file we saved to your computer in step 1, and click okay.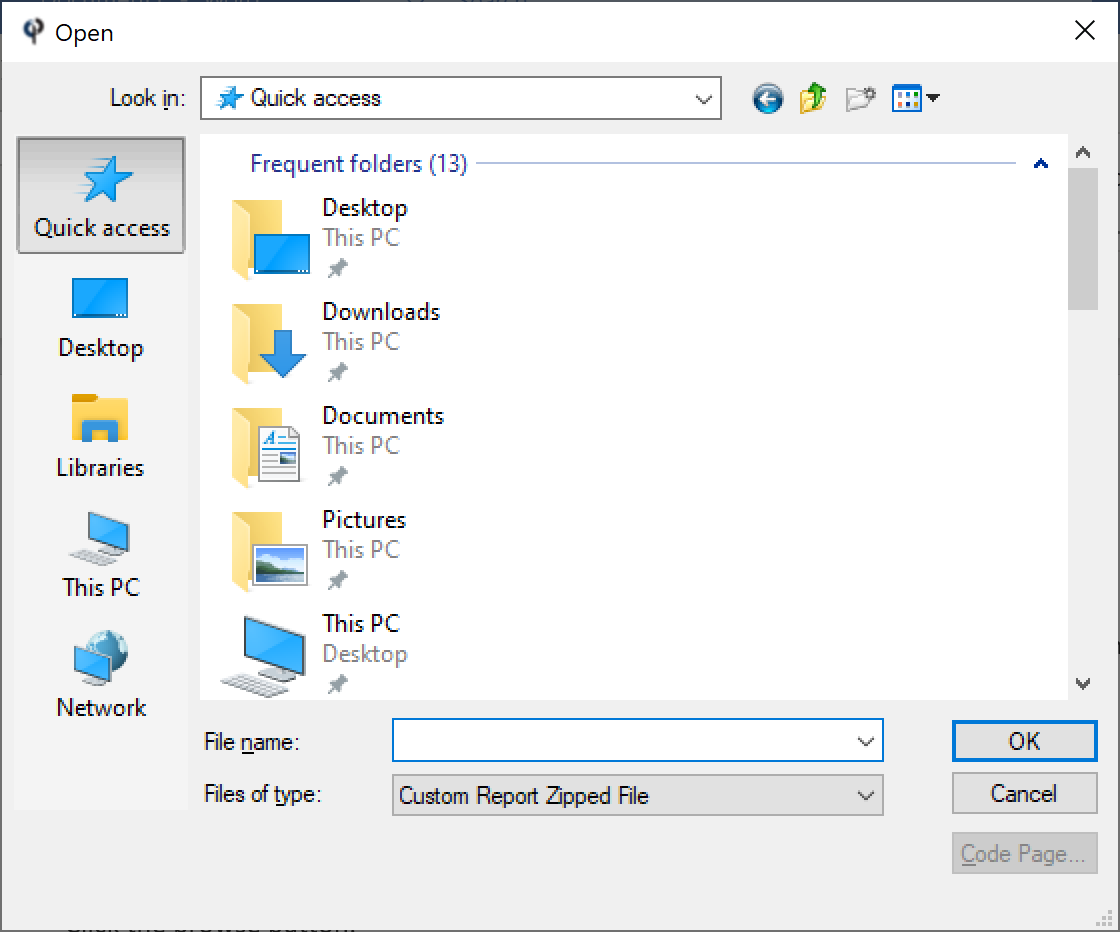
7. Click save.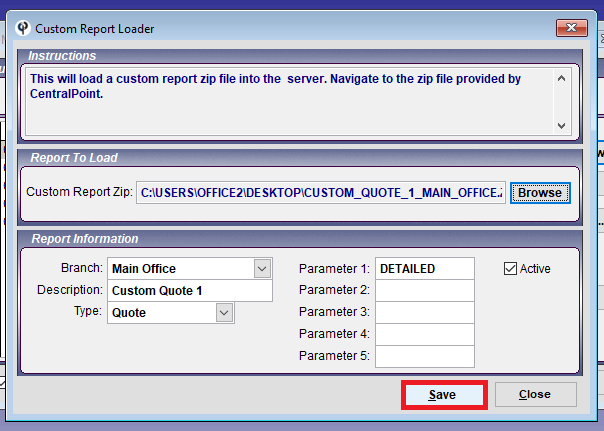
8. If this is an update to an existing report, you will also need to click Replace.
9. Click okay on the confirmation message.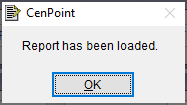
How to set your custom report as the default in CenPoint.
1. Go to File > Company/Branch Information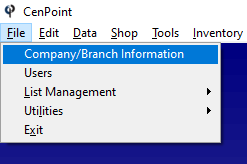
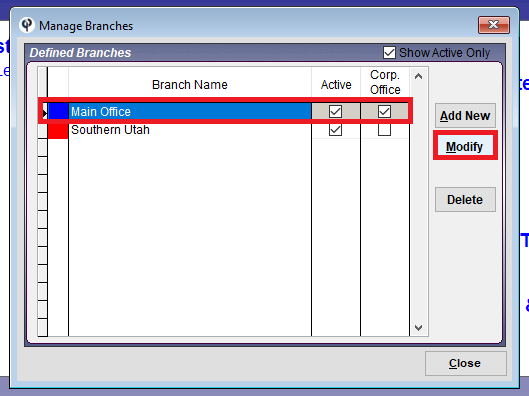
2. Highlight a branch and click “Modify”.
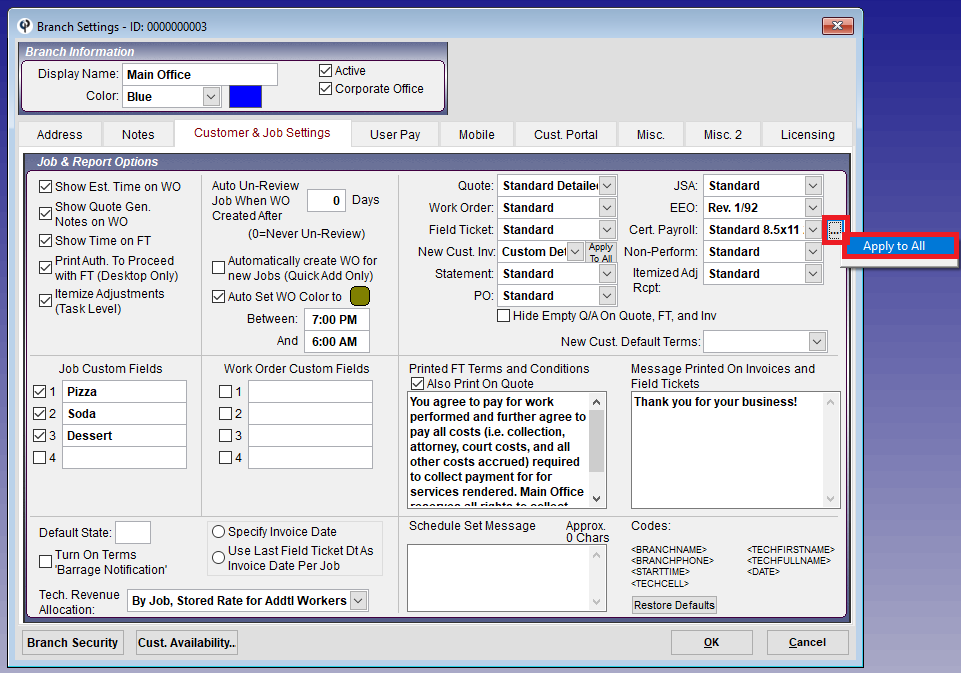
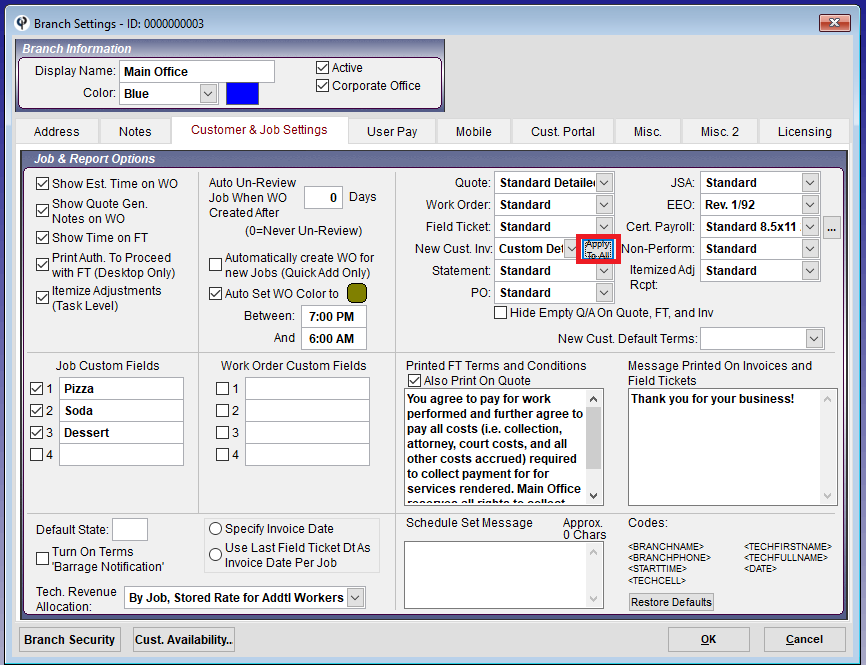
3. Go to the “Customer & Job Settings” tab.
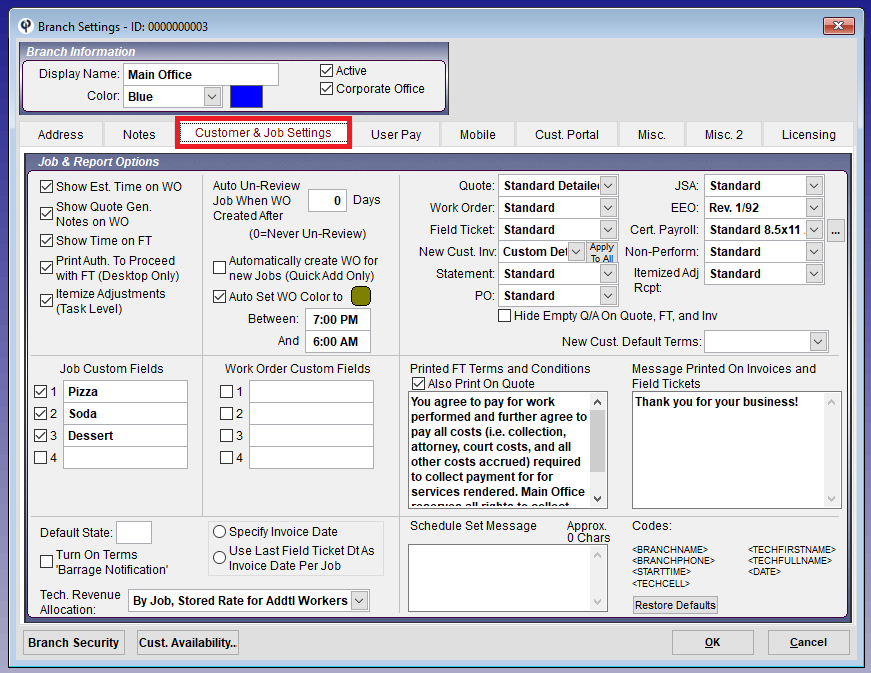
4. All of the settings here, indicated which template will be used as the default, for the various reports.
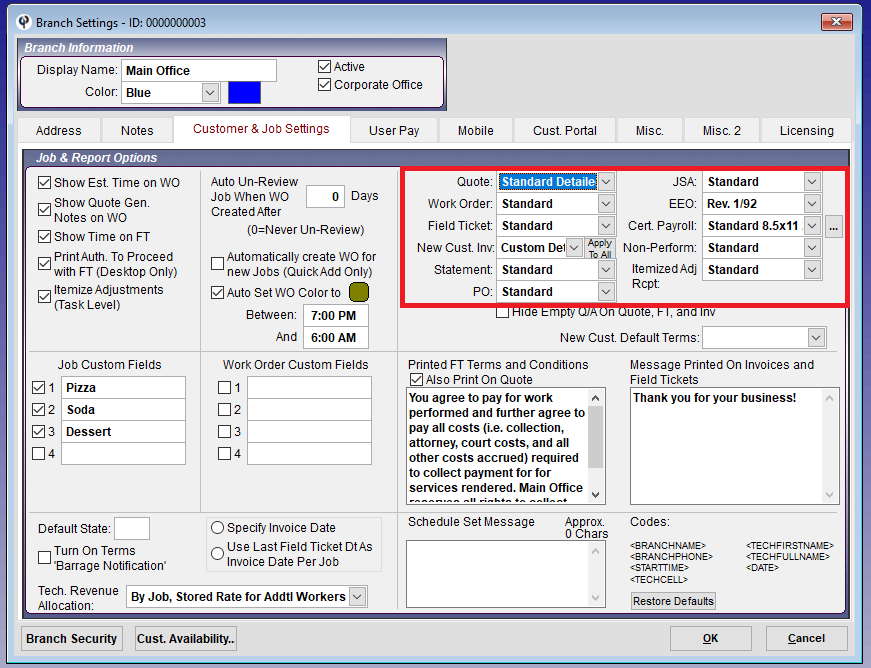
5. Find your report, such as Quote, or Statement, and click the drop-down next to it. Your custom report will most likely be the last option in the list, with the word custom in the name.
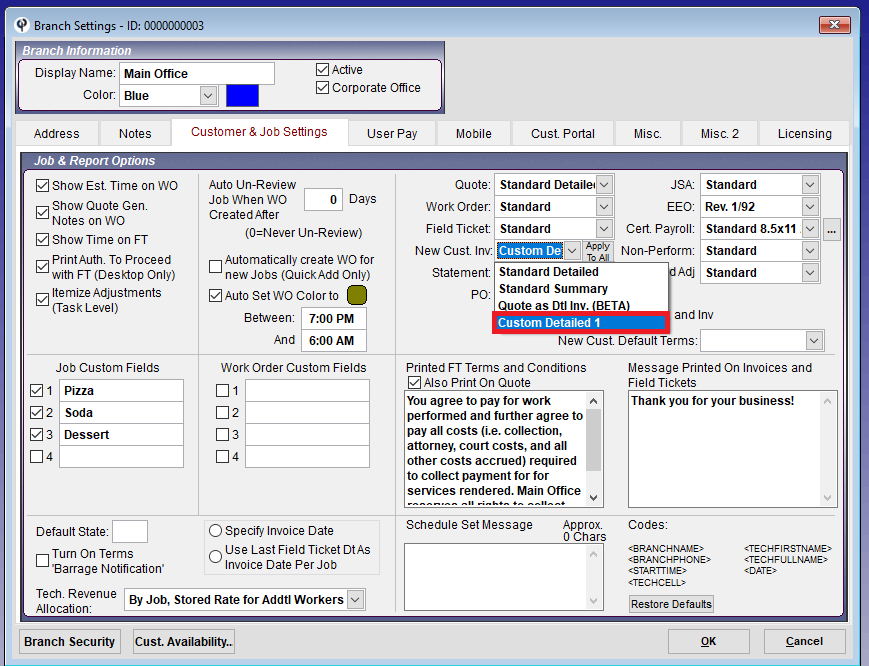
6. Note that for quotes, invoices, and certified payroll. Changing the default only serves to change the template for new quotes, or new jobs (we don't automatically change the look of reports that may have been sent the customer). Read below for tips on changing the template for existing Quotes & Jobs.
- If changing the default Quote template under branch settings, this will only directly affect new quotes. To manually change the Quote template on an existing Quote, open the Quote and switch the report drop down to your new custom template.
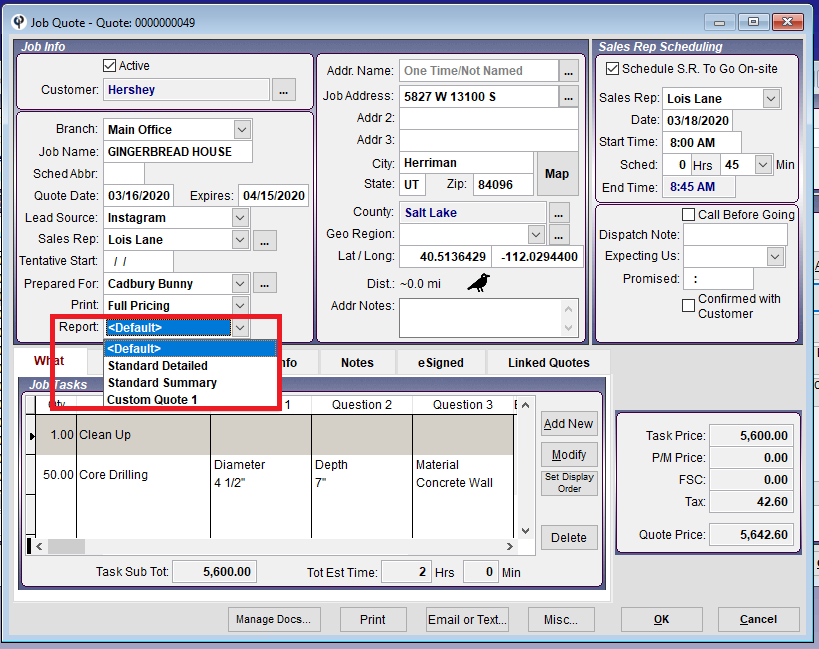
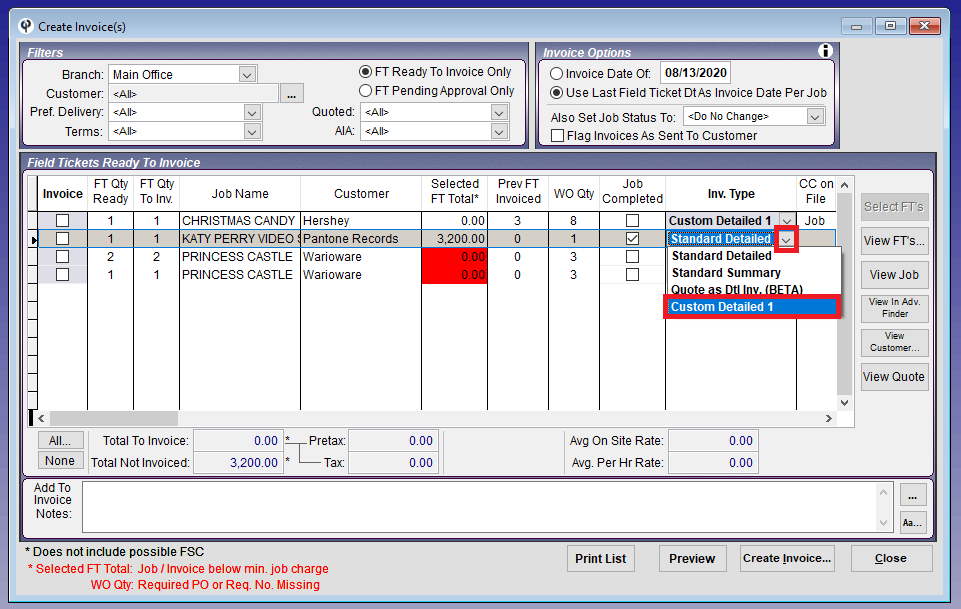
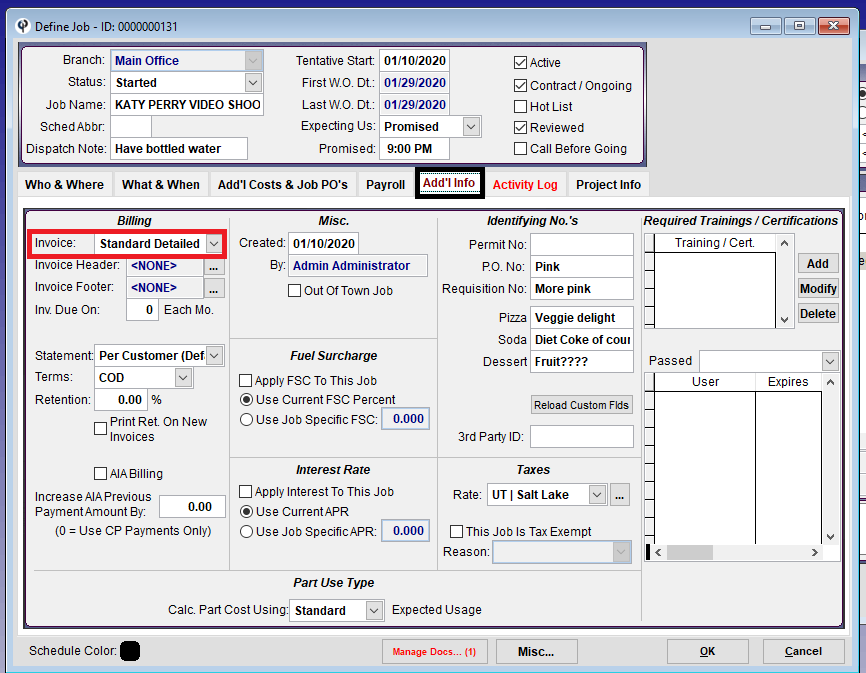
- If changing the default Invoice templates, this will only directly affect new customers. You may also want to click the “Apply to All” button. This will make the new template the default for all existing customers (which means all new jobs will default to the new template). For existing jobs, you may need to manually switch the template at the time of invoicing (seen in the second image below), or you can template on the Job itself (seen in the third image below).
- If changing the default Certified Payroll Template, this will only directly affect new jobs. You may also want to click the elipsis button next to the drop-down, and click Apply to All, which makes this the default template for all existing jobs.
