
Navigate to the Office Security Tab
Go to More -> Users
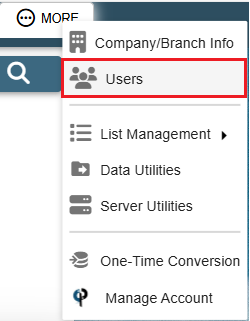
Find your user and then double click on them or click the Ellipsis -> Modify
.png)
Find and click on the Office Security tab.

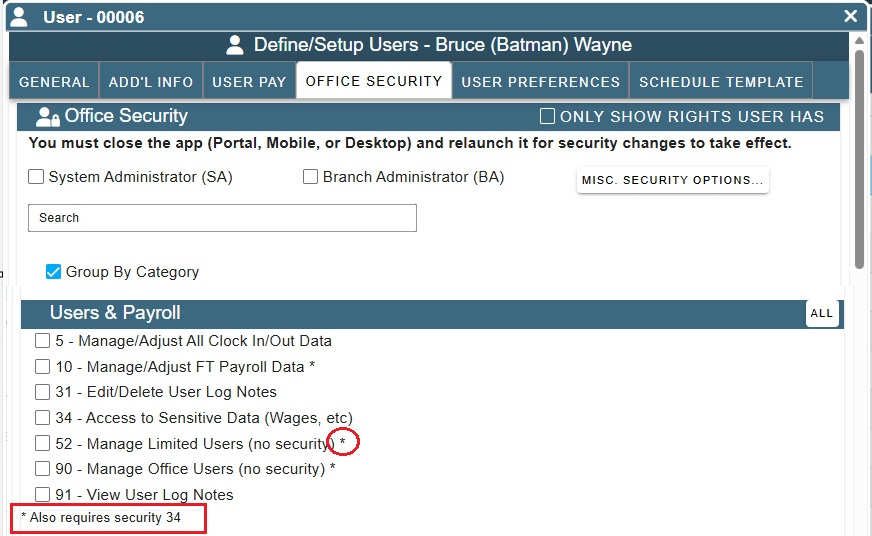
Office Security Table (Top of Page)
'Only Show Rights User Has' allows you to quickly see only the permissions that have already been granted that user.
'System Administrator (SA)' grans access to all security levels for across all branches.
'Branch Administrator (BA)' grants all access to only the assigned branch.
Copy and Paste is a great way to set up a new user.
Copy an existing users security access that matches the new user then 'Paste' on the new user.
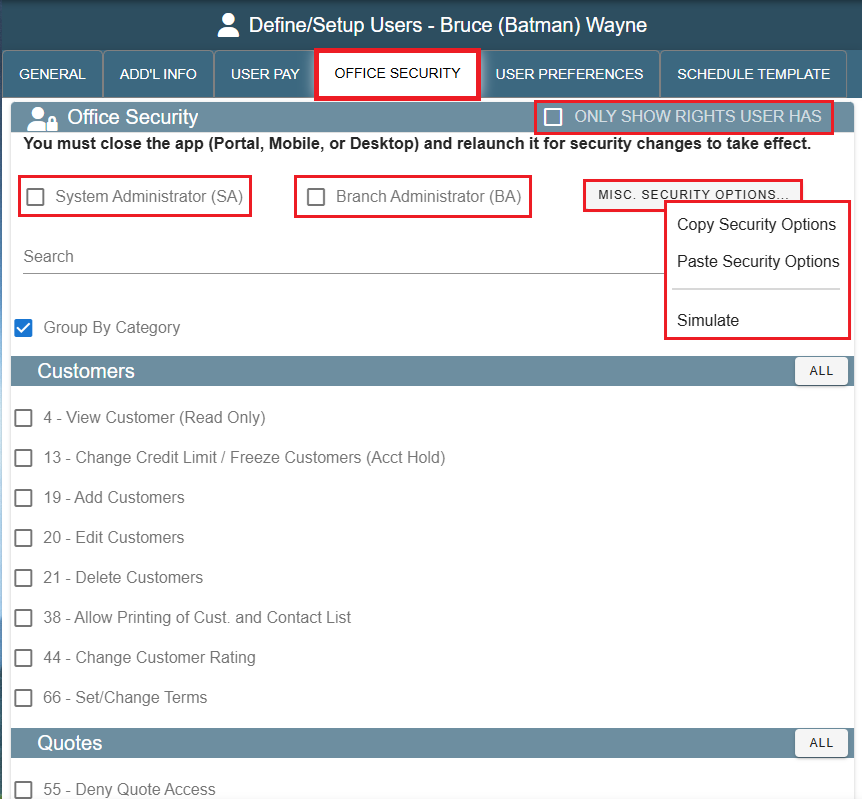
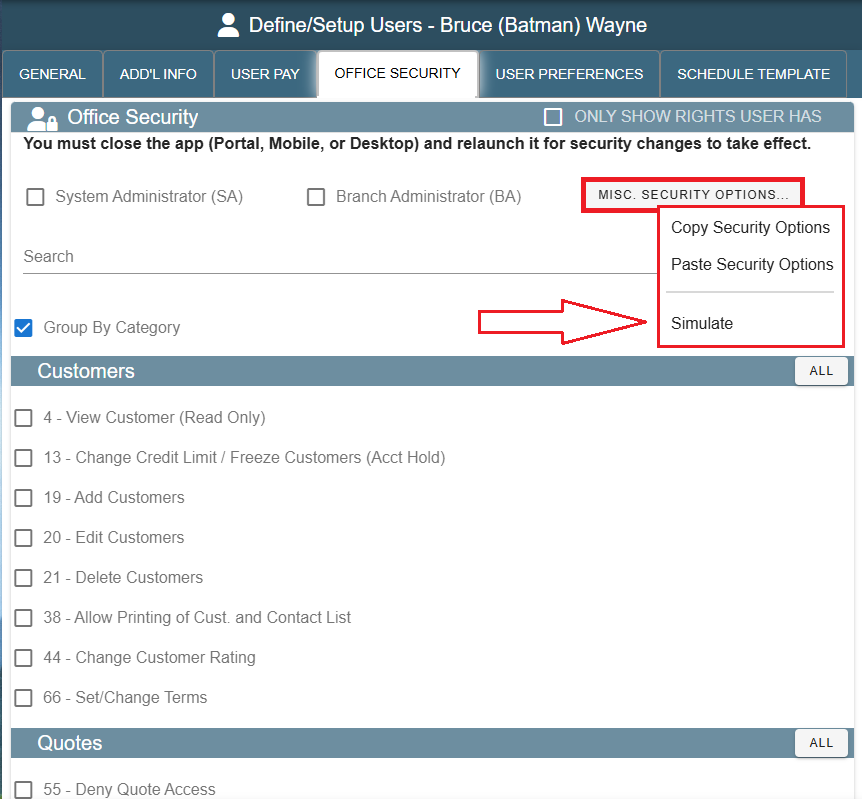
Simulate Button (Preview Security Levels)
To preview what this User will or will not be able to see/alter, click on Misc. Security Options -> Simulate
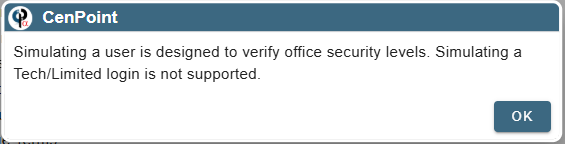
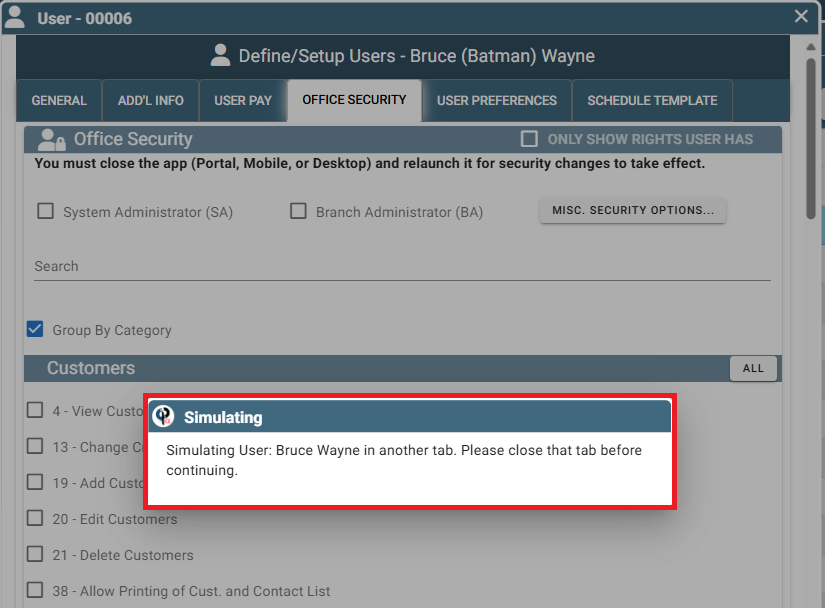
NOTE: Simulate will only work on office workers, it will not work for field techs.
If you do try to simulate a tech user, you will be met with this error.
A window asking if you would like to proceed will appear
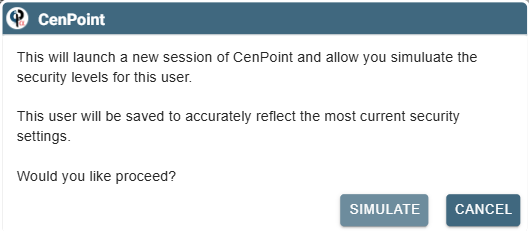
Clicking 'Simulate' will open a new window with CenPoint Portal as if you were logged in as that user.
You can now verify what they can and cannot access.
Examples of things you may wish to prove the user can or cannot see: creating invoices, altering Credit Card Information, Scheduling Techs, Task Prices, etc...
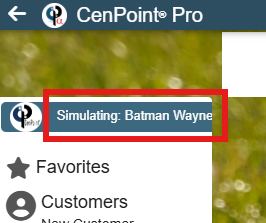
While the 'Simulation' window is open a message like this will be displayed on your original CenPoint window:
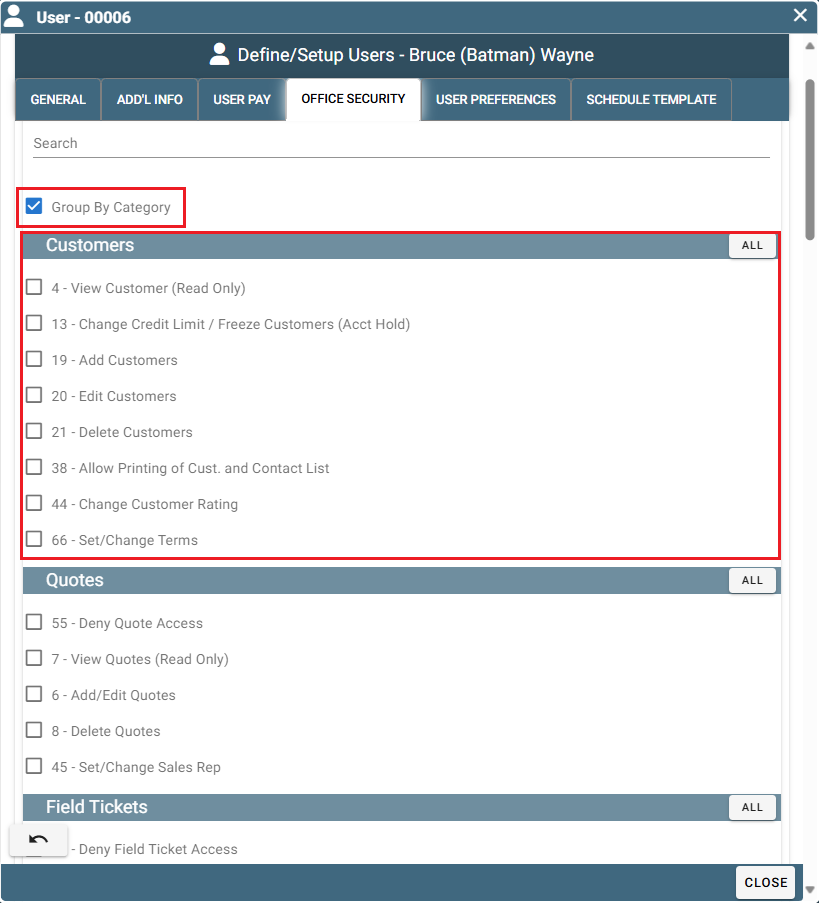
Group By Category Checkbox
To see all related settings for something like Field Tickets or Quotes simply check the box "Group By Category".
Numbered Checkboxes
When the boxes are grouped by category use the 'All' button to quickly select all access needed for a category.

When selecting a check box with an *asterisk also make sure to check the box for the other security levels listed.
Common Office Security Questions
Access to Job Costing Report
- requires option 34 Security, access to sensitive data.
Access/Deny Access to Invoices
- Option 54 Deny A/R Access
Access to Time Card Reports
- Option 9 Manage/Adjust FT timecard data and or Option 10 Manage/Adjust FT Payroll* also requires Option 28 Data Push options
Access for Credit Cards
- Option 11 View/Edit Cust CC Info and Option 19 Add Customers and or 20 Edit Customers
User(Mechanic) that only needs to see the schedule
- Option 49 Scheduler is read only
User(Mechanic) needs to see Schedule, Jobs/WO for scope of work but not pricing
- Option 49 Scheduler read only, Option 60 deny FT access, and Option 2 View Jobs only.
User ability to change Customer Terms:
- Option 66 (under the 'Customers' category, setting name: ‘Set/Change Terms’) or System Admin/Branch Admin to change terms.
Access to Customer Aging Report must have A/R access:
- Option 54 must be unchecked.
If you have any questions, feel free to give us a call at 801-478-6822 extension 4 or send us an email at Support@Cenpoint.com