User Pay Tab
Find the User Pay Tab
Go to More -> Users
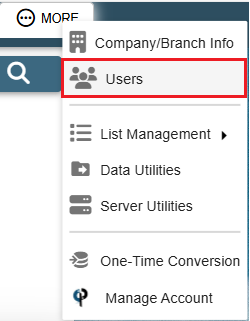
Find your user and then double click on them or click the Ellipsis -> Modify
.png)
Go to the User Pay tab.
.png)
Rate of Pay:
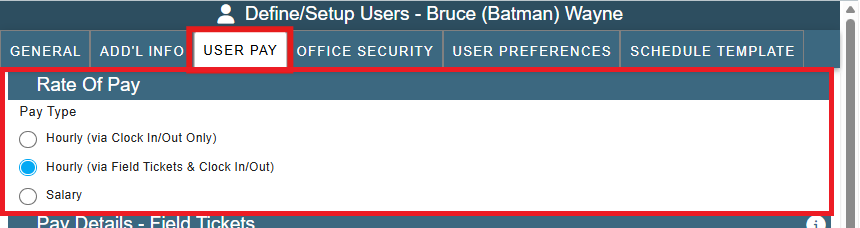
If a user should only be getting paid based on clock in/out, make sure that Hourly (Via Clock In/Out Only) is clicked.
If a user is supposed to be getting their pay based on the FT's (Field Tickets) they worked and they aren't, check to make sure the Hourly (via Field Tickets & Clock In/Out) is checked
If a user's pay is wavering and it should be solid no matter what, make sure that the Salary is clicked.
Pay Details - Field Tickets
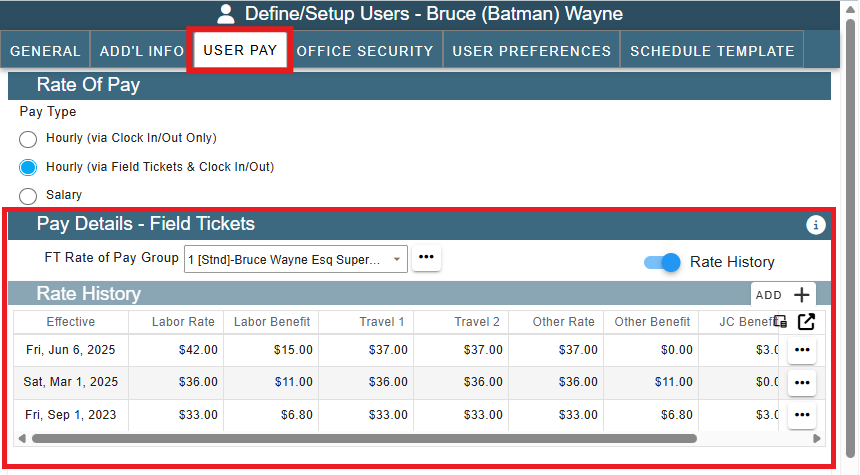
You can assign a pay group to a user that will dictate how their pay is while they are on Field Tickets.
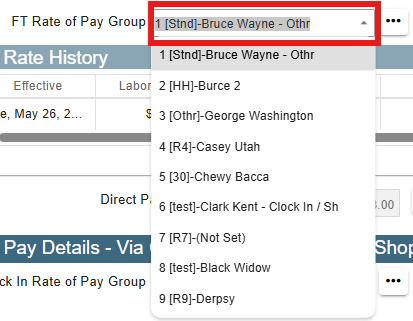
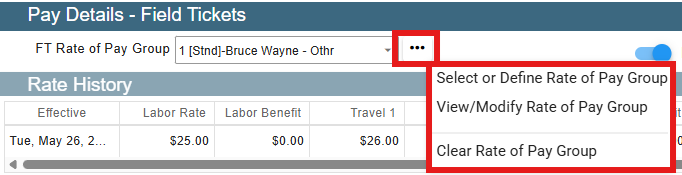
If you need to create or modify a pay group, click the ellipsis next to the drop down. This will give you options to modify or create a new pay group.
For more information on setting up Rate of Pay and how it works see these two links:
1. Extensive Breakdown of everything related to the User Pay Tab including how it connects to Field Tickets: User Pay
2. Explains what a Rate of Pay is and how to apply them to technicians: Rate of Pay
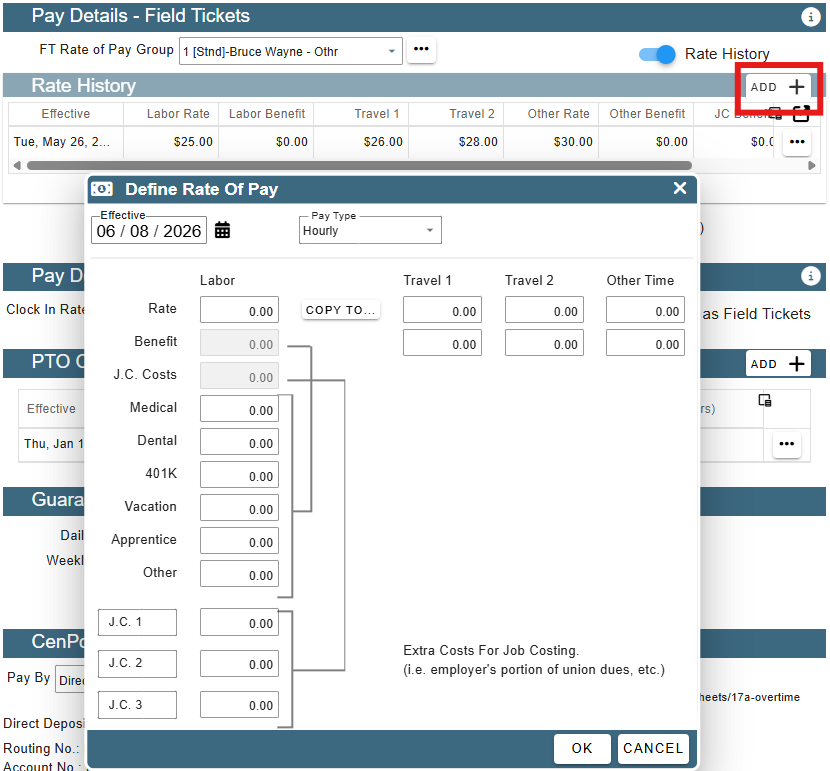
There's also the pay history, which shows how a user has been getting paid over time. If you want to add a new pay rate, go ahead and click add and define how they are being paid manually, no Pay Groups involved!
* You should always add a new pay rate rather than update an existing one. Adding a new rate preserves the full rate history. If you replace an existing pay rate by updating the amount and effective date, the previous rate information will be lost, and you will no longer have an accurate pay history.
In short, always add a new record to maintain the history instead of updating an existing record.
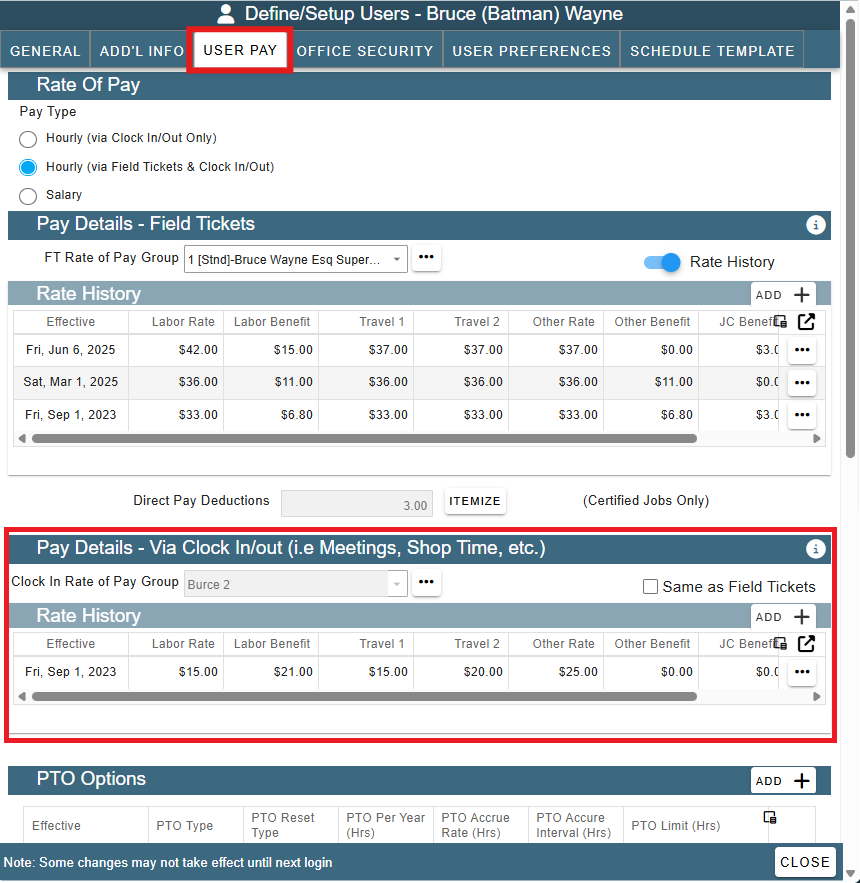
Pay Details- Via Clock In/out
This section is for how the user is getting paid for things like shop time and office work, meetings and such. You can leave it the same as the Field Tickets or you can set a different pay group by unchecking the "Same as Field Tickets" box and adding a Clock in/out pay rate that is different from the amount your technician is being paid on the Field Ticket.
PTO Options
This is where you will define the PTO if you offer it. If it is a yearly reset, how much the user earns or how the accrue it.

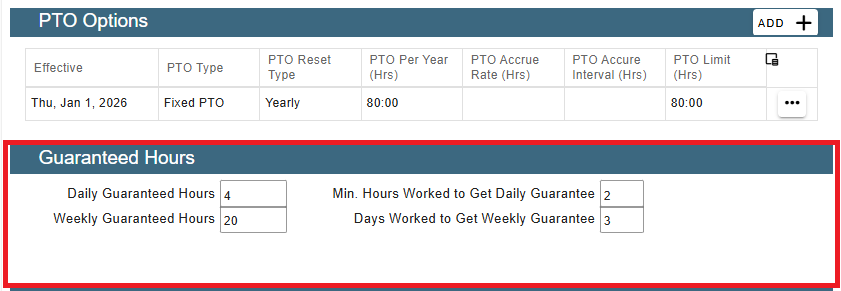
Guaranteed Hours
If you have users that get guaranteed hours, then the guaranteed Hours is where you would go to set that up.
For more information on Guaranteed Hours use the following link: https://help.cenpoint.com/docs/guaranteed-hours
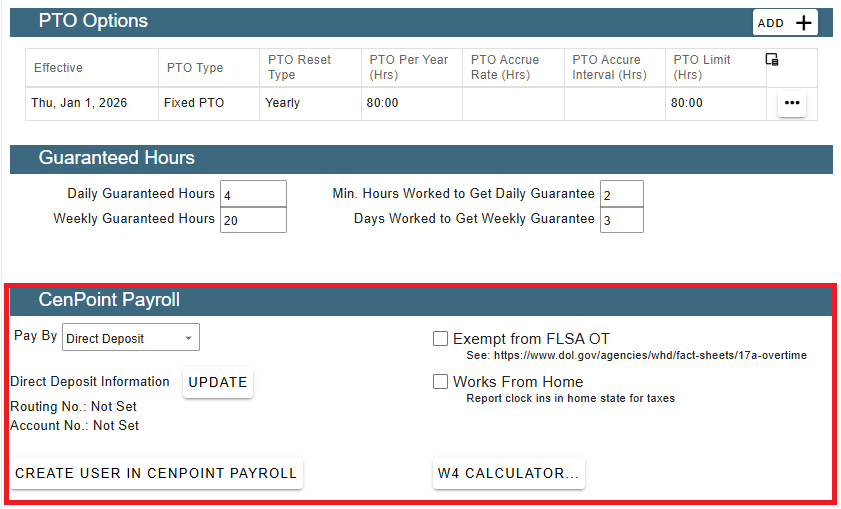
CenPoint Payroll
This is where you set up the pay information for the user, including the tax information and payment method.
For more information on CenPoint Payroll use the following link: https://help.cenpoint.com/docs/everee-payroll-integration-set-up
Benefits / Deductions
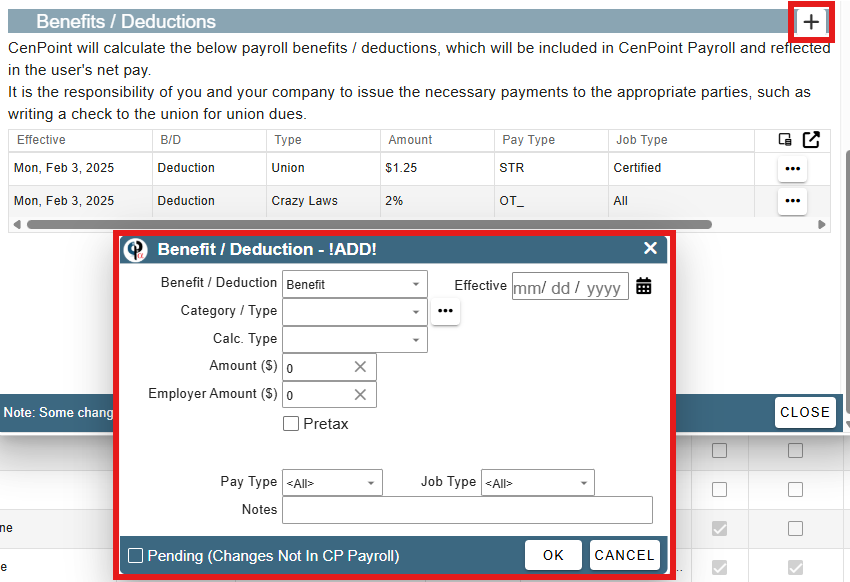
If a user has deductions or benefits that they earn while working at your company, this is where it would be tracked. Deductions for Unions or even wage garnishments such as court mandated child support, would be done here.
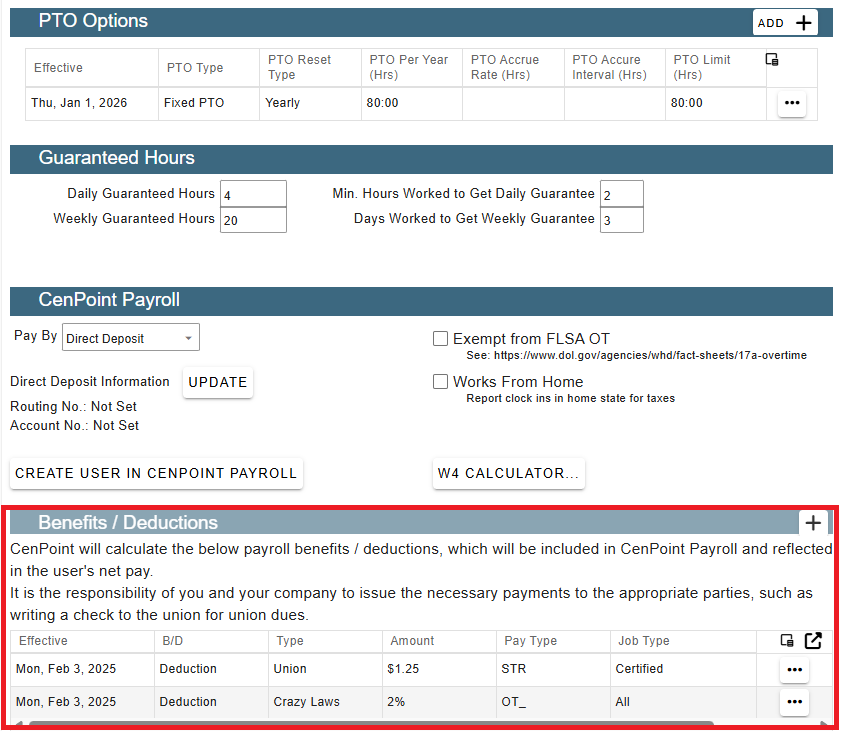
To add a deduction or benefit, click the plus icon and it will open the following menu. Fill it out with the correct type and what types of pay or job that it applies to.