2. How to Pre-Authorize a CC for a Job?
3. Pre-Authorization Report
4. Charging the Credit Card.
1. What is a Pre-Authorization?
Preauthorization allows you to reserve/verify credit card funds, before charging the card. A great example of this in daily life is paying for gasoline, where a Pre-Authorization of $100 dollars can often be seen before the actual charge goes through. See https://en.wikipedia.org/wiki/Authorization_hold for more info.
2. How to Pre-Authorize a CC for a Job?
2a. There are 3 buttons that allow you to pre-authorize a CC for a Job.
i. From the Quick Add Job Screen, utilize the "Pre-Auth. CC After Save" checkbox, and click "OK".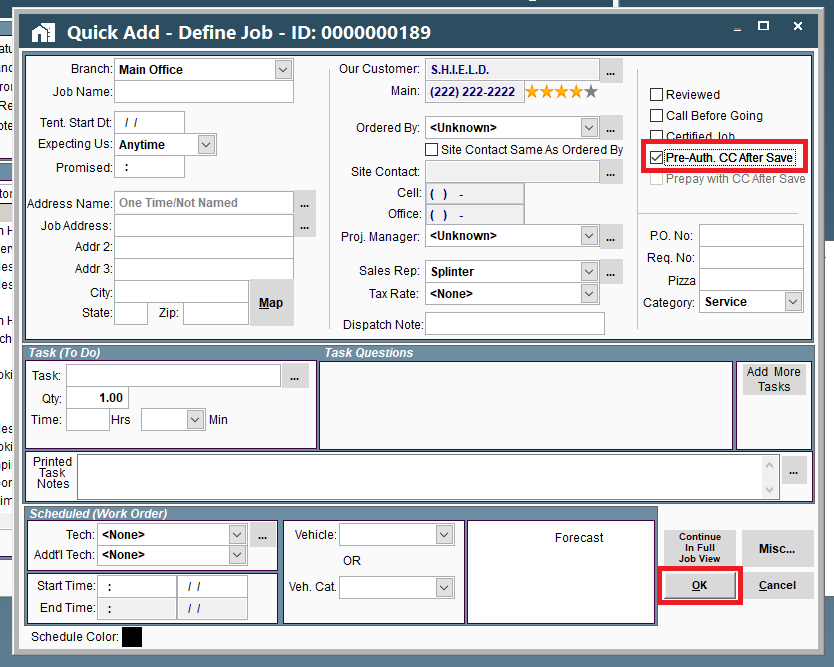
ii. Modify the Job > Click the “Misc” button > “Pre-Authorize CC”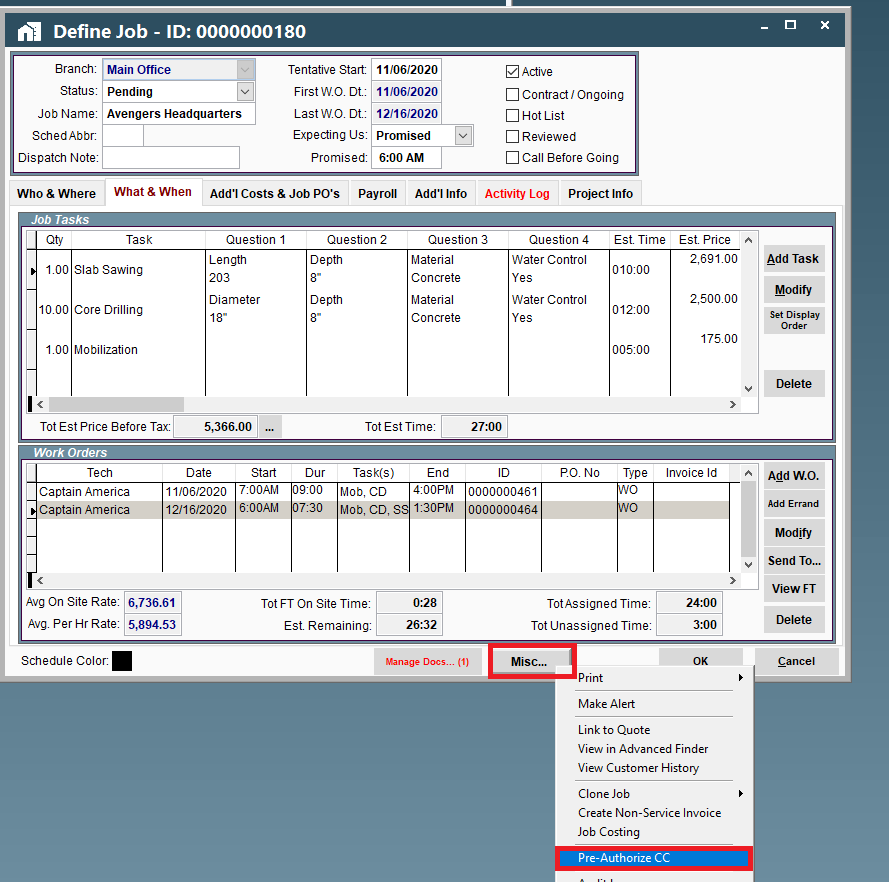
iii. Modify the Job > Click the ellipsis next to the Estimated Price > “Pre-Authorize CC”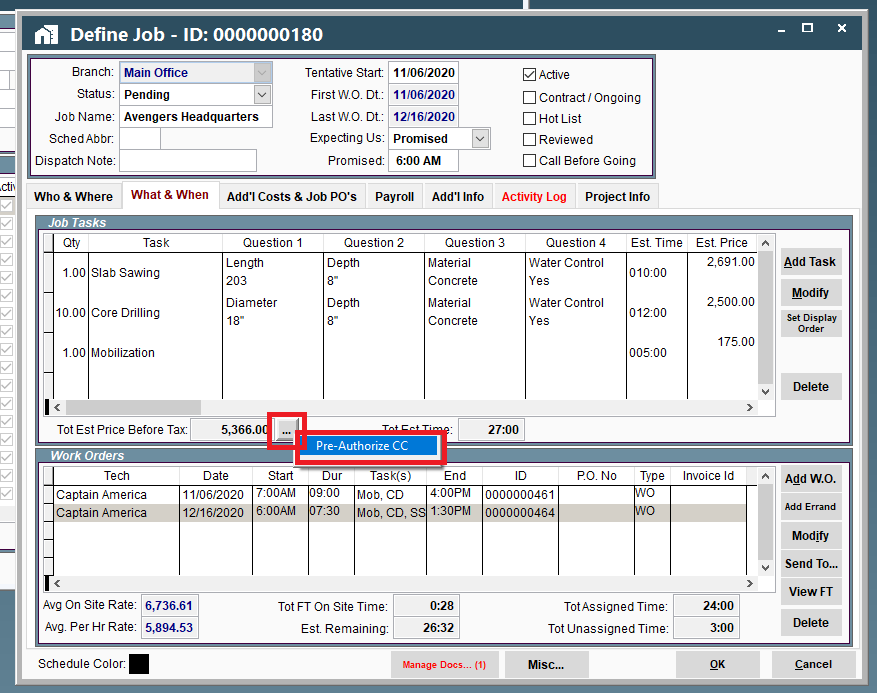
2b. Once you have clicked pre-authorize, your browser will open to this window.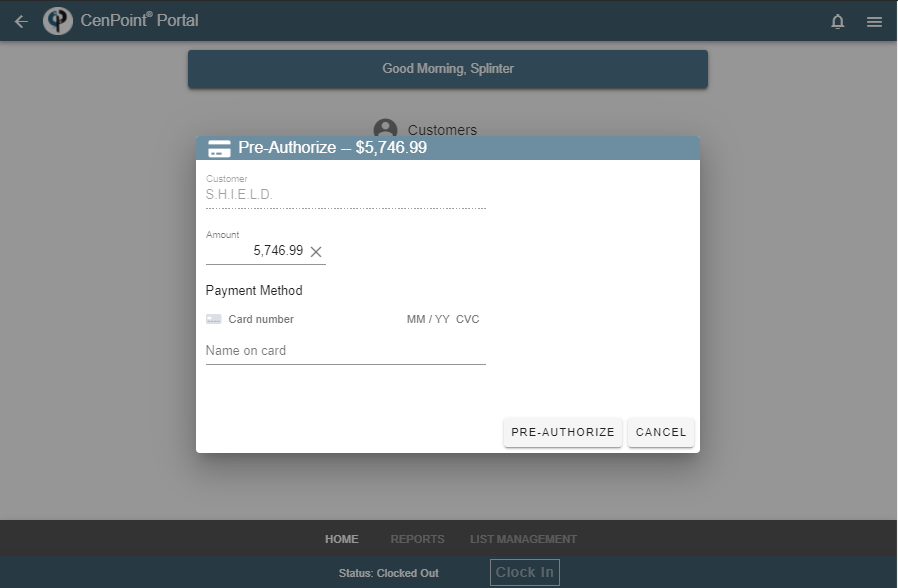
2c. The amount will default to the total estimated price + tax, but you can type in any amount.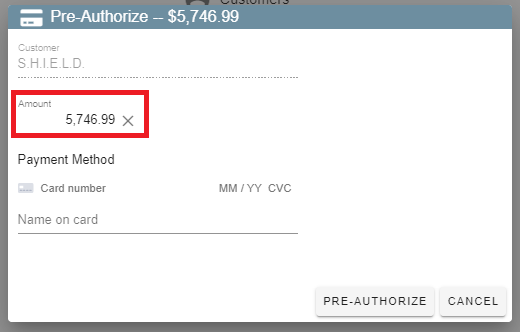
2d. Next, enter the credit card information, and click “Pre-Authorize”.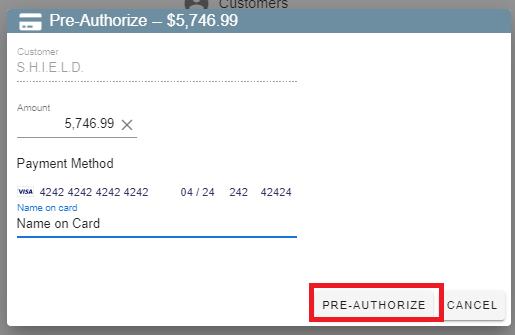
2e. Congratulations, you have Pre-Authorized the CC for the Job.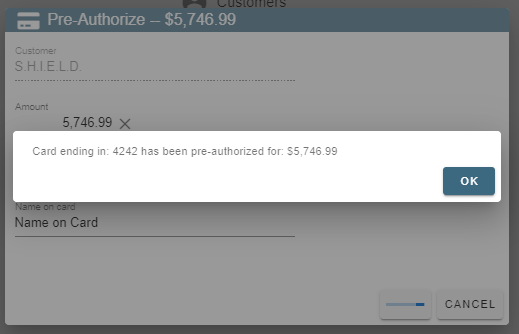
3. Pre-Authorization CC Report
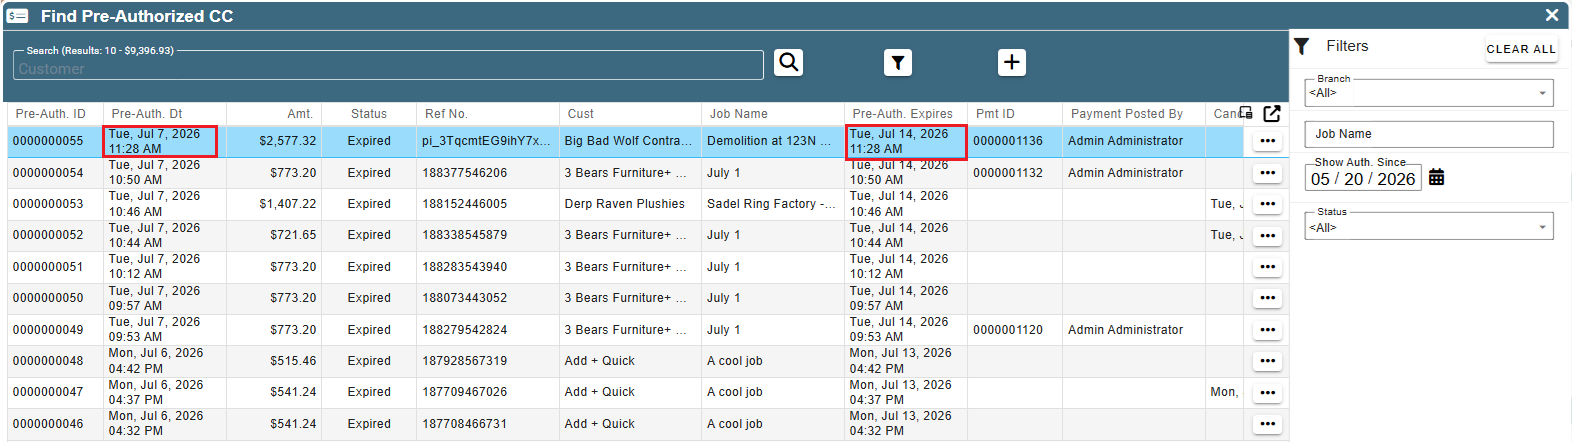
3a. The Pre-Authorized CC report allows us to view Pre-Authorizations, quickly launch the payment screen to apply them, or cancel them altogether.
3b. Go to A/R > Payments > Pre-Authorized CC.
3c. Note the Pre-Authorization expiration date (7 days for most credit card merchants), and the ability to cancel a Pre-Authorization.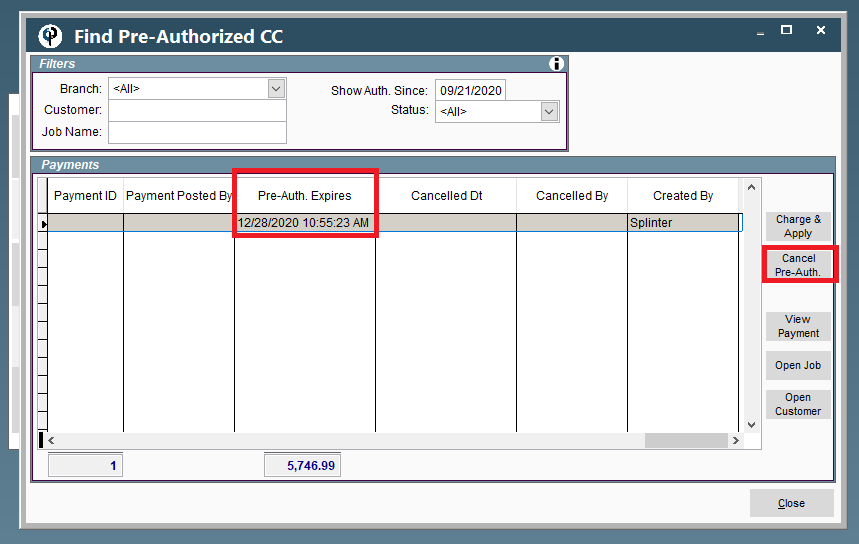
4. Charging the Credit Card
There are 4 ways to charge the credit card that was Pre-Authorized.
4a. If you attempt to enter the make payment screen (for an Invoice tied to the preauthorized Job), CenPoint will ask if you would like to utilize the Pre-Authorized amount.
i. Start either by clicking “Enter Payments” on the homepage and selecting a customer, or by clicking "Make Payment" > "All Other Payment Types" on the find Invoice screen.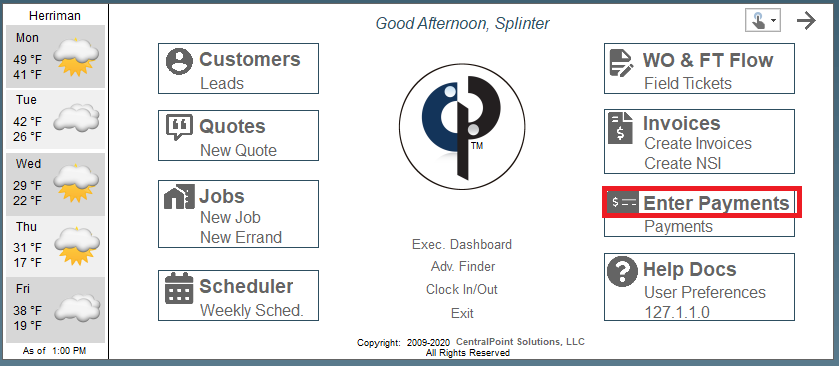
.png)
ii. Click “Apply in Browser”.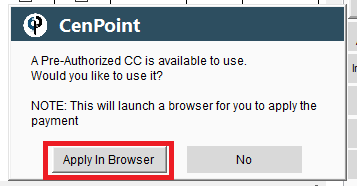
iii. Your default browser will open to this page, where you can apply / actually charge the pre-authorized amount.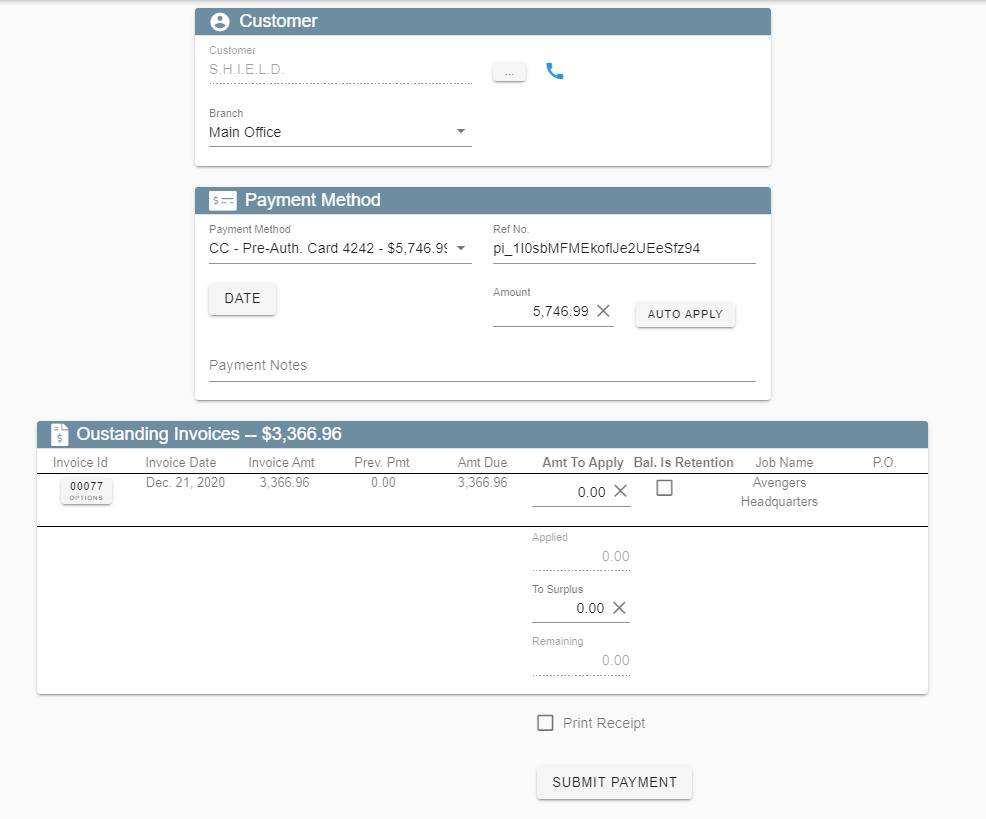
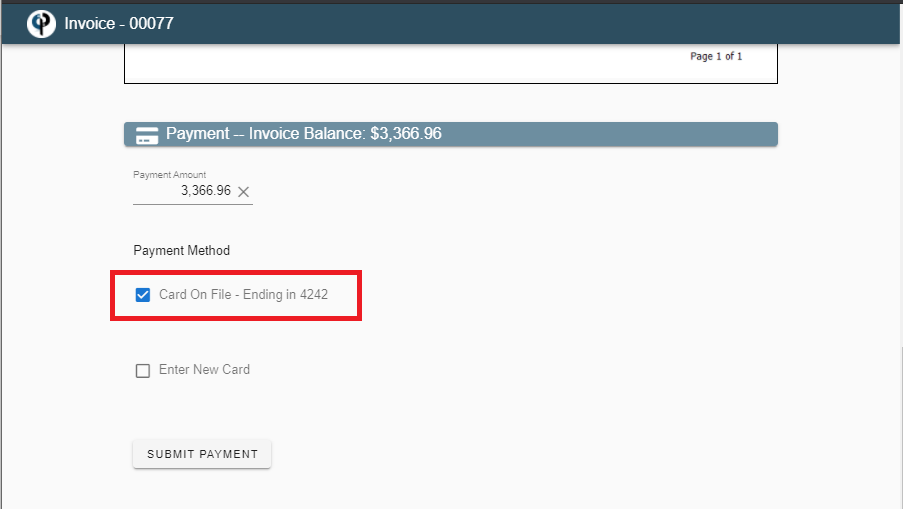
4b. If you send the customer a link to view and pay their Invoice (for a Job that has been preauthorized), they will have the option to charge the card on file.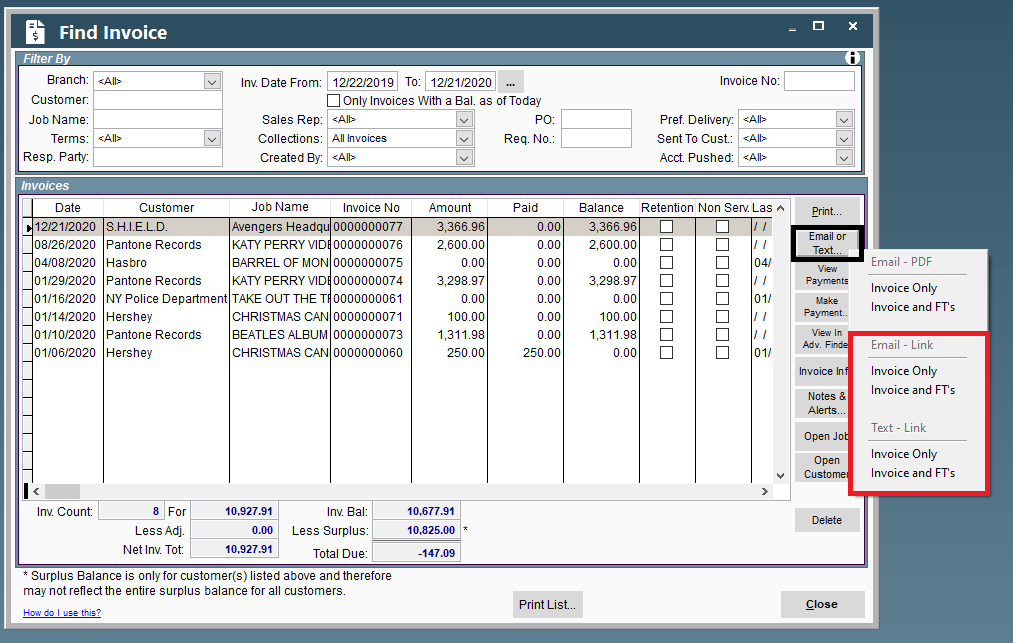
4c. If this is a COD Job, the technician will have the option to collect payment via the card on file, just like when you send the customer a link. See COD Payments to learn more. 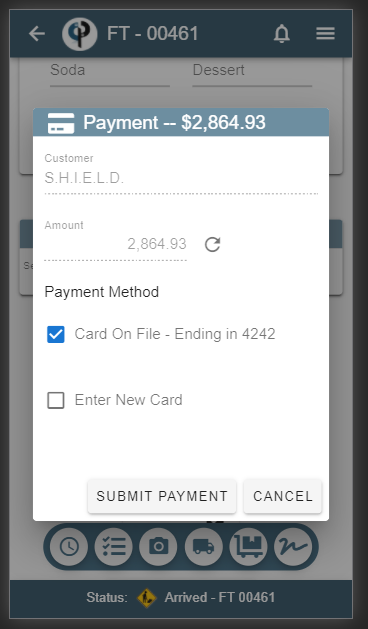
4d. When you mark a Field Ticket as ready for invoicing and click okay (And there is only one field ticket for the Job with Pre-Authorized CC) you will be asked if you want to create and pay the Invoice (with the pre-authorized CC), all with one click!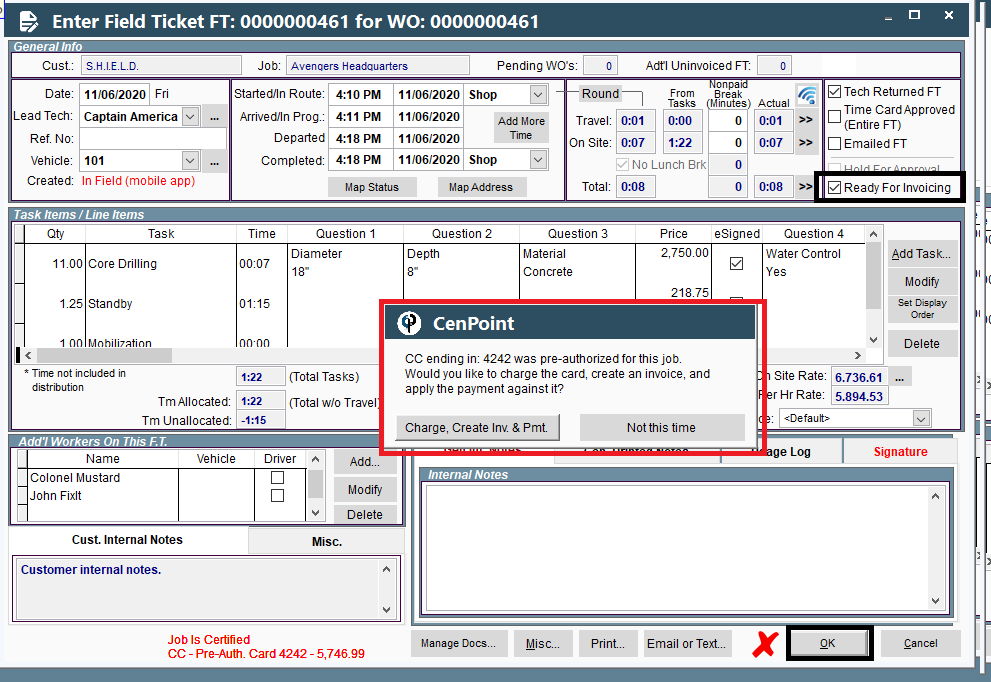
5. Preauthorized CC on Mobile
When adding a new job on the mobile app in Quick Add mode check the Pre-Auth CC After Save
Once all the information on the job is filled out click OK
.jpg)
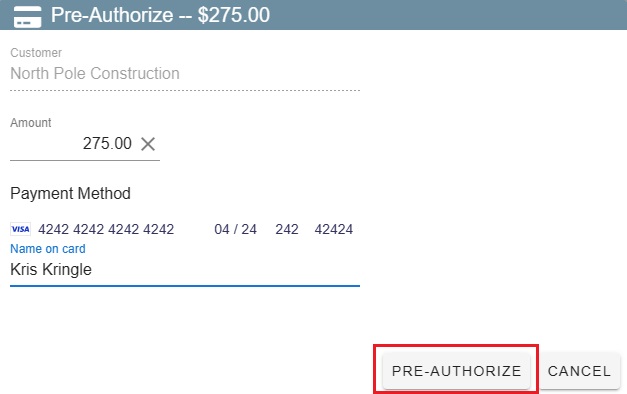
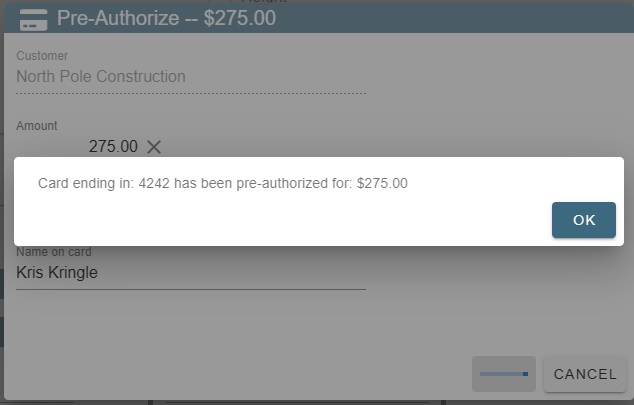
A Pre-Authorization window will open. Fill in the information and click Pre-Authorize.
6. Apply the Pre-Authorization to an invoice on the Mobile App
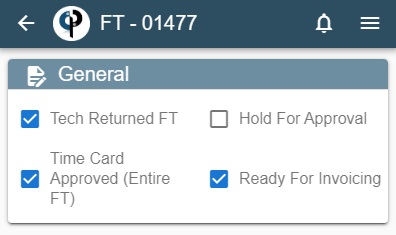
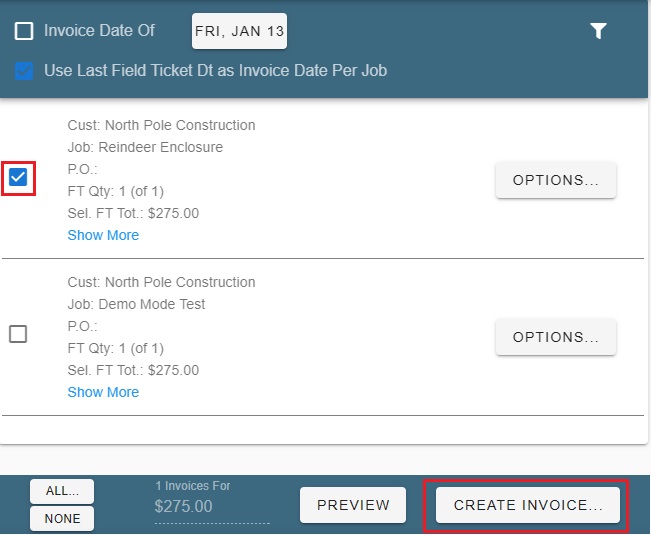
Mark Field Ticket(s) ready to invoice.
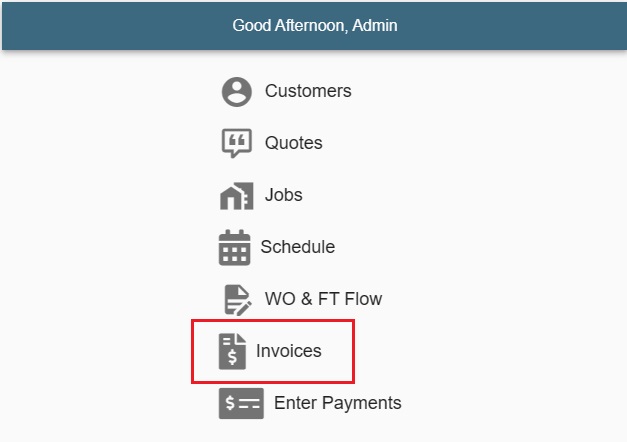
Go to Invoice on the home screen.
Click the + to create a new invoice for the Field Ticket(s)

Select the Field Ticket(s) and click Create Invoice.
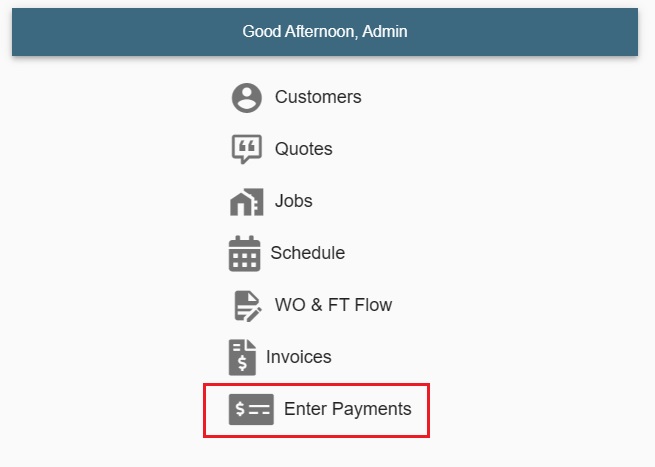
Go to Enter Payments and Select the customer.
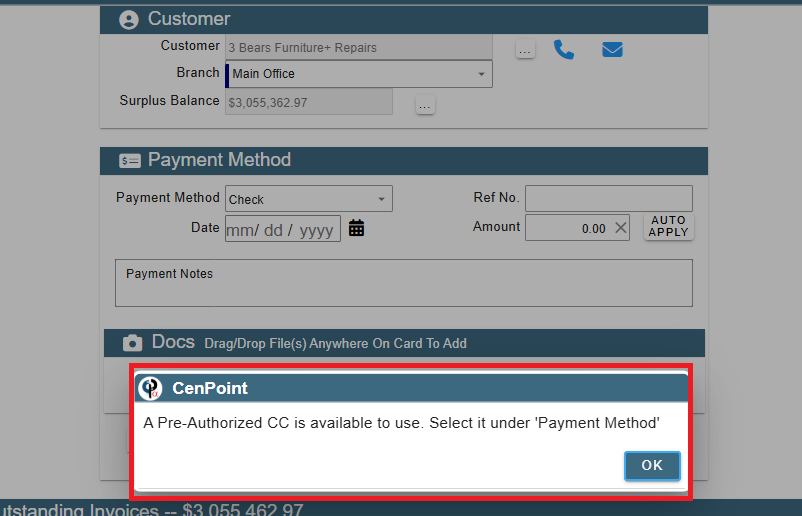
You should be prompted that a Pre-Authorization is available.

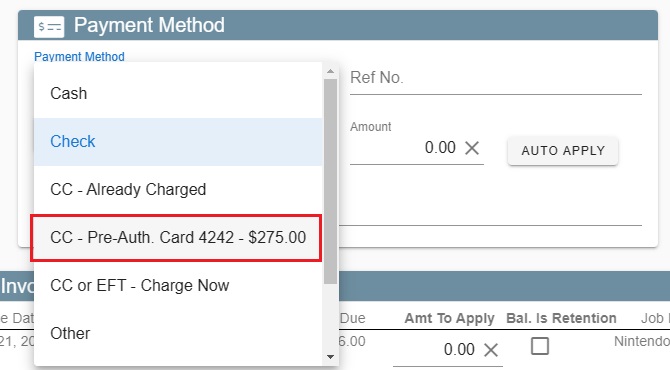
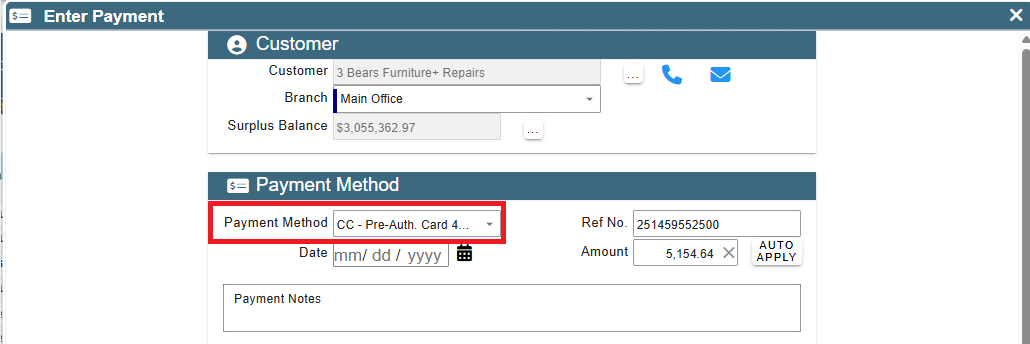
Select CC-Pre-Auth Card in the Payment Method drop down list.
Once CC-Pre-Auth is selected for the Payment Method the payment information should fill in.
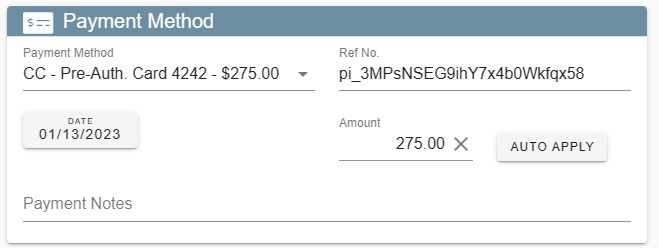
Click Auto Apply and it should apply the Pre-Auth to the correct invoice, or you may manually apply the Pre-Auth
to the correct invoice.
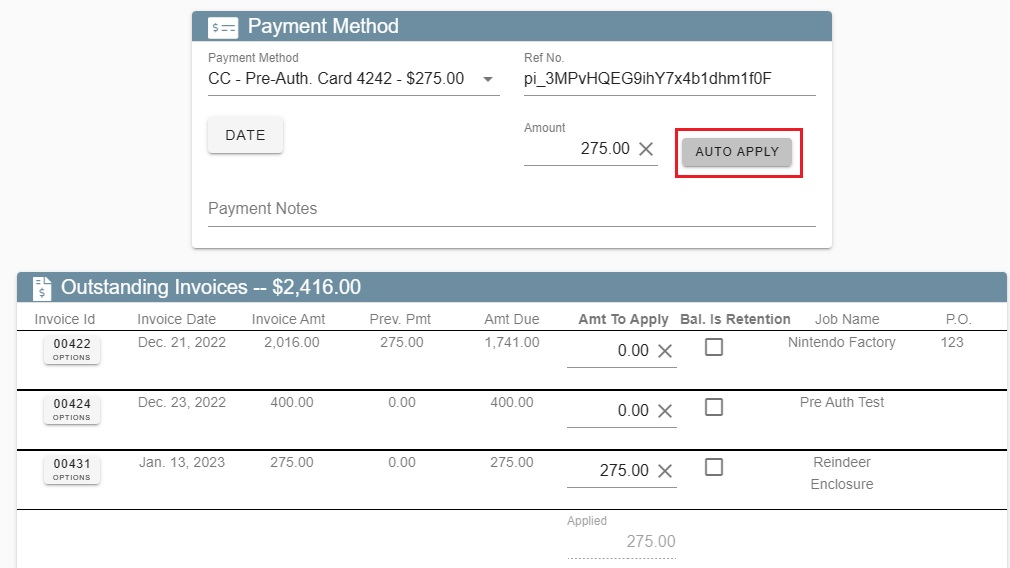
How to apply a Pre-Auth with a convivence fee to an invoice
Assuming you already have a Pre -Auth ready to go against an invoice you should see this message when you go to Make Payments from the Invoice screen
Select Pre-Auth from the payment method
In this case our invoice is $5000.00 the Pre -Auth amount is 5,154.64 as a 3% Concivene Fee was added when the Pre-Auth was originally done.
Apply the $5,000.00 to the invoice and the 3% - 154.64 will go into the 'Remaining'
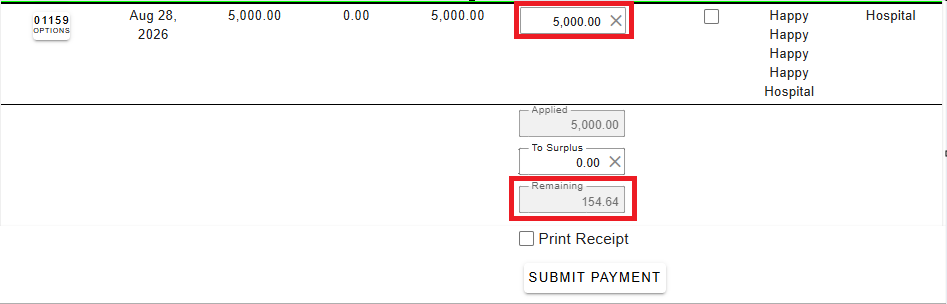
Then Click 'Submit Payment'
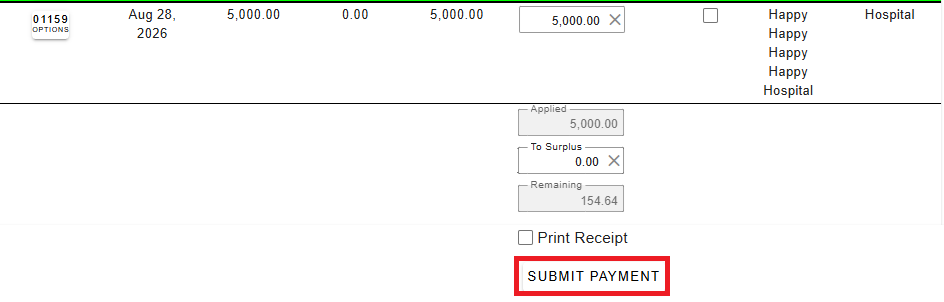
You will then be prompted on how to distribute the remaining amount, either Add as Fee to Invoice or to Surplus.
In this case we want to Add as Fee to Invoie
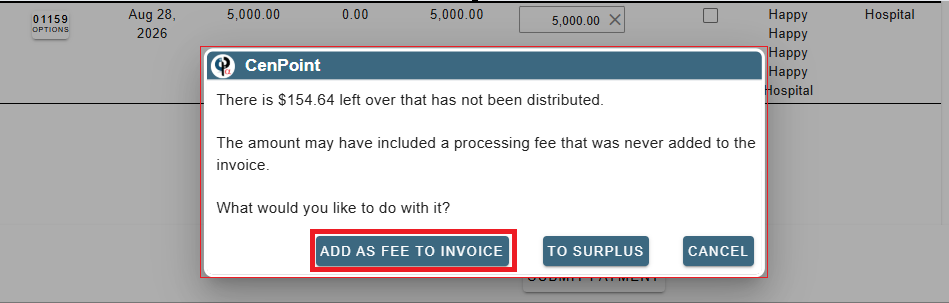
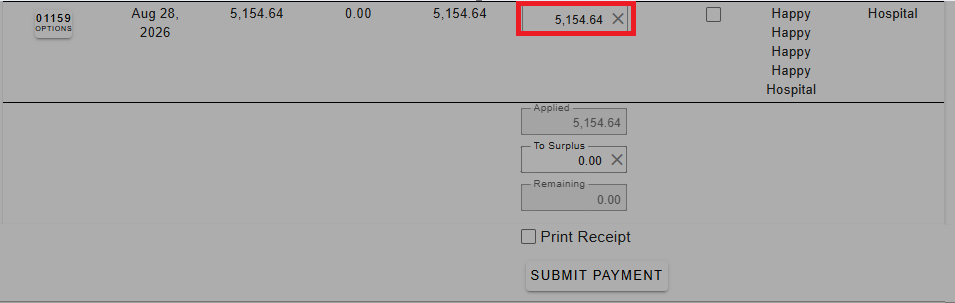
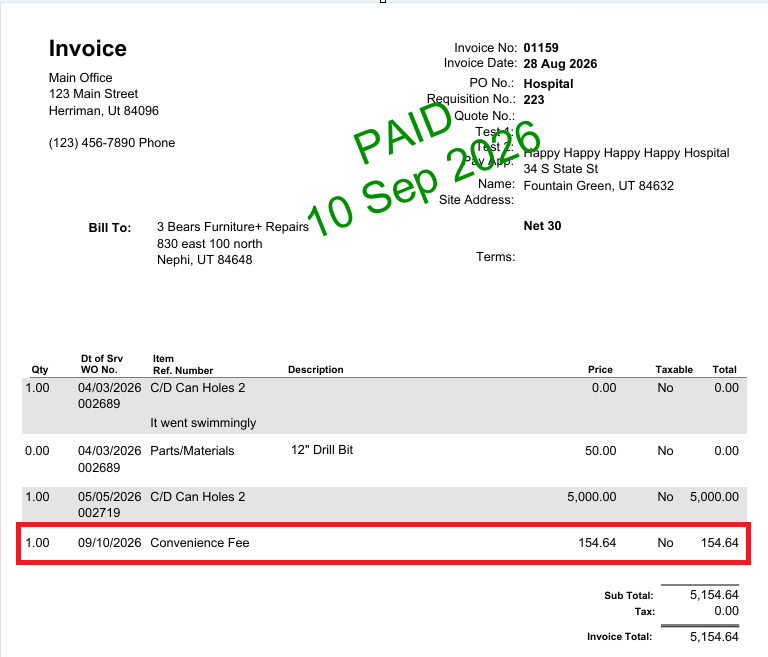
Adding the fee to the invoice updates the invoice amount to include the fee allowing you to fully distribute the payment against that invoice.
FAQ
Error(connectivity) when trying to use Pre-Authorization and now you can't use it.
You’ll want to double check in Clover/Stripe but the pre-auth was probably charged, but did not record the payment in CenPoint. You’ll want to enter ‘another’ payment and just choose ‘CC – Already Charged’ as the source and then enter the payment amount, choose the invoice, etc. so you show it as being paid if it really did charge the pre-auth.
My pre-authorization is missing on the Payment screen?
In most cases this is because the pre auth has expired. A pre auth is only good for 7 days. To check when or if a pre auth has expired go to A/R ->Payments-> Pre Authorized CC
On this screen you can see when the pre auth was charged and the status of the pre auth.