This article covers the Printed Check Report and changing check numbers.
To get to the printed check report, go to CP Books → Essentials → Checks → Printed Check Report.
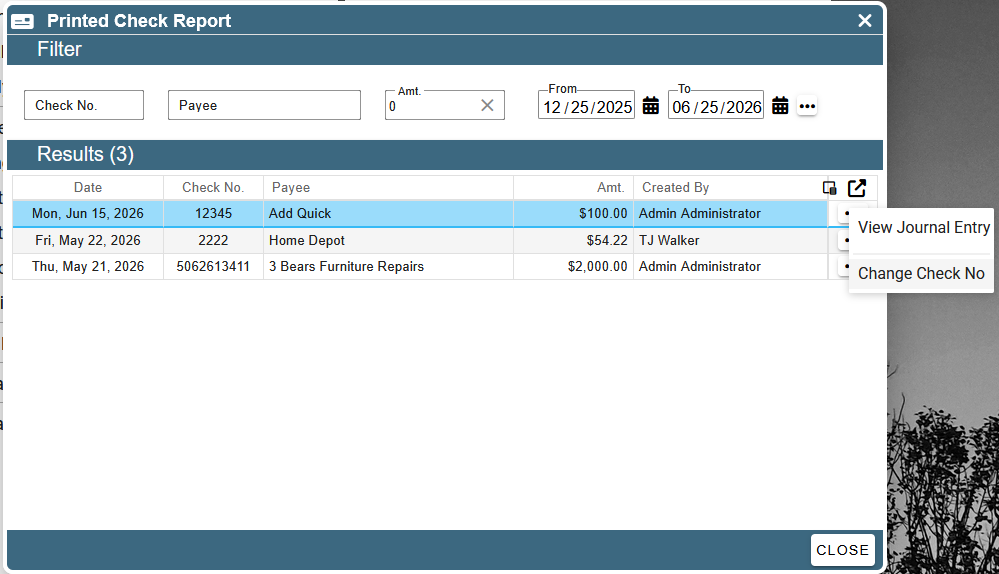
By default, this screen loads printed checks for the last month. To change this, modify the dates in the date picker at the top.
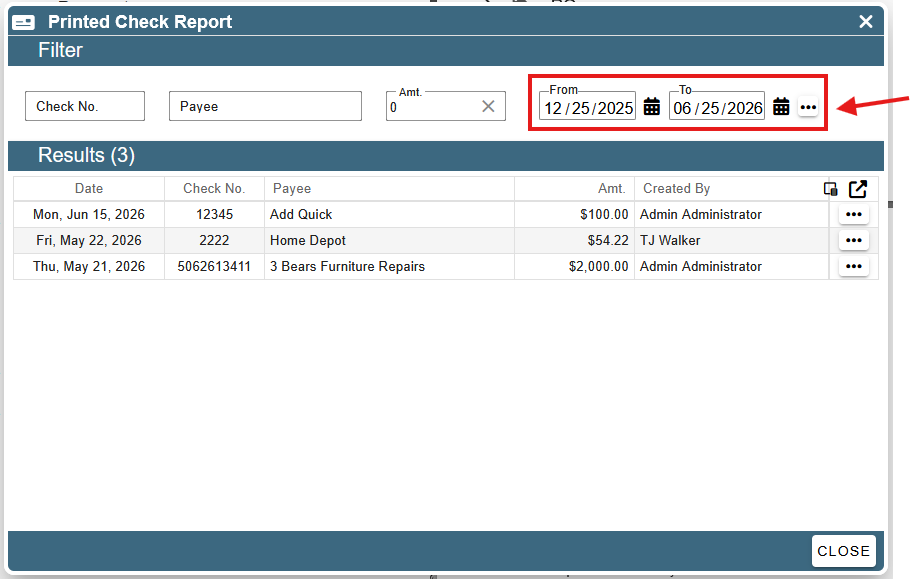
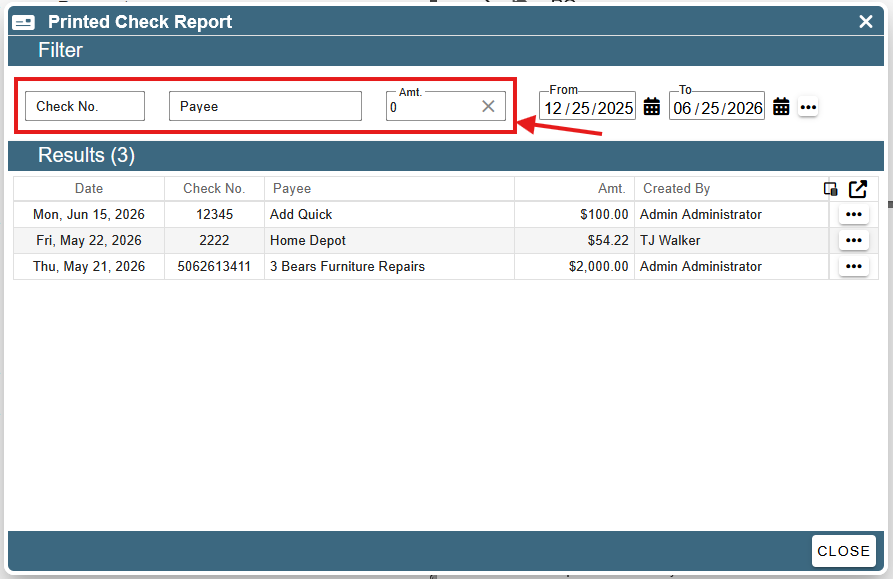
You may also filter checks by their Check No, Payee, or Amount by using the filter fields at the top of the report.
Viewing a Journal Entry
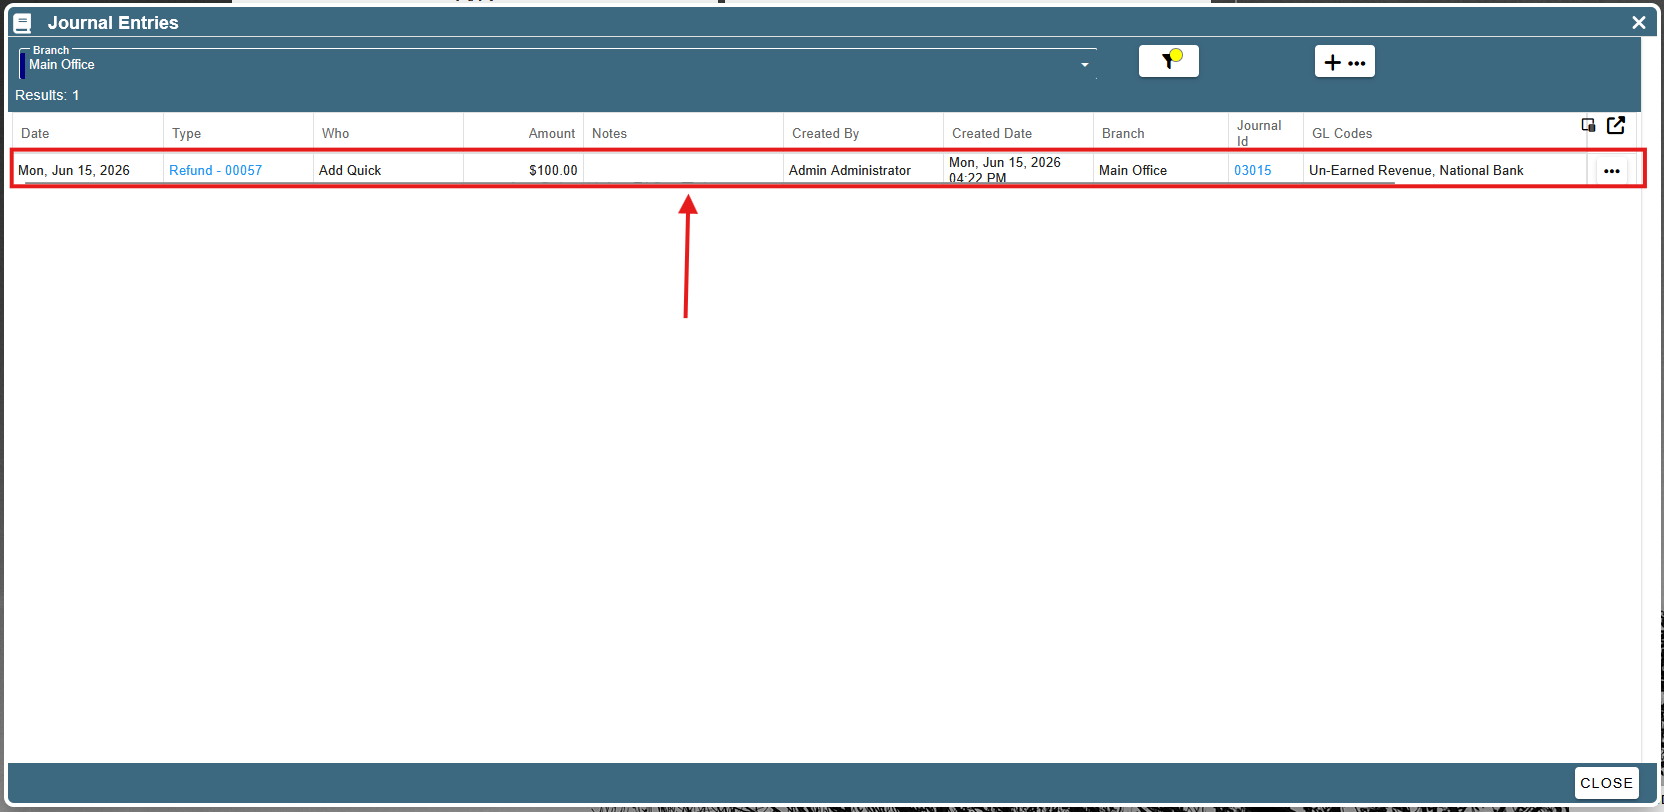
To view a printed check’s journal entry, click the ellipses at the end of a check’s row and select “View Journal Entry”. This will load the '“Journal Entries” screen.

The “Journal Entries” screen now shows the journal entry associated with the selected check. Double-click on this journal entry to load it.
Changing a Check Number
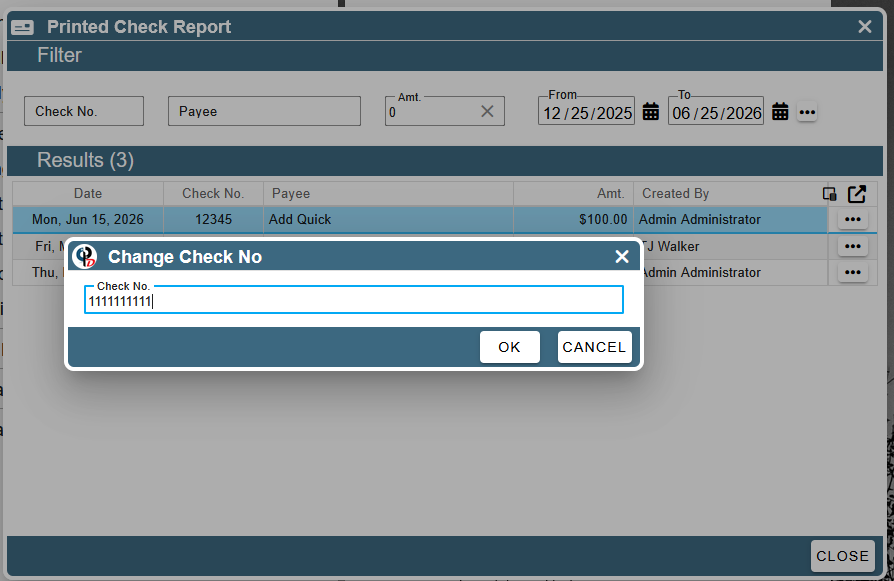
To change a check number, click the ellipses at the end of a check’s row and select “Change Check No.”
In the dialog popup, the previous check number is shown. Change the check number and press “OK” to save it.
After clicking “OK”, the updated check number shows on the check.
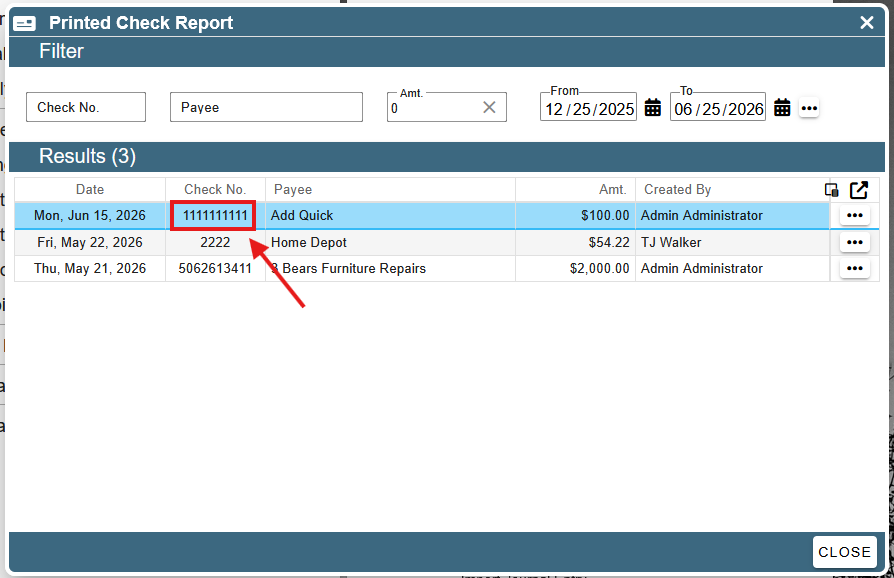
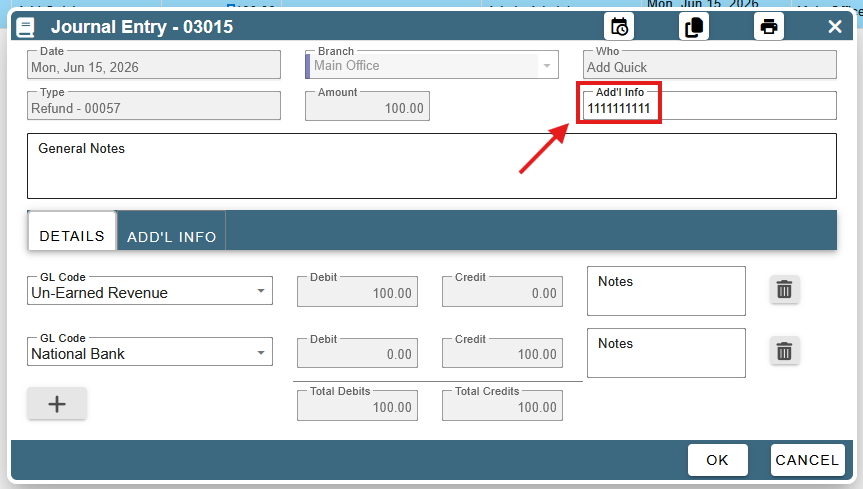
The updated check number is also reflected on the check’s journal entry.