
This article will cover the simplest way to add a job in CenPoint on Desktop and Portal
SS Quick Add on Desktop
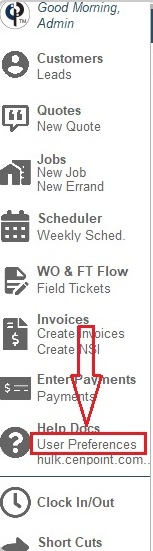
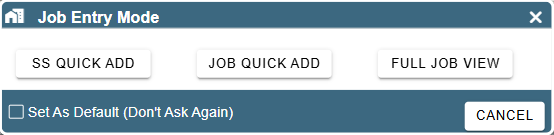
Alter Job Preferences to “SS Quick Add” on Desktop
User Preferences → Job Add Mode → Select Super Simple (SS) Quick Add → Click OK
.png)
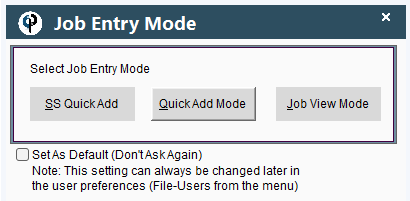
Tip: If you leave your Job Add Mode on Prompt it will always give you the choice between SS Quick Add, Job Quick Add, and Full Job View Mode.
When set to Prompt this popup would appear every time you click New Job.
This saves you the hassle of swapping back and forth in the settings whenever you want to change which job entry mode you want to use.
Create a Job in a SS Quick Way on Desktop
This is the quickest and simplest way to add a job.
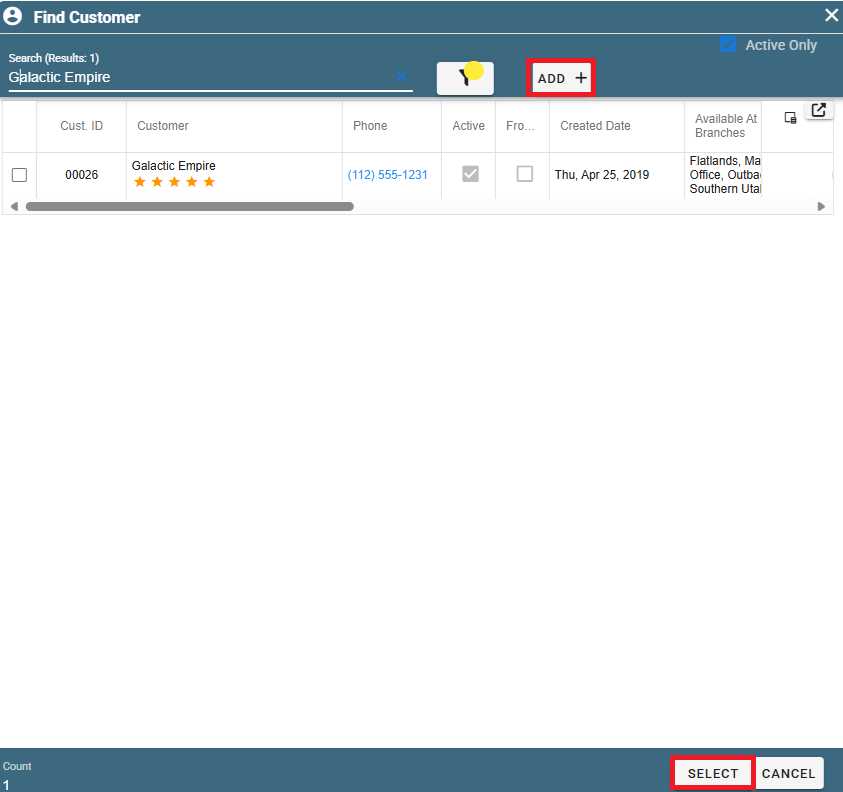
Click on New Job on your main menu. The customer window will pop up.
Search for the customer you are after. If you need you may click Add New to create a new customer or Modify to alter an existing customer’s information.
Once you’ve found your customer click Select to go to the Job screen.
.png)
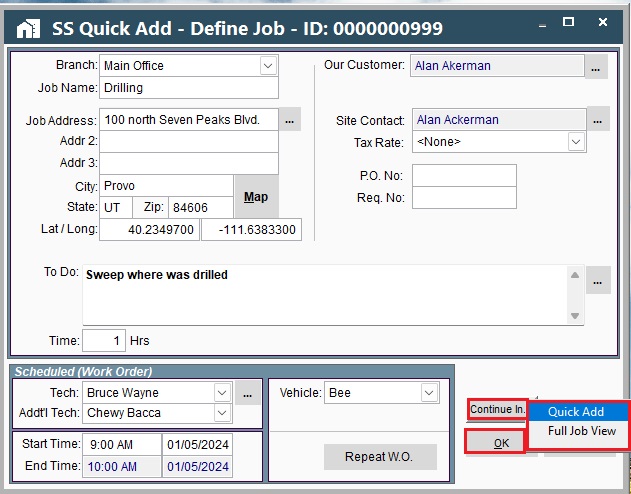
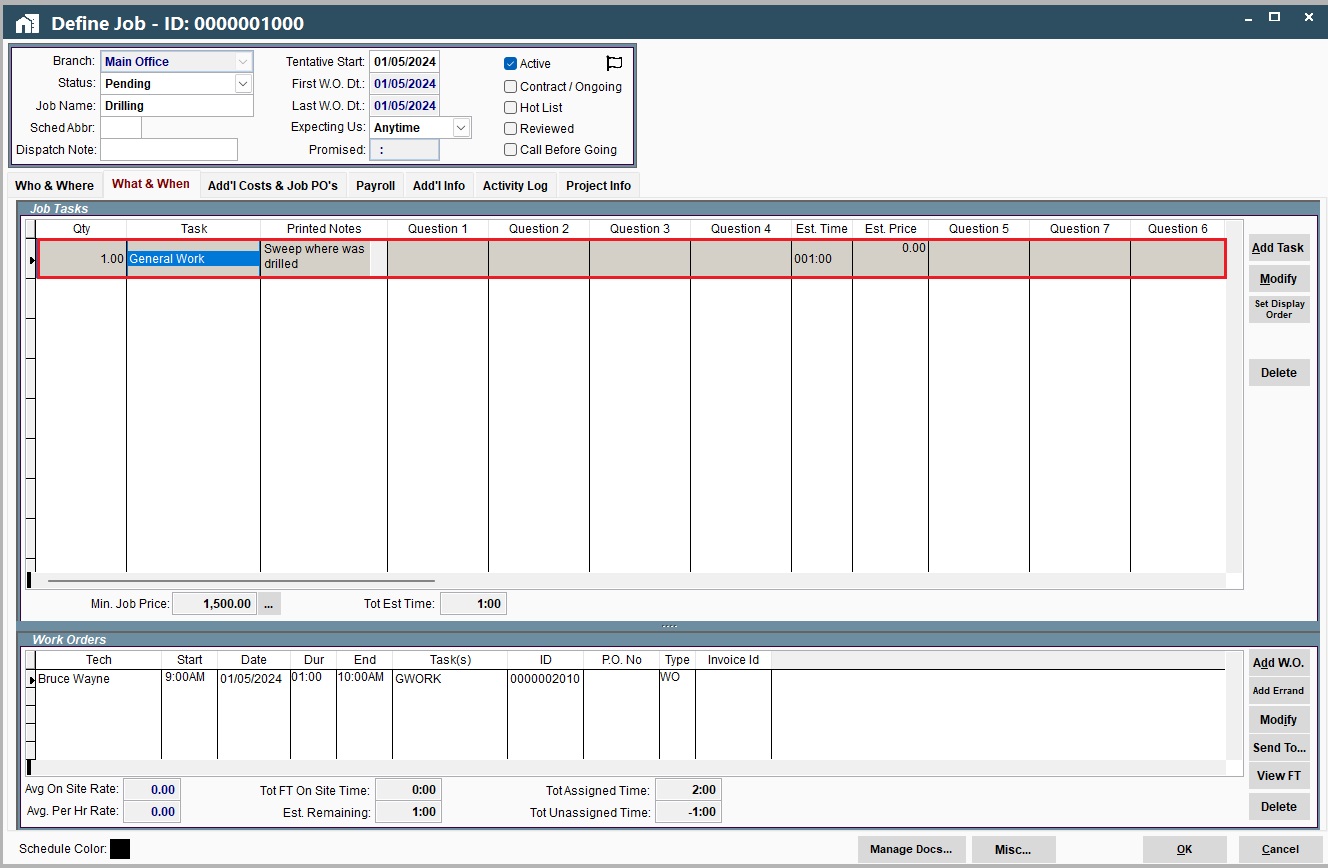
In SS Quick Add Define Job, If you click Continue In → Quick Add as shown in the screenshot above, It will show in more detail.
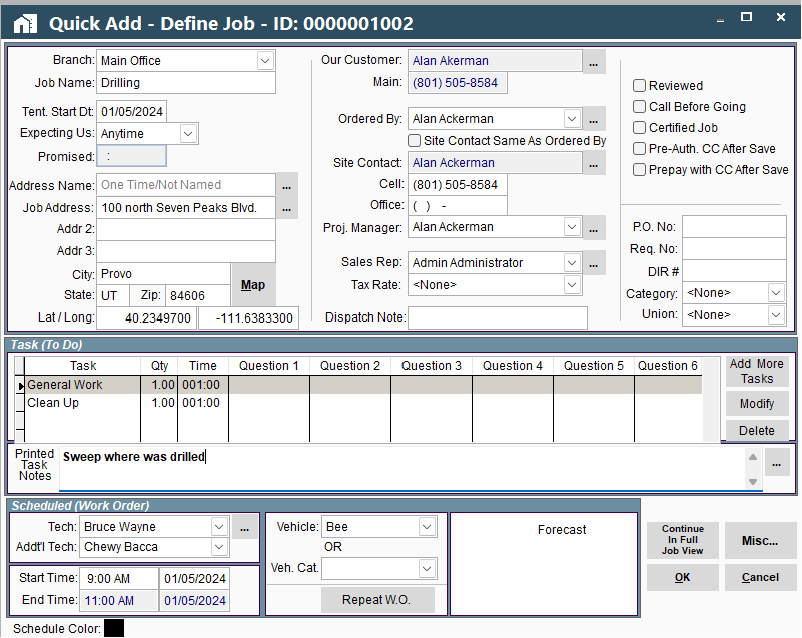
Now you can add tasks and additional details
In SS Quick Add Define Job, if you click Continue In → Full Job View it will show you in more detail.
You can also add more tasks
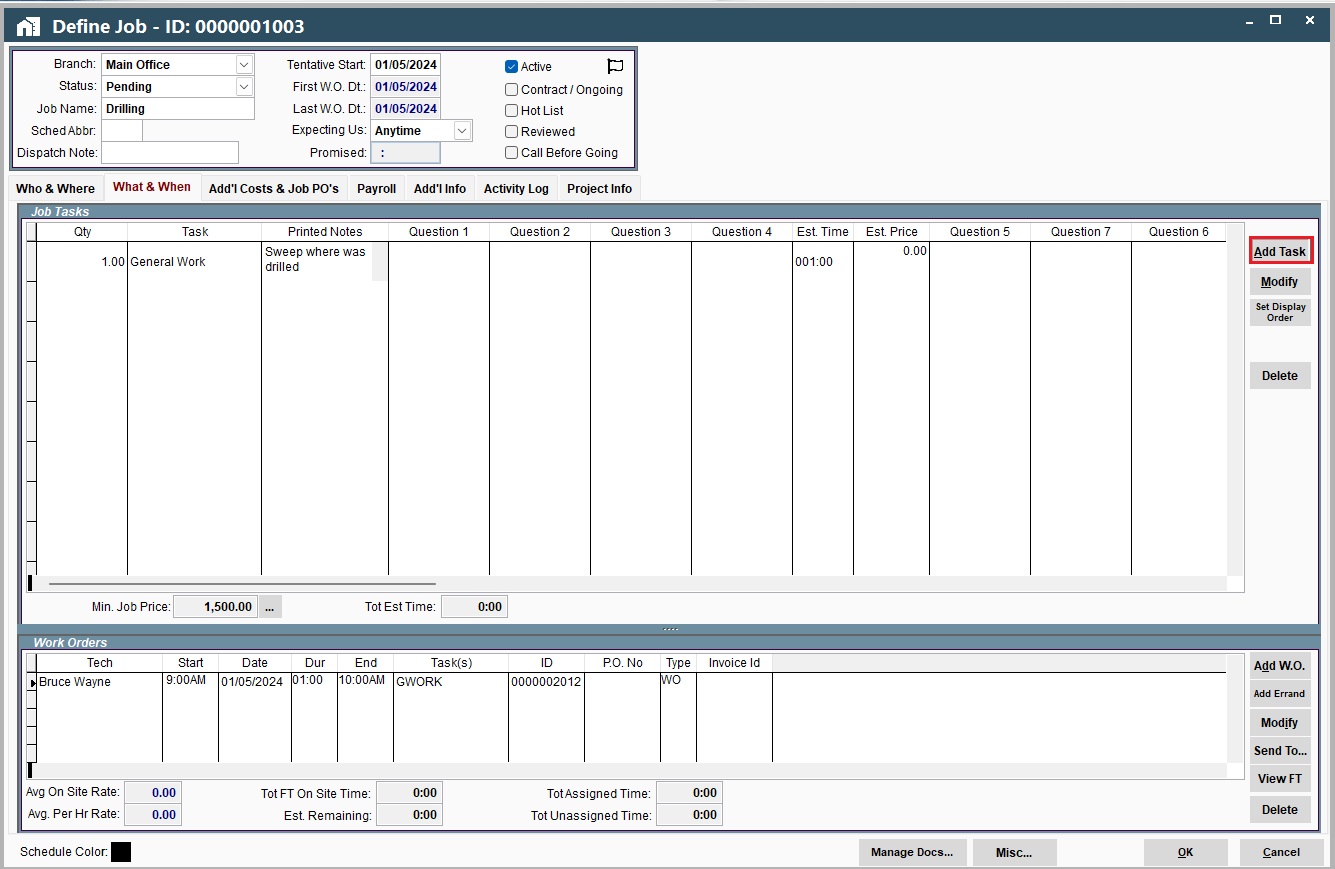
When you go to jobs and select the job you just created, it will look something this:
If you did not continue in Quick Add or Full Job View your tasks will say “General Work”.
You can click on it twice to edit it and add more details.
SS Quick Add on Portal
Alter Job Preferences to “SS Quick Add” on Portal
Go to More → Users → Select your user
.png)
Tip: If you leave your Job Add Mode on Prompt it will always give you the choice between SS Quick Add, Job Quick Add, and Full Job View Mode.
When set to prompt this popup would appear every time you click New Job.
Create a Job in SS Quick Way on Portal
Click on New Job and the customer window will pop up.
You can create a new customer by clicking Add.
Find your customer, click on them once to highlight them, and then click select. You may use the search bar to help find the customer.
Fill in the Job Address and Customer Information.
Click on the Ellipsis next to Customer to see options on viewing more information about the customer.
Click on the Ellipsis next to Site Contact to see a list of potential site contacts and/or add a new job contact.
Hot List allows you to put this job on a Priority Waiting List that you can see from your calendar to help you fit them in as soon as something opens up.
.png)
Under the To Do taskbar you may put in your custom notes on what the task is.
If you click on the ellipsis to the right you can manage some predefined notes to speed up your process.
.png)
Scheduled (Work Order)
Use the drop-down menu to select up to 2 technicians and a vehicle.
You can select a start time and a scheduled date.
To add more information select Continue in→ (Job Quick Add or Full Job View).
To save and complete your SS Quick Job click OK.
.png)