
CenPoint allows you to create AIA applications utilizing data from the job and it's invoices. In this article we will cover the following topics.
1. How to create, print, and delete an AIA application
2. Where does the data come from page 1
3. Where does the data come from page 2
How to create an AIA application on Desktop
You must first go through the typical invoicing process in CenPoint. See Invoicing Intro Videos for more info.
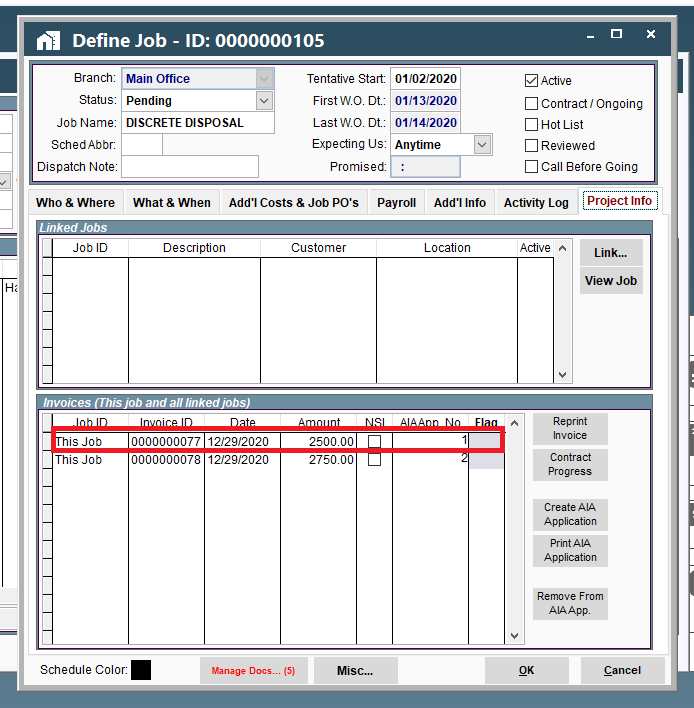
Next open the Job, and go to the “Project Info” tab, which displays your invoices
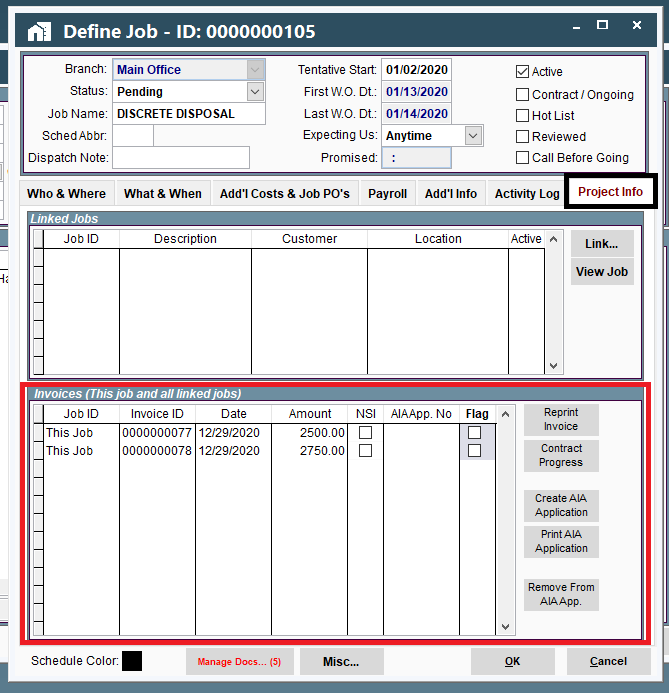
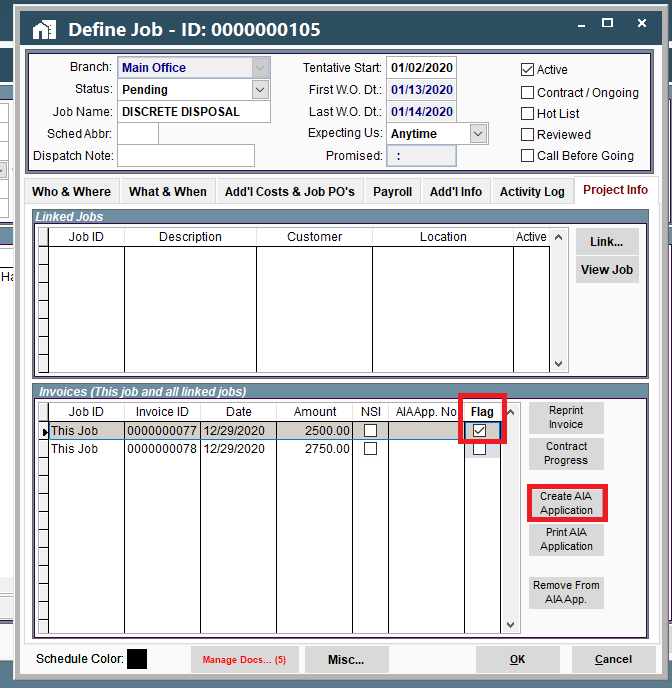
AIA applications are created based off of invoices. Flag 1 or more Invoices, with the flag checkbox, and click “Create AIA Application”.
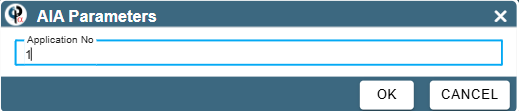
Accept or modify the application number.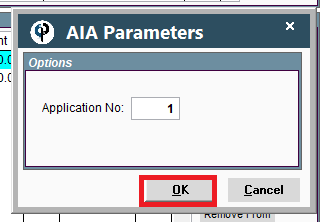
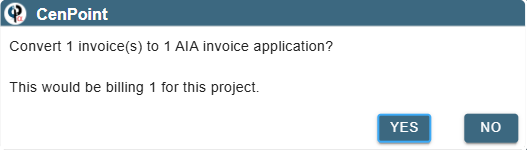
Confirm you would like to proceed.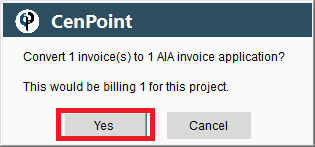
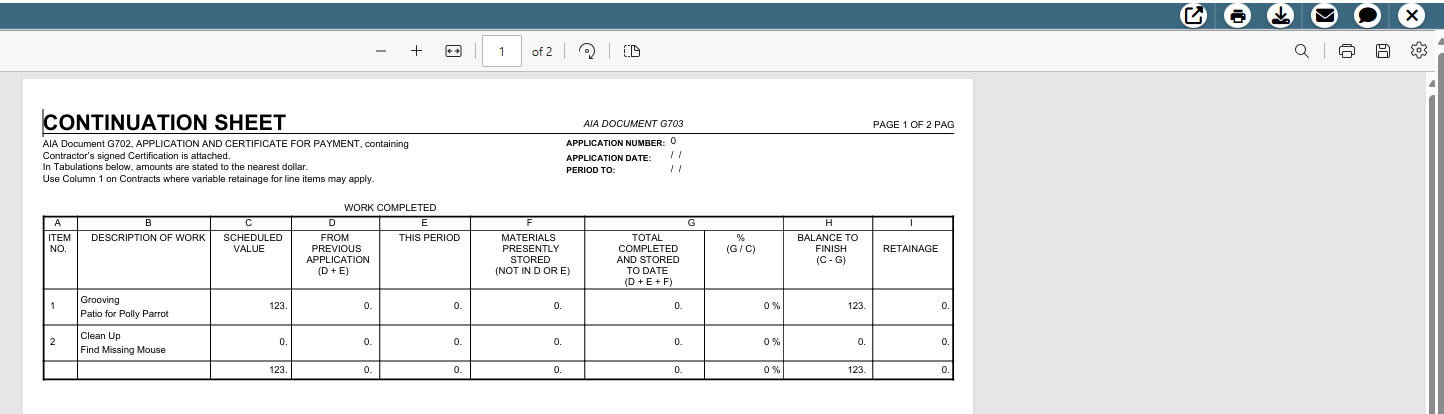
Congratulations, you have created your AIA application, and can print, save, or email it.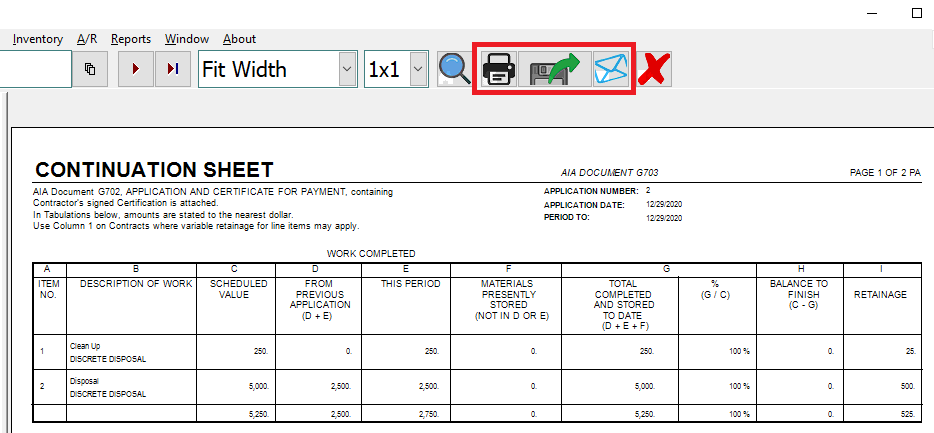
After your AIA application has been created, you can reprint with the “Print AIA Application” button..png)
If adjustments need to be made, you can simply delete the AIA application and re-create it once your changes have been made.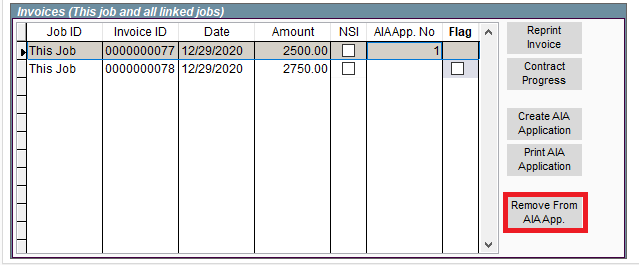
How To Create an AIA Application on Portal
You must first go through the typical invoicing process in CenPoint. See Invoicing Intro Videos for more info.
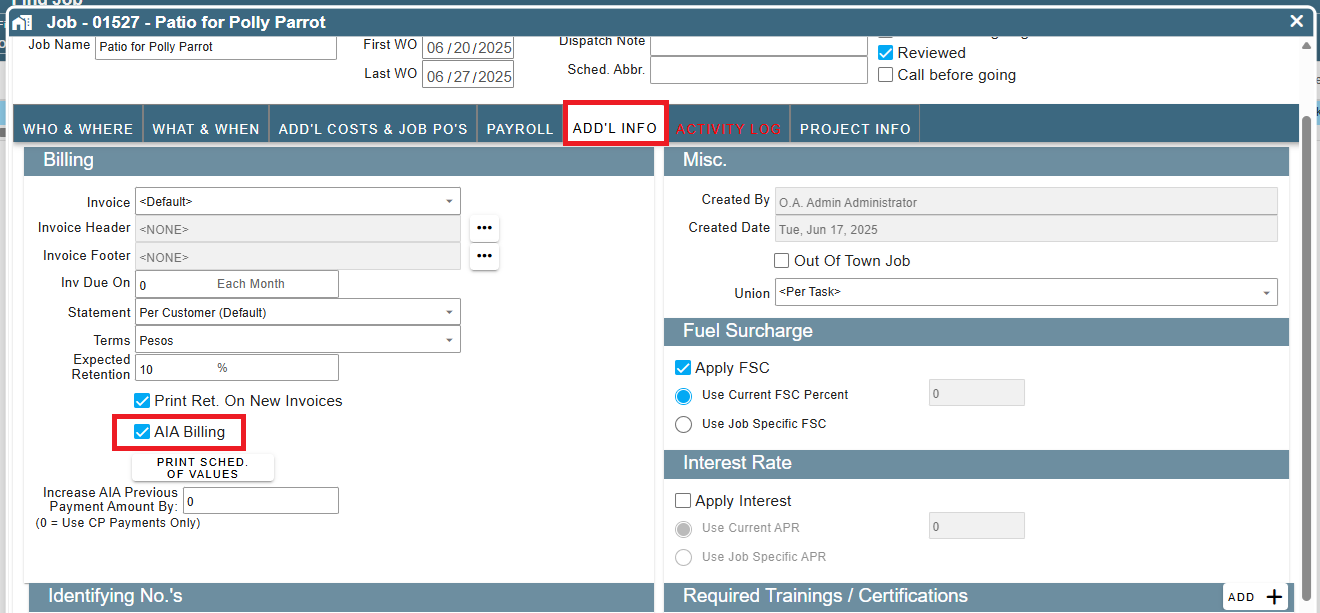
Start by going to the Additional info tab and marking the Job as AIA
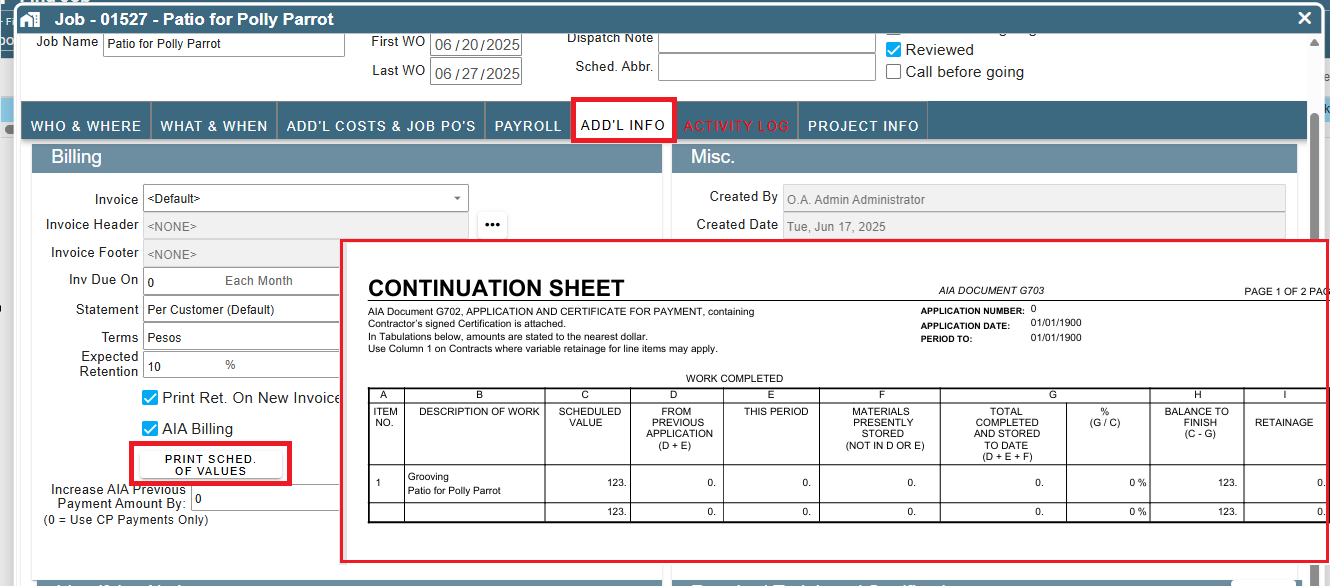
From this same Additional Info screen you can also print the Schedule of Values
Next open the Job, and go to the “Project Info” tab, which displays your invoices
.png)
AIA applications are created based off of invoices. Check the “Flag” checkbox on each invoice you would like to include in the AIA application and then click on the Ellipsis → “Create AIA Application”.
.png)
Accept or modify the application number.
Confirm you would like to proceed.
Congratulations, you have created your AIA application! You can print, save, email, or text it by clicking on the appropriate icon on the upper right-hand corner.
After your AIA application has been created, you can reprint it by clicking the Ellipsis → “Print AIA Application”.
.png)
If adjustments need to be made, you can simply delete the AIA application by clicking Ellipsis → “Remove From AIA App.” and then re-create it once your changes have been made.
.png)
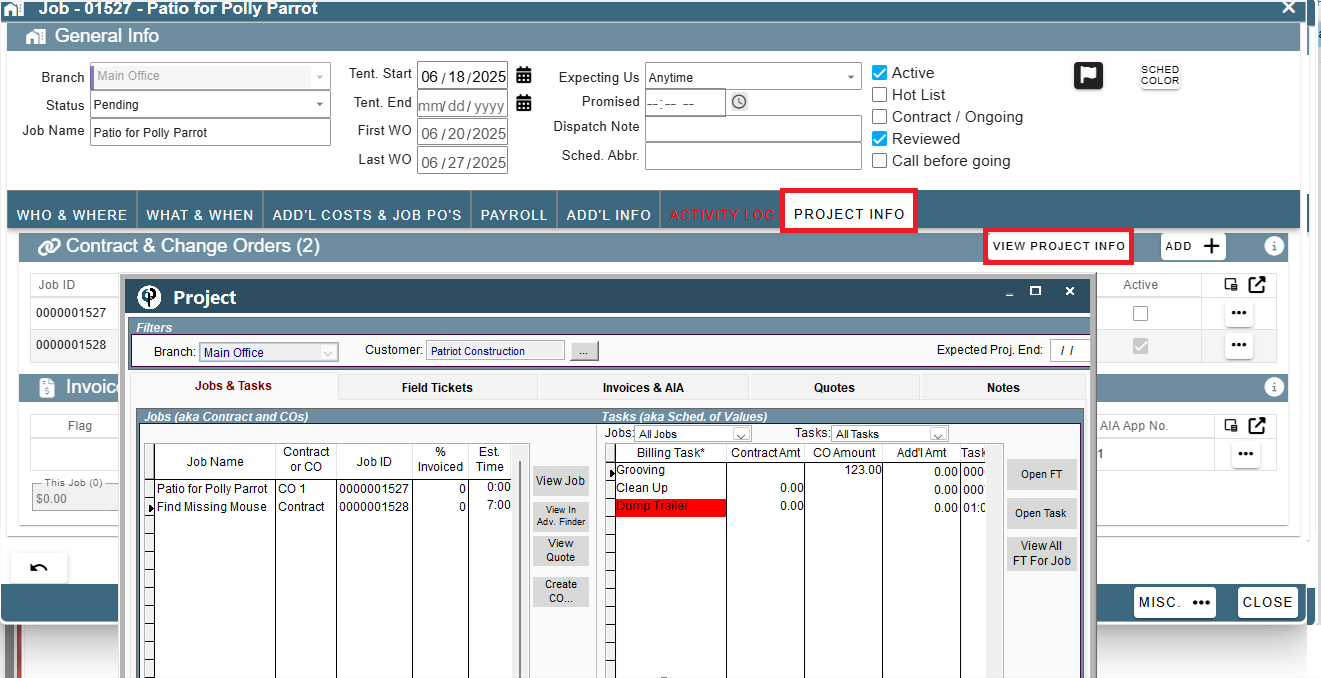
The Project screen gives you a good overview of the Job, including tracking and creating change orders etc…
In the project info tab, click the view project info button to launch the Project screen.
Where does the data come from Page 1?
The data displaying on the AIA report does not solely pull from the invoices. Let’s go over each column and field, to see where this data populates from.
Column B & C: Description of Work
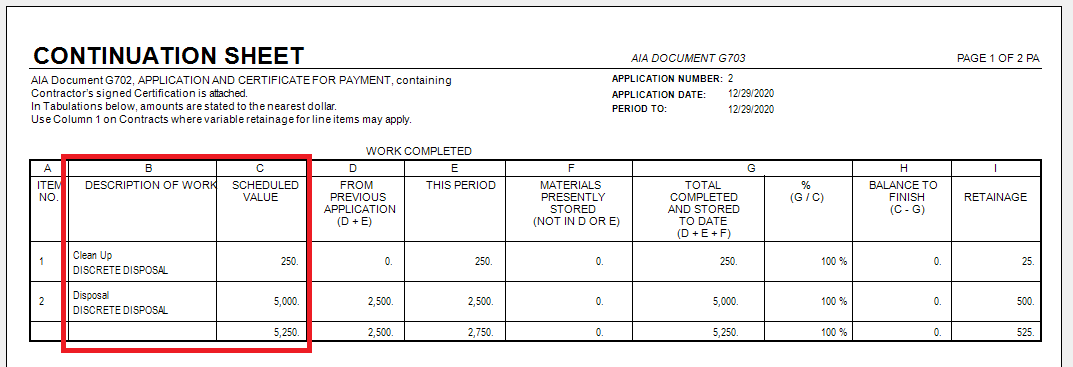
i. The task descriptions and their prices pull from the Job tasks.
.png)
ii. Additionally, if a task is added to a field ticket, that was not included in the Job tasks, it will also display in this column.
Column D: From previous application
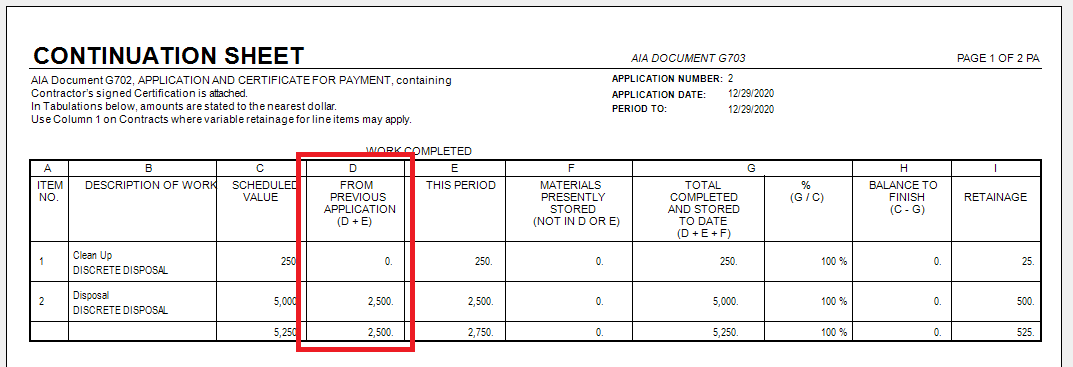
This column displays the price associated with each task from all previous AIA applications. In the example above we are looking at application number 2. Column D displays info from application number 1
Column E: This Period
This column displays the price associated with each task on the Invoice(s) associated with this AIA application.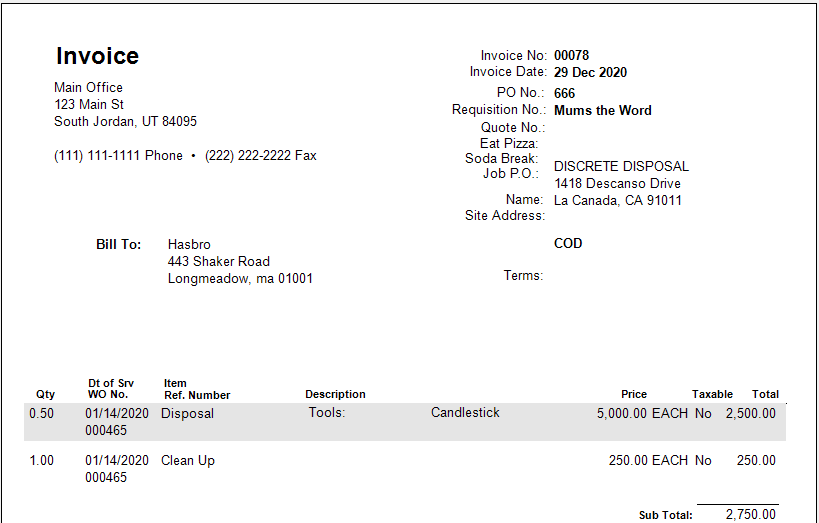
Columns G & H:
These columns are calculated with the previously defined columns
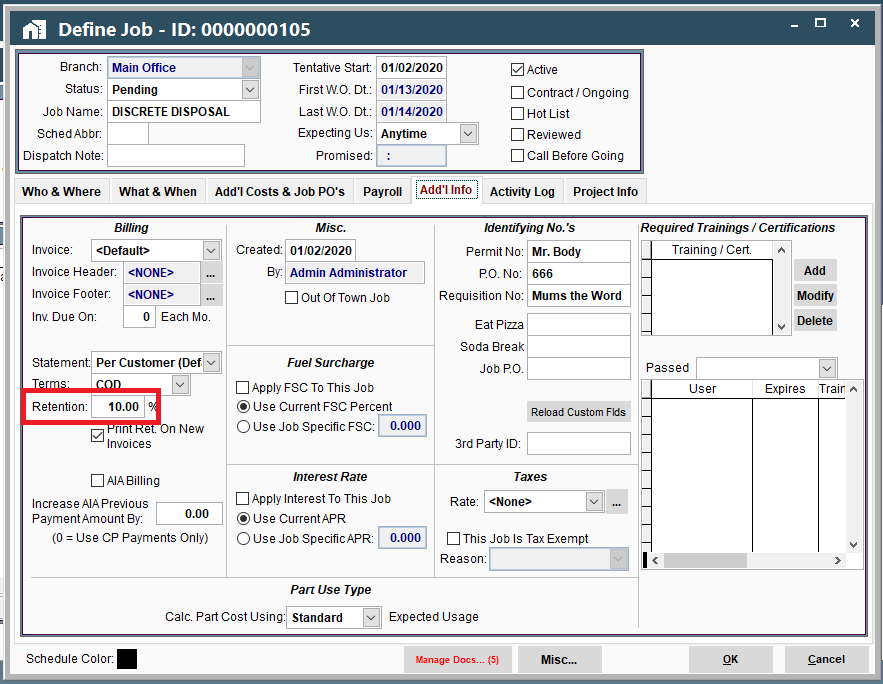
Column I: Retainage
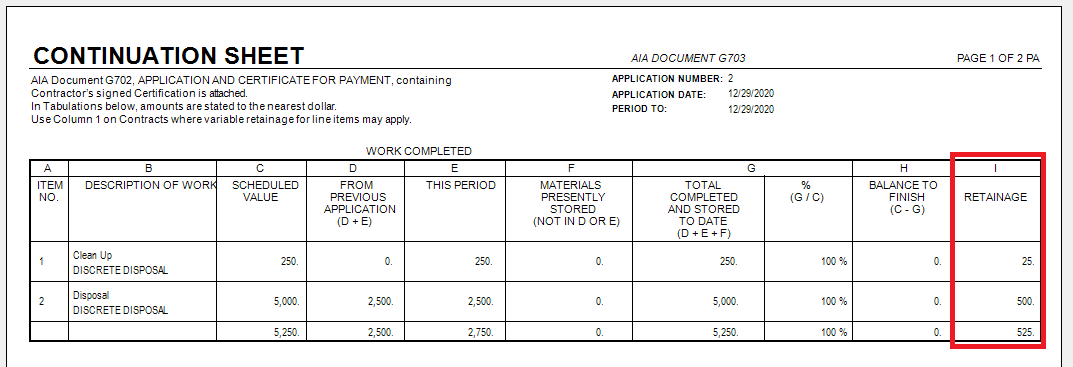
The retainage is calculated by taking the retainage percentage (specified on the Job) and multiplying it by column C.
Where does the data come from page 2?
To Owner
The name and address populate from the customer..png)
From Contractor
The name and address populate from the branch.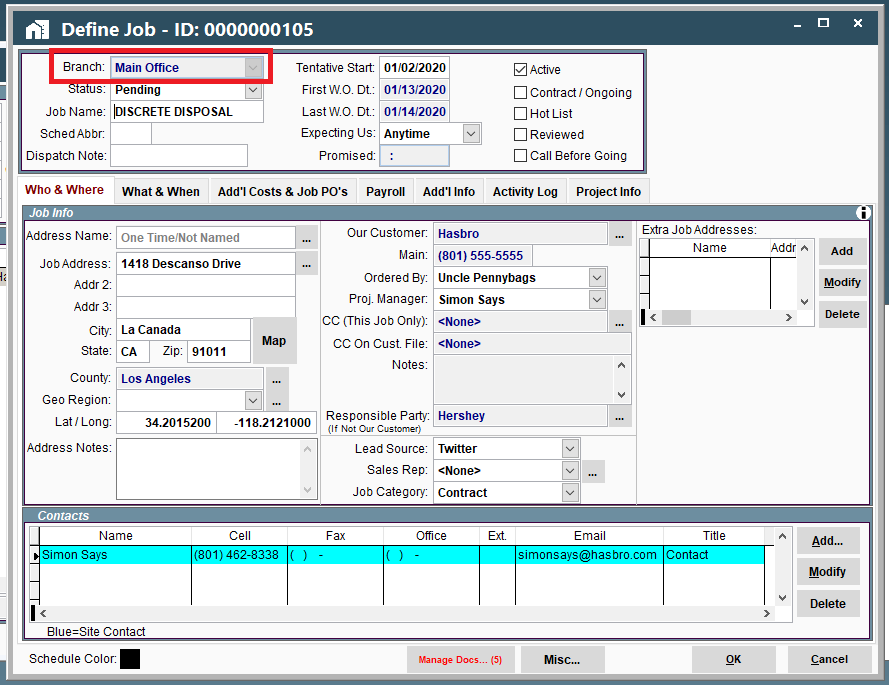
Application number

You get to specify the application number when you first create the AIA application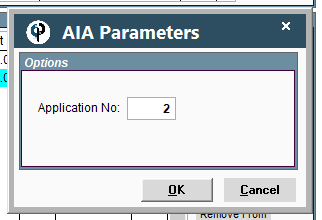
.png)
Period To
Populates from the Invoice date
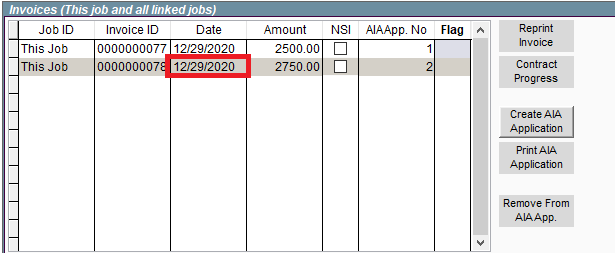
KA#
Populates from the requisition number.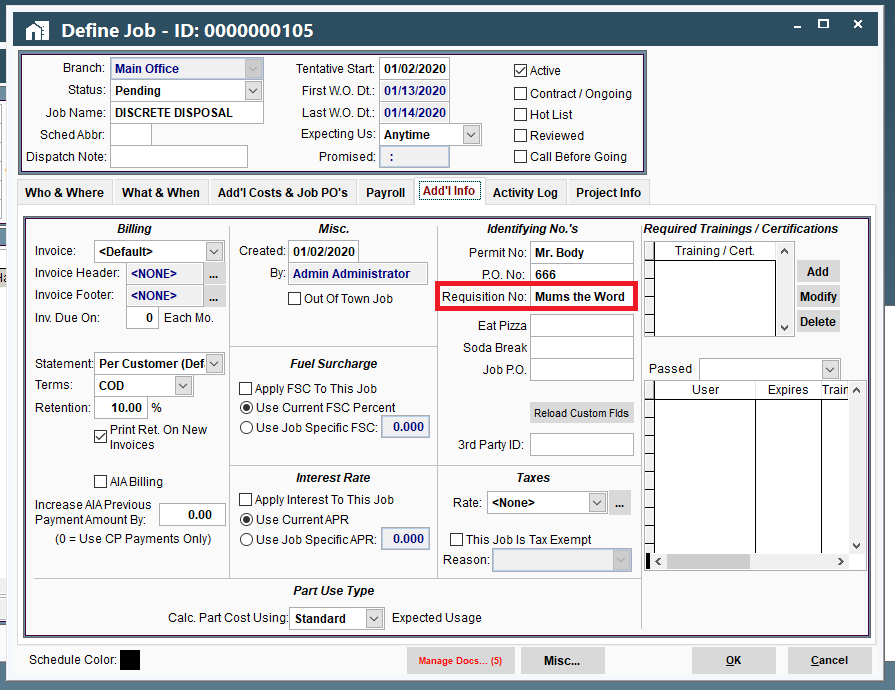
Job
Populates from Job name.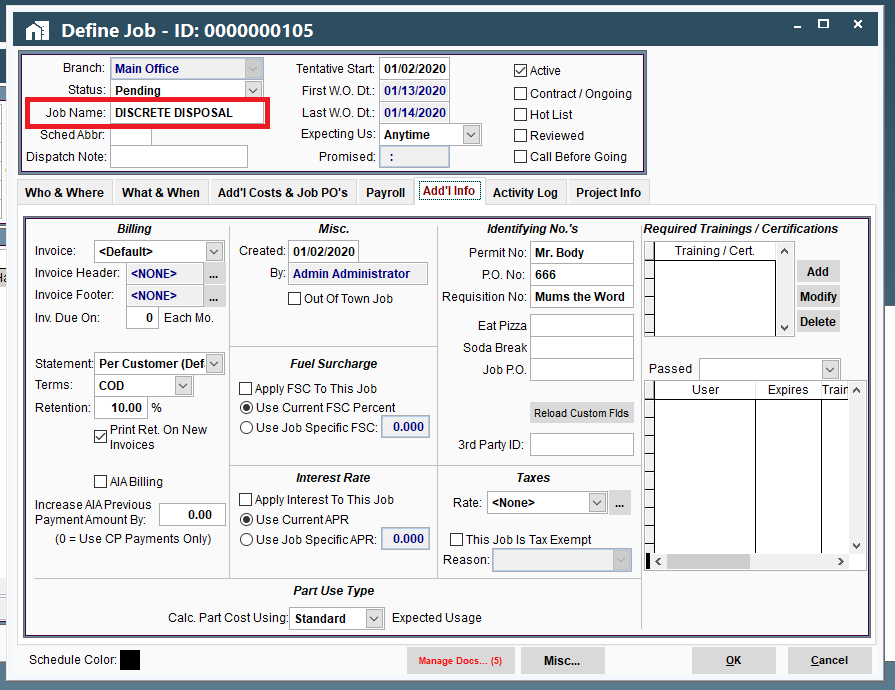
Contract Date
Populates from the first work order date.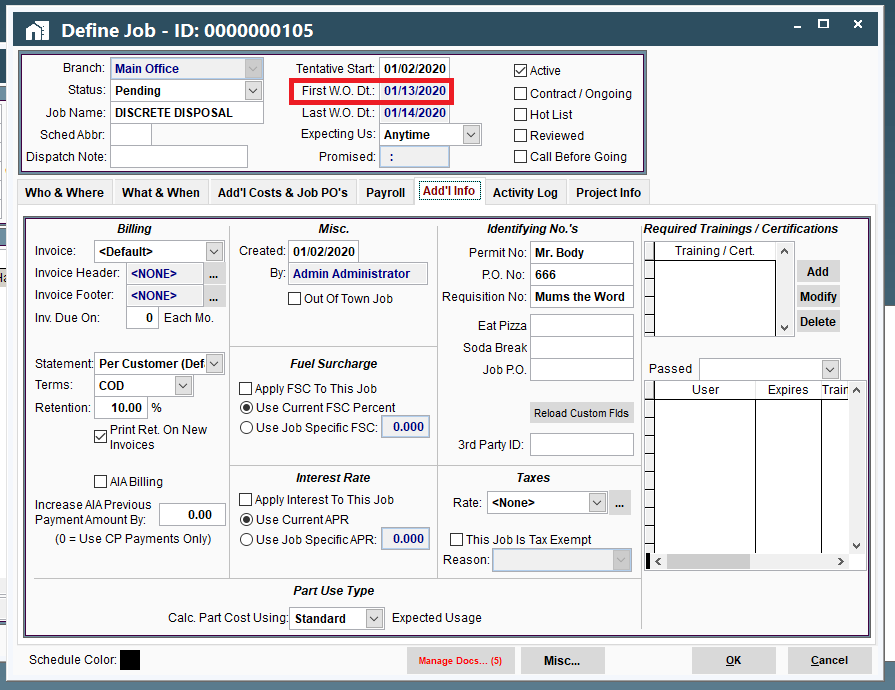
Original contract sum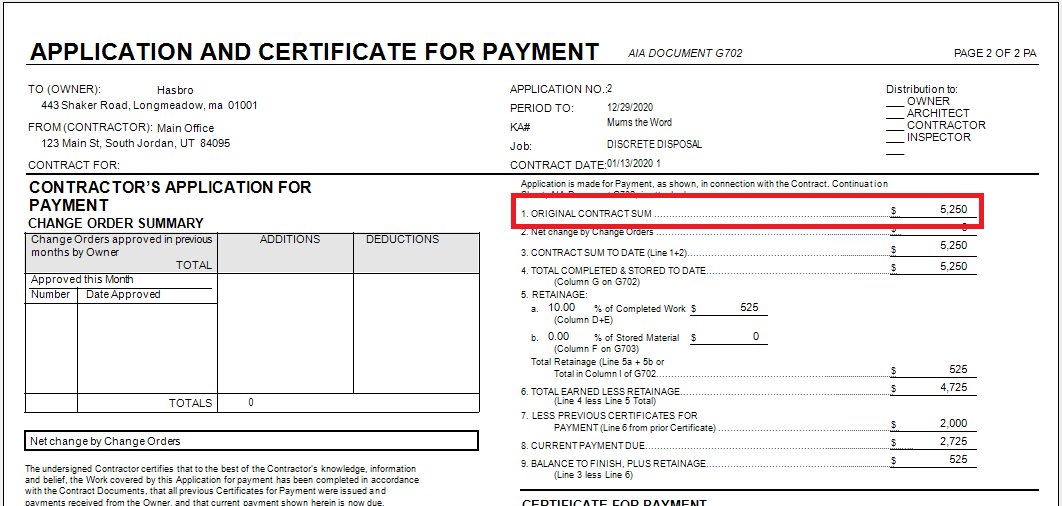
Pulls from column B on the first page.
Net change by Change Orders
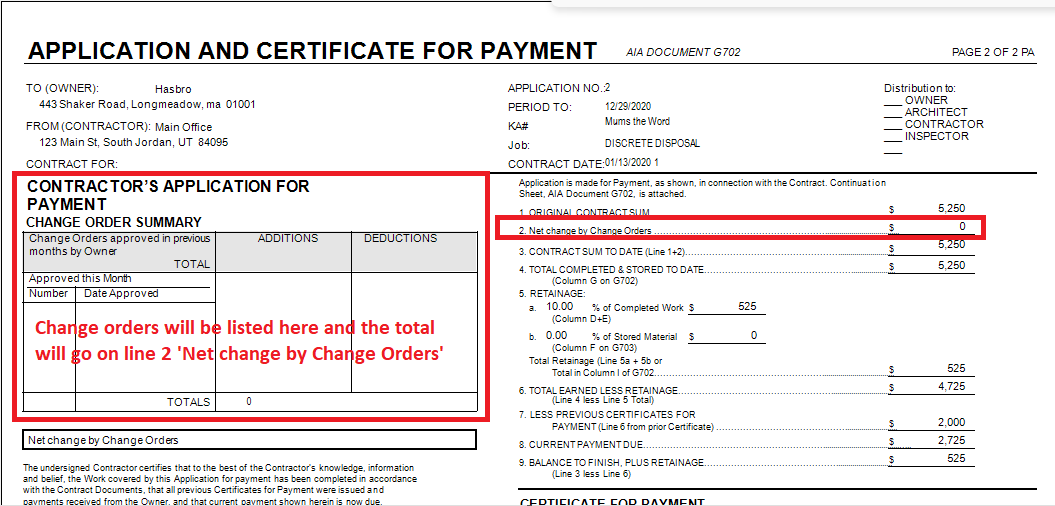
If a Job has a change order, the Job task price of the change order job will display here.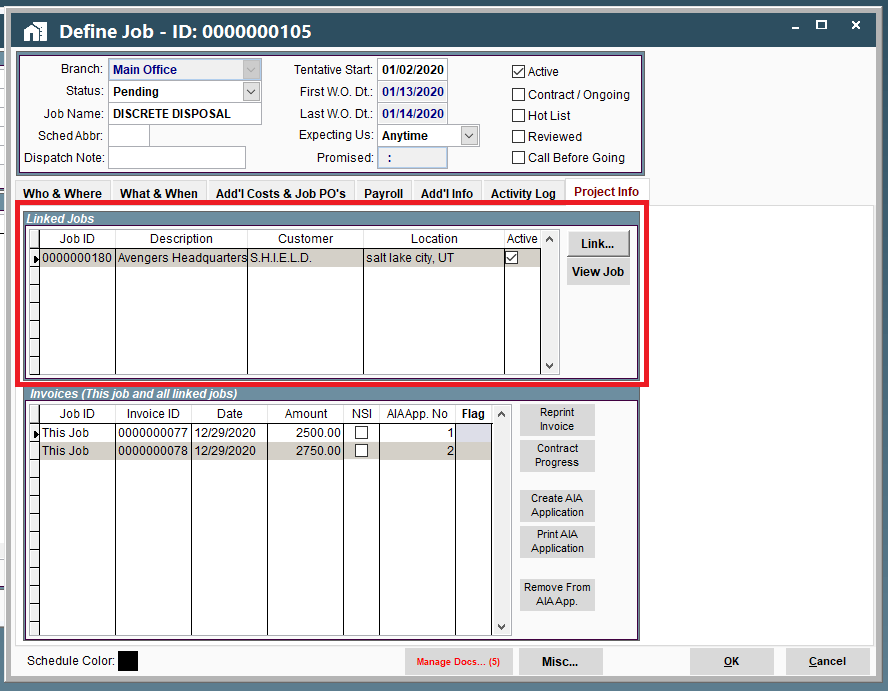
Retainage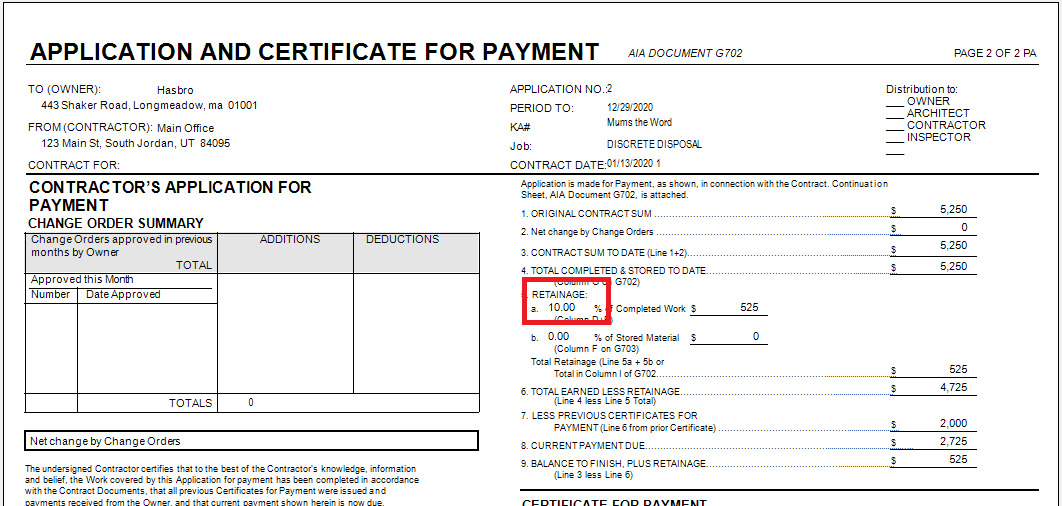
The percentage pulls from the Job retention percentage field.