
Customer Portal
Go to More → Company/Branch Info
.png)
Then double click on your branch or select the Ellipsis→ Modify
.png)
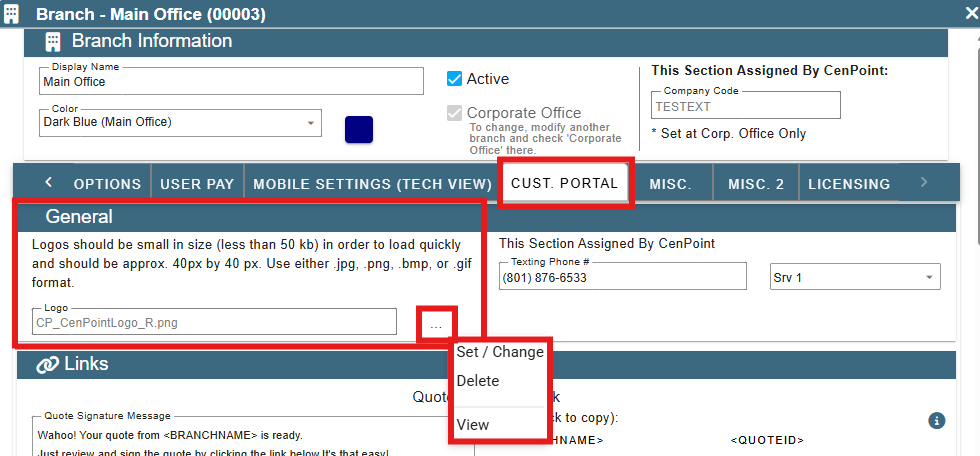
Go to the Cust. Portal tab and find the Links section
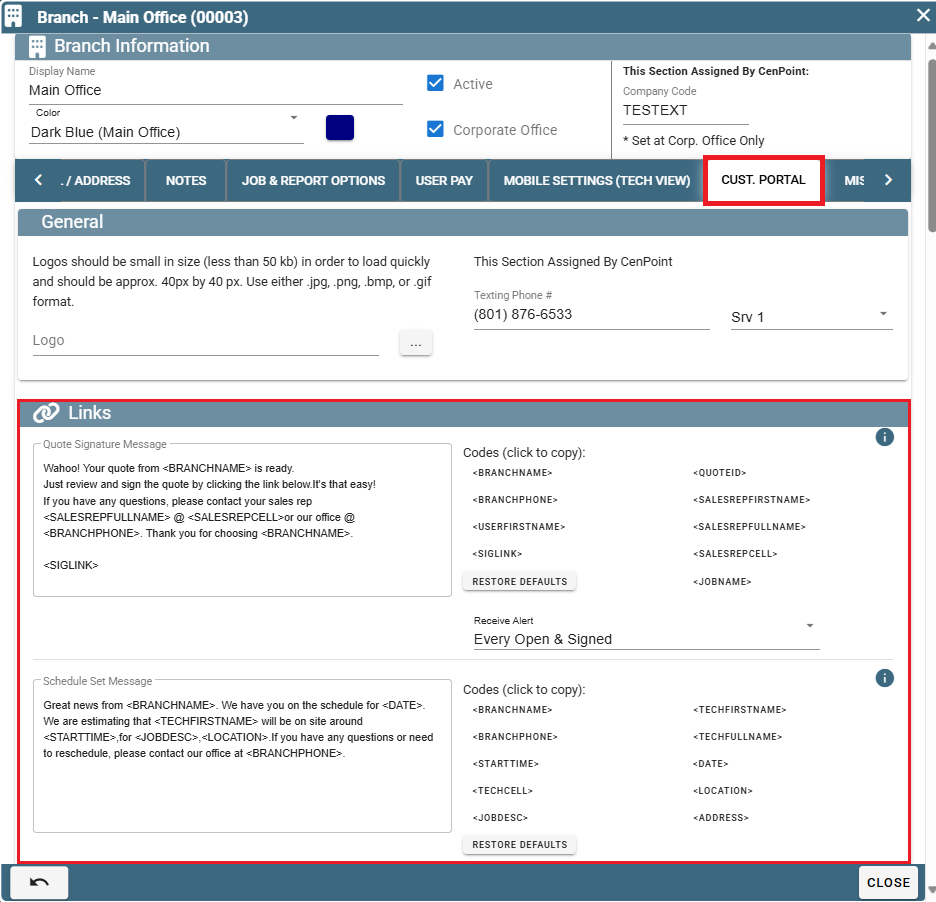
Quote Signature
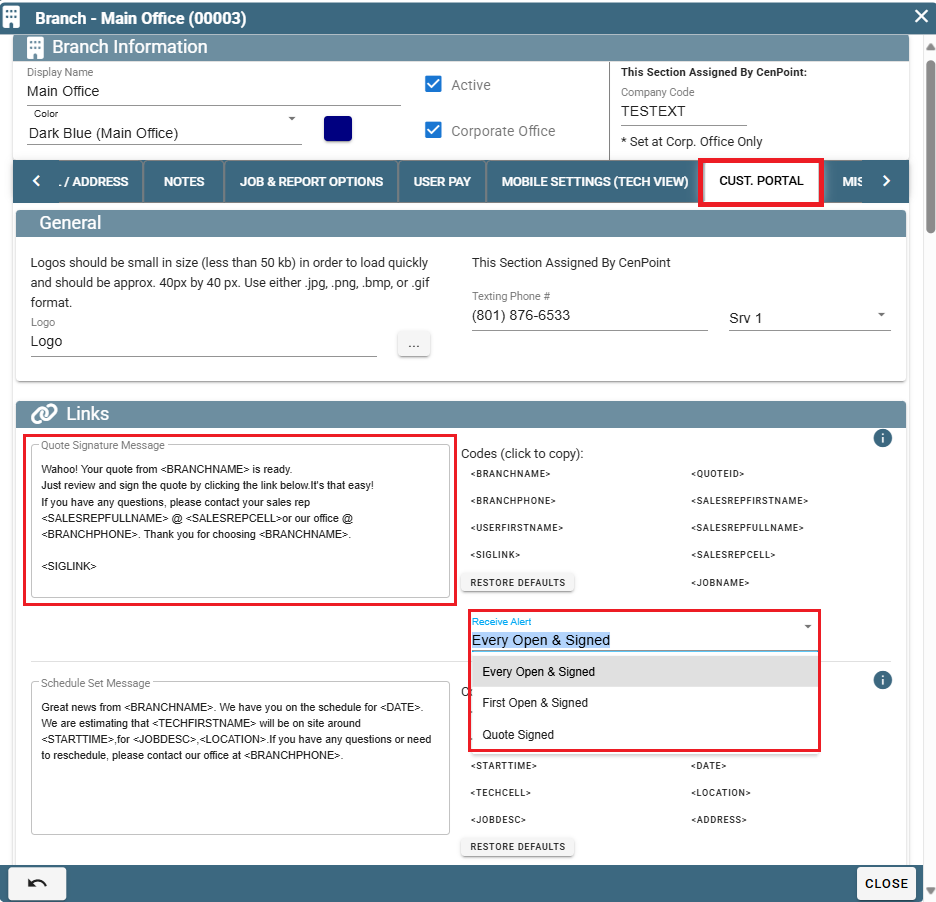
To set up your quote signature, use the options on the right to customize.
Select a quote alert option.
Example of what the customer would see.
.png)
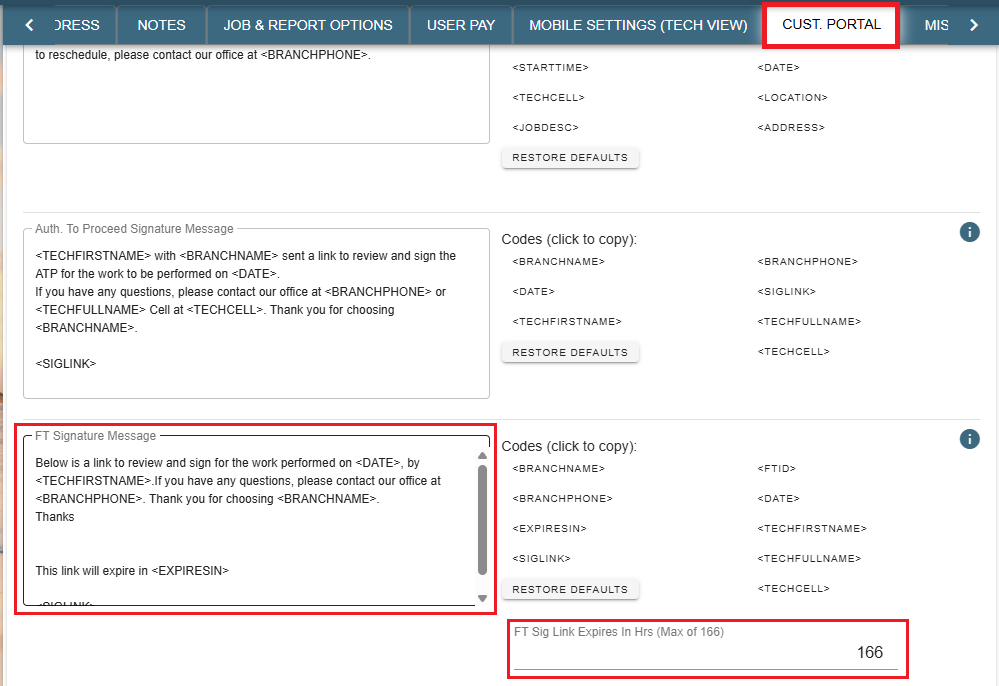
Field Ticket Signature Link
Set up your Field Ticket Signature Link, use the options on the right to customize.
Select a how long until the link expires. The max is 166 hours, which is almost 7 days!
Example of what the customer would see.
.png)
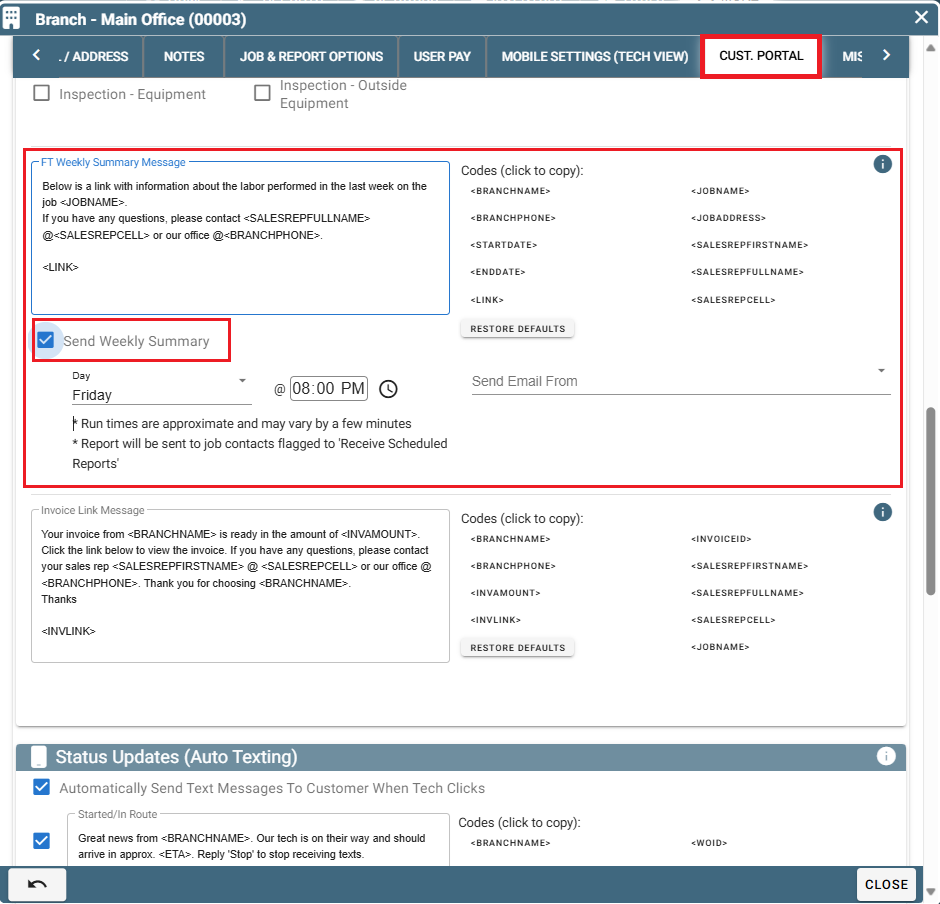
FT Weekly Summary Message
Note: The weekly message will only be sent if the "Send Weekly Summary" box in Branch Settings is checked AND if the Contact's box in the job is checked saying they "Receive Scheduled Reports"
If the "Send Weekly Summary" box is clicked a weekly text will be sent out to all valid contacts reporting on the Field Tickets progress.
Simply type in your message into this box and when you wish to use something that could change from Job to Job like a Job name or Sales Representative just click on the corresponding variable on the right, click copy, and paste it into the textbox.
To set up a person to receive this text, go inside the Job and go to the Contacts.
Modify your chosen contact and click the checkbox labeled "Receive Scheduled Reports".
It will be right next to where you can make that contact a Site Contact, Billing Contact, Main Contact, or FT Doc Contact.
That person will now get a weekly text that you will have set up in your branch settings under the Customer Portal tab.
Here's a visual of where the Contact checkbox is found inside a Job.

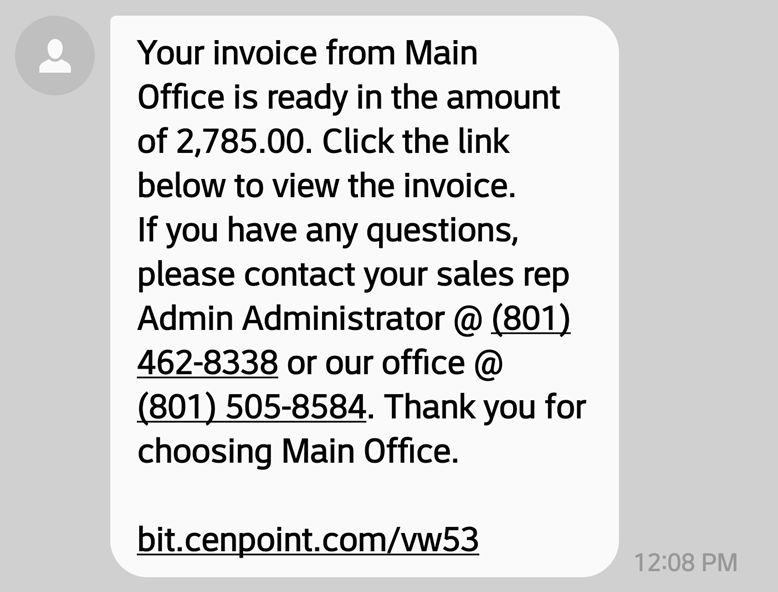
Invoice Link Message
Set up your Invoice Link Message, use the options on the right to customize.

Example of what the customer would see.
Logos
Add your companies logo to the header of Links the customer receives.
(This can also be a gif. so you could use an animated logo)
Example logo and Quote: 

NOTE: This will not add your logo to the quote, job or invoice reports. If you want those, please contact support@cenpoint.com with a request for that and we can help get you set up. There is a onetime fee associated with each custom report, but unlimited revisions afterwards!
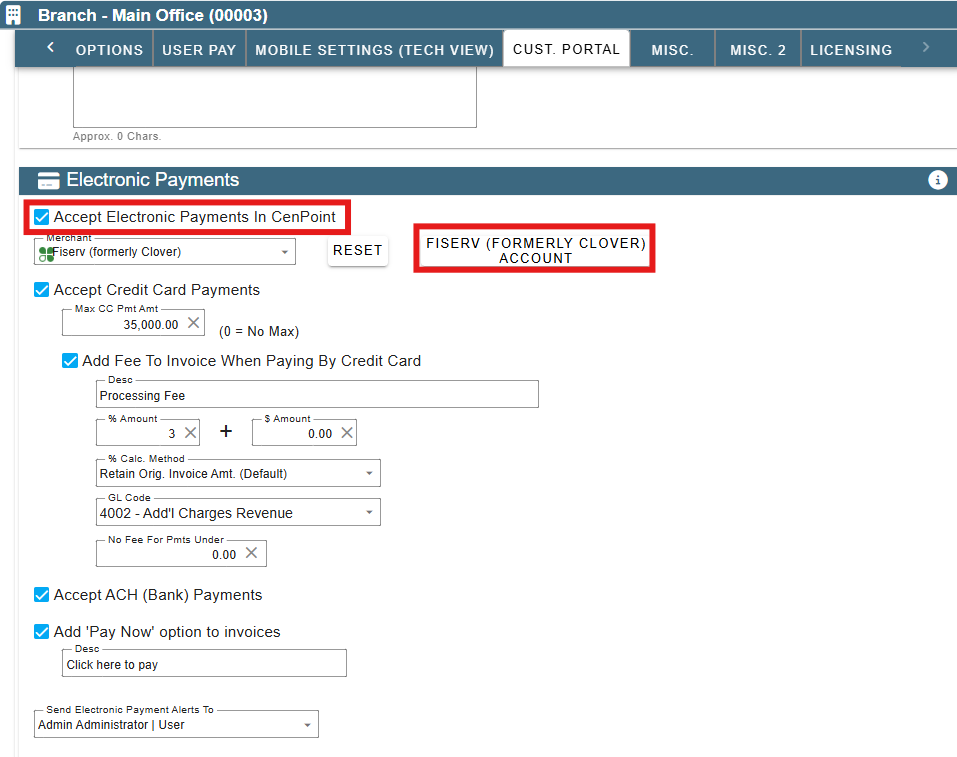
Accept Credit Cards
Still in the Cust. Portal tab scroll down until you find the Electronic Payments section.
Check the box to accept credit cards then click the Fiserv (Formerly Clover) Account to
set up your account with Stripe or Fiserv.
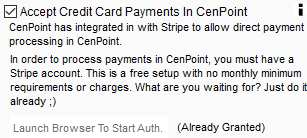
For more information on accepting credit cards and Stripe use the link below:
What are the codes to set up messages?
The codes might not be intuitive at first glance, so let's break them down:
<BRANCHNAME> - This is the branch name. So if your branch is Super Happy Drilling and Coring, that is what would replace this code.
<BRANCHPHONE> - This is the branch main phone number. If you have this set up in CenPoint, this will be replaced by the branch phone number.
<JOBNAME> - This is the Job Name. So if you've prepared "Highway 6 drill and patch" as a name for a job, that would replace this code.
<JOBADDRESS> - This is the code for the job address, the address listed on the job in the first place.
<JOBSITEADDRESS> - This is also, the code for the job address, but used for Status Updates.
<STARTDATE> - This is the code for the starting date of the job. This is used for the FT Weekly Summary Link
<STARTTIME> - This code is for the start time of the job.
<ENDDATE> - This is the code for the ending date of the job. This is used for the FT Weekly Summary Link
<SALESREPFIRSTNAME> - This is the code for the first name of the sales rep in charge of this job.
<SALESREPFULLNAME> - This is the code for the full name of the sales rep in charge of this job.
<SALESREPCELL> - This is the phone number of the sales rep for the job. If the user does not have a phone number set up in CenPoint, this will not work! Make sure that all sales rep users have phone numbers that customers can contact. They'll be happier that way. Trust us. :)
<TECHFIRSTNAME> - This is the code for the first name of the tech on this job.
<TECHFULLNAME> - This is the code for the full name of the tech on this job.
<TECHCELL> - This is the phone number of the tech for the job. If the user does not have a phone number set up in CenPoint, this will not work!
<DATE> - This is the code for listing the date. It shows the date for the job in question. So, if today was Wednesday the 18th, and I send something scheduled for the 23rd, this code would show Monday the 23rd.
<EXPIRESIN> - This code is for showing how long a link for something is good for. Like a signature or document link.
<SIGLINK> - This is the link for the signature link. When sending a quote, this is how the customer can sign it. Please don't remove this unless you are somehow sending the link otherwise.
<DOCLINK> - This is the link to the document list for the job.
<INVLINK> - This is the link for the invoice.
<LINK> - This is the link for all the work that was done over the past week. This is used for the FT Weekly Summary Link
<QUOTEID> - This is for the quote id. If you have Quote #7588, this is what would show instead of the code.
<FTID> - This code is for the field ticket ID.
<INVOICEID> - This is the invoice ID. So, invoice # 65598 would show for that invoice instead of the code.
<INVAMOUNT> - This shows the amount of the invoice. If the customer owes $3520 at the end of the work, this is what would show.
<ETA> - This shows the estimated arrival time, used for Status Updates to show when a tech is on their way and when a customer can expect the tech(s)
<WOID> This is the work order ID that is being done. This is used for the Status Updates.