
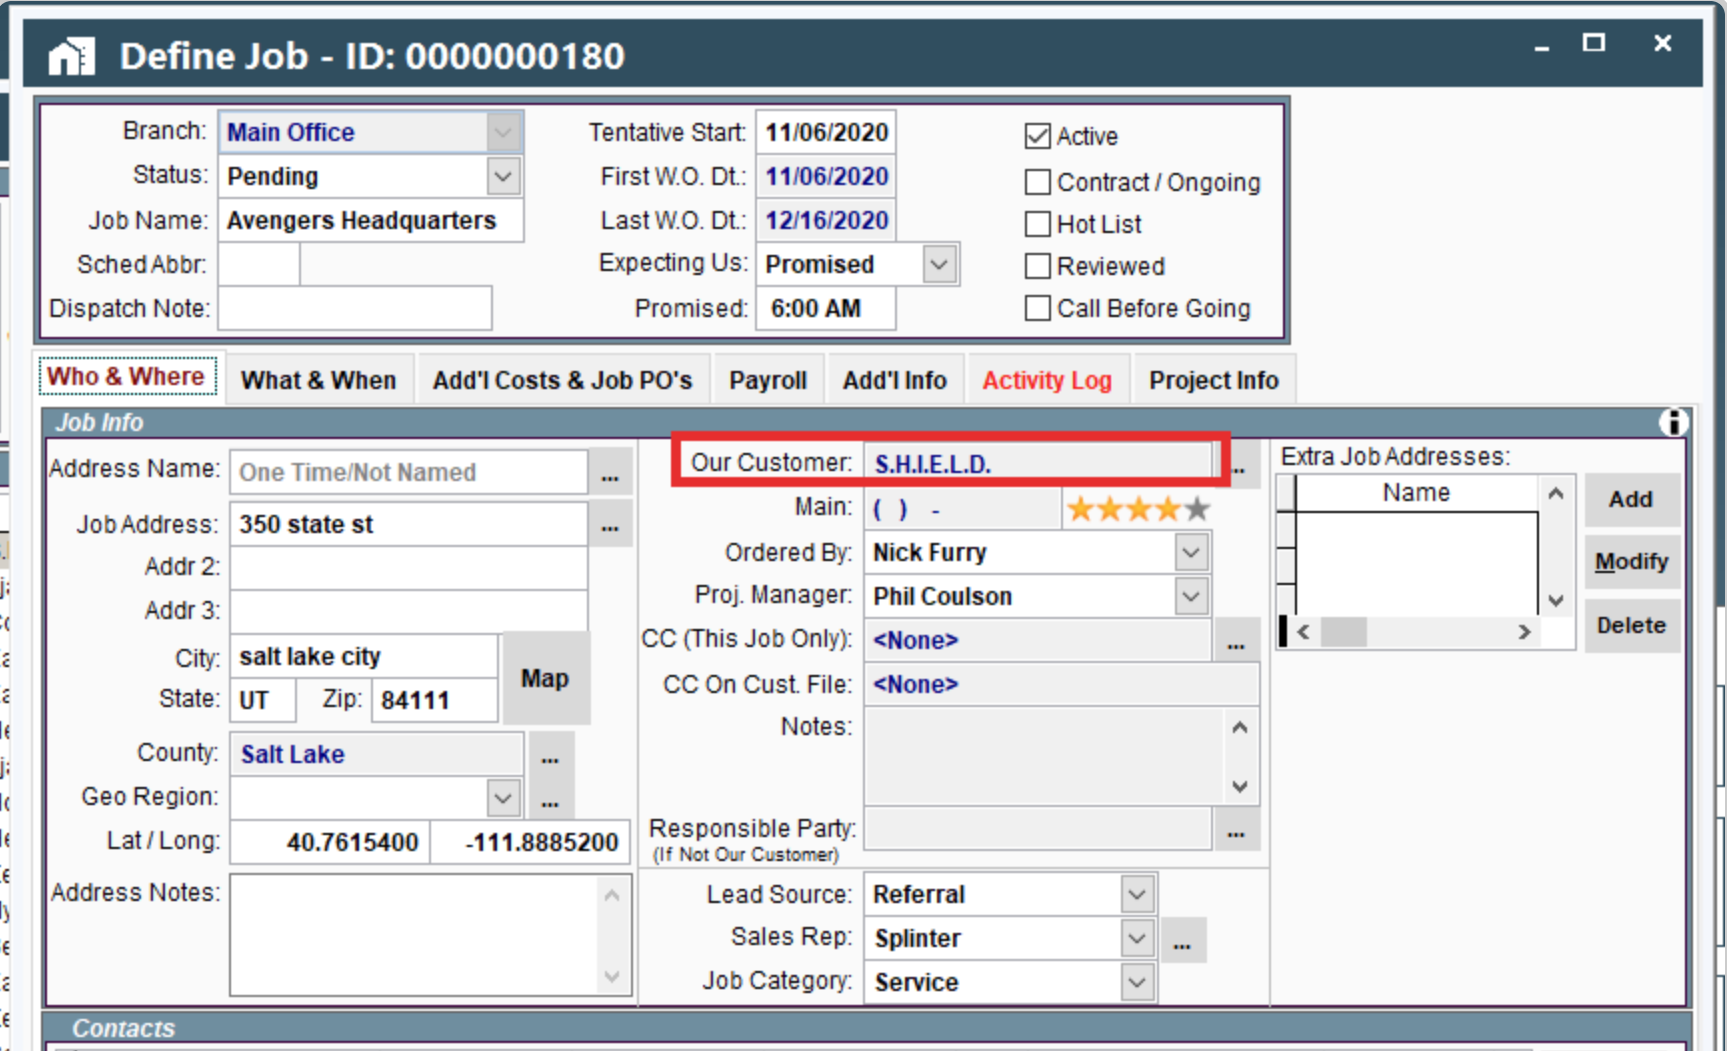
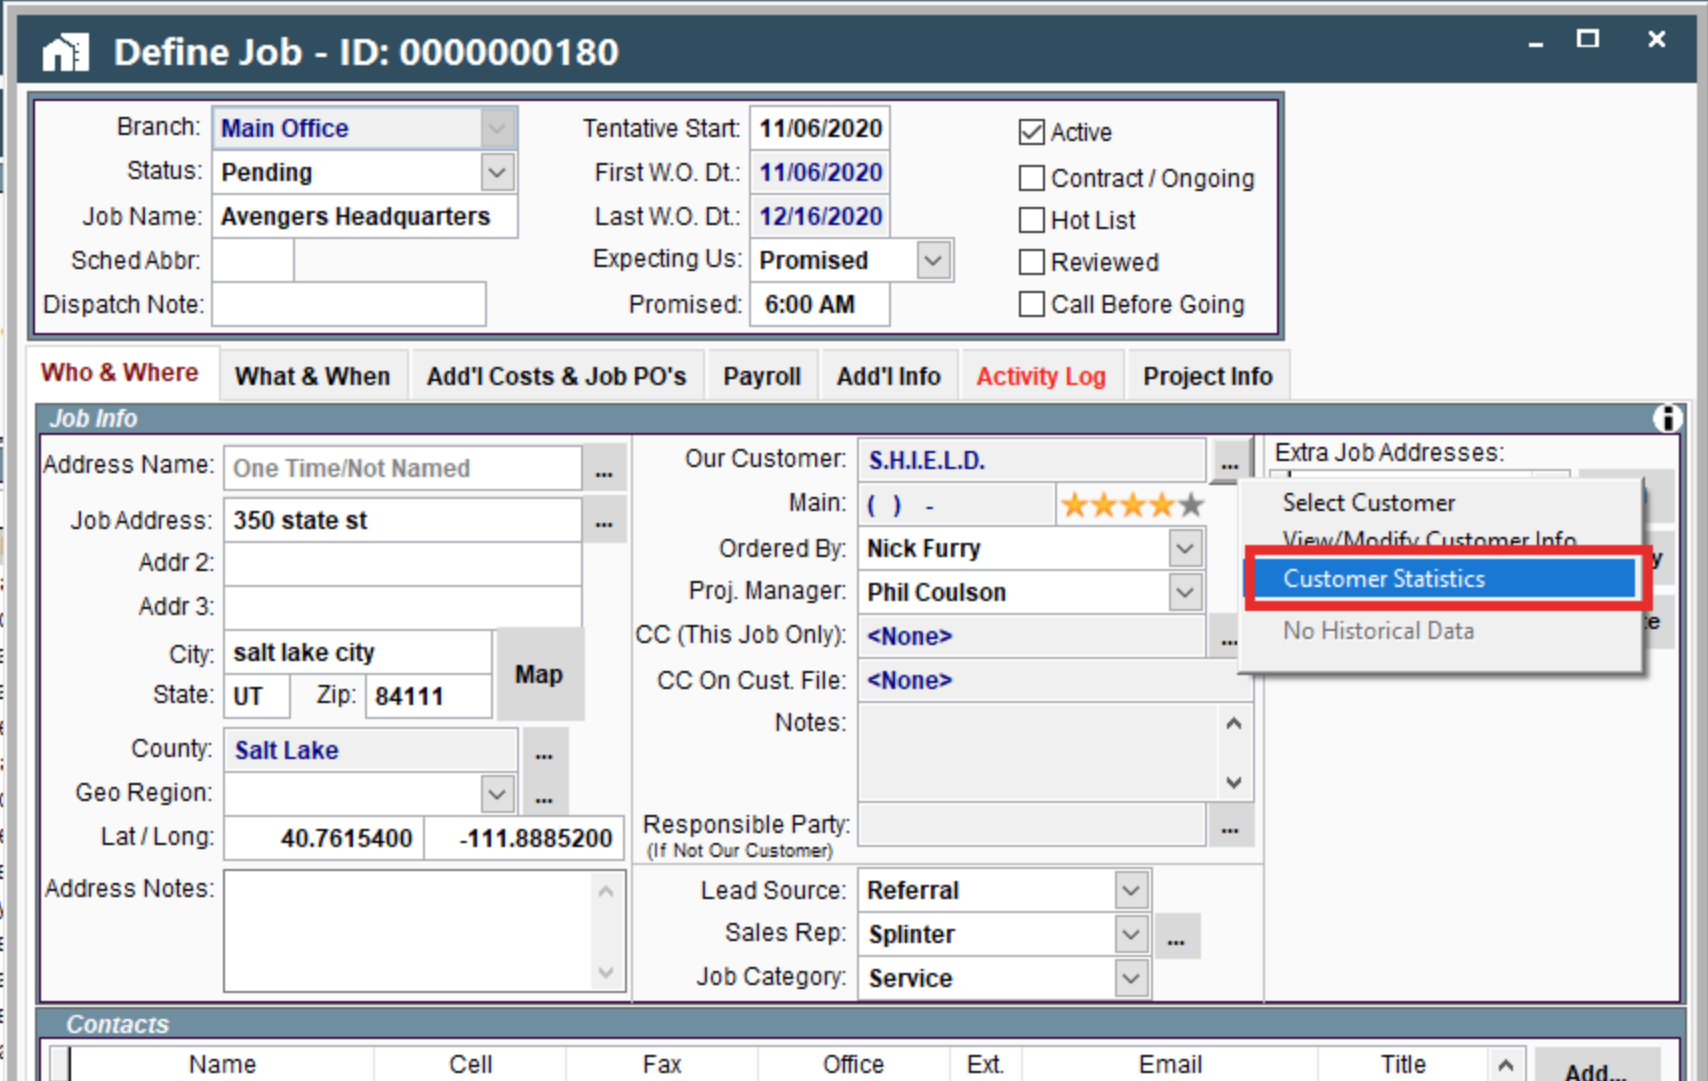
This article covers the "Our Customer" field on the Job (pictured below).
Job Customer Field on Desktop
The Job Customer Field displays which customer this job is attached to.
If you click the ellipsis next to the customer name, three options display (select customer, view/modify customer info, and customer statistics)
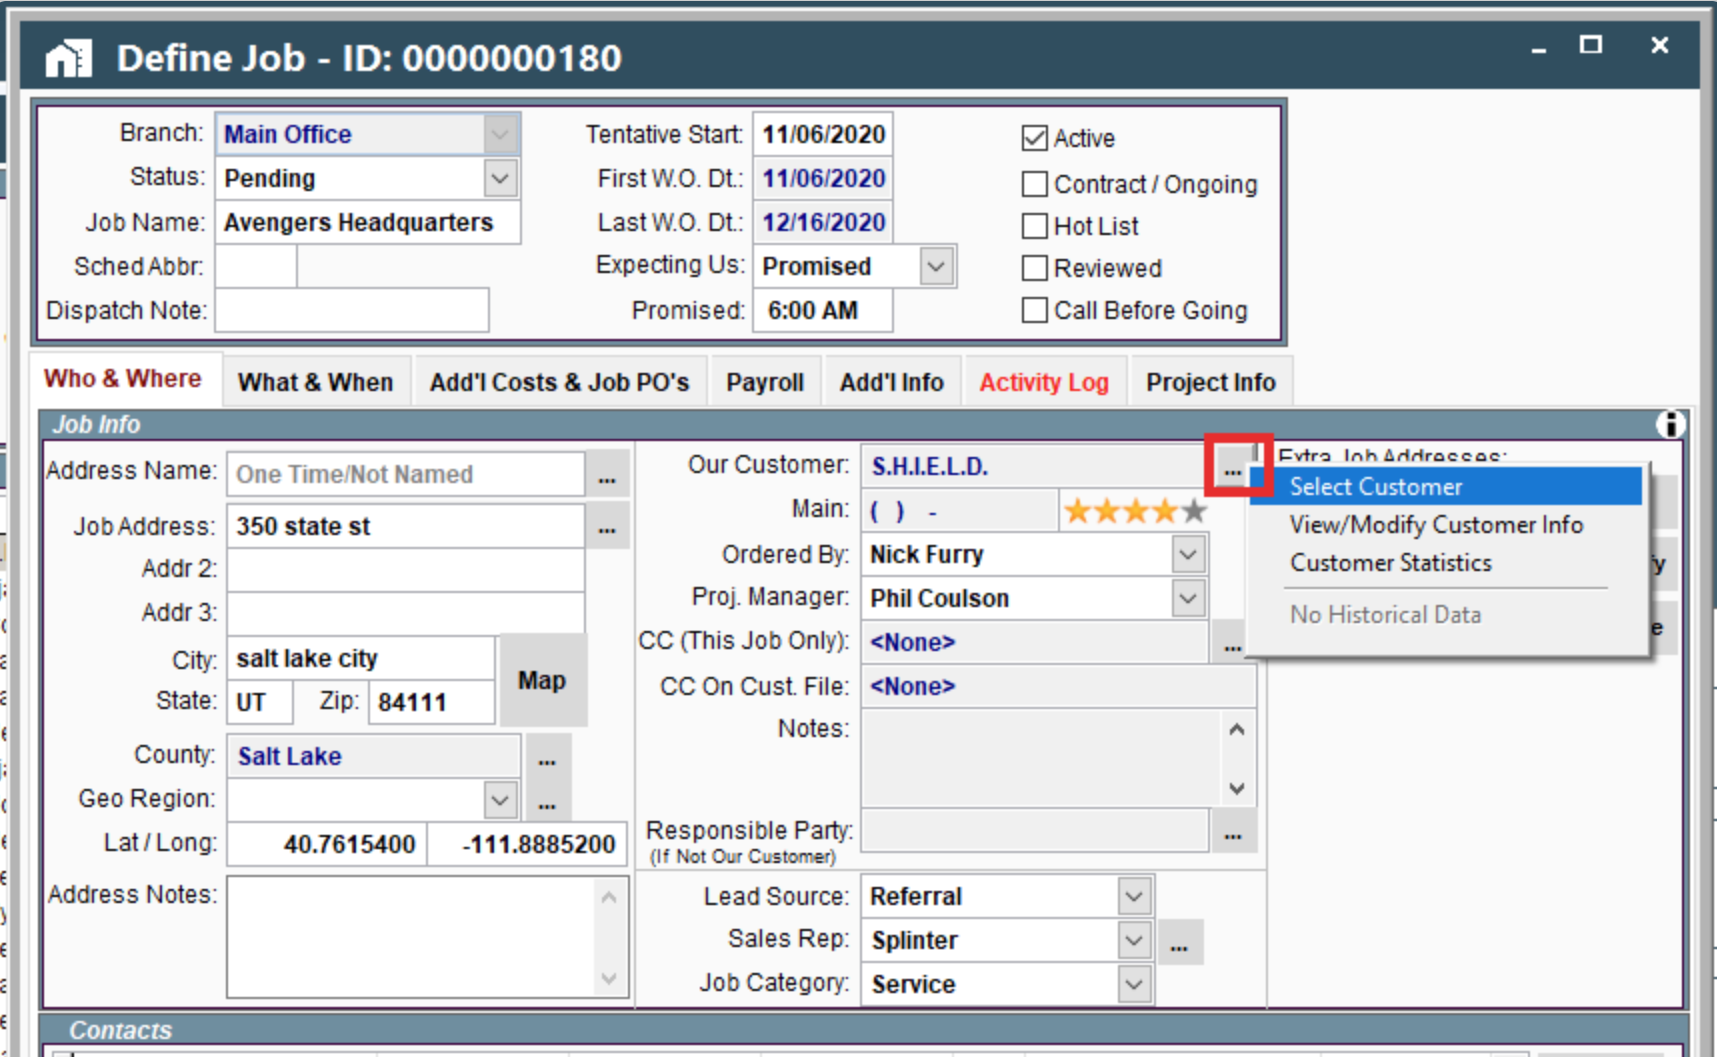
1. Select Customer (Reassign Job to Different Customer)
Click on the Ellipsis → Select Customer
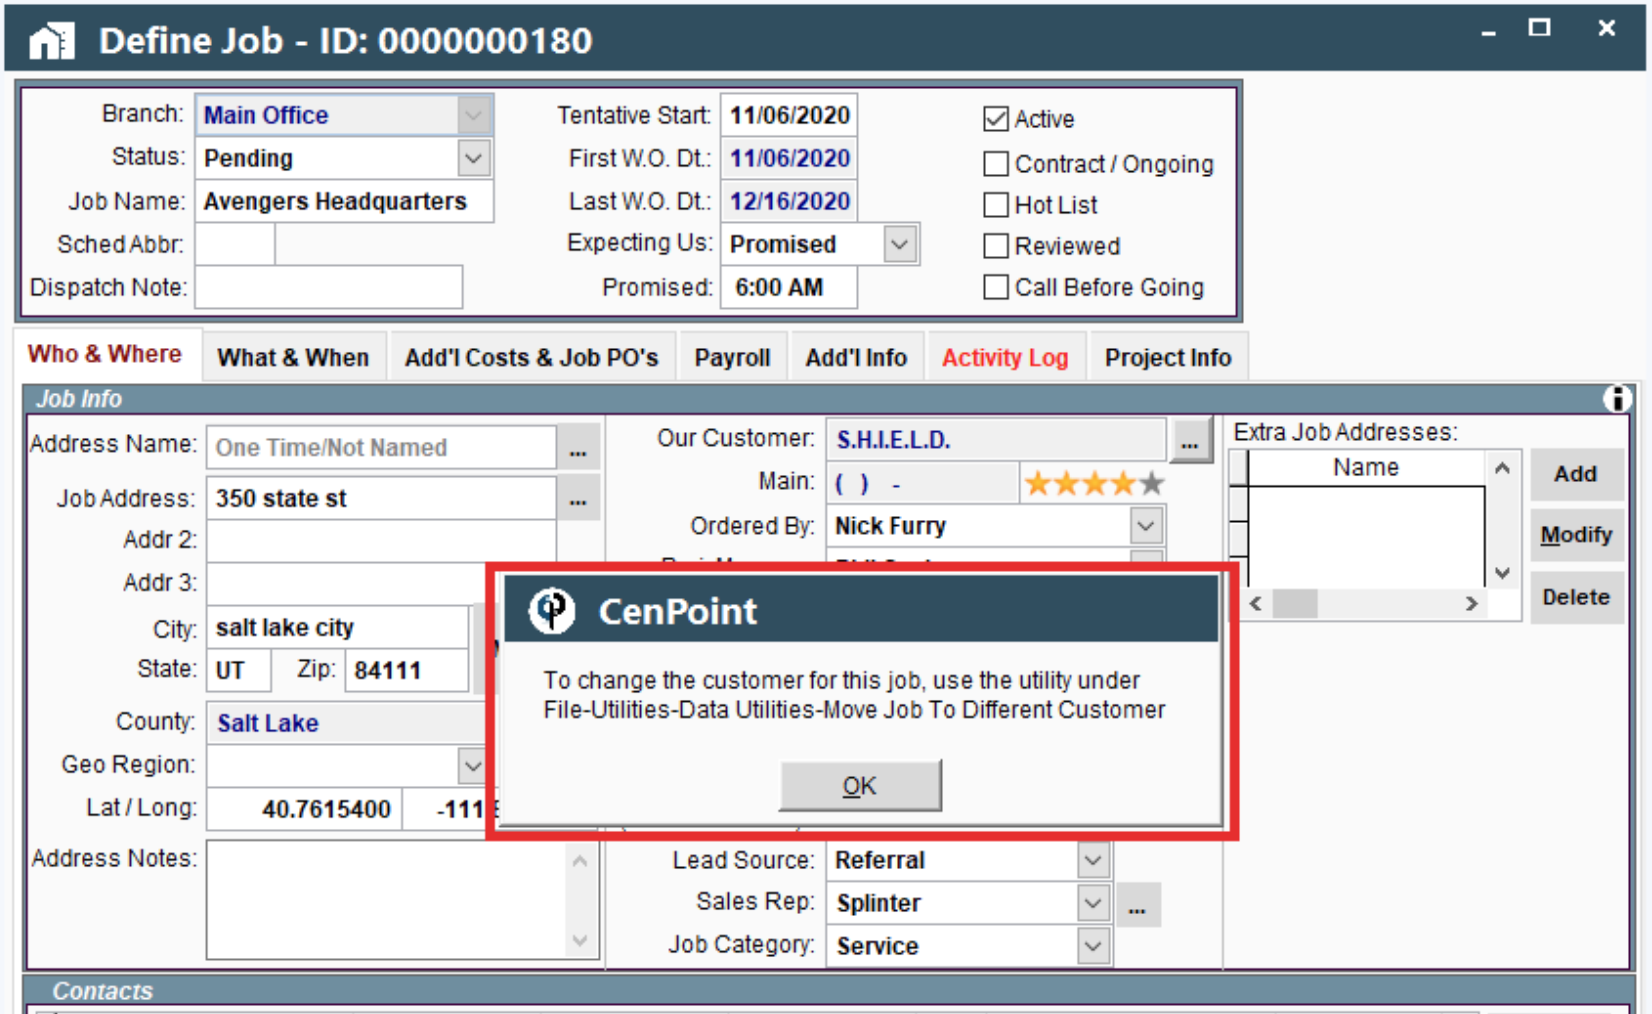
If you click "select customer", the message below will display. See Move a Job to a Different Customer for instructions on changing the customer selection.
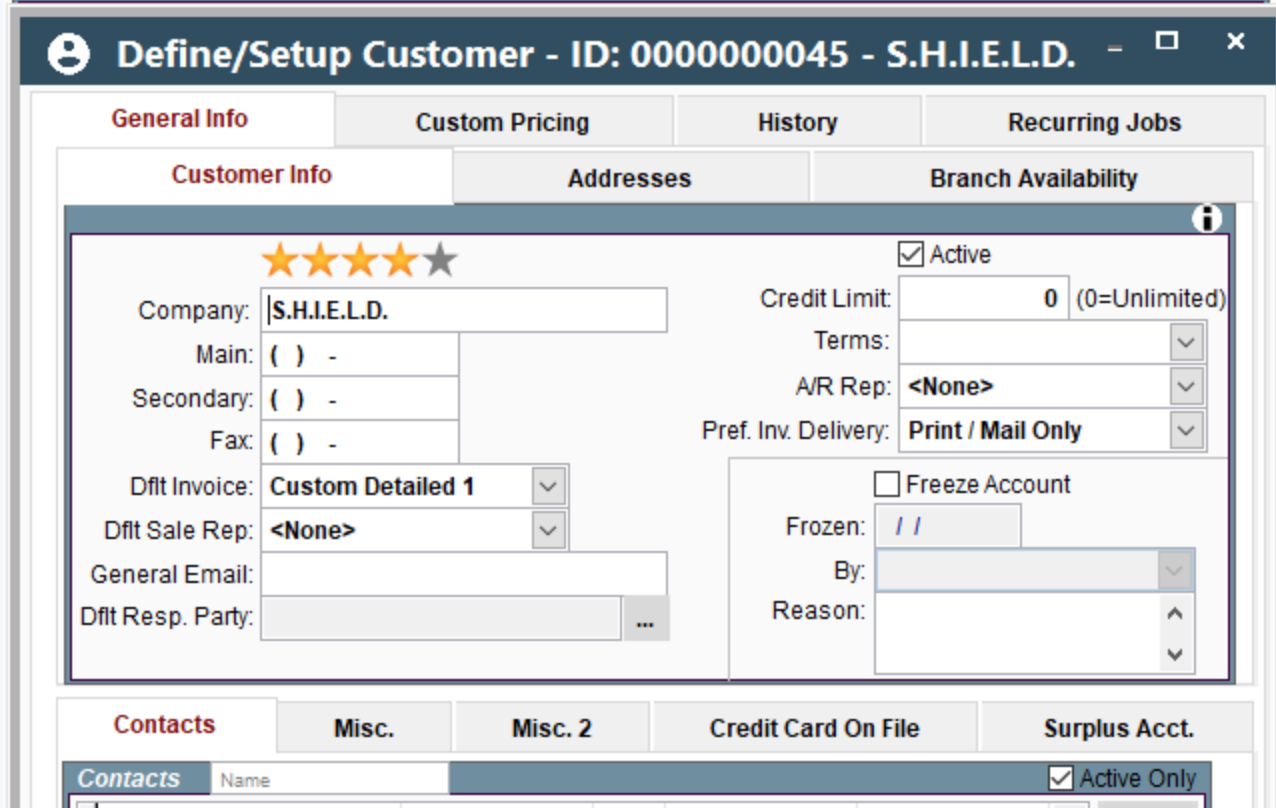
2. View/Modify Customer Info
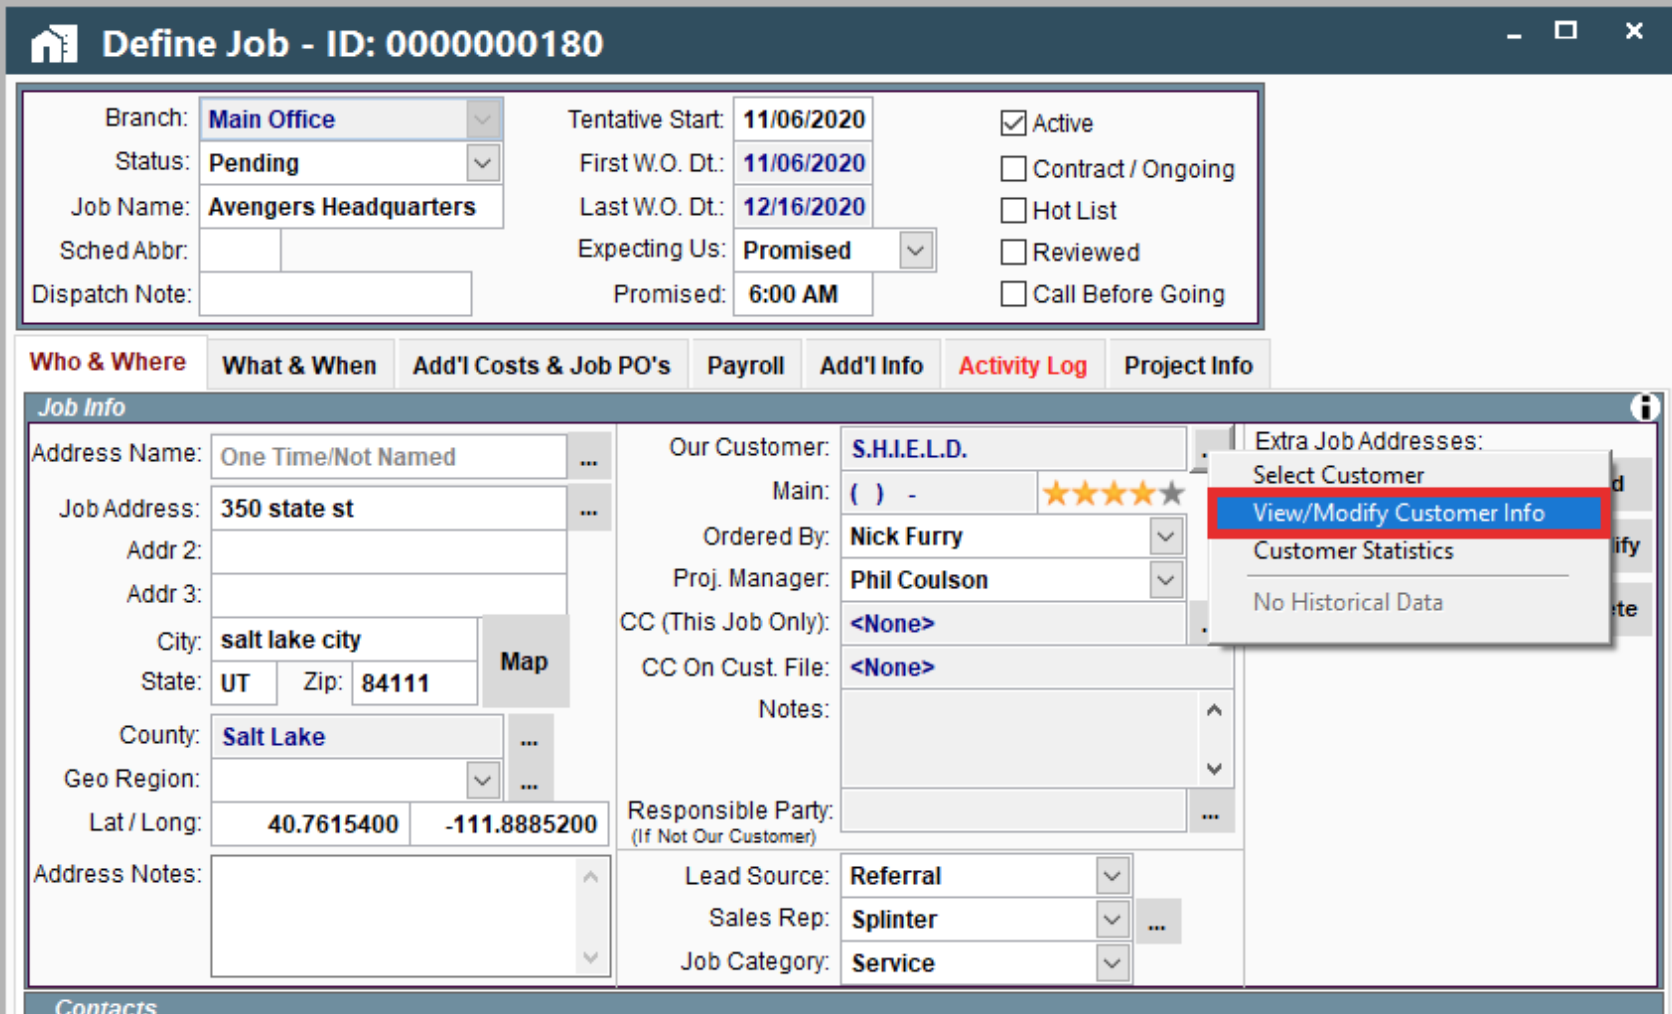
When “View/Modify Customer Info” is clicked, the customer screen opens.
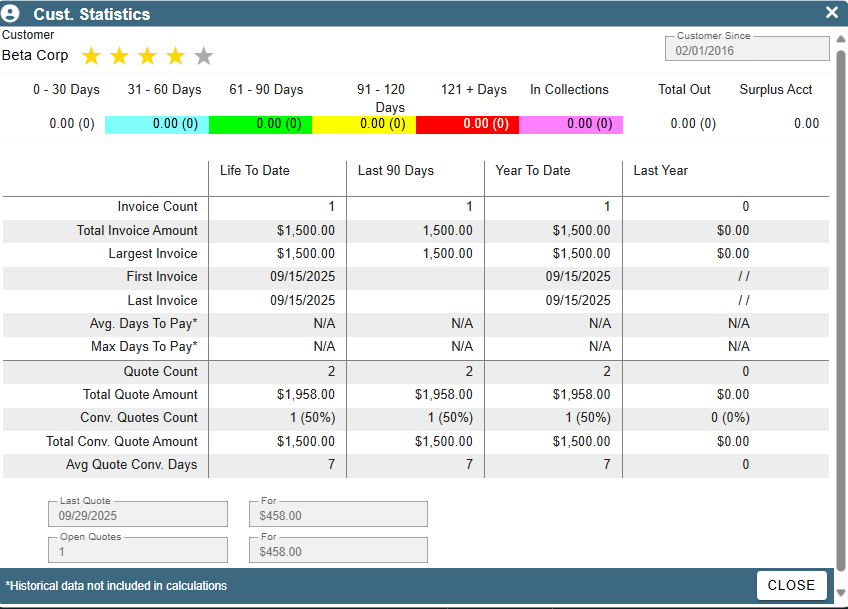
3. Customer Statistics
When “Customer Statistics” is clicked, the customer stats open.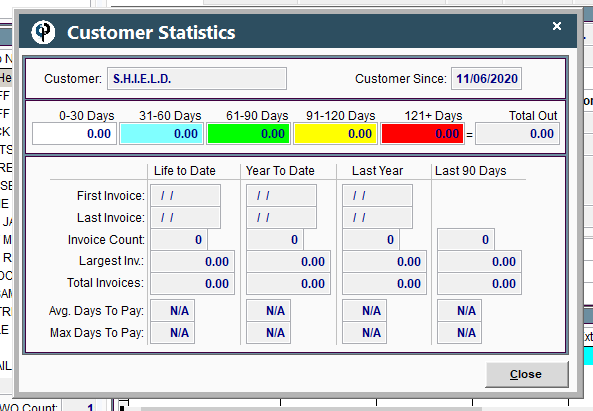
Job Customer Fields on Portal
The Job Customer Field displays which customer this job is attached to.
.png)
If you click on the ellipsis next to the customer’s name a dropdown menu will appear. Four options are displayed (select customer, view/modify customer info, customer statistics, and History)
.png)
1. Select Customer (Reassign Job to Different Customer)
Click on the Ellipsis → Select Customer to reassign this job to a different customer.
See Move a Job to a Different Customer for instructions on changing the customer selection.
.png)
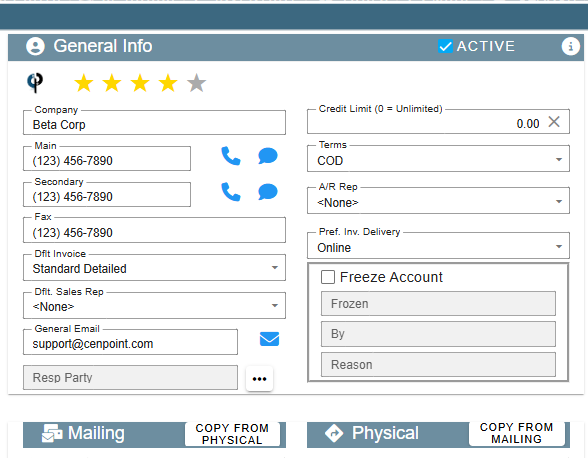
2. Open Customer
Clicking “Open Customer” will take you to the customer screen where you can view or edit any desired information about the customer.
.png)
3. Customer Statistics
Clicking “Customer Statistics” will pull up a window with a lot of numbers and useful information about the customer and past jobs they’ve had with you.
4. Historical Data
If you imported this customer into CenPoint from elsewhere, the “Historical Data” button would allow you to see the past information about that customer. This button doesn’t apply to customers that were originally created in CenPont.
.png)