
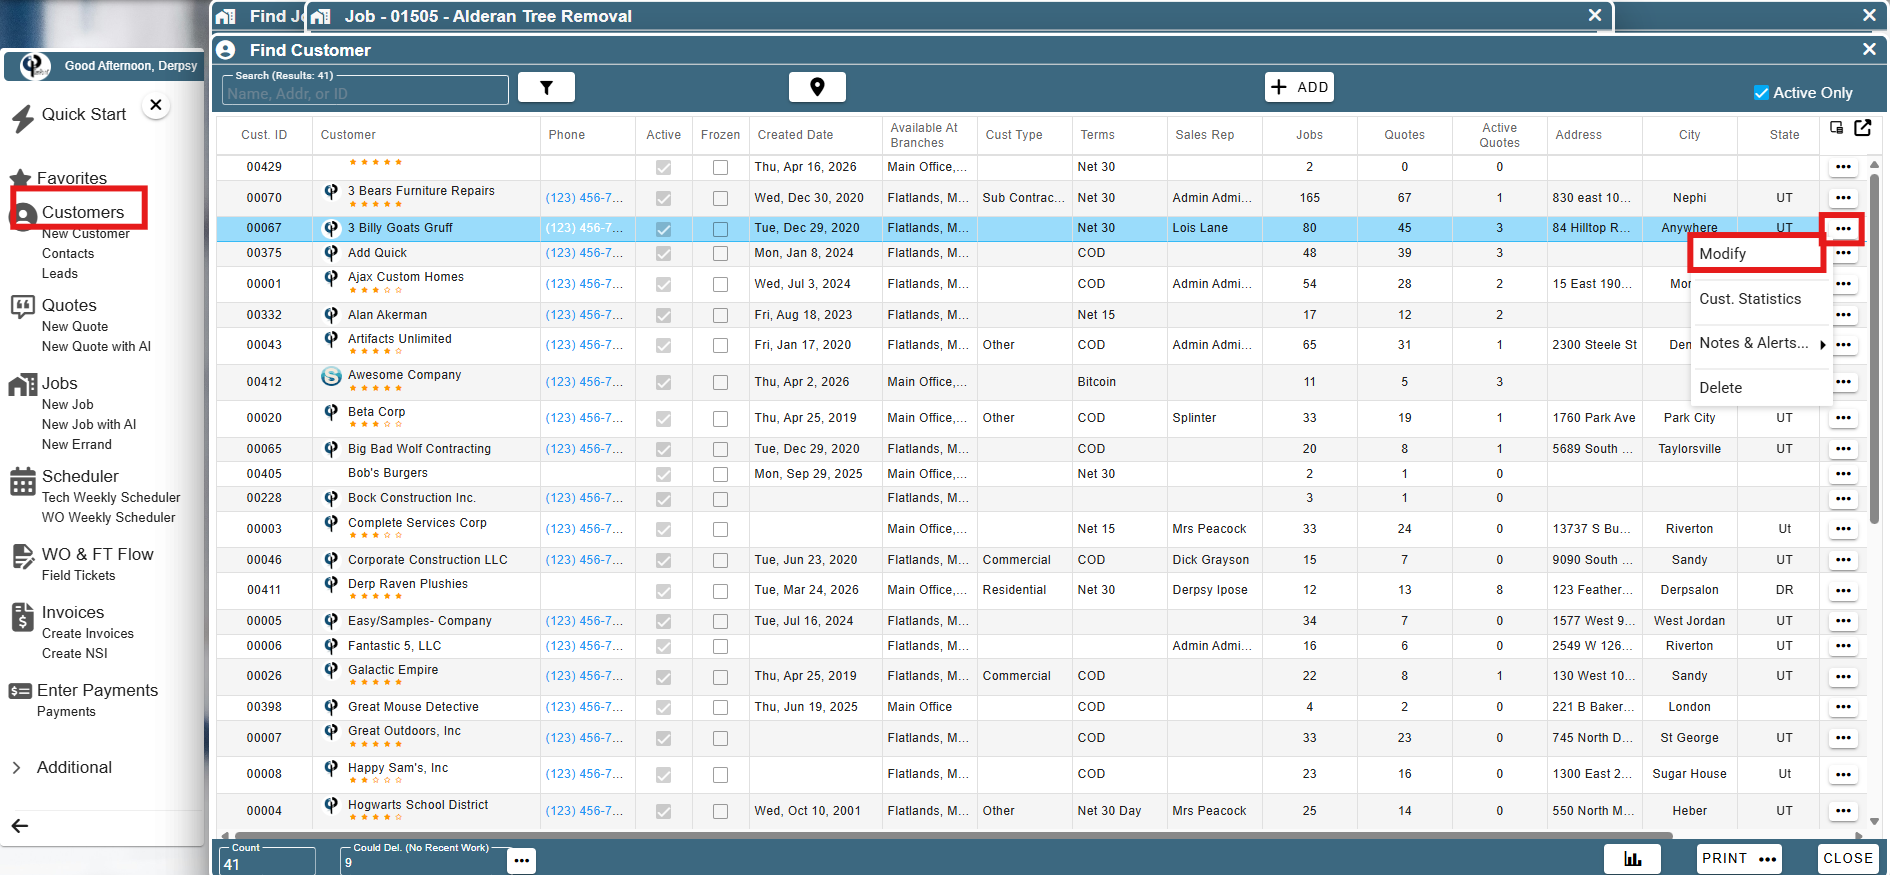
Find your customer by going to Customer → click the ellipsis → Modify
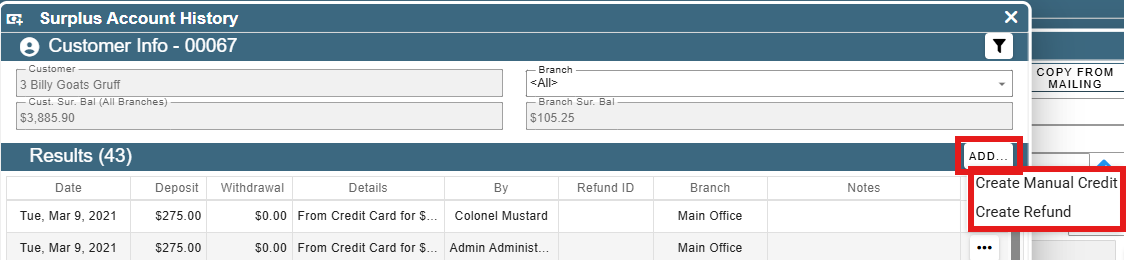
Go to Aging / Surplus Acct and click the ellipsis next to the Surplus account.

On the Surplus account history Click ‘Add’ then click ‘Create Refund’
Fill out the information to do the refund

The refund will show on the Surplus Account History for the customer. To get to the Surplus Account History click on the ellipsis next to surplus account on the customer screen.
