Setting up vehicles
Add Vehicles
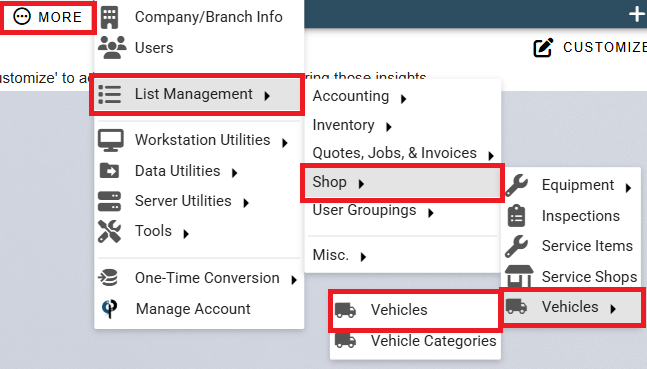
To add vehicles to CenPoint go to More -> List Management -> Shop -> Vehicles
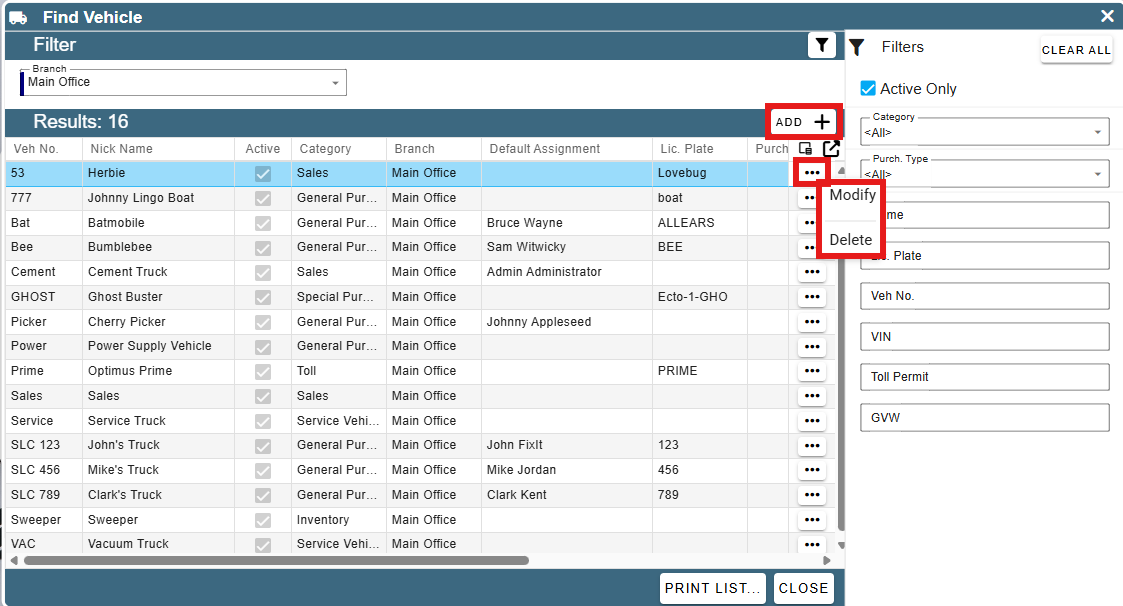
Click the 'Add' button to create a new vehicle.
Double click on a Vehicle or select the Ellipsis -> Modify to edit a vehicle.
Click the Ellipsis -> Delete to remove this vehicle from the list of vehicles actively in use.
General Info Table
Select a branch for this vehicle.
Each Vehicle needs to be assigned a unique vehicle number and a nickname.
Fill in the other applicable information
Assigning the vehicle to a tech will auto assign the vehicle to any job the tech is initially put onto. If the tech moves off the job, the vehicle stays with the job and must be manually removed. Sometimes you want one vehicle for a job, not necessarily the tech.
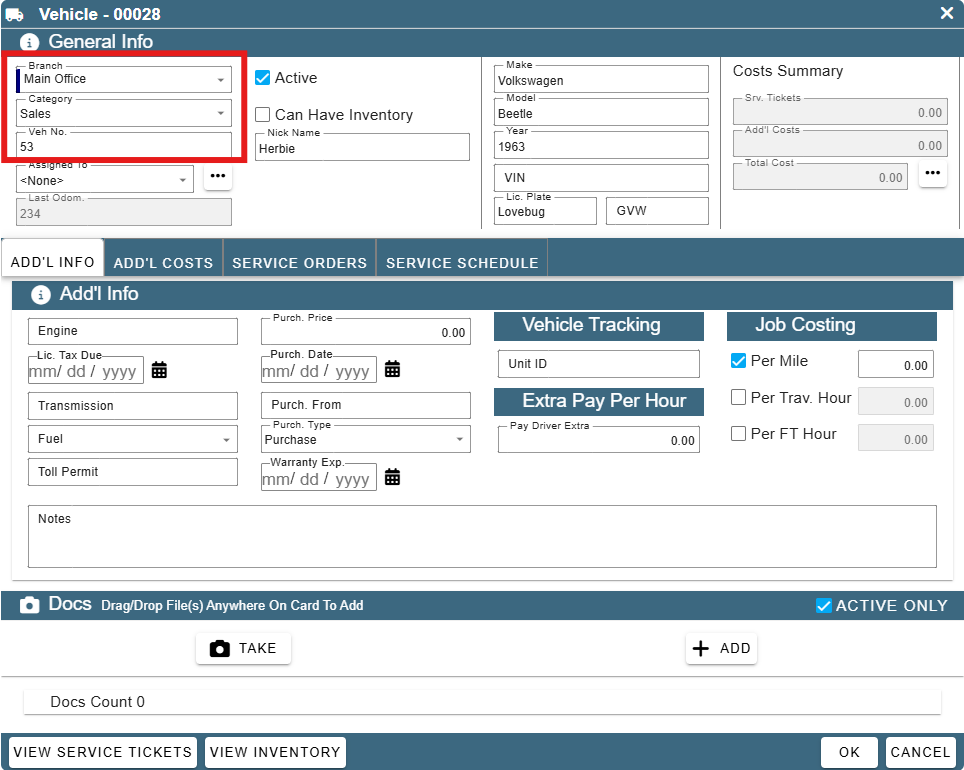
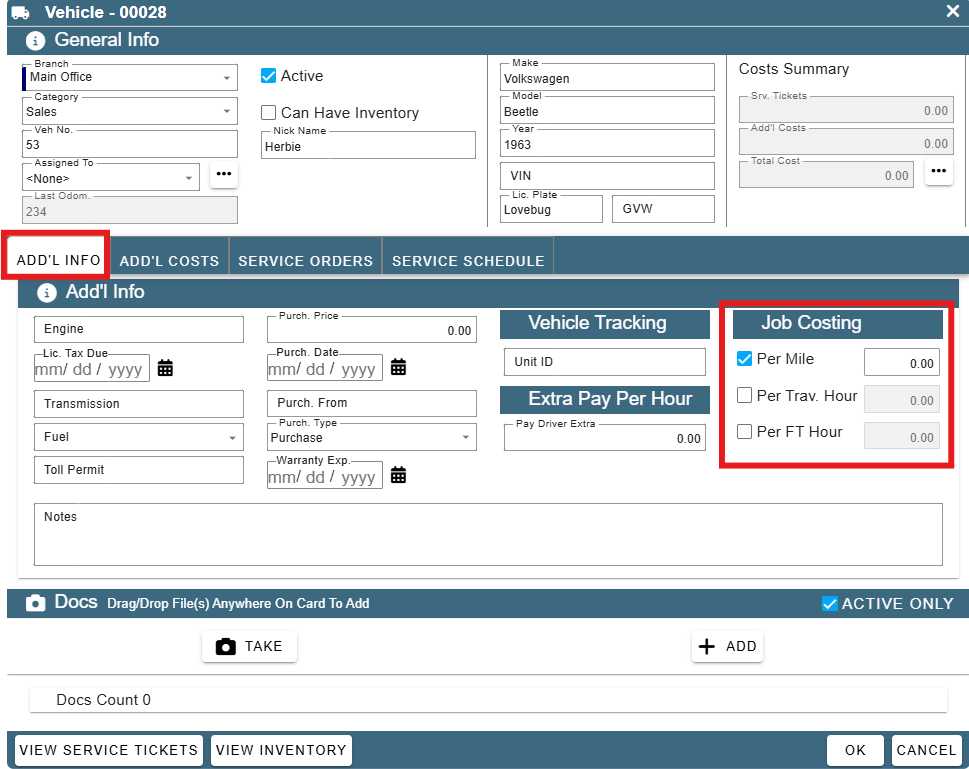
Additional Info Table
The Add'l Info tab holds detailed information about the vehicle and tracking.
It is also possible here to record how much the vehicle costs to operate per mile, travel hour, and/or field ticket hour.
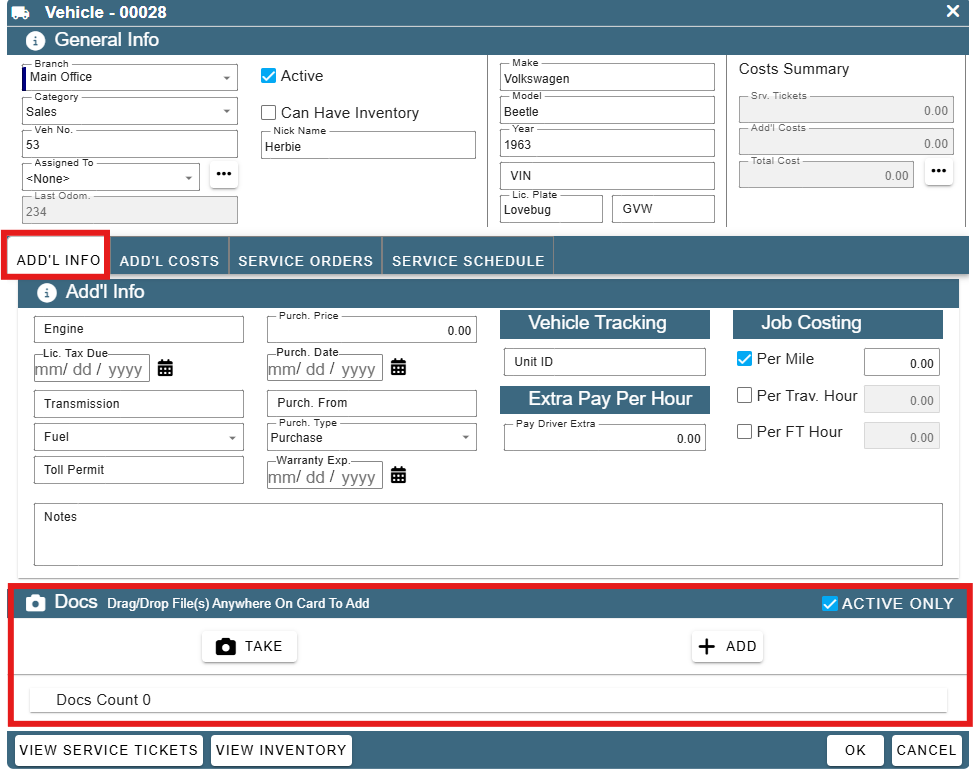
Docs Table
Store documents associated with the Vehicle here.
Some examples might include Vehicle Insurance, Registration, User's Manual, and Photos of the vehicle.
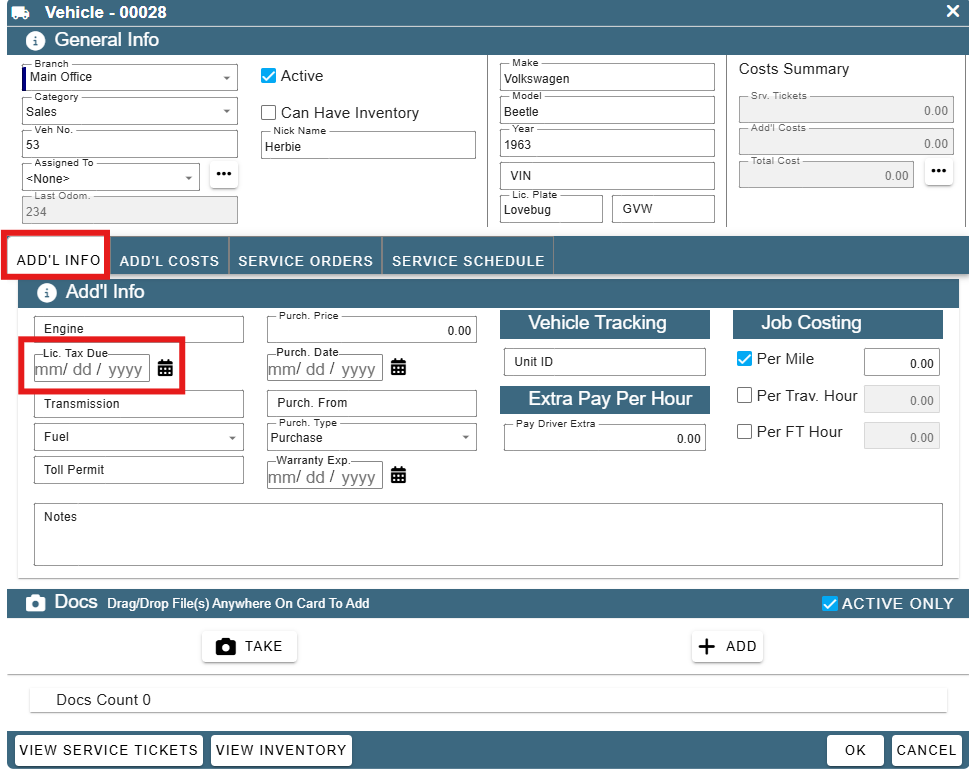
License Plate Expiration
There is a button labeled 'Lic Tax Due:' where you can enter the expiration date of that vehicle's registration.
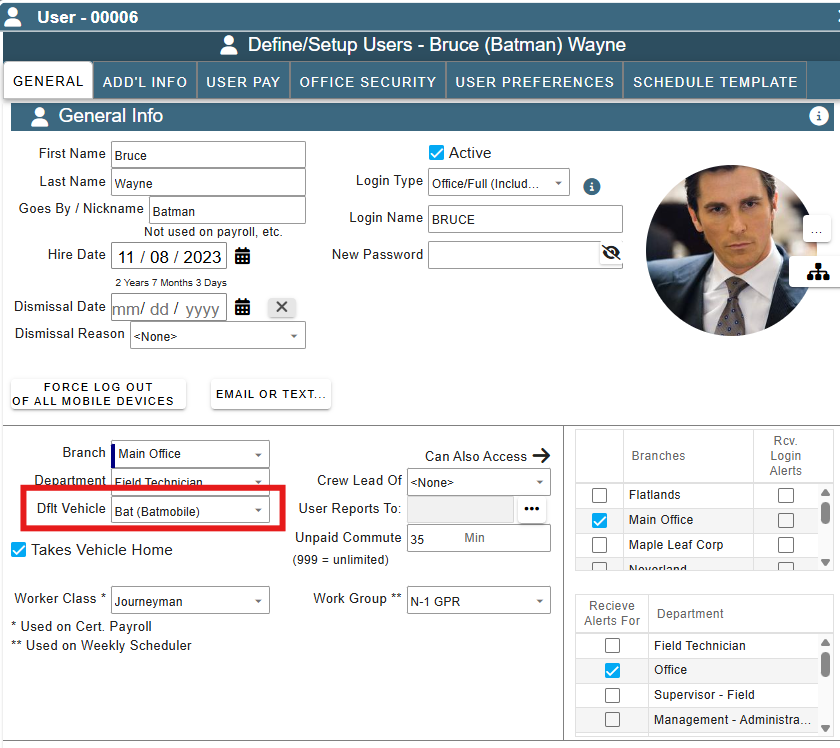
Assigning Default Vehicles to Users
Go to More -> Users
.png)
Find your user and then double click on them or click the Ellipsis -> Modify
.png)
Go to the General tab and find the 'Dflt Vehicle' dropdown.
Select the default vehicle (if any) that you would like to assign to that user.
Add'l Costs
The additional costs tab shows all the additional costs for vehicle that aren't on Service Tickets.
To add a new cost, just click the Add button. Or to modify or delete an existing one, just click the ellipsis next to the cost you want to modify or delete and select your option.
.png)
Modify or add will bring you to a screen like this, just enter the information you want, and click ok!
.png)
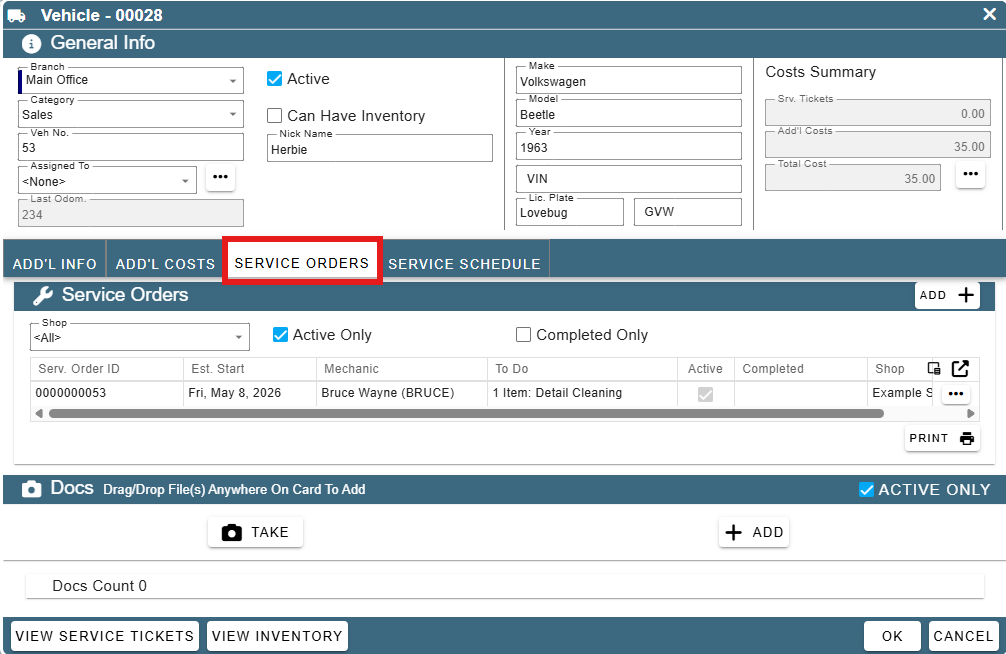
Service Orders
Service orders for the vehicle will be found in the Service Orders tab. It'll show all the info associated with the service order. To learn more about service orders: Service Orders
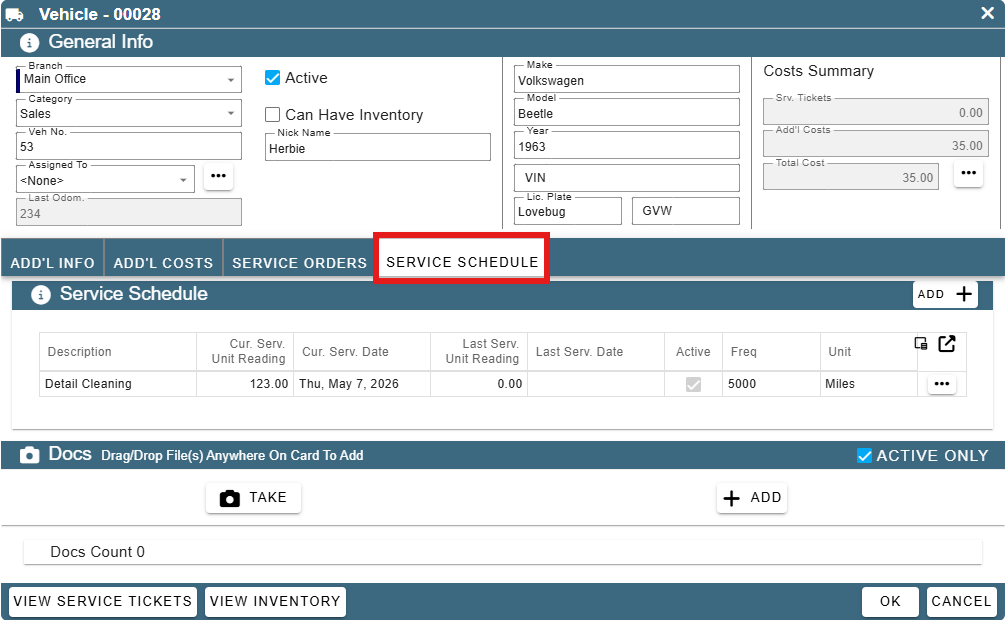
Service Schedule
To see the scheduled services that are for the vehicle, click over onto the Service Schedule tab.