Incidental Charges Overview
An Incidental charge is an unexpected expense (normally fairly small) that happened on the job site.
Some examples could be paying for parking at the job site, needing to repair equipment that broke in the middle of the day, needing new gloves, etc...
This article goes over two aspects of Incidental Charges:
One: How to define an incidental charge
Two: How to attach an incidental charge to a Task inside a Field Ticket
Incidental Charges
Attaching Incidental Charges to a Field Ticket is coming soon to CenPoint Portal :)
Define an Incidental Charge
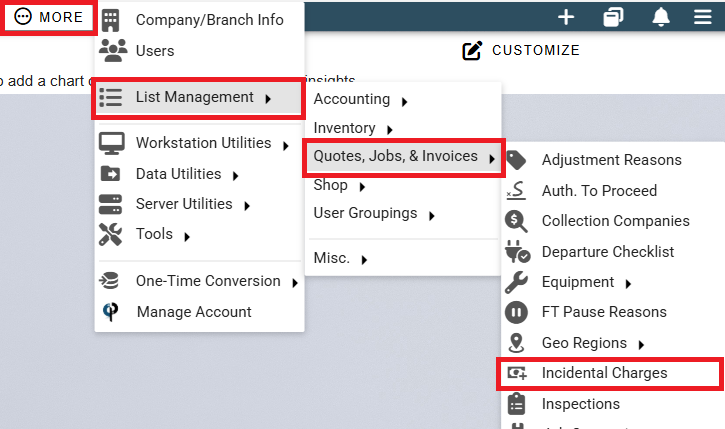
Go to More -> List Management -> Quotes, Jobs, & Invoices -> Incidental Charges
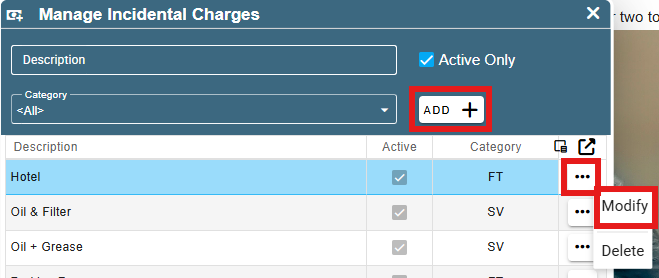
Click the Plus sign to add a new Incidental Charge.
Click the Ellipsis -> Modify to edit an existing Incidental Charge.
This window will appear upon attempting to add or edit an Incidental Charge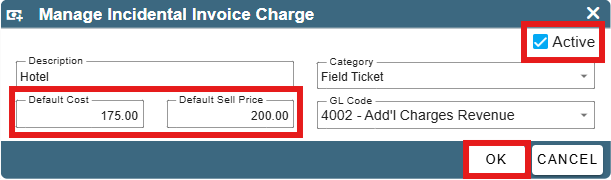
Here's a breakdown of the different fields when creating an Incidental Invoice Charge:
Category: Select whether this Incidental charge would occur on Field Tickets or Service Tickets. For more information on Service Tickets and Field Tickets see the following links:
Field Tickets and Service Tickets
Default Cost: The default amount this incidental charge will cost you.
Default Sell Price: The default amount you will charge the customer for this Incidental Charge.
GL Code: The code that is used for accounting purposes to categorize this expense. For more information on GL codes see the following link:
Note: For this Incidental Charge to be able to be assigned to a Field Ticket please make sure the 'Active' box is checked.
Add a Vendor
Go to More -> List Management -> Accounting -> Vendors
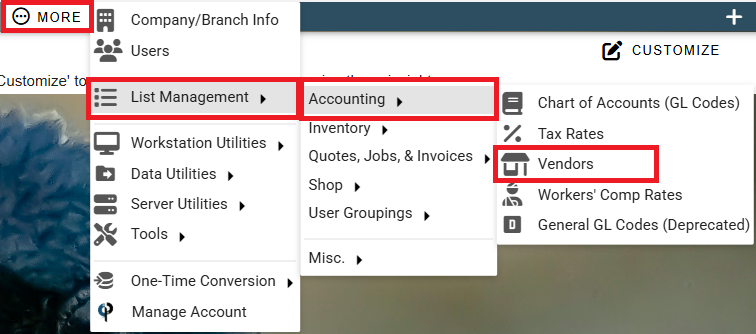
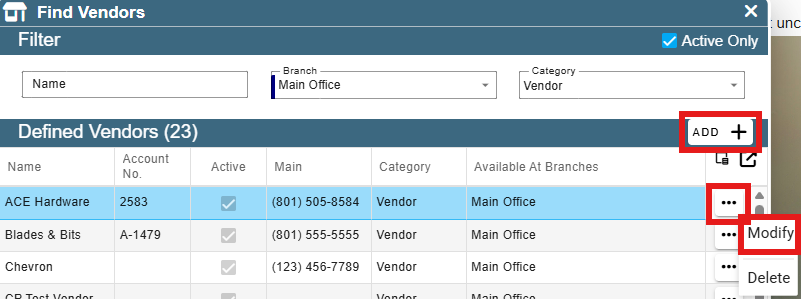
Click 'Add' to create a new vendor.
Click the Ellipsis -> Modify to edit an existing vendor.
Fill out information like the Address on the Vendor.
Definition of Category:
The Vendor category is for places that you would expect to go back and buy from again. Examples might include hardware stores or a parking garage that you frequent.
The Other/1-Off category is for places that you don't expect to be back and buy from again soon. Examples might include a catered meal or a parking meter on a random street that you won't be returning to.
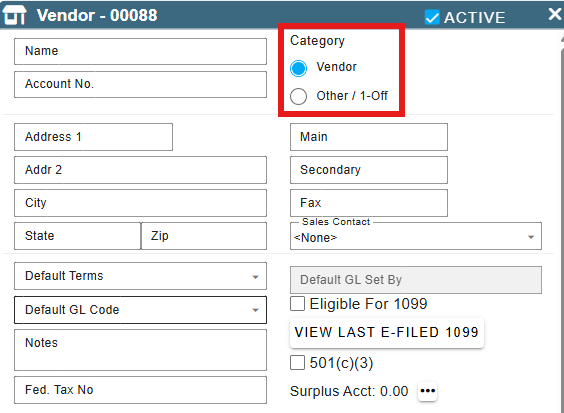
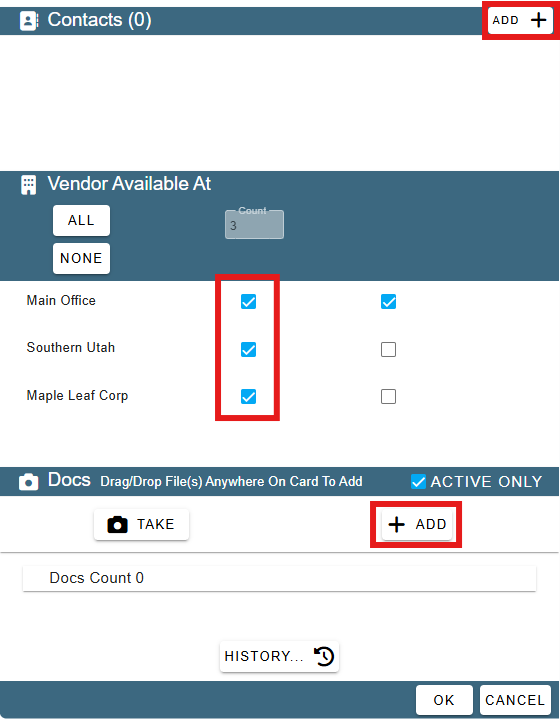
Add any Contacts associated with the Vendor.
Set which branches can see this Vendor.
Add any documents associated with the Vendor. Examples may include receipts or special instructions about the vendor.
Click OK to save the information and close the window.