
Once you have set up PTO for your employee's in CenPoint they can request time off through either the mobile app or the desktop version of CenPoint.
If you need information on setting up PTO use this link: Set Up PTO
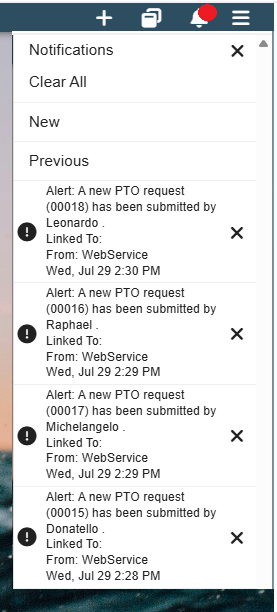
When an employee requests time off, a notification is sent to the person designated in the Branch Settings to receive time-off requests. The notification will appear under the bell icon in the top ribbon.
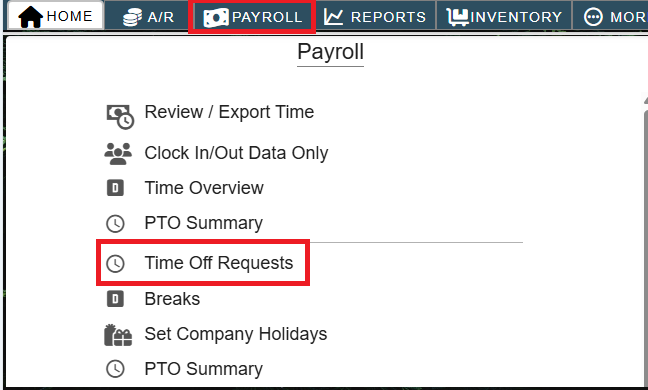
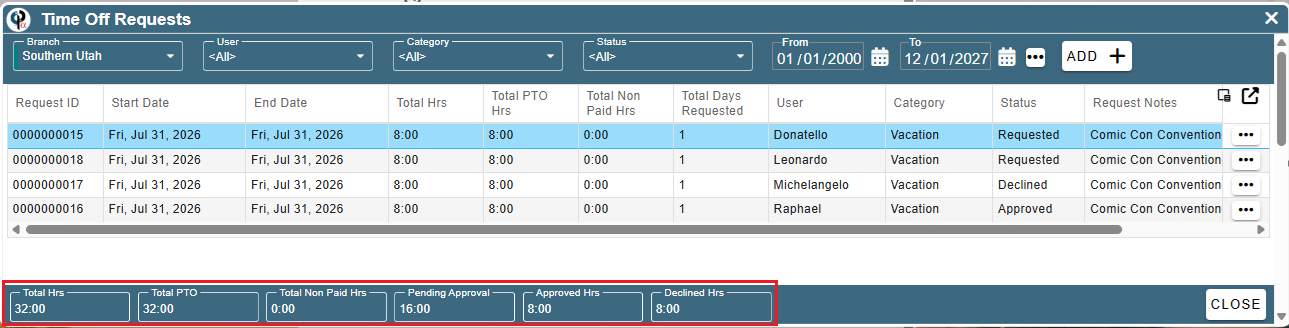
View the time off requests by going to the Payroll tab and clicking Time Off Requests
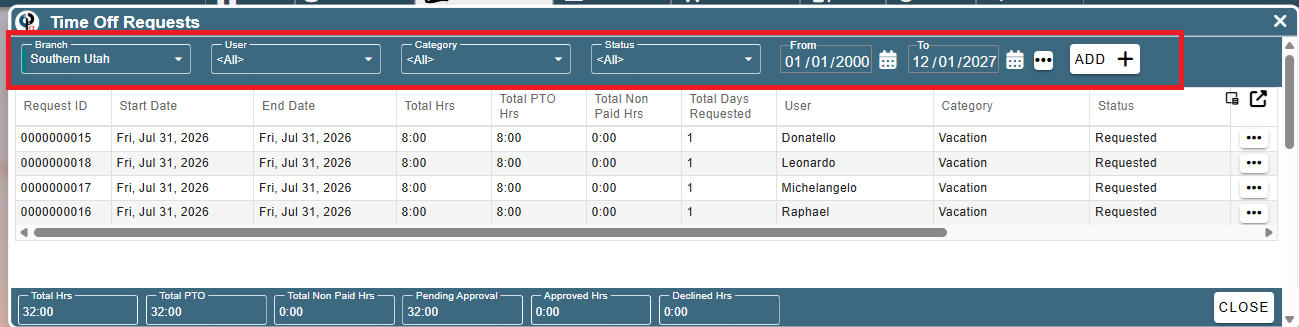
Top Filter Bar
Branch dropdown — Lets you switch between different locations to see only that branch's results.
User dropdown — Lets you filter down to a specific employee.
Category dropdown — Filters by the type of time off (e.g., Vacation, Sick, Unpaid).
Status dropdown — Filters by request status (Requested, Approved, Declined, etc.).
Date fields- Filter results to requests within a specific date window.
ADD (+) button — lets you create a new time-off request manually.
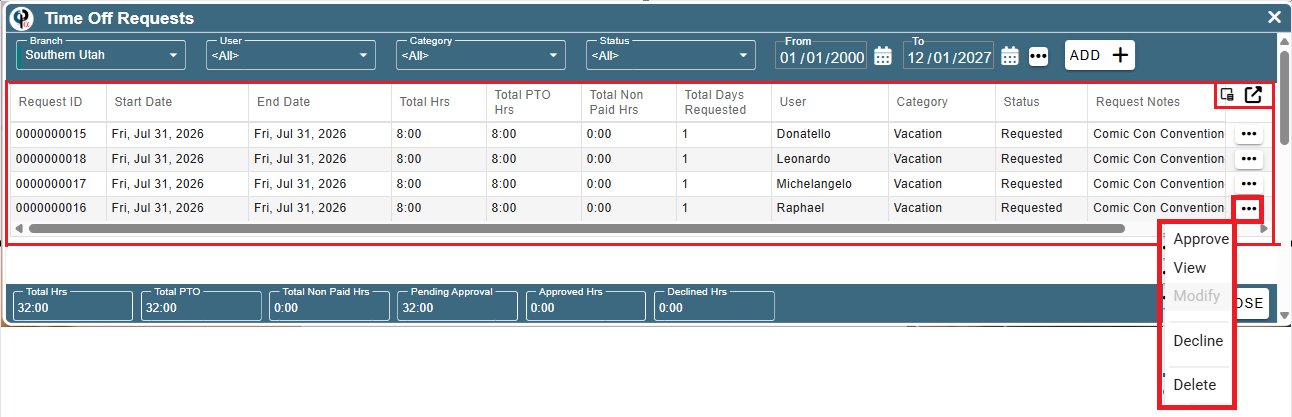
Main Data Table
Each row is an individual time-off request within the columns
Request ID — unique identifier for the request
Start Date / End Date — the date range the time off covers.
Total Hrs — total hours requested off.
Total PTO Hrs — how many of those hours are paid time off.
Total Non Paid Hrs — how many hours are unpaid.
Total Days Requested — number of days covered.
User — the employee's name
Category — type of leave (ie: Vacation, Sick Time).
Status — current state of the request "Requested" — meaning pending approval "Approved" request has been approved
"..." (three dots) button at the end of each row — opens row-specific actions, likely Approve, Decline, Modify, or Delete that request.
Two icons in the top-right of the table (a document/export icon and a column picker)
Bottom Summary Bar
These are read-only calculated totals reflecting the currently filtered rows:
Total Hrs — sum of all requested hours
Total PTO — sum of all PTO hours
Total Non Paid Hrs
Pending Approval hours still awaiting a decision
Approved Hrs
Declined Hrs
Click the Ellipsis to view the time off request
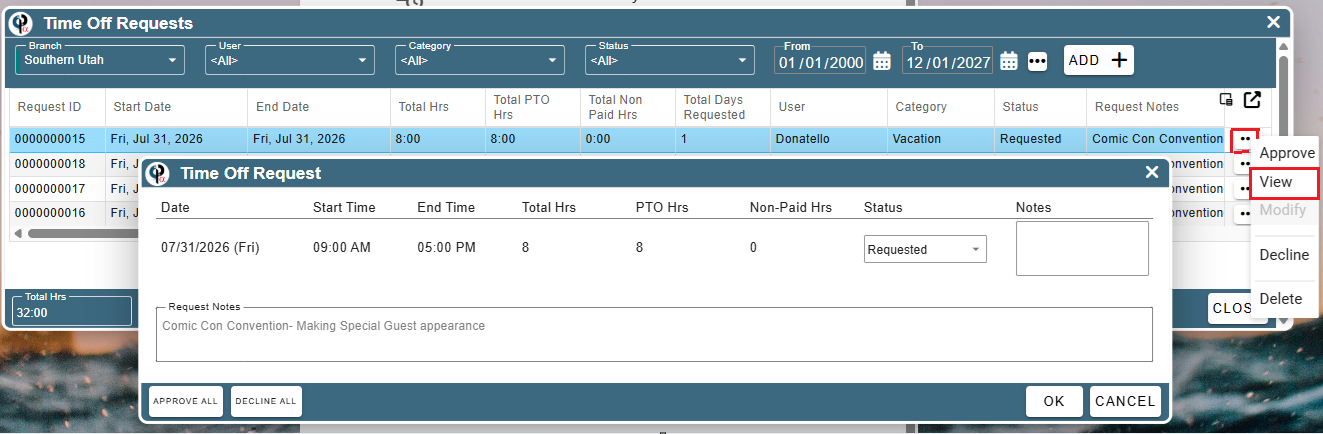
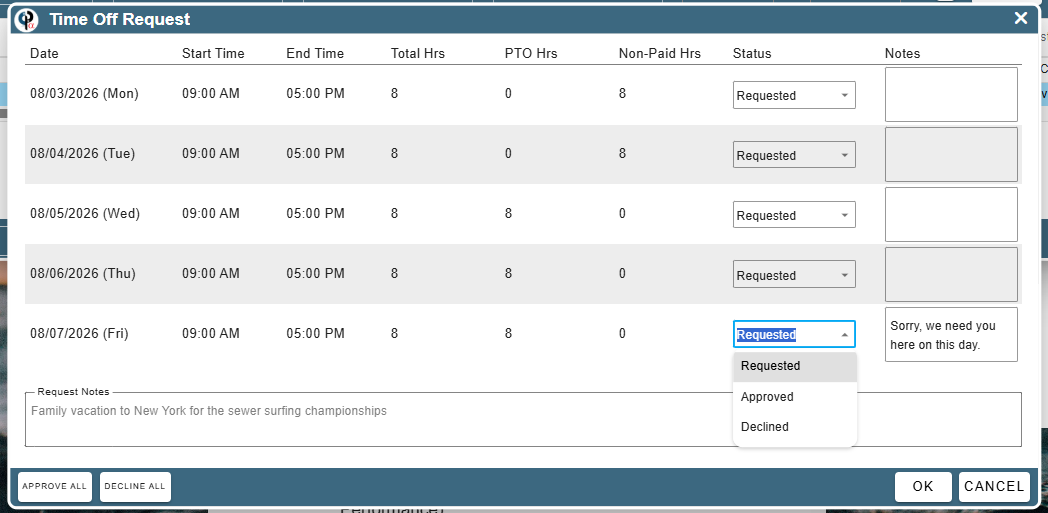
Individual Time Off Request
Date: the specific day(s) being requested off.
Start Time — 09:00 AM, when the requested leave would begin.
End Time — 05:00 PM, when it would end.
Total Hrs -the total hours covered by this request.
PTO Hrs - how many of those hours are paid time off.
Non-Paid Hrs how many hours (if any) are unpaid.
Status — a dropdown set to "Approved" or "Declined" for this specific date/row without using the bulk buttons.
Notes — Approver would type notes about the request here that the tech then can see on their time off requests.
Request Notes:These are typed in by the tech when submitting the request
APPROVE ALL — approves every date/row in this request in one click (useful if a request spans multiple days)
DECLINE ALL — declines every date/row in this request.
OK — confirms/saves any changes made on this screen
CANCEL — closes the window without saving any changes.
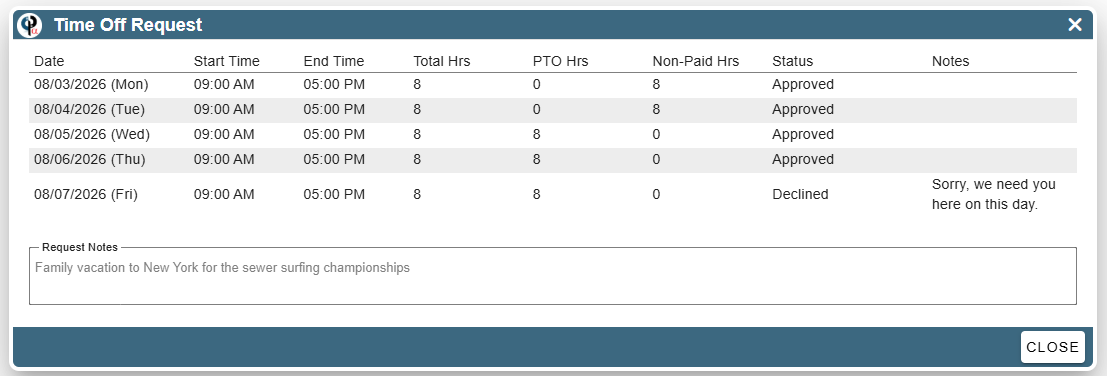
This is what the tech would see based on the above sererio
How do I change some of the time from PTO to Unpaid ?
This must be done by the tech on their app, the tech would go into the request and modify the time and submit it again.
What happens when the employee is out of PTO hours?
They can only schedule unpaid time off if all their PTO hour has been used.
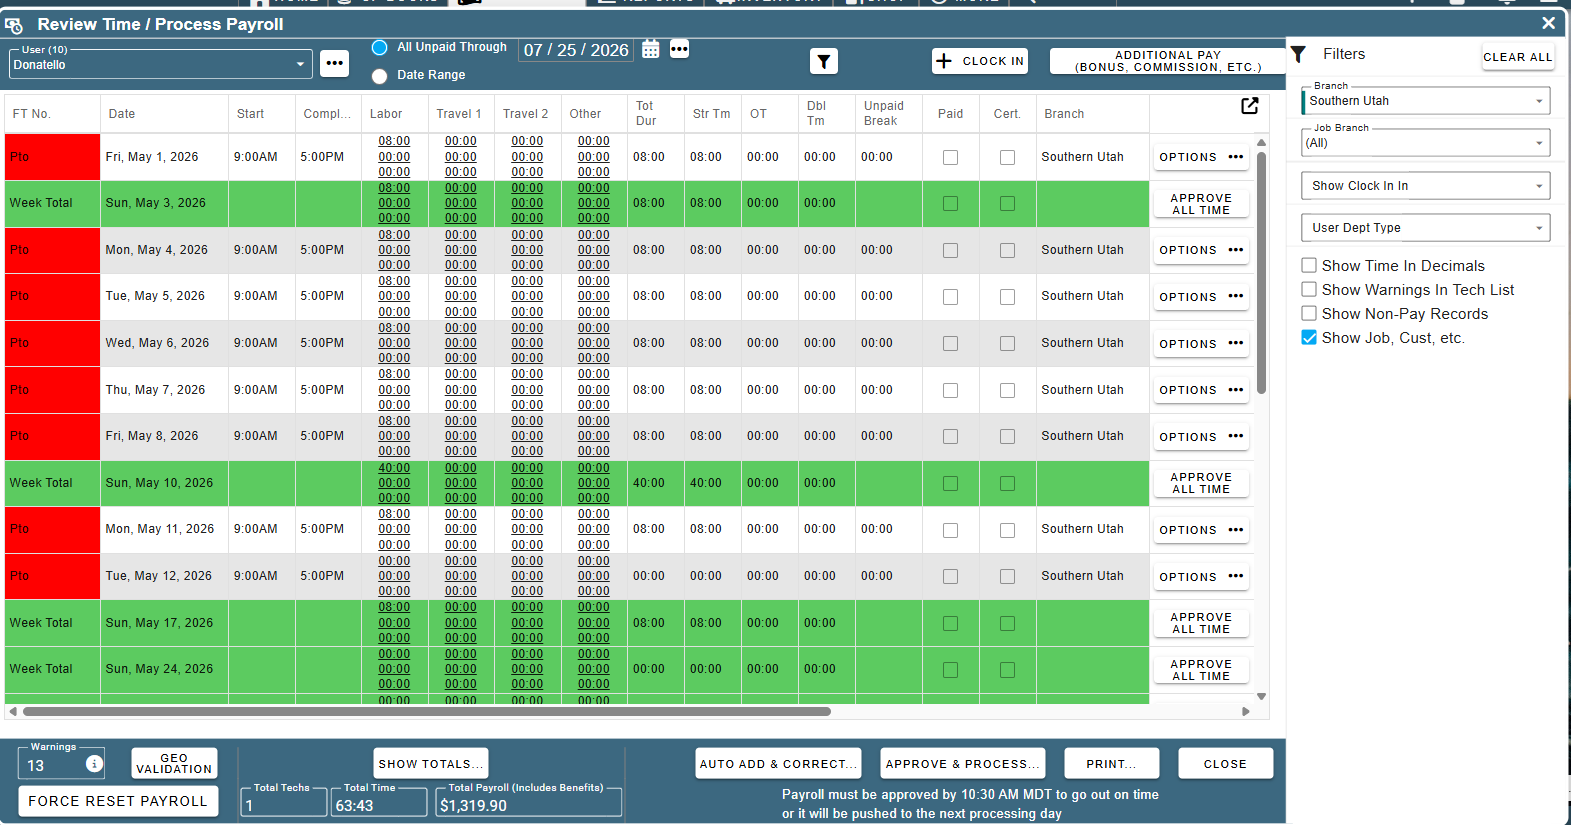
Once a PTO request is approved, it will automatically show up in the Review Time / Process Payroll screen as PTO hours, along with an auto-generated clock-in entry matching the time range specified on the original request. PTO time will still need to be approved as part of the normal payroll process.
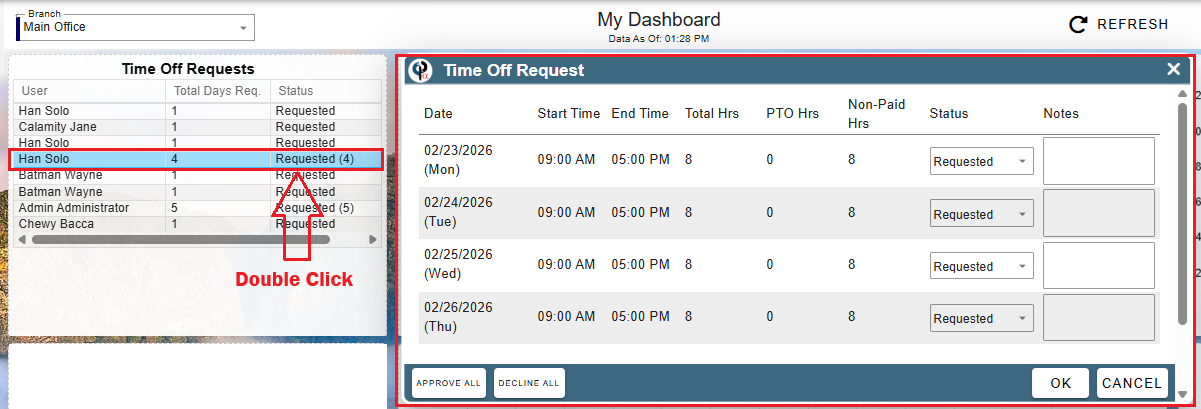
You can easily access time off requests from the dashboard if you have Time Off Requests selected as a dash board option.
Double click on an entry from the time off request and a pop up window will launch with the information on that request along with the ability to approve/decline or leave notes for that request.
For more information on setting up the dashboard use the following link: Dashboard