CenPoint has a variety of different schedulers such as daily/weekly/monthly, vehicle and equipment scheduling. There is something for everybody!
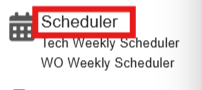
Find the different schedules on the Left Side Menu

For this we are going to focus on the main Scheduler
Click the Scheduler button to pop up the scheduler
Layout adjustments
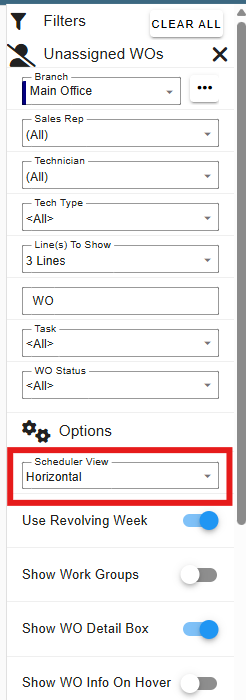
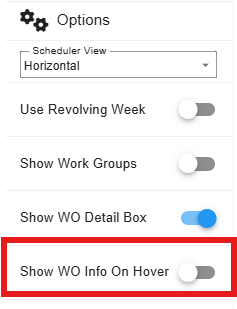
To adjust how the layout is adjusted, you can change it with the Scheduler View. This can also be found in the filter view as well. Something to note: if my view looks different, that’s due to filter adjustments, which we will cover later.

Header Bar
Navigating the header bar is rather simple. We can see the date and how much time is scheduled out for today, if my view looks different, that’s due to filter adjustments, which we will cover later.

Going across the top of the header bar, we have several icons. Going from left to right, we start with the date, this shows what day I am focusing on.

The Looping arrow is the refresh button. If you made an edit to a WO and don’t see that change yet, refresh the view and it should show up.

The funnel is the filter. This pops up a side menu where you can see all your filters for the view. We will go into more detail about that further down in this article.
.png)
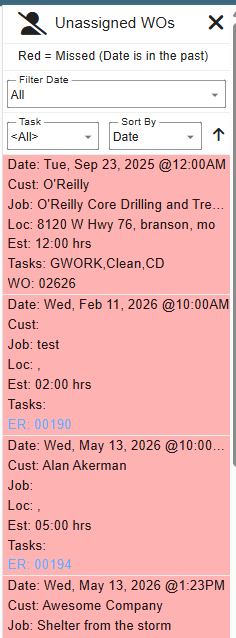
The person with a slash through it is the Unassigned WO’s. This pulls up a side menu that lists all of the unassigned WO’s you currently have in CenPoint. If they are red, they are past due.
.png)
This pulls up a side window that has all of the unassigned WOs. We are pretty bad about our WOs so we have a few that are well over due..... Ignore us......
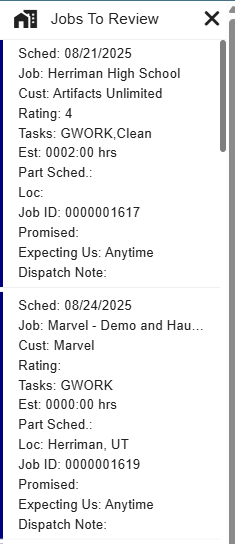
The house icon is for Jobs to Review. This is for jobs that haven’t been marked as reviewed.

This brings up a side menu where you can see all the jobs that haven’t been reviewed yet.
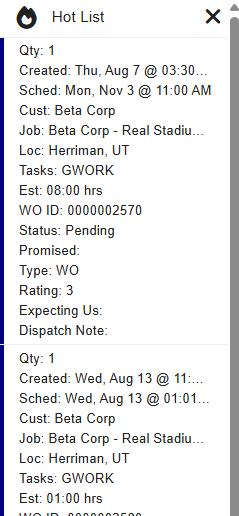
The fire is for Hot List jobs. If a job has been marked as being on the Hot List.

This brings up a side menu where you can see all the jobs in the hotlist.
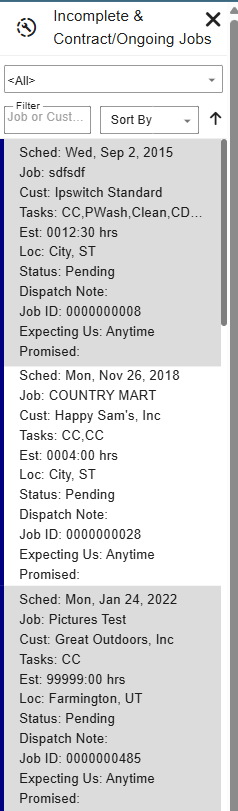
The wrench with a dotted circle around it is for jobs that are Incomplete &Contract/Ongoing. These jobs are in progress or just under contract

Clicking this brings up a side menu where you can view all incomplete or ongoing jobs.
Lastly, along the bottom, is the date range. This allows you to select what date you want to see or what you are doing.

Filters
There’s a lot here at first glance, but let’s break this down
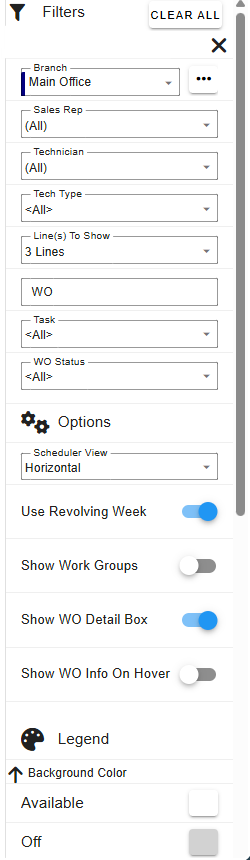
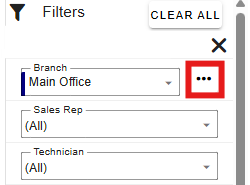
First up is the Branch and Branch Grouping. They both share a drop down, but you can use them to look at the schedule for a Branch or Branch Grouping.
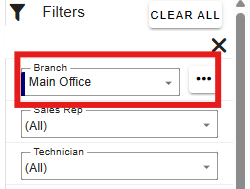
The ellipsis next to the branch drop down is where you would go to manage branch grouping.
The next section is for filtering by the kinds of people working the job. Things like your sales rep that made the job, the tech associated with the job and even going as broad as what type of tech is working the job.
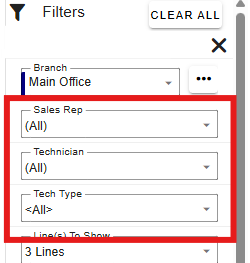
Next is the Lines to Show section. This shows how much information you want to see at any given point in time about the job previews. For more information on that, please visit the Misc. 2 Tab document

The WO is for if you are looking for a specific WO by entering the WO id number.

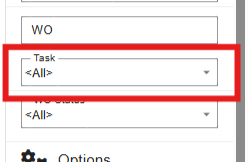
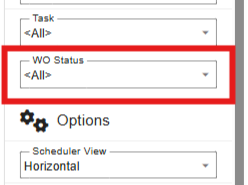
Task is for filtering by WOs that have a specified task
WO Status is for filtering by the status of the WO.
Scheduler View changes how the view is seen. Jump to here to learn more.
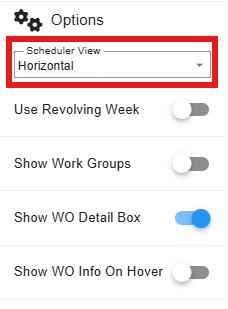
The revolving week makes it so that the week moves based on the month date, just altering the display. Turning this off makes Sunday the first day of the week.

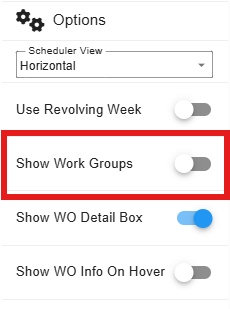
Show Work Groups will separate the workers by their groupings listed in their profile. It can make it nice if you need to schedule all of the TMNT gang to go crimefighting…. I mean, send them to clean the sewers…. yeah….
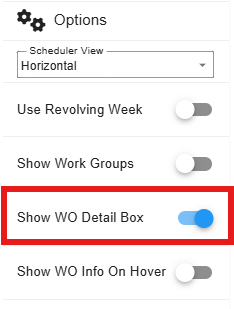
Show WO Detail box enables a mini pop up in the bottom right hand corner of the scheduler that will give you some more details on the WO.
Show WO Info on Hover is for showing you more information on hovering on a WO.
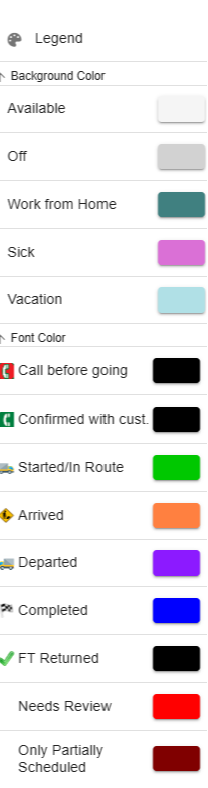
Lastly, the Legend.
Click on the Legend tab for the meanings of the colors on the scheduler.
As the Technicians go about their day, you will receive alerts on the Scheduler for the status of the Technician.
Scheduler View
There are four main layouts for the scheduler view. I’ll go over each carefully.
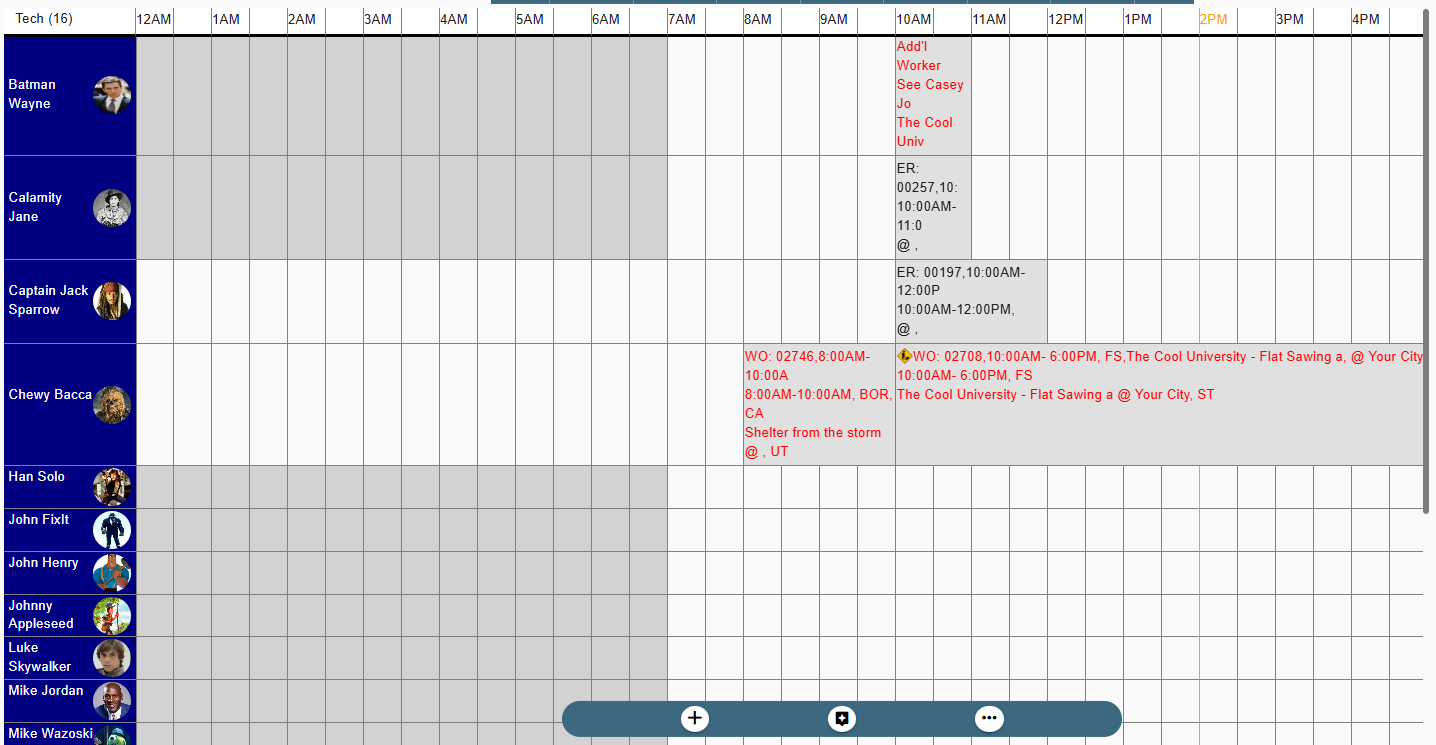
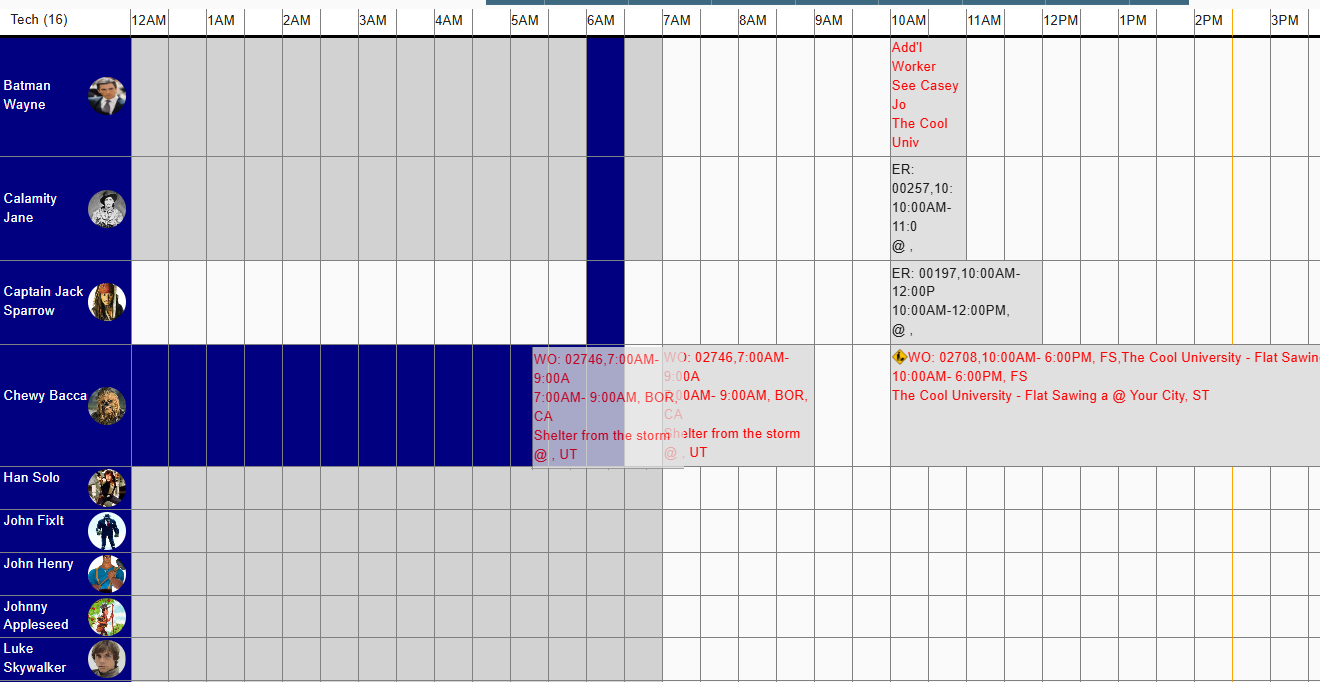
Horizontal means that the workers, or techs, show up on the left-hand side of the screen and time progresses to the right, starting in the morning and ending in the evening. This is the most like the legacy view used to be, so if you miss it, it’s still here. Just a little more polished now.
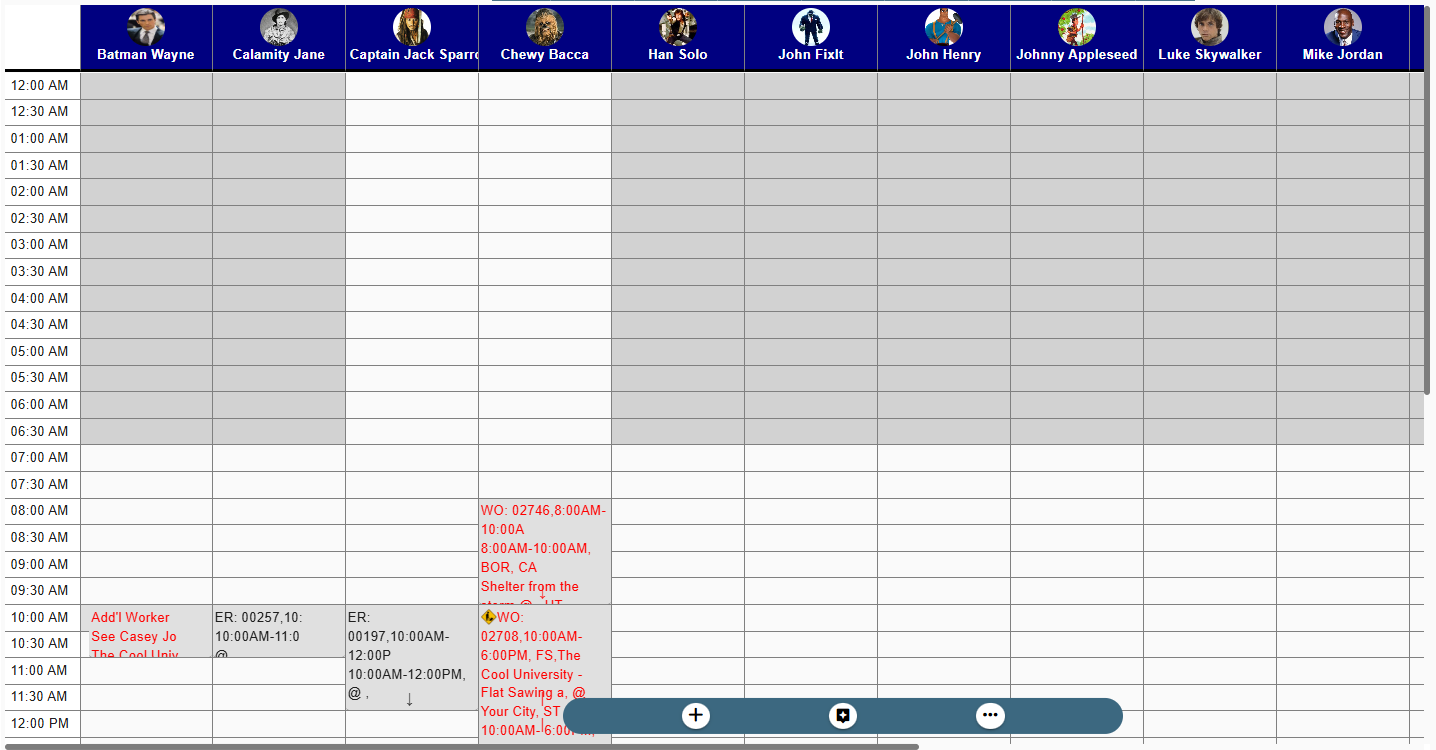
Vertical view has the techs listed across the top, with their times flowing like a waterfall downward. Starting again in the morning and going to the evening.
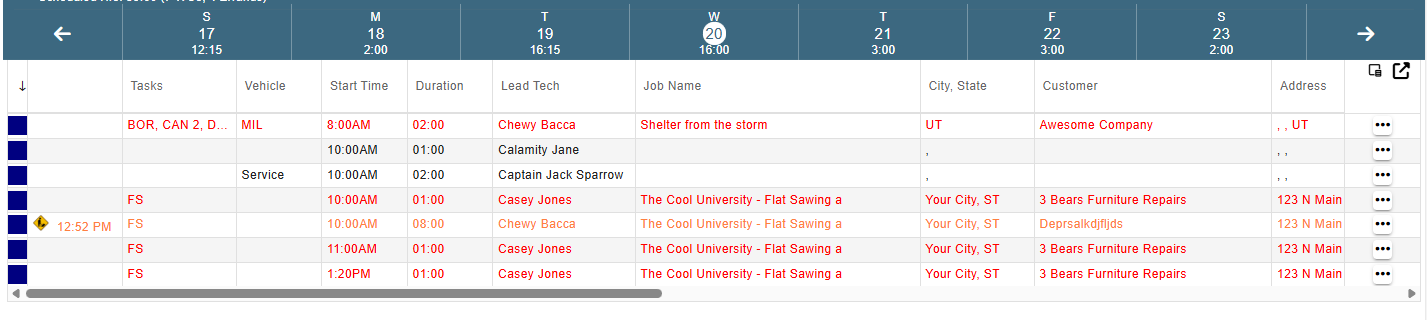
Work order grid lists out all the jobs in a list going down.
Work Order Phone View gives a version that your techs are more likely to experience.

There is also a drag and drop feature to change a WO from one technician to another or even quickly shift the time of the WO as well. Simply click and drag! With my coloration, you can see the workorder being dragged to 6AM on Chewy, the dark blue indicates the row and column the WO will be dropped into.
You can also use drag and drop to schedule Unassigned work orders, Incomplete jobs and Ongoing jobs.
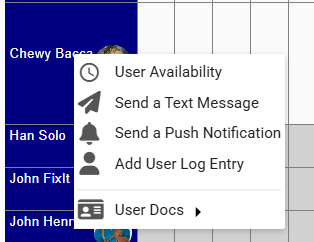
Left click on the technician's name to see a list of options for that technician.
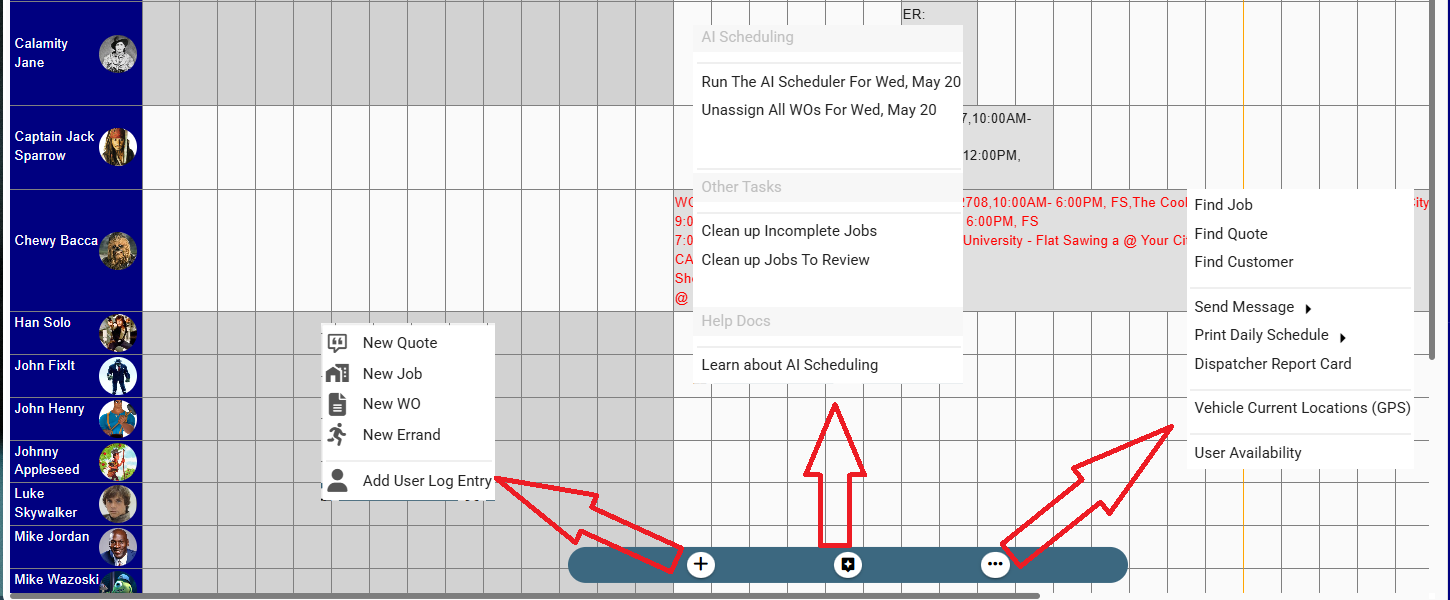
If you click plus button, you will see some options like: New Quote, New Job, New WO, and New Errand
Scheduler button will change the schedule from daily to weekly or from weekly to daily schedule
The ellipsis button will help you to find Job, Quote, Customer and Send Message