This article is broken into 3 parts
1. Overview of Feature
2. Defining your Worker's Comp. rates.
3. Assigning each task to a Worker's Comp rate.
This video is visually out of date, but the concepts are still the same, or similar enough.
Overview of Worker’s Comp Rates
Workers comp rates in CenPoint are used to automatically calculate how much you owe for Worker’s Comp. insurance. If you pay a flat rate for workers compensation every month, you will not need to utilize this feature. However, if your payments fluctuate depending on the hours/dollars paid towards specific types of work (more dangerous work tends to have a higher rate), then you can benefit from this feature.
To learn more about Worker's Comp. rates see . . .
Correcting Workers Comp Errors
Worker’s Comp
Define Worker’s Comp. Rates
To define your Worker’s Comp. rates go to More → List Management → Accounting → Worker’s Comp rates
.png)
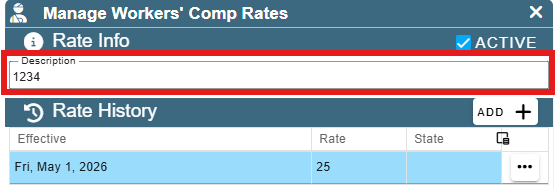
This screen will display a list of all your defined rates. To create a new rate, click ‘Add’.
To edit a define rate, click the Ellipsis → Modify.

Give your rate a description
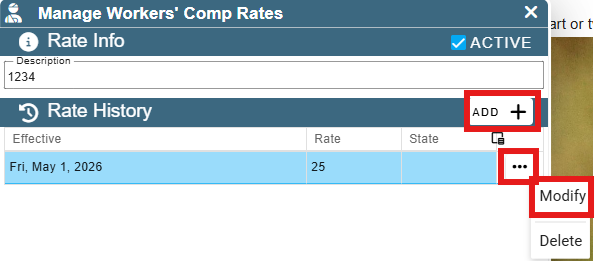
Click ‘Add’ to create a new rate. (You can have multiple rates under this description, which allows you to track changes over time or create different rates for different states).
Add your rate, then press ‘OK’ to save.
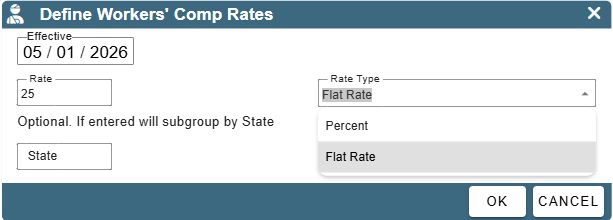
Note: The “Effective” date can be placed in the future, allowing you to pre-schedule different Worker’s Comp Rates if so desired.
Notes on these fields
- If entering a percentage, do not enter as a decimal. For example 5%, will be added as 5.00, not 0.05.
- The percentage means that for every dollar paid in this category, n% will be owed in Worker’s Comp.
- A flat rate means that this dollar amount will be owed every time this workers comp rate is used.
- If State is entered, this rate will be used if the job address is in this state. This field is optional.
Assign Rates to Clock In/Out Categories
For more information on Clock in/out categories, see the following link:
https://help.cenpoint.com/docs/clock-inout-categories
If applicable for your company, you can assign a worker’s comp rate to a clock in category.
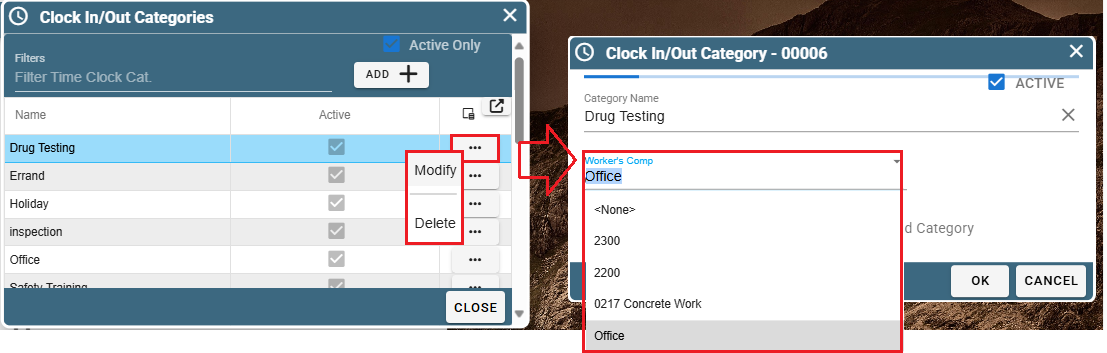
Once you have your worker’s comp rates set up, go to More → List Management → Users → Clock In/Out Categories
.png)
Click on the Ellipsis → Modify of your desired Clock In/Out Category. Click on the ‘Worker’s Comp’ dropdown menu to select the desired worker’s comp rate.
Click the OK button to save your changes and close the window.