
This article covers how to see pre-existing customer list and add a new one.
Customer Overview on Desktop
A customer is a company or person that you sell a service or product to.
This article will cover how to create a new customer in CenPoint and how to find an existing customer.
Create a Customer on Desktop
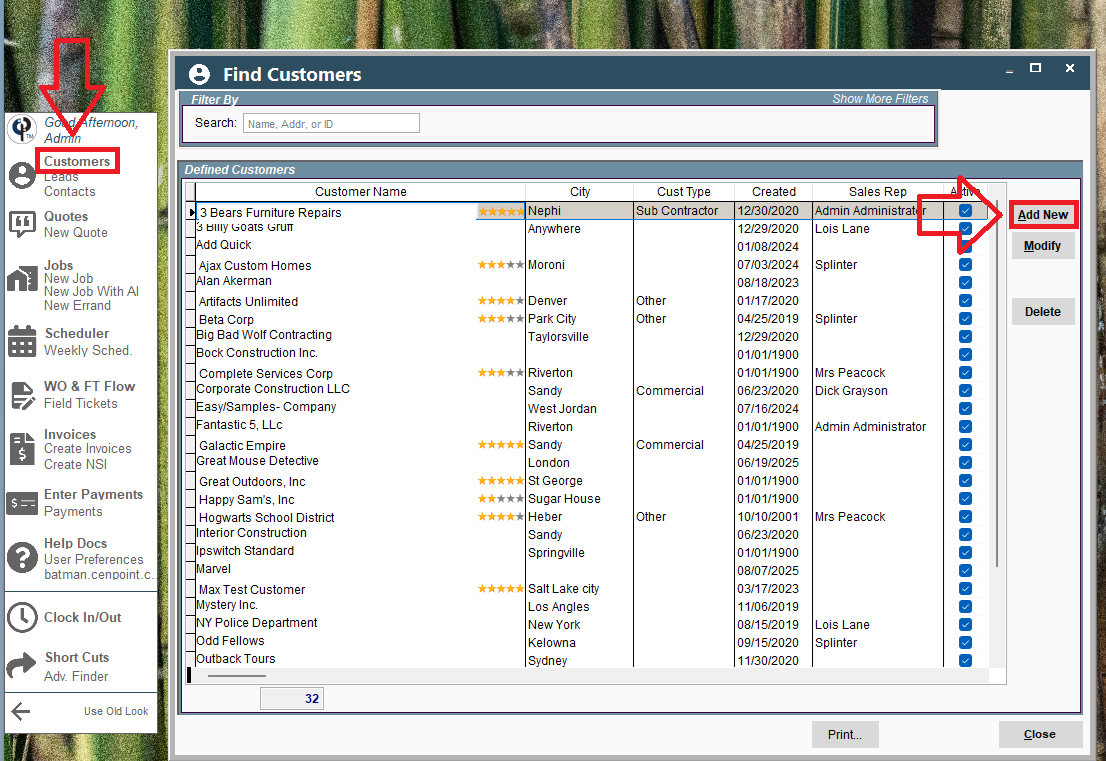
Click on Customers.
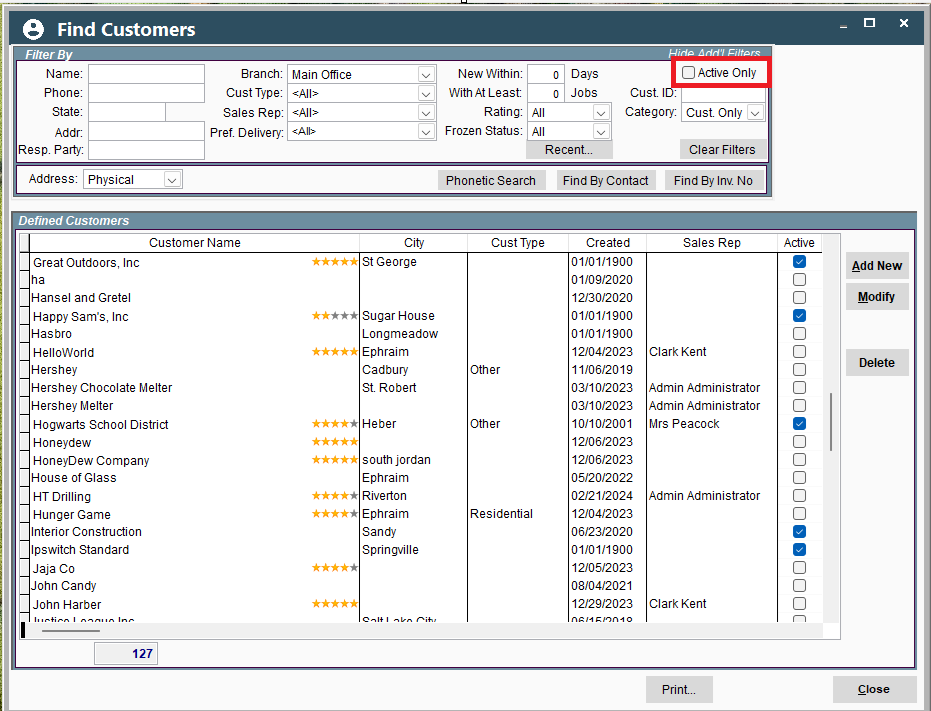
The window “Find Customers” will appear.
Click on ‘Add New’ to create a new customer.
The Define/Setup Customer window will appear.
Enter in the customer’s Company Name and phone number.
Enter in any other applicable information about the customer’s company.
.png)
Definition of confusing fields:
Terms: The agreement of payment between you and the customer. Examples may include COD (Collect on Delivery) or Net 30 (Payment within 30 days of service)
A/R Rep: The person who is in charge of billing the customer for work performed.
Default Sale Rep: The person who coordinates between the customer and the crew performing the service.
Freeze Account: Temporarily put a hold on the account. A warning will appear when you try to create a new quote or job for this customer when the account is frozen. This is usually done when you are having difficulty getting a payment from the customer. You can manually freeze a customer anytime. If the customer ever exceeds the Credit Limit that you can set, their account will be automatically frozen until they make a payment and owe less than their credit limit again.
Click on the ‘Addresses’ tab and add in the Company’s address.
Click on the ‘Copy…’ button for copy and paste options with the address.
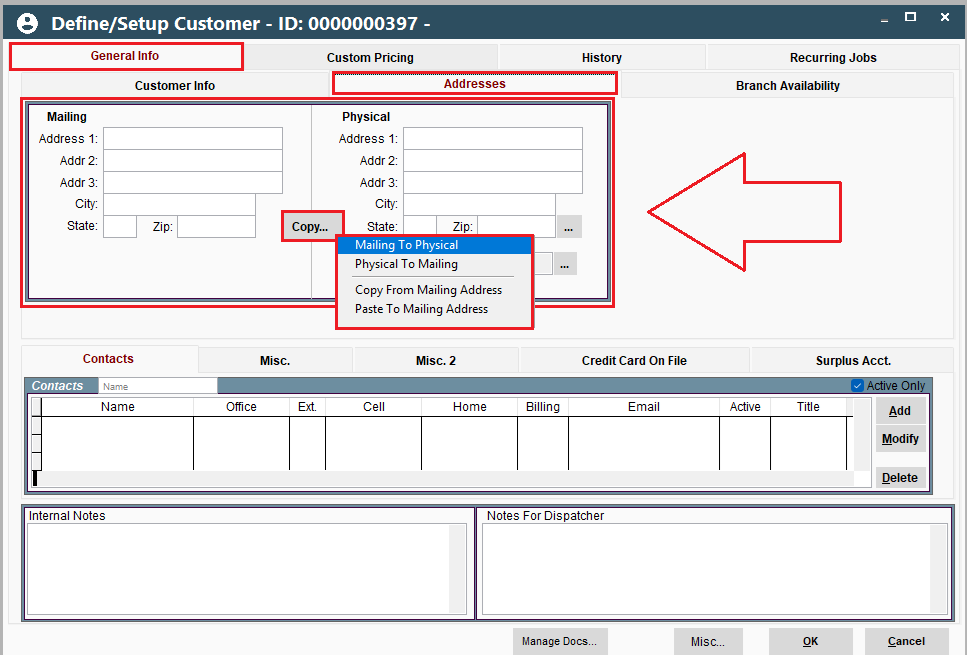
Create a contact for the customer to enable quick communication between you and the customer.
Click ‘Add’ to create a new contact. Click on an existing contact and then click ‘Modify’ to edit that contact’s information.
.png)
Fill in any applicable information about the Customer Contact.
Add any notes about them that you may feel important to remember.
Click OK to close the window and save your new contact.
.png)
Internal notes: notes that only you and other office users in CenPoint will see.
Dispatch notes: notes that the technicians sent to this Customer’s location will see.
Click OK to save your new Customer once all desired information has been entered.
For more information on the different features tied with a Customer, see the following link: Customer Fields
.png)
Find an Active or Current Customer on Desktop
If you wish to create a quote or a job for a customer, please see the following links:
When creating a Quote or Job, the “Find Customers” window will automatically appear.
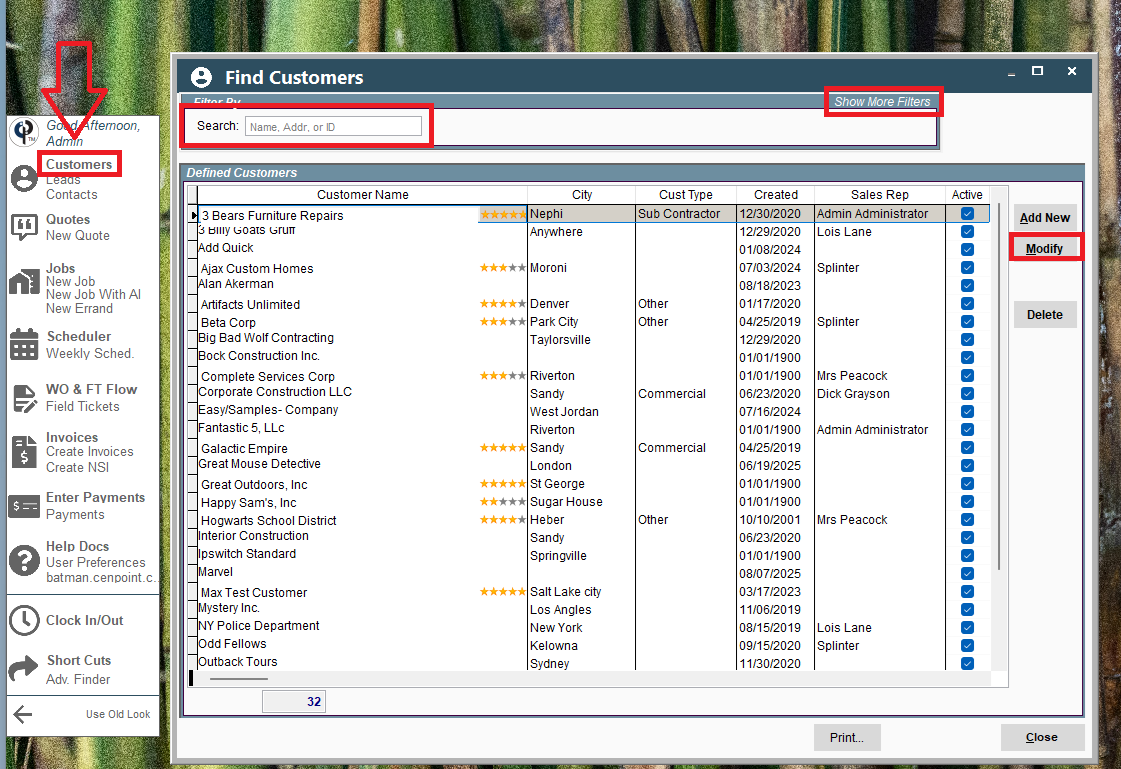
To locate the “Find Customers” window on Desktop click on the “Customers” button.
In the “Find Customers” window use the search bar to find your desired customer. You can search by Customer name, address, or their Customer ID number.
If needed, click the ‘Show More Filters’ button to see more searching options.
Once you’ve found the customer, click on them and then click ‘Modify’
Find an Inactive or Deleted Customer on Desktop
A deleted customer is the same as an inactive customer. This allows you to go back later and find old customers if you ever need to.
Click on the ‘Customers’ button to open the ‘Find Customers’ window.
Click on the ‘Show More Filters’ button.
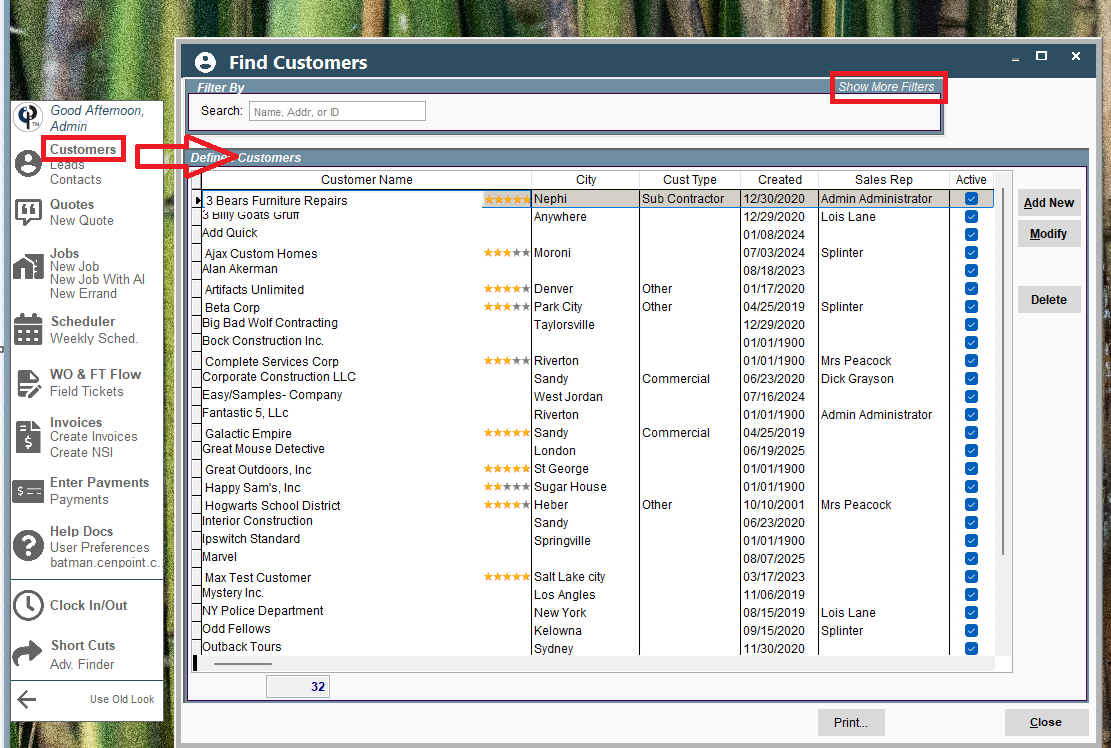
Uncheck the ‘Active Only’ checkbox in the upper right corner.
Use the search options to find your customer.
Click on the desired customer and then click ‘Modify’
To activate an inactive customer simply check the ‘Active’ checkbox in the Customer Info tab.
Click OK to save your changes and close the Customer window.

Customer Overview on Portal
If you want to customize the layout of your Find Customer screen, follow this link: https://help.cenpoint.com/docs/grid-screen-on-portal
Create a Customer on Portal
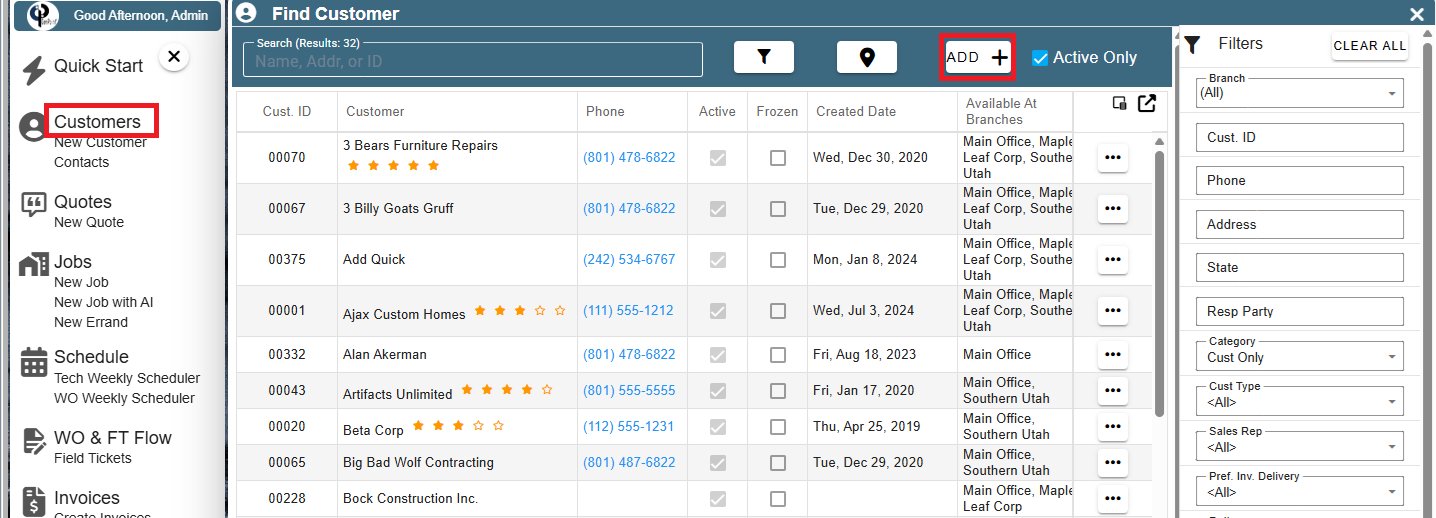
On the “Home” tab on Portal click on ‘New Customer”
.png)
Alternatively, you can click on “Customers” and then click the ‘Add’ button on the ‘Find Customer’ window that would appear.
Enter in the customer’s Company Name and phone number.
Enter in any other applicable information about the customer’s company.
.png)
Definition of confusing fields:
Terms: The agreement of payment between you and the customer. Examples may include COD (Collect on Delivery) or Net 30 (Payment within 30 days of service)
A/R Rep: The person who is in charge of billing the customer for work performed.
Default Sale Rep: The person who coordinates between the customer and the crew performing the service.
Freeze Account: Temporarily put a hold on the account. A warning will appear when you try to create a new quote, job, or work order for this customer when the account is frozen. This is usually done when you are having difficulty getting a payment from the customer. You can manually freeze a customer anytime. If the customer ever exceeds the Credit Limit that you can set, their account will be automatically frozen until they make a payment and owe less than their credit limit again.
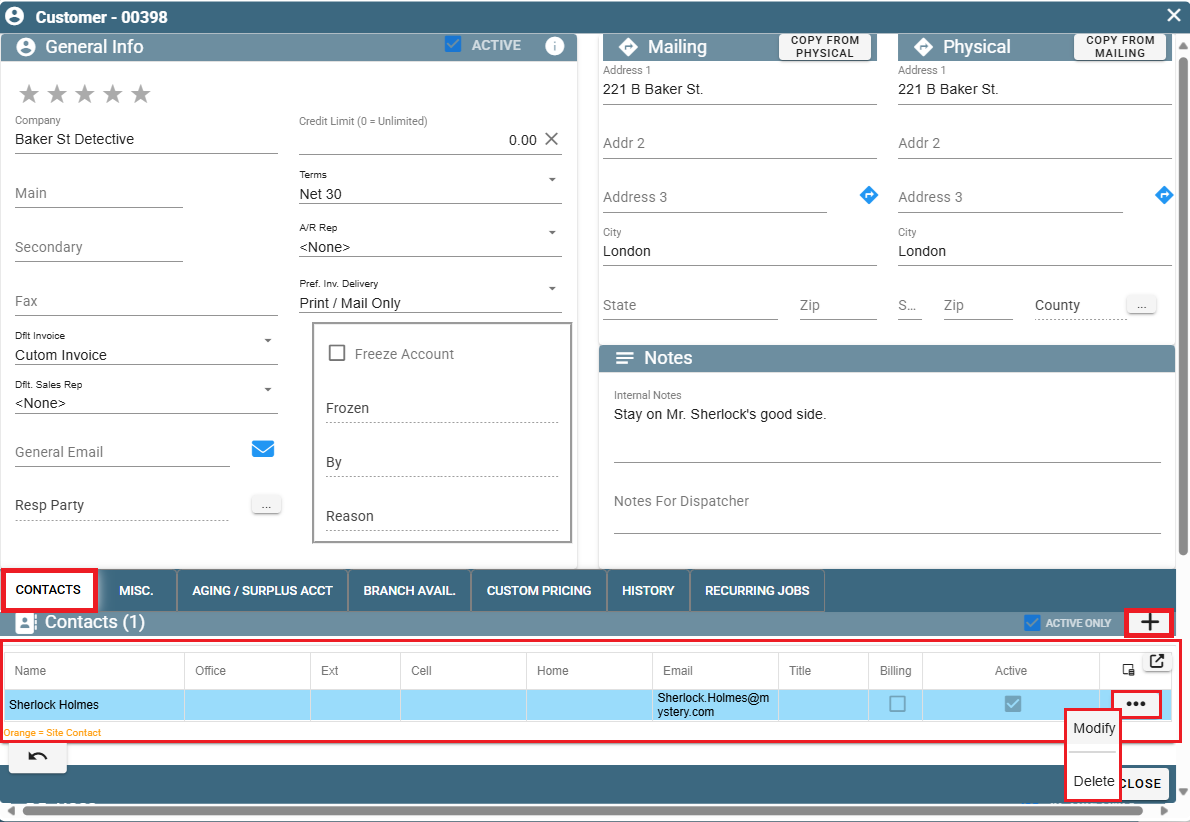
Enter in the Mailing Address and Physical address of the new Customer.
To make inputting the addresses easier use the ‘Copy From…’ buttons on the upper right corner of the addresses.

Internal notes: notes that only you and other office users in CenPoint will see.
Dispatch notes: notes that the technicians sent to this Customer’s location will see.
.png)
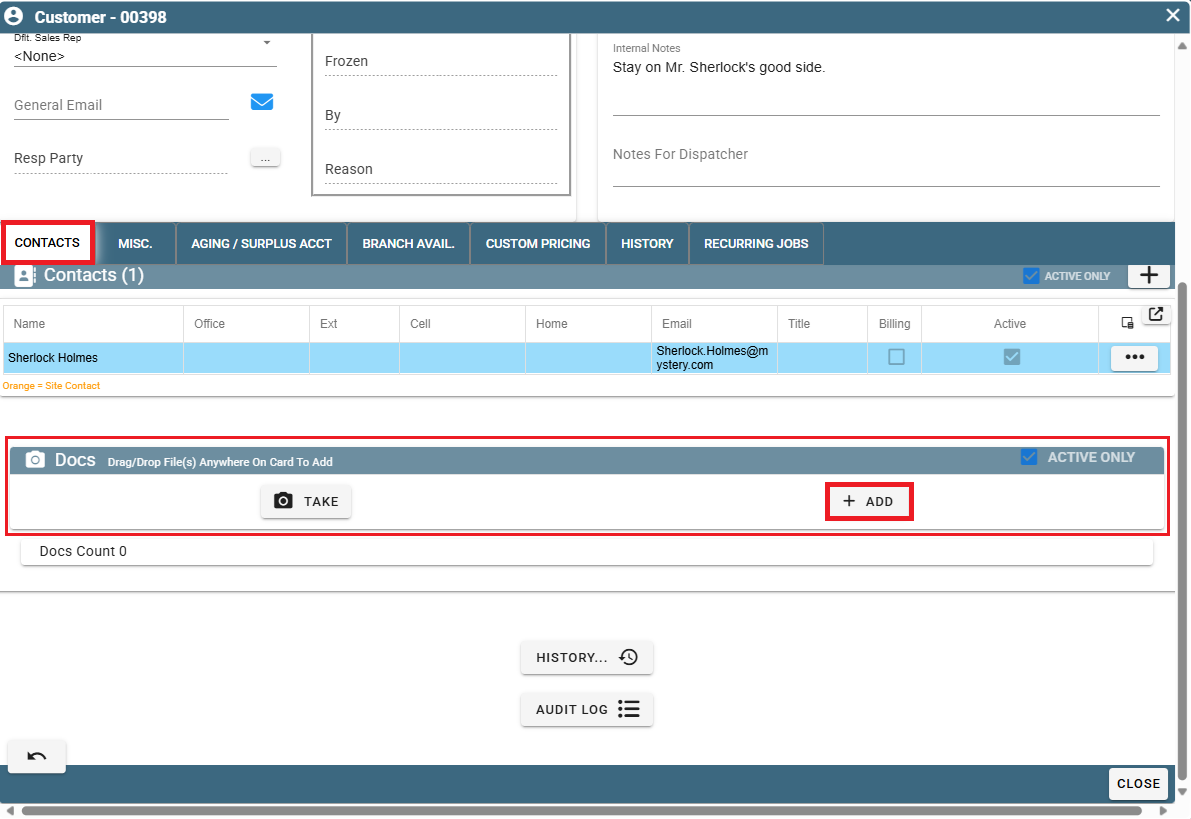
Create a contact for the customer to enable quick communication between you and the customer.
Click the Plus symbol under the ‘Contacts’ tab to create a new contact.
Click the Ellipsis → Modify to edit an existing contact.
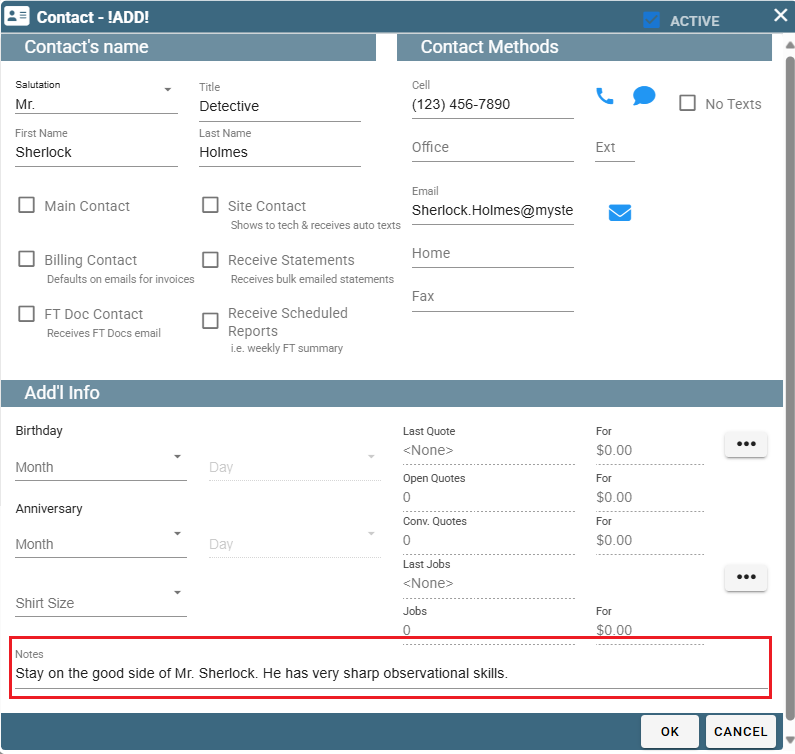
Fill in any applicable information about the Customer Contact.
Add any notes about them that you may feel important to remember.
Click OK to close the window and save your new contact.
Add any Documents associated with the customer by clicking the ‘Add’ button in the Docs table.
Find an Active or Current Customer on Portal
If you wish to create a quote or a job for a customer, please see the following links:
When creating a Quote or Job, the “Find Customers” window will automatically appear.
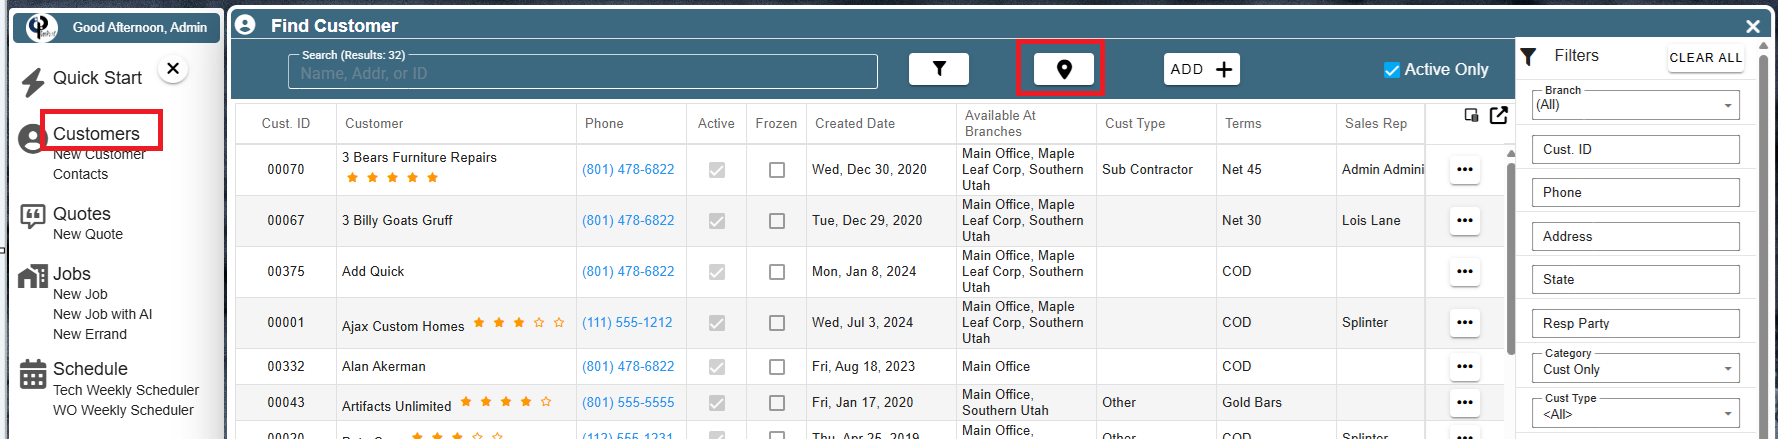
To locate the “Find Customers” window on Portal click on the “Customers” button.
.png)
Use the search bar to find your desired customer.
If you wish to print the list of all the customers, Click the "Print" button found at the very bottom right of the screen.
Use the filters to the right for more searching options.
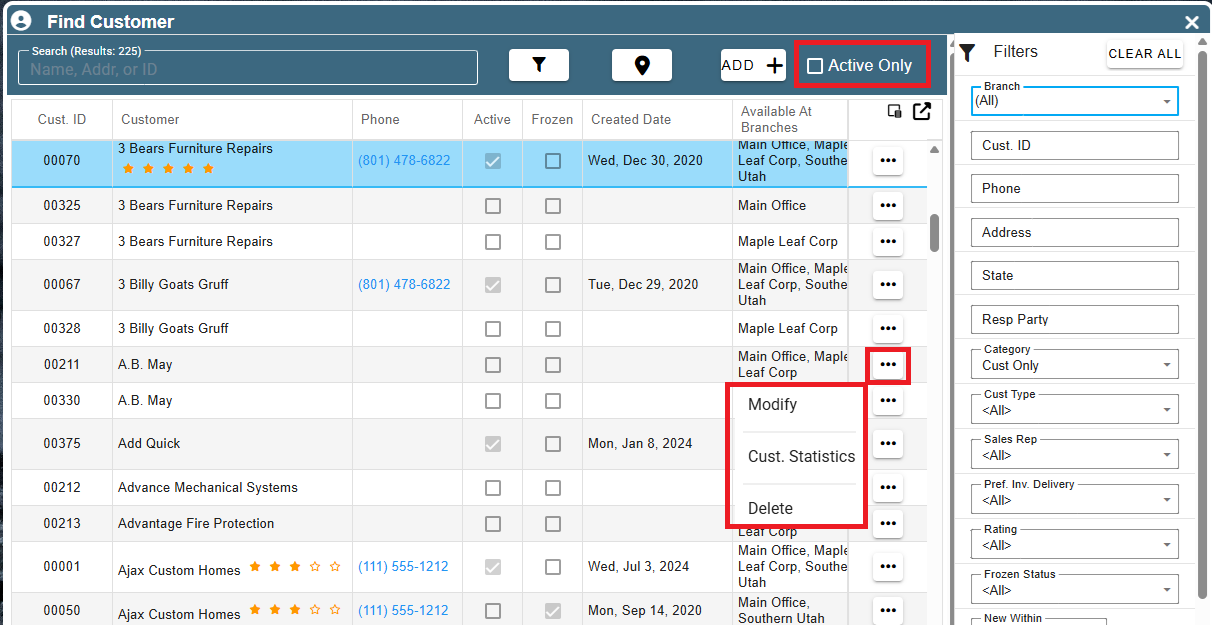
Once you’ve found the customer, click on the Ellipsis → Modify

Find an Inactive or Deleted Customer on Portal
A deleted customer is the same as an inactive customer. This allows you to go back later and find old customers if you ever need to.
Click on the ‘Customers’ button to open the ‘Find Customer’ window.
Uncheck the ‘Active Only’ checkbox in the upper right corner.
Use the other filters as needed and click the Ellipsis → Modify on the desired customer.
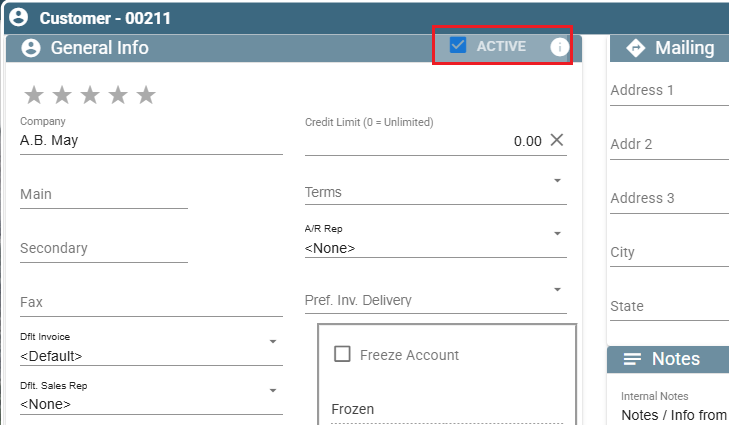
To Activate an inactive customer simply check the ‘Active’ checkbox in the upper right corner of the ‘General Info’ table.
Click ‘Close’ to close the window with your changes saved.
Find a Customer by Proximity to Yourself on Portal
Click on ‘Customers’ on the home screen and then the map/pin icon on the ‘Find Customer’ window.
Use the ‘Miles’ sliding bar to set the distance from you that you would like to search.
Type a customer’s name into the ‘Filter’ search bar to find that specific customer in your search radius.
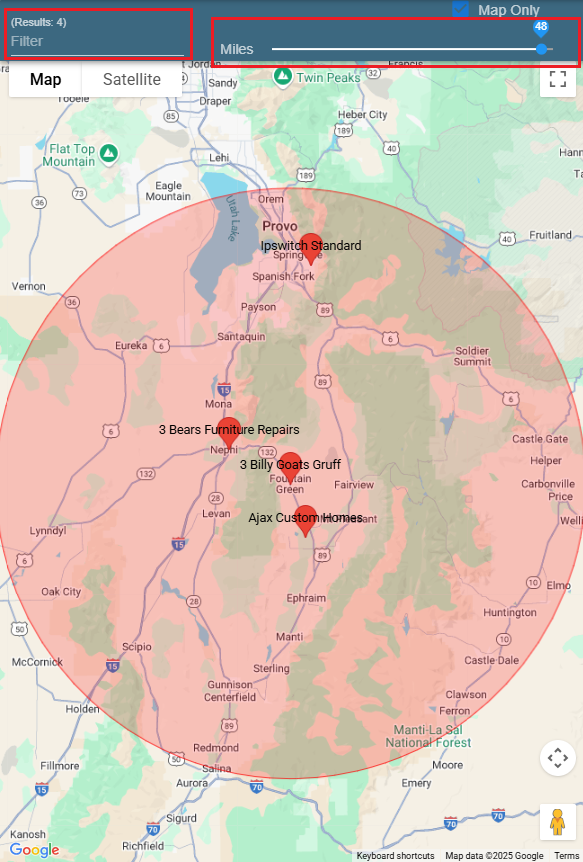
Uncheck the ‘Map Only’ checkbox to see a printed list of all the customers within your set range and how far they are from you.
Click the ‘Open’ button to see that Customer’s information and contacts.
.png)