
2. How to set up your own custom tasks in CenPoint.
1. How tasks are used in CenPoint
2. How to set up your own custom tasks in CenPoint.
How to set up a task
Go to More-> List Management-> Quotes, Jobs, & Invoices-> Task Options-> Tasks
.png)
Click 'Add New' to add a new task
Highlight an existing task and click 'Modify' to edit it.
.png)
Type in an abbreviation for the Task, Task Name, Pricing Method.
To learn more about pricing use this link: Pricing Matrix
Select a Category- To add a new category go to More-> List Management-> Quotes, Jobs, & Invoices-> Tasks-> Task Categories
Add a pay category and a GL Code if applicable- to add a new GL Code go to More->List Management-> Accounting-> GL Codes
Mark if the task is taxable, T&M, and a target margin if desired.
If you are creating a new task similar to one you already have created,
use the Copy/Paste feature to save time. Go to the task you want to copy, click Copy/Paste,
then Add a new task and click Copy/Paste, then make any desired changes to the new task.

Add Questions to your task
Add Questions to your task, by clicking the question box and type in your question.
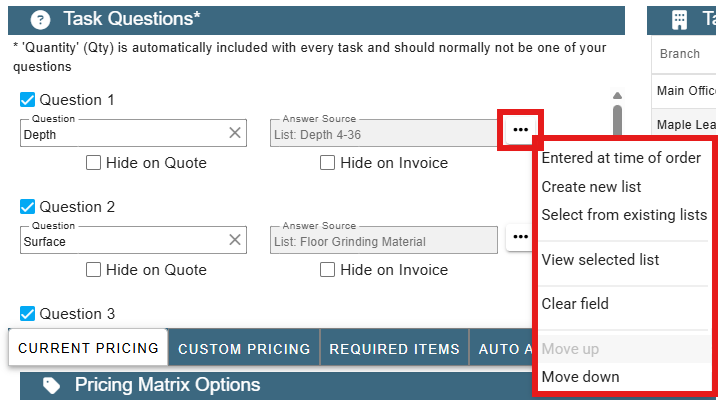
Then select your answer source by clicking on the ellipsis. Choose entered at time of order, or from a list.
To create a new list of answers, click create new list, give your list a name and type in your answers.
You can also create a new list by going to More-> List Management-> Quotes, Jobs, & Invoices-> Tasks-> Task Lists
.png)
If you have a large list (example: a list of measurements) we recommend using this import feature. Copy/Paste is another time saving feature when creating a list.
Once you create a list it may be used for multiple tasks.
Then check the boxes to determine if and where the questions will be printed.
Task Availability
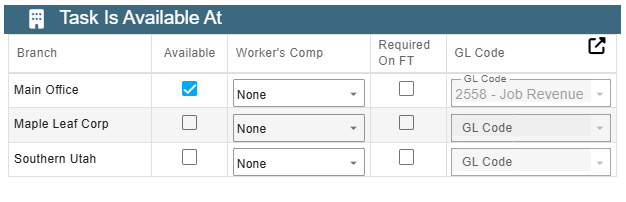
Select the Branches where this task is available.
Select a worker Comp rate if applicable. Use the this link to learn how to set up Workers Comp: Workers Comp
Check the Required on Field Ticket box if you want this task to be required.
Example of a task that you may want required on a Field Ticket is a mobilization fee.
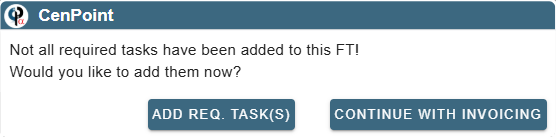
When marking a Field Ticket ready for invoicing, you will get a prompt if the required task has not been added.
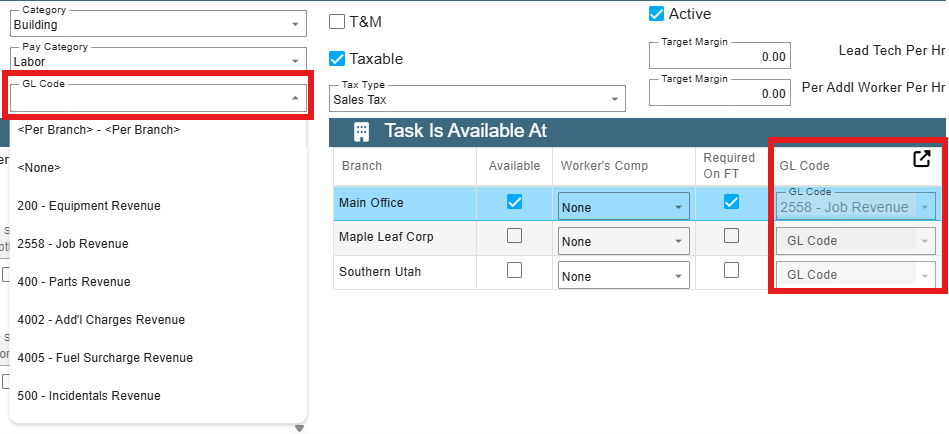
Choose a GL code if applicable. To use a different GL Code for different branches, choose the 'Per Branch' option when defining the task.
Pricing
Both Current and Custom Pricing are talked about in other articles. Please see:
Standard Pricing - There's better options now to use but it's the basic way to price out
Pricing Matrix - Set up a matrix for pricing that allows some customization
Formula Pricing - Create a completely custom way to price something out
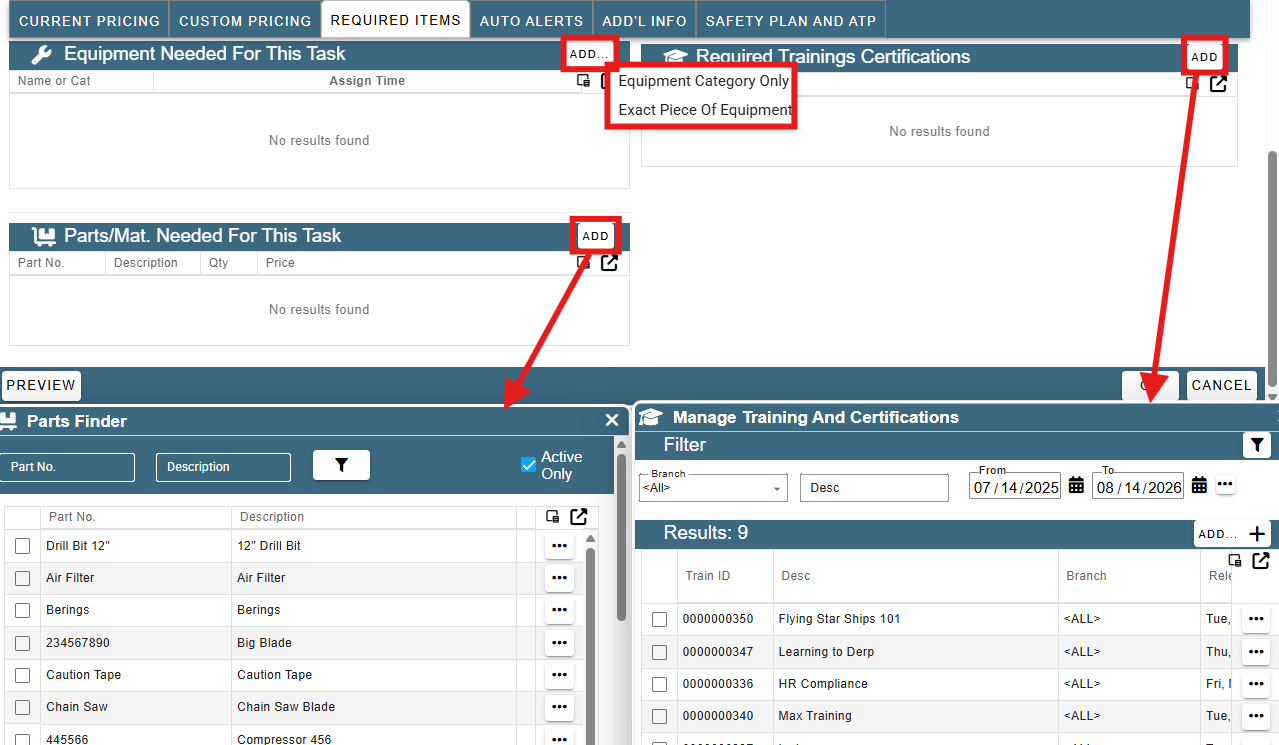
Required Items
Add Equipment needed for the task
Add Parts and Material needed for the task
Add a Training or Certification that is needed for the task.
When assigning the task you will be notified if the selected technician has not passed the training.
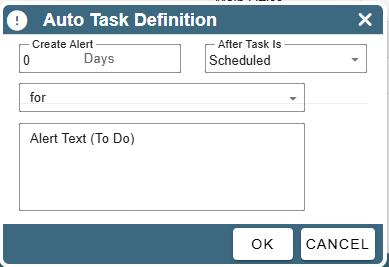
Auto Alerts
Add an Auto Alert for the task.
For more information on Alerts use this link: Alerts

Add'l Info
Additional Options include:
Use this task to track progress- This is used on contract jobs
Rapid Request Module- This is deprecated and no longer has functionality, though may be returned later on.
Calculate Usage By is a way that you can figure usage by multiplying answers and quantity if you want.
Printed Notes- This is something that would be printed on the invoice when it comes time to print that.
.png)
Safety Plan and Authorization to Proceed
Add in any Safety Plans you want associated with the task.
For more information on setting up Safety Plans use the following link: Safety Plans
Add authorizing to proceed items for the customer to sign off on.
For information on setting up Authorization to Proceed use the following link: Set up ATP
