Older Video
CenPoint has undergone a facelift since the recording of this video. However, all concepts remain the same.
Customer Fields
Filter and Find Customers on Portal
Click on ‘Customers’ on the home screen to open the ‘Find Customer’ window.
.png)
Use the search bar on the upper left and the filters to the right to find the customer you are looking for.
Reorder or resize the cells in the grid to fit your preferences. Drag the columns left or right to reorder them.
Click the Ellipsis → Modify to edit an existing Customer. 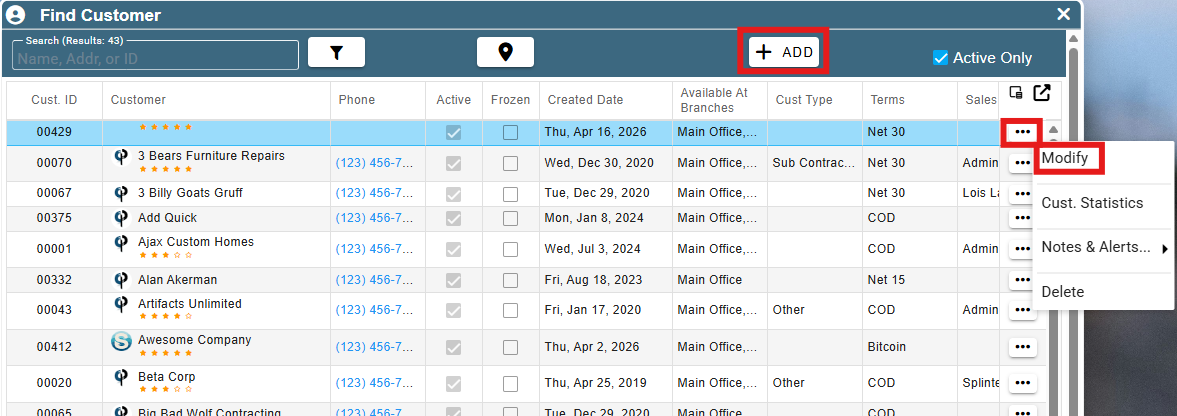
General Info Section on Portal
General Info Table on Portal
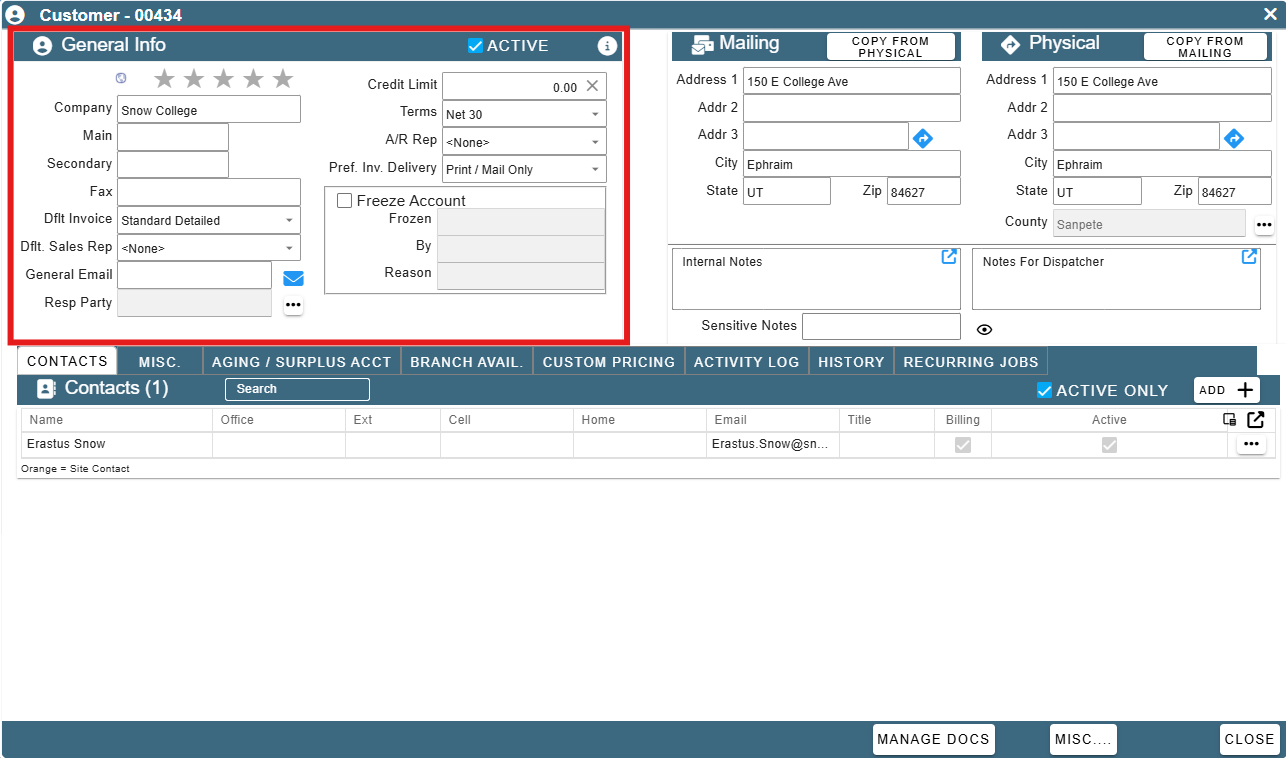
Fill in information on your customer.
You can give your customer ratings to help signify how good of a customer they have been.
The ratings you give the customer will appear on the schedulers.
For more information on how to add new Terms, see the following link: Terms
Dflt. Invoice: The default type of invoice you will send the Customer.
Dflt. Sale Rep: The default person who coordinates between the customer and the crew performing the service.
Active: This checkbox determines if the customer is ‘active’ or is able to be attached to Quotes, Jobs, Invoices, etc… on Cenpoint.
Credit Limit: The limit of how much a customer is allowed to owe at a given time. The customer’s account will be temporarily frozen (cannot accept new Jobs, Quotes, or Work Orders) when they exceed this limit.
Terms: The agreement of payment between you and the customer. Examples of Terms include Net 30 days where the customer agrees to pay within 30 days of the service and Collect on Delivery (COD) where the customer pays at the moment the service is completed.
A/R Rep: The person who is in charge of billing the customer for work performed.
Pref. Inv. Delivery: The preferred method of submitting an invoice to the customer
Freeze Account: Temporarily put a hold on the account. A warning will appear when you try to create a new quote or job for this customer when the account is frozen. This is usually done when you are having difficulty getting a payment from the customer. You can manually freeze a customer anytime. If the customer ever exceeds the Credit Limit that you can set, their account will be automatically frozen until they make a payment and owe less than their credit limit again.
Mailing and Physical Address Tables on Portal
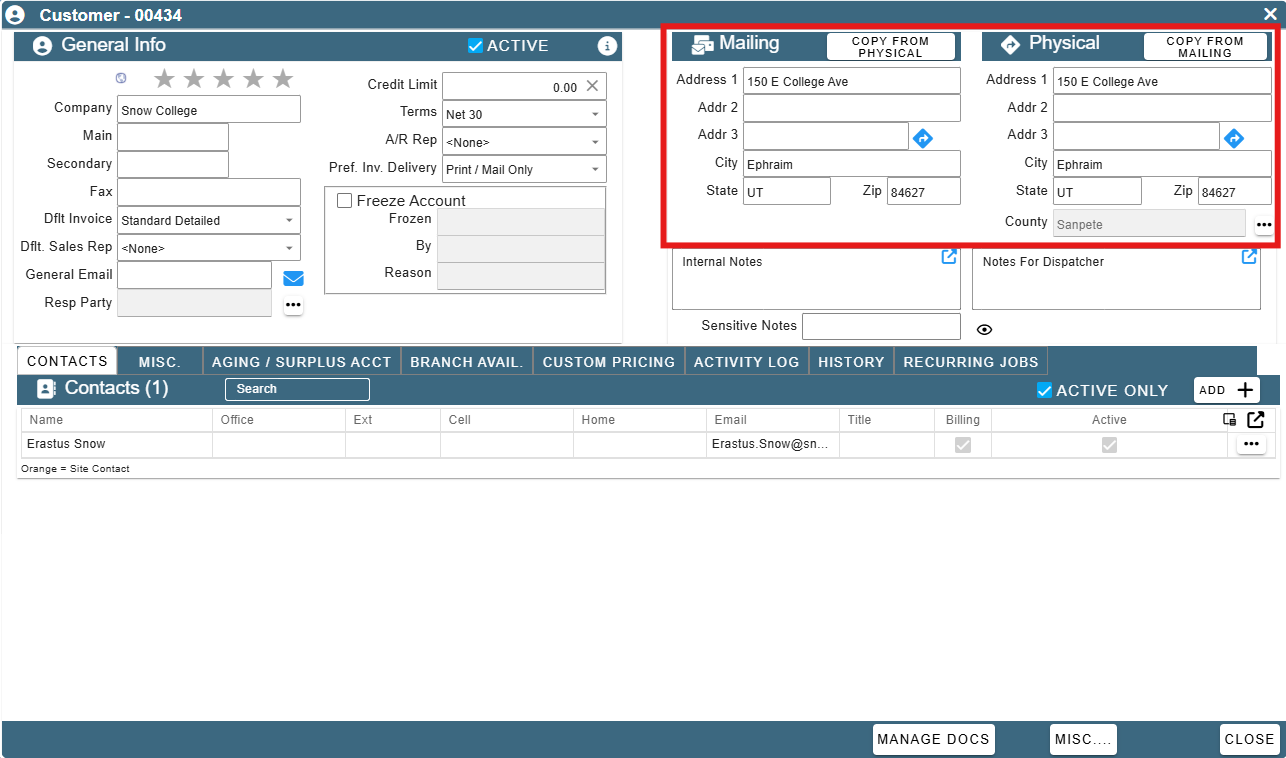
Add an address for your customer. The Mailing address will show up on Quotes and Invoices.
Click the ‘Copy From…’ button on the upper right corner of the Mailing and Physical tables to copy/paste an address from one table to the other.
Customer Notes
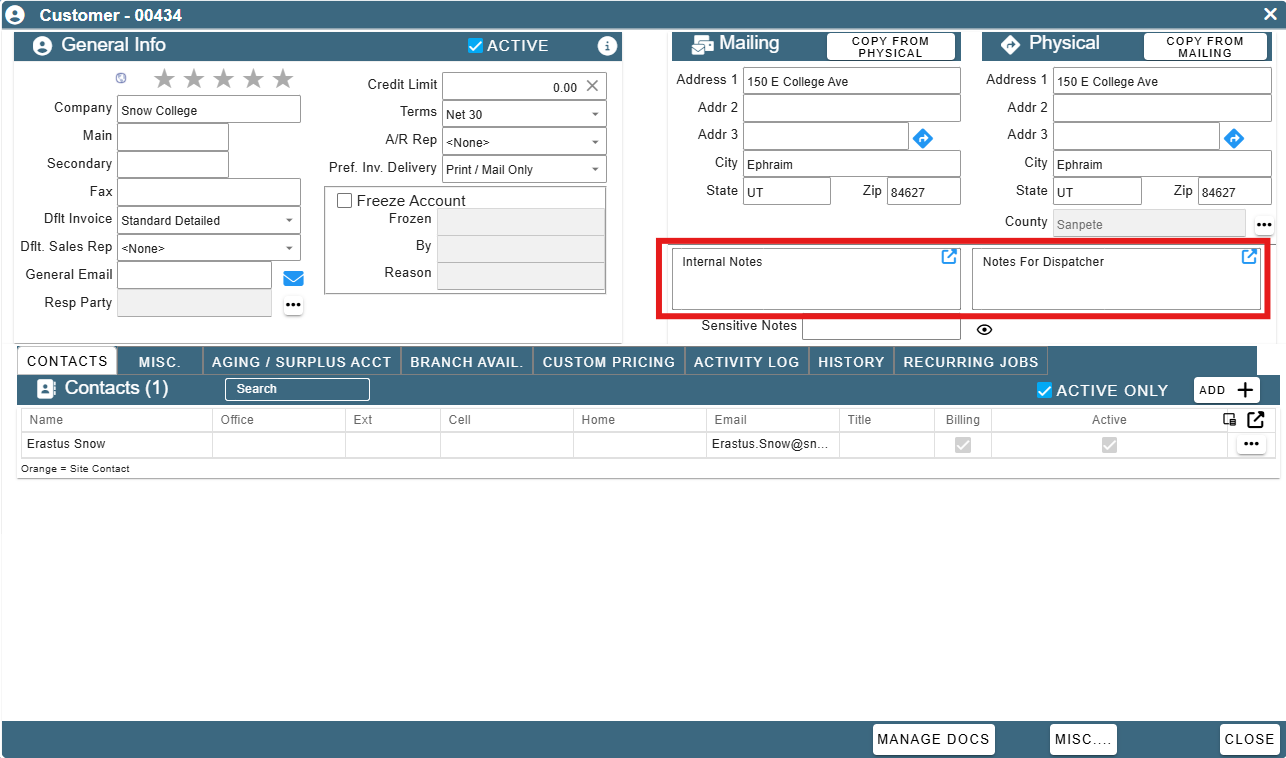
Internal notes: notes that only you and other office users in CenPoint will see.
Dispatch notes: notes that the technicians sent to this Customer’s location will see.
Contacts tab
Set up the customer contacts.
Customers can have multiple 'Contacts'.
Click the Plus symbol to create a new contact. Click on the ellipsis next to an existing contact and then click ‘Modify’ to edit it.

The different checkboxes determine what types of messages will be sent to that contact.
Every Job can have different contacts attached to it, so it is normal if there are multiple contacts marked with the same checkboxes.
Main Contact: They are the head contact when communicating with the customer.
Billing Contacts: Their e-mail address will populate when sending invoices.
FT Doc Contact: Receives documents associated with the Field Tickets.
Site Contact: Receives text alerts for your technicians when selected on the job. (i.e. they will be notified when a technician arrives/leaves the jobsite). Technicians will also be able to see this number and contact them if needed.
Receive Statements: e-mail address will populate when sending statements to the customer.
Receive Scheduled Reports: Receives a weekly report on work performed for the given job.
The Additional Info table is a great way for your sales department to add personal touch to customer satisfaction.
.png)
Misc. tab on Portal
Please enter the date the customer was created and the customer type. Doing so will help CenPoint properly calculate the billed-out reports.
To edit the ‘Cust. Type’ list see the following link for more information: Modify Customer Type List
If the customer is tax exempt the tax number is stored here.
Requires PO: A Purchase Order is required to buy materials and like items.
Requisition Req’d: A Requisition (formal paper request) is required to buy things like materials for the Job.
Requires PM: A Project Manager is required for this customer.
Print Ret. On New Invoices: Print the Retention rate on new invoices sent to this customer.
Retention: The percentage of the Job Price that will be withheld by the customer until a predetermined milestone is reached.
By checking ‘requires PO’ and/or ‘Requisition number’, when a new job is created there will be a prompt to fill the PO and Req. number in.
Globally and Locally Blacklist: Click this button to Globally Blacklist a customer who won’t pay or who has been extremely troublesome.
Please note that when you do this they get added to CenPoint’s GLOBAL blacklist database and all CenPoint users can now be warned against that customer.
See the following link for more information: Customer Blacklist
Locally Whitelist: If a customer shows up as being on CenPoint’s blacklist you can accept the risk of that customer by clicking ‘Locally Whitelist’ to remove that warning for you locally. The customer will still be blacklisted for all other users of CenPoint.
.png)
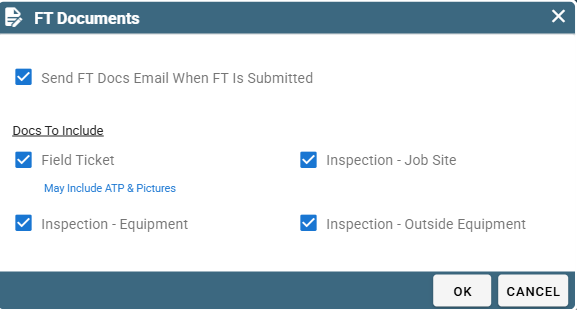
FT Doc Settings: Button that easily allows you to adjust which documents are attached with the Field Tickets.
This window appears when the button is clicked
Surplus Account / Aging tab on Portal
Aging: This report is synonymous with a statement showing a customer’s outstanding balance.
It especially refers to how long an invoice has been sent to a customer without them having paid it.
Statement Link: A link to a report on what outstanding balances a customer has and how long the balance has been there.
You can email your customer a ‘Statement Link’ and let them pay multiple invoices with a Credit Card.
For more information on Statement Links see the following link: Statement Link
.png)
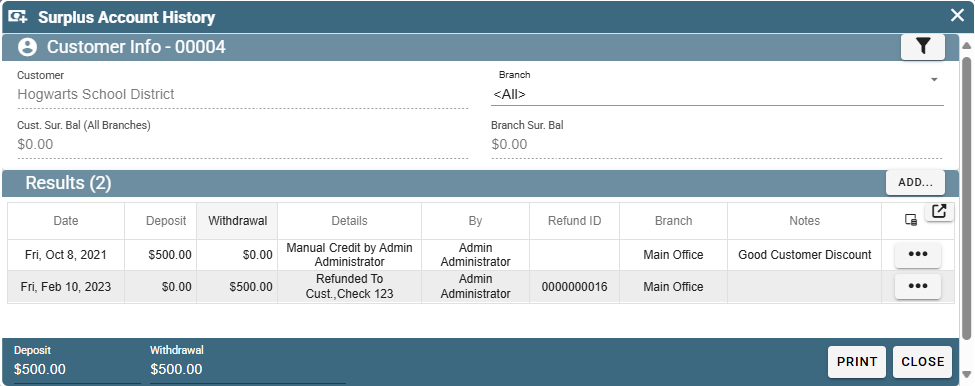
If you click on the ellipsis next to the ‘Surplus Acct:’ you can pull up a history of when a customer paid more than what was due or had a surplus outstanding balance.
From there you can also create a manual credit or manual refund for the customer.
For more information on creating a refund see the following link: Refund Surplus
Note: all COD payments will show up here when a technician accepts the payment in the field. They can then be applied towards an invoice.
Branch Availability tab on Portal
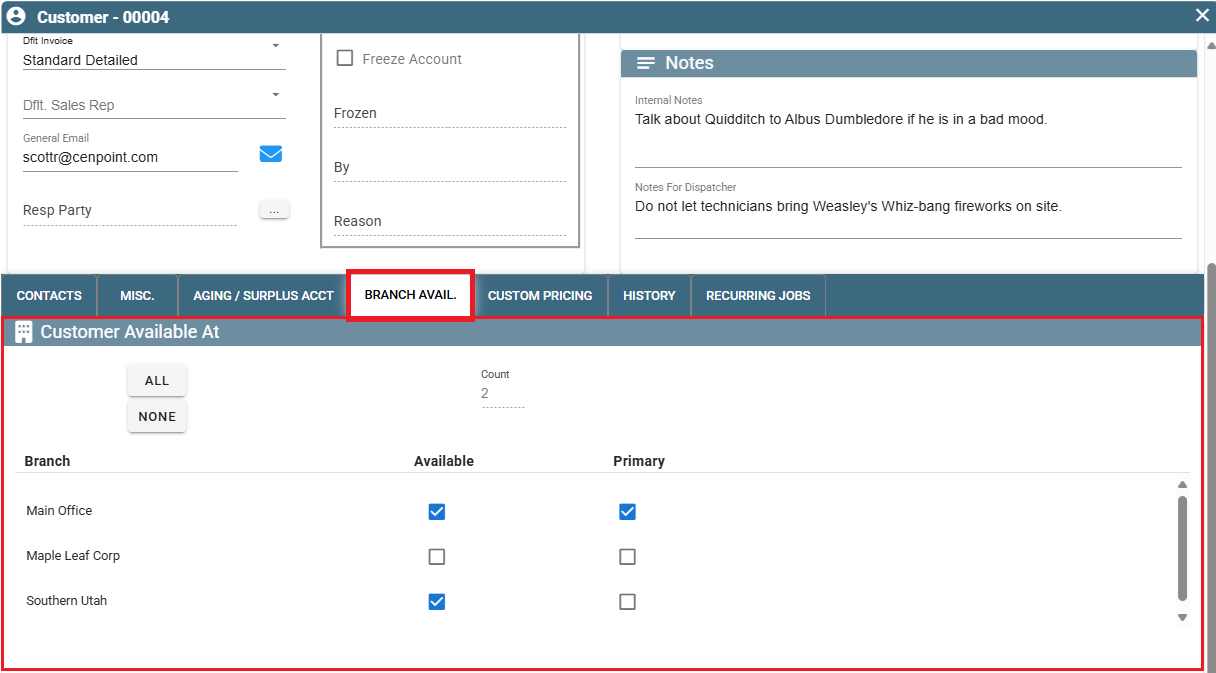
Choose which Branches will be able to see this customer.
Customers may be shared between multiple branches.
Custom Pricing tab on Portal
Coming soon to Portal, you will be able to offer a custom price on a task to specific customers.
An example of why you may wish to do this is have a membership or loyal customer “discount” on a certain service.

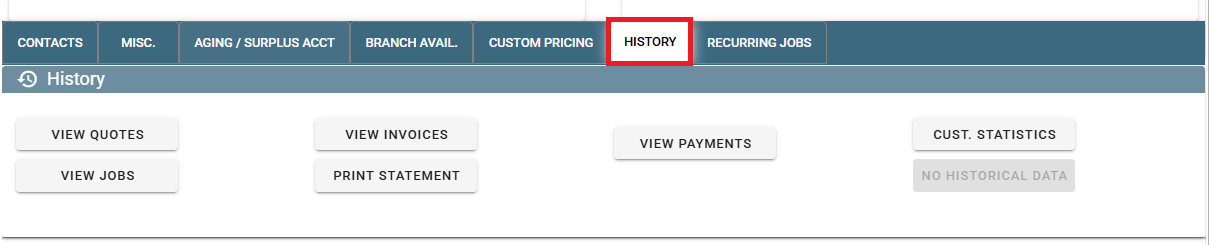
History tab on Portal
View Quotes, Jobs, Invoices, Payments, and statements related to this customer.
Also view Customer Statistics here.
Recurring Jobs tab on Portal
Coming soon to Portal, you will be able to set up a repeating job with a customer.

Customer Documents on Portal
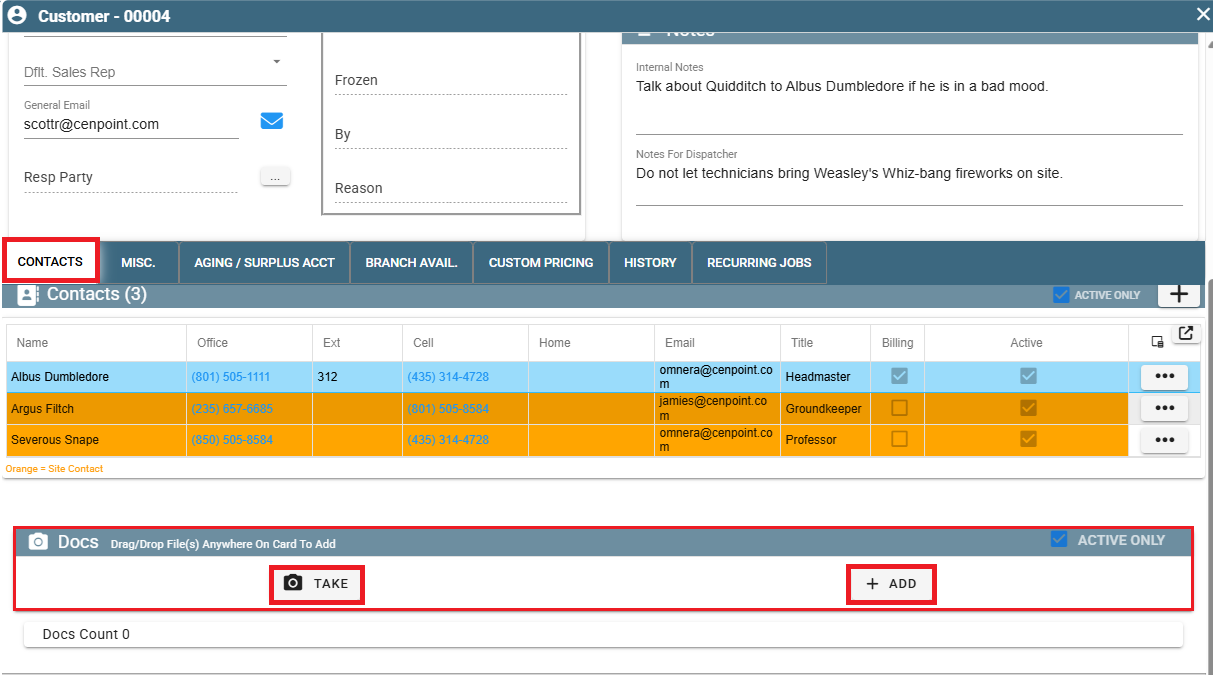
Under the Contacts tab click the ‘Add’ button to attach new documents to that customer.
Click the ‘Take’ button to take a new photo now.
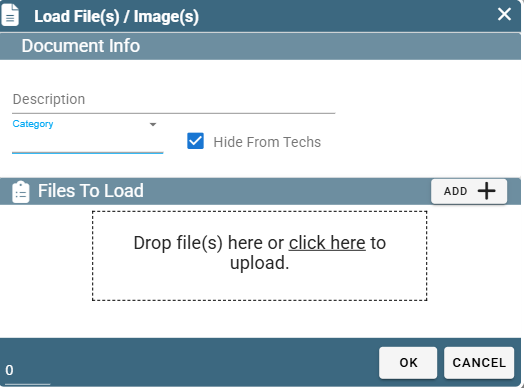
Upon clicking the ‘Add’ button, this window will appear.
Choose a category this file should go under.
Check the box ‘Hide From Techs’ to decide if Technicians can see this file.
Enter in a description of the file.
Click OK to save and upload your file(s)
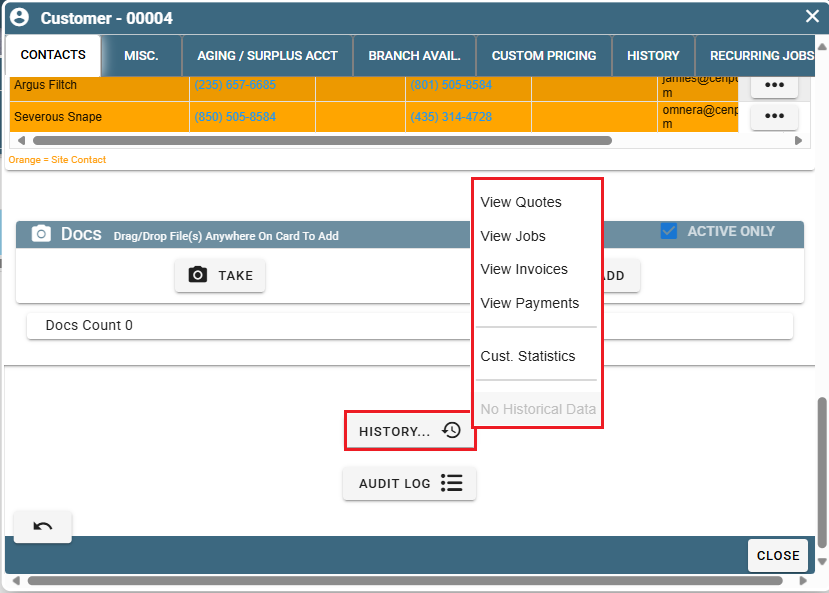
Customer History Button on Portal
Click the ‘History’ button to see the Quotes, Jobs, Invoices, Payments, and Statistics related to the customer.
Customer Audit Log on Portal
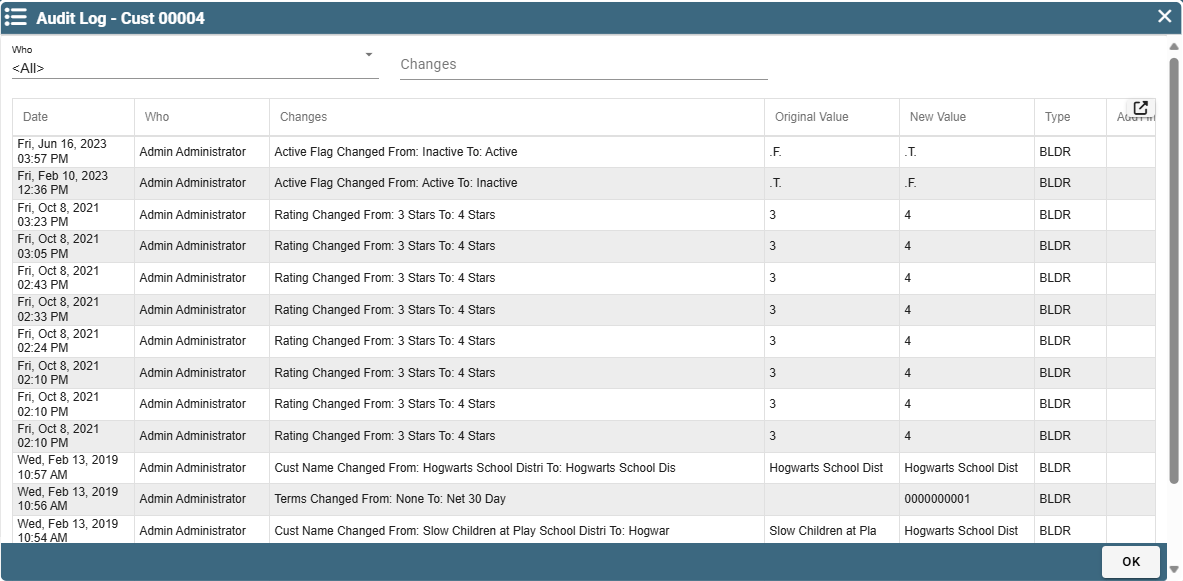
Click the button ‘Audit Log’ to see which Users in CenPoint have updated this Customer’s information.
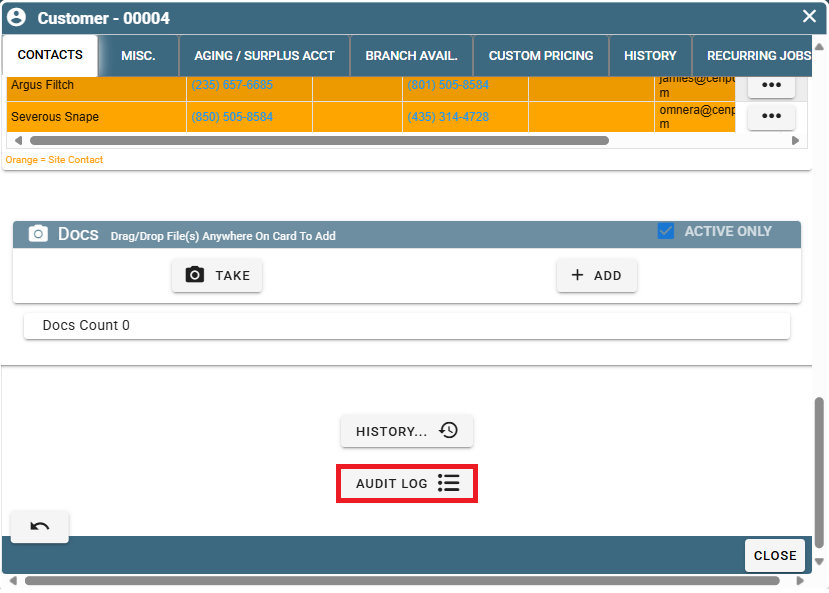
Upon clicking the button this window will appear in which you can review the edits on this customer.