
Work Order Fields on Desktop
Work order number and Job number on Desktop
.png)
Job name is displayed here.
.png)
Type in the date or use the calendar to select the date.
.png)
Lead Tech on Desktop
.png)
Select the lead technician from the drop down.
Only users in a field department and available in the same branch as the Job will display.
To select a technician not in the list, click the Ellipsis button, then click "Select a Tech Not in the List".
.png)
To modify a technicians department, go to File → Users → modify the user → in the General tab → change the Department drop down.
To make a department such as "Administrator" or "Sales" display users in the Lead Tech drop down, you can mark that department as a field department.
For more information follow this link. Define Departments
Vehicle on Desktop
Select the vehicle that the lead technician will drive with this drop down.
.png)
Additional Workers on Desktop
Additional workers can be added with the add button.
.png)
By default additional workers will be passengers in the lead technician's vehicle.
There is an option to assign an additional worker to a different vehicle and specify whether they will drive that vehicle or be a passenger.
.png)
Expecting Us/Promised on Desktop
This information carries over from the Job, to help you schedule the start time.
'Promised-Hard' cannot be changed via drag & drop on the scheduler
'Promised-Soft' can be changed with Drag & Drop but prompts for confirmation
.png)
Start Time & Shop Report Time on Desktop
The start time is the time the technicians are expected to arrive on site.
.png)
The shop report time is the time the technicians are expected to arrive at the shop (if applicable).
.png)
End Time on Desktop
The end time field is read-only, because it auto fills based off of the task assignment.
.png)
Sent to Tech on Desktop
By default, CenPoint will display work orders on the technician's mobile app as soon as they are created.
However, if you change this setting, the Work Order will not display on the mobile app until this box is checked.
( this feature is found under Company Branch-> Mobile Tab)
This checkbox can be ignored if not using that feature.
.png)
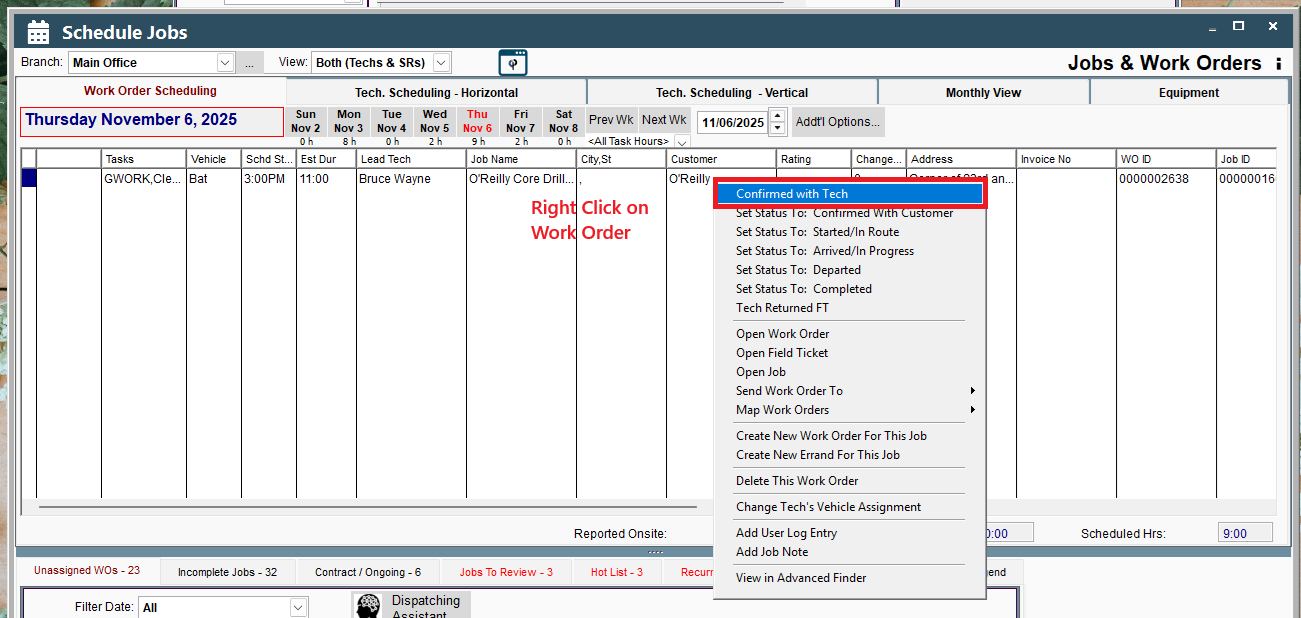
Confirmed with Tech on Desktop
You can mark Confirmed with tech from the scheduler or on the Work Order
.png)
From the sceduler(s) right click the Work Order and click confirmed with tech. Doing this will check the box on the Work Order confirmed with tech.
You can also manually check the box on the Work Order.
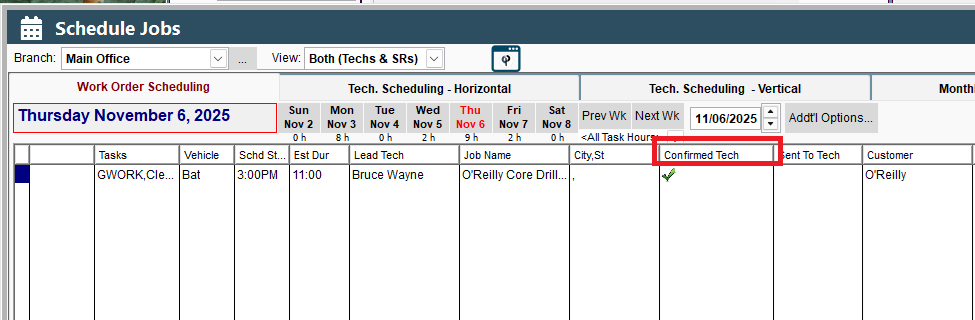
In the grid on the Work Order Scheduler you can see that it was confirmed with the Tech.
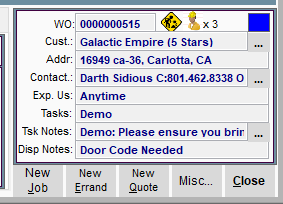
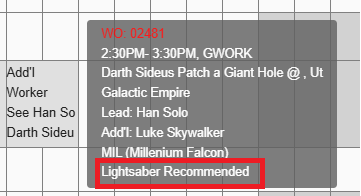
Dispatch Notes on Desktop
Dispatch will show on the schedule screens. ( Pictured Below).png)
Assigned Tech to Tasks on Desktop
All tasks assigned to the Job will display here.
.png)
For a multi-day Job, you may not be working on all tasks all days, so you only check the box next to tasks to be worked on that day.
.png)
You will need to put in an assigned time for each task. This is what auto populates your end time.
.png)
The assigned quantity column allows you to specify a quantity for your task.
If left blank, it will display the Job quantity.
To learn how to set up tasks use the following link: Task Setup
.png)
Task Time on Desktop
.png)
The Estimated Task Time shows you the predicted man hours for this task entered on the Job tasks/Quote task.
.png)
The Task Assigned Time shows you how many man hours have already been assigned.
In the below example, there are previous work orders, so the tasks assigned time of 36 hours comes from the assigned time of 4 hours multiplied by the number of workers.
.png)
The "Task Unassigned Time" is equal to the estimated task time minus the task assigned time.
It displays in green if more hours are needed, and in red if you have exceeded the estimated task time.
.png)
Equipment on Desktop
Equipment can be assigned here.
Pieces of equipment assigned to Job tasks will appear here, allowing you to check the assigned box.
Additionally, you can add a piece of equipment with the add button.
Once a piece of equipment has been assigned, you will need to select a start time, and assigned time.
This feature is intended to help you schedule equipment.
If you don't need a piece of equipment for the full duration of a Job, we want to keep track of those hours.
Note: if you are not interested in keeping track of where your equipment is, you can simply note the equipment needs to be taken in the work order notes.
To learn how to set up equipment use the following link: Equipment Setup
.png)
Add'l Workers Assigned to this W.O. on Desktop
Assign additional workers here, add techs individually or select a crew.
( To set up a crew: go to File → List Management → User Groupings → Crews)
You can assign different vehicles here as well.
If no other vehicles is selected, all the technicians will be assigned to the Lead Tech's vehicle.
In the example pictured below Chewbacca has no other vehicle assignment,
so he will be in the Millennium Falcon with the Lead Tech Leia Organa.
.png)
Add'l Info on Desktop
Additional Information will show:
Created: when and who created the Work Order.
Last Edit: when and who last edited the Work Order.
.png)
You can also view changes on the job including changes on work orders
by going to Misc Button → Audit Log on the Job screen.
.png)
Prepay on Desktop
You can Prepay or Pre-Authorize a credit card from the Prepay Button.
In order to process payments in CenPoint set up a free Stripe account.
Set up a Stripe account by going to:
File → Company Branch Information → Modifying your branch → going to the Customer Portal tab.
Follow the links below for more information
Credit Card Processing in CenPoint
.png)
Print W.O. on Desktop
Allows you to print out work order with or without pricing.
Once displayed on your screen, you will have the option to print to your printer, download a PDF, email a PDF attachment, or text someone a link to the document.
.png)
Repeat W.O. on Desktop
Repeat W.O. Allows you to repeat the Work Order on multiple days. This is helpful for longer jobs.
Repeat a Work Order by clicking the Repeat W.O. button.
Then select the criteria with start and end dates and what days the Work Order will repeat.
.png)
The repeating Work Orders will then be added to the W.O. list on the Job and on the schedulers.
To learn more about this feature use the following link: Repeat Work Order
.png)
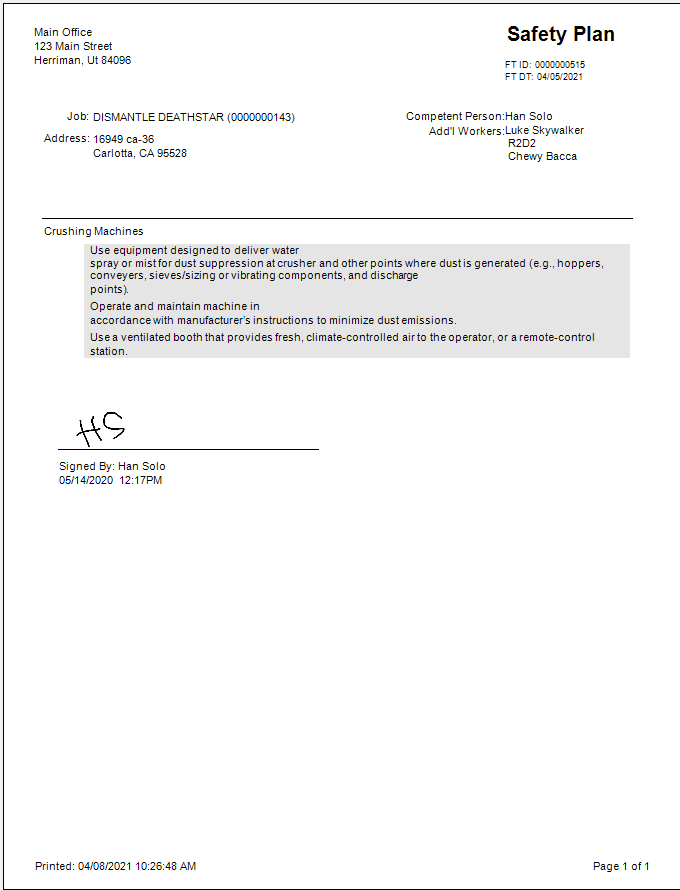
Safety Plan on Desktop
CenPoint automatically compiles a safety plan for each Field Ticket based off of the number of hours spent doing different tasks. (proper task set up required).
View a safety plan by clicking the Safety Plan button.
If the number of hours change on the task, refresh the safety plan to reflect those hours.
To learn more about setting up safety plans use the following link: Safety Plans
.png)
OK or Cancel on Desktop
Click OK to save your work.
Clicking the Cancel button or the X will not save any changes.
.png)
Work Order Fields on Portal
Work order number on Portal
.png)
Job Name on Portal
Job name is displayed here
.png)
Sched. Date on Portal: Each Work Order represents one day of work
Type in the date or use the calendar to select the date.
.png)
Lead Tech on Portal
.png)
Select the lead technician from the dropdown.
Only users in a field department and available in the same branch as the Job will display.
To select a technician not in the list, click the Ellipsis button, then click "Select a Tech Not in the List"
.png)
To modify a technician's department, go to More → Users → select your user → General tab → change the Department drop down.
To make a department such as "Administrator" or "Sales" display users in the Lead Tech drop down, you can mark that department as a field department.
For more information follow this link. Define Departments
Vehicle in Portal
Select the vehicle that the lead technician will drive with this drop down.
.png)
Additional Workers in Portal
Additional workers can be added with the Add button
.png)
By default, additional workers will be passengers in the lead technician's vehicle.
There is an option to assign an additional worker to a different vehicle and specify whether they will drive that vehicle or be a passenger.
Expecting Us/Promised on Portal
This information carries over from the Job, to help you schedule the start time.
'Promised-Hard' cannot be changed via drag & drop on the scheduler
'Promised-Soft' can be changed with Drag & Drop but prompts for confirmation.
.png)
Start Time & Shop Report Time on Portal
The start time is the time the technicians are expected to arrive on site.
.png)
The shop report time is the time the technicians are expected to arrive at the shop (if applicable).
.png)
End Time on Portal
The end time field is read-only, because it auto fills based off of the task assignment.
.png)
Sent to Tech on Portal
By default, CenPoint will display work orders on the technicians mobile app as soon as they are created.
However, if you change this setting, the Work Order will not display on the mobile app until this box is checked.
(this feature is found under Company Branch → Mobile Tab)
This checkbox can be ignored if not using that feature.
.png)
Confirmed with Tech on Portal
.png)
Dispatch Notes on Portal
If entered on Desktop the notes can be viewed from the schedule, but Portal does not yet support adding dispatch notes.
Assigned Tech to Tasks on Portal
All tasks assigned to the Job will display here.
.png)
For a multi-day Job, you may not be working on all tasks all days, so you only check the box next to tasks to be worked on that day.
.png)
You'll need to put in an assigned time for each task. This is what auto populates your end time.
.png)
The assigned Quantity column allows you to specify a quantity for your task.
If left blank, it will display the Job quantity.
.png)
Add'l Workers Assigned to this W.O. on Portal
Assign additional workers here, add techs individually or select a crew.
(To set up a crew: go to More → List Management → User Groupings → Crews)
You can also assign different vehicles here as well.
If no other vehicles are selected all the technicians will be assigned to the Lead Tech's vehicle.
In the example pictured below Chewbacca has no other vehicle assignment,
so he will be in the Millennium Falcon with the Lead Tech Han Solo.
.png)
Add'l Info on Portal
Additional Information will show:
Created: when and who created the Work Order.
Last Edit: when and who last edited the Work Order.
.png)
You can also view changes on the job including changes on work orders by going to Misc Button → Audit Log on the Job screen.
.png)
Prepay on Portal
You can Prepay or Pre-Authorize a credit card from the Prepay Button.
In order to process payments in CenPoint set up a free Stripe account.
Set up a Stripe account by going to:
More → Company Branch Information → Open up your desired branch → go to the Customer Portal Tab
Follow the links below for more information
Credit Card Processing in CenPoint
.png)
Print W.O. on Portal
Allows you to print out work order with or without pricing.
Once displayed on your screen, you will have the option to print to your printer, download a PDF, email a PDF attachment, or text someone a link to the document.
.png)
Repeat W.O. on Portal
Repeat W.O. Allows you to repeat the Work Order on multiple days, for longer jobs.
Repeat a Work Order by clicking the Repeat W.O. button.
Then select the criteria with start and end dates and what days the Work Order will repeat.
.png)
The repeating Work Orders will then be added to the W.O. list on the Job
and on the schedulers.
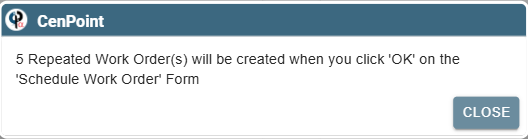
To learn more about this feature use the following link: Repeat Work Order
An alert like this will appear once you click OK.
OK or Cancel on Portal
Click OK to save your work.
Clicking the Cancel button or the X will not save any changes.
.png)